THIS OLD DESK GETS A MAKEOVER USING A FAUX WOOD PAINT TECHNIQUE, A LITTLE BIT OF SUNSHINE, AND A NEW DIXIE BELLE TRANSFER!
 Hi sweet SI Family! Thanks for all the wonderful feedback on last week’s T2T post. I had a good few requests to see the Faux Wood Paint Technique on a piece of furniture. So for today’s makeover, I’m transforming this vintage desk using a little bit of sunshine, the faux wood technique, and a GORGEOUS Dixie Belle Transfer from their NEW Belle’s And Whistles furniture transfer line!
Also, be sure to read to the end of today’s post. For a limited time, Dixie Belle Paint Company is looking for furniture artists to send Transfer Bundles to… if you qualify, you might also be trying a few of these fabulous designs!
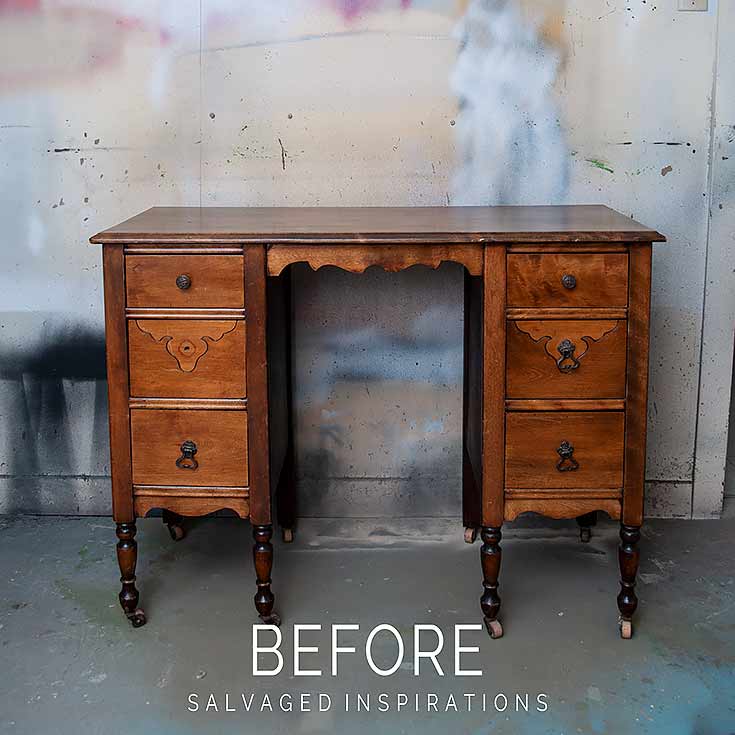
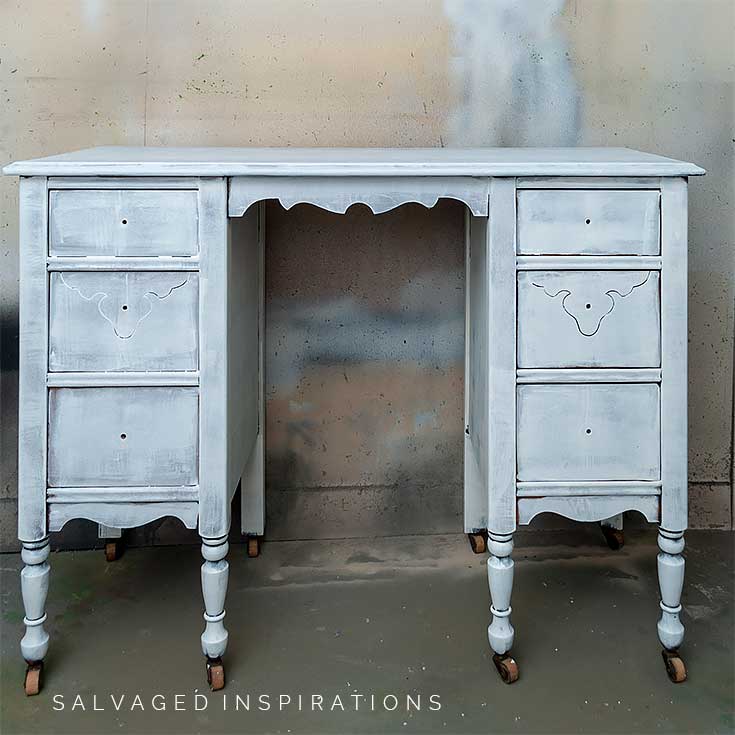
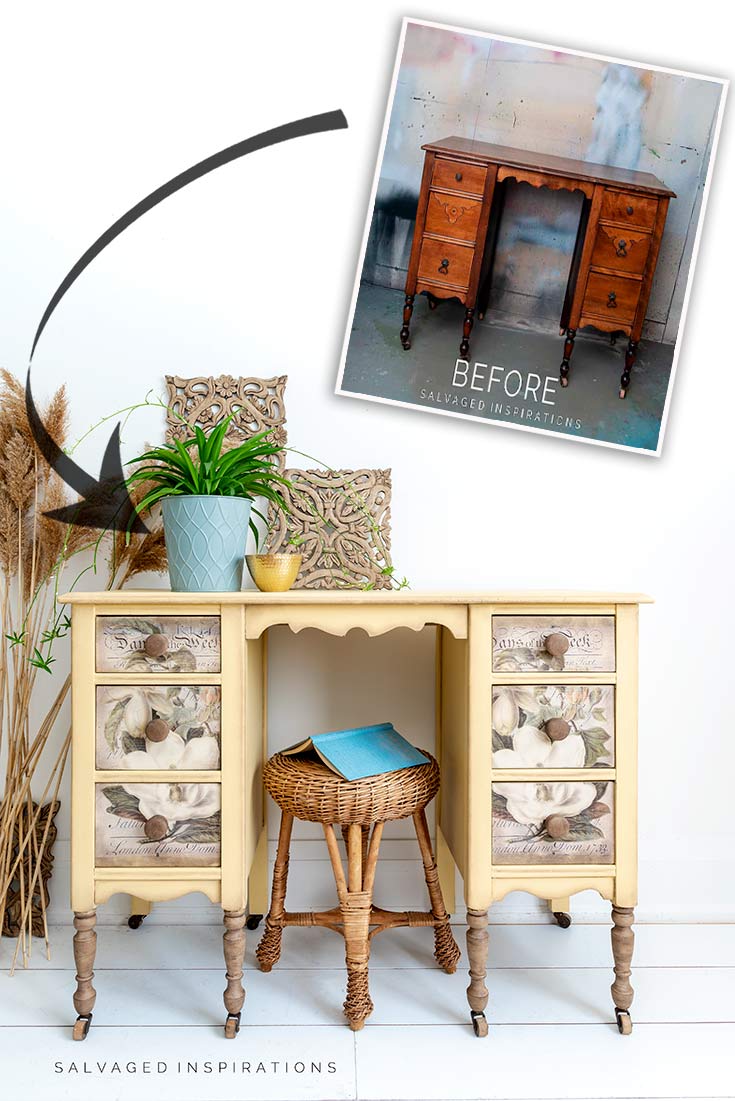
Here’s what I started with. This desk was selling on FBM for $65 and I picked it up for $50.
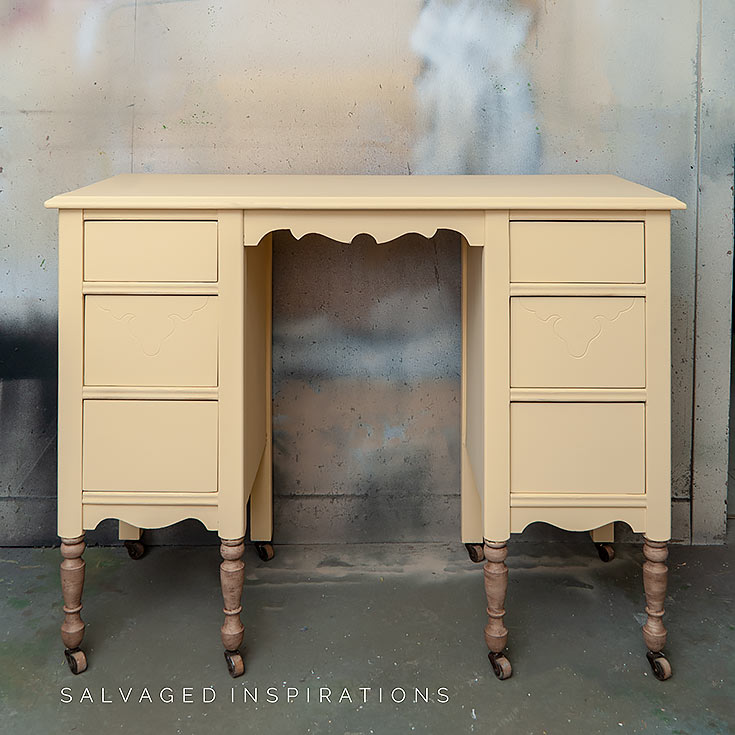
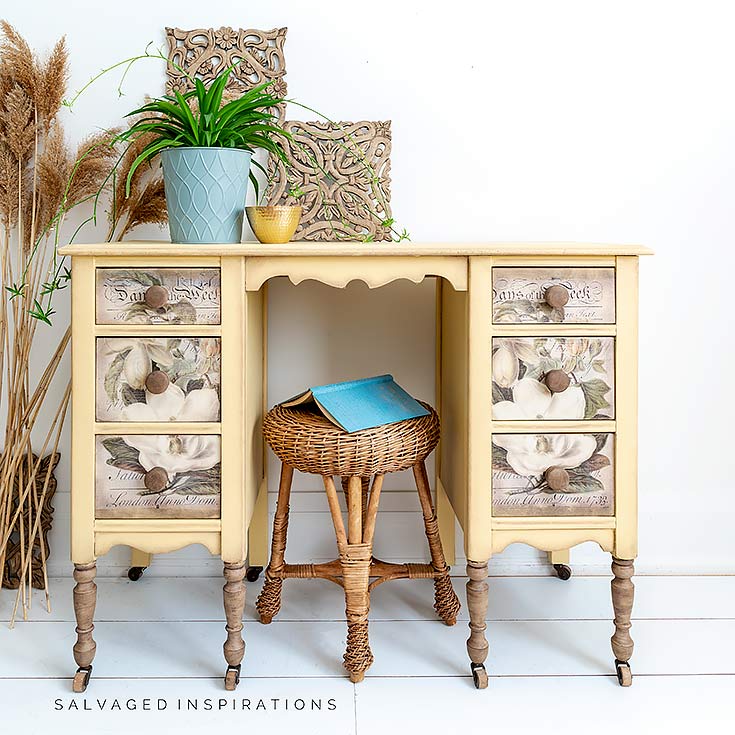
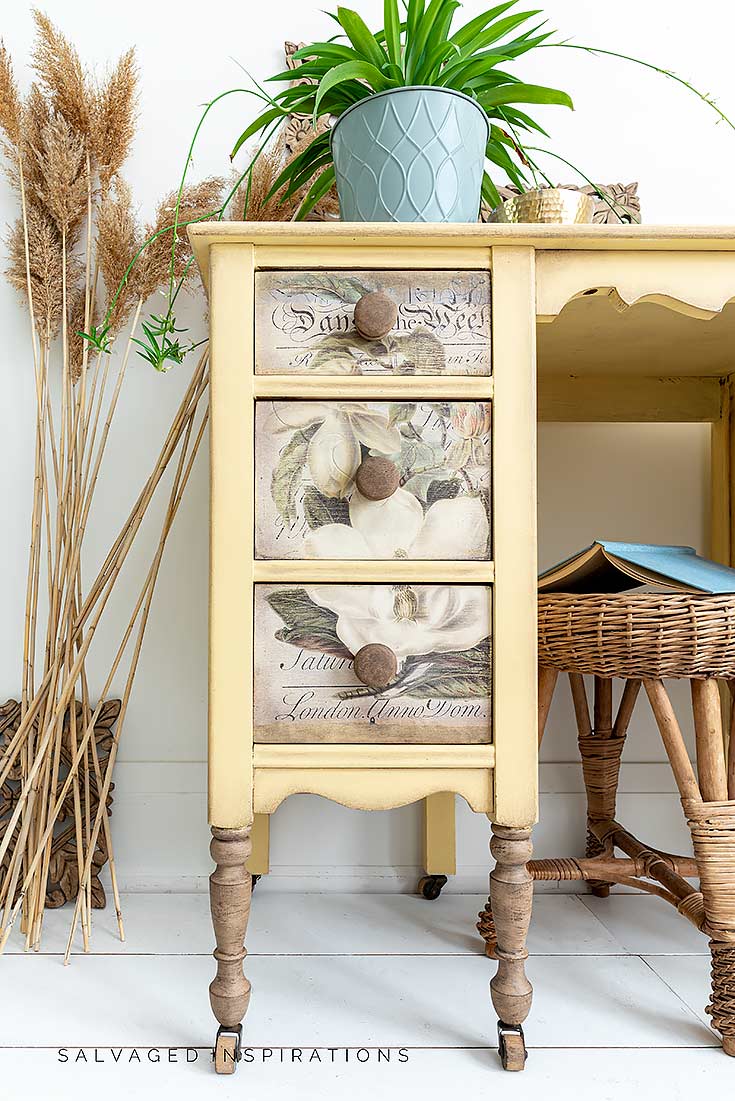
Here’s the reveal. I know I say it over and over again but it’s amazing what a little paint and in this case a furniture transfer can do!
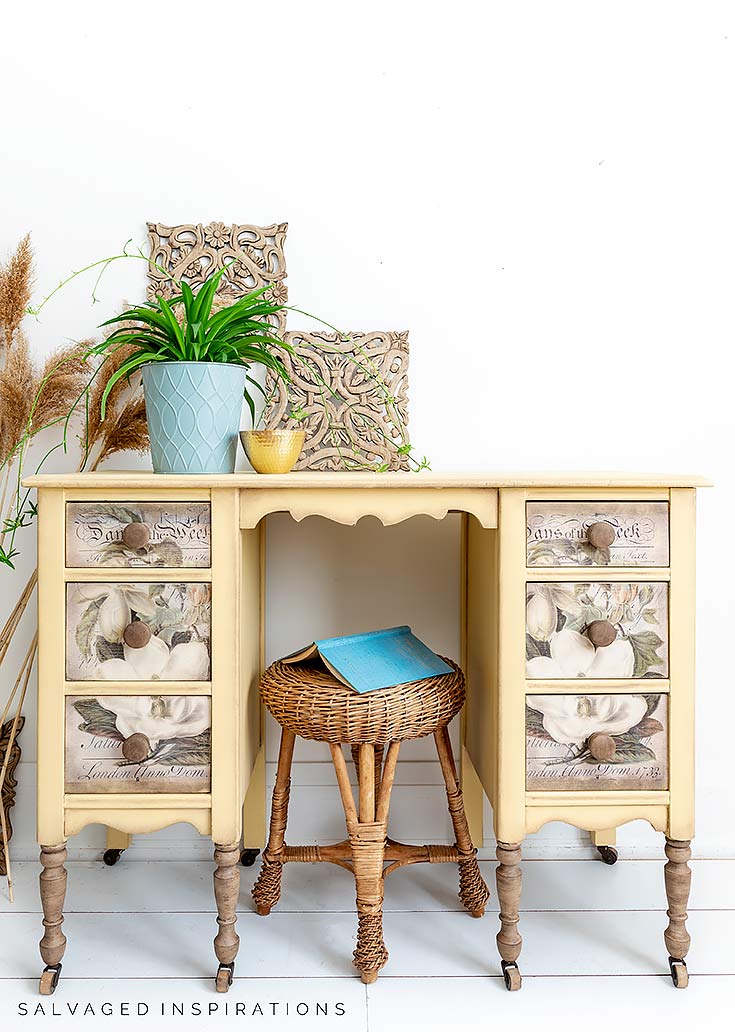
What do you think?

THIS POST IS SPONSORED/CONTAINS AFFILIATE LINKS TO PRODUCTS I USE. YOU CAN SEE MY FULL DISCLOSURE HERE.
SOURCE LIST
Vintage Desk – SALVAGED
Paint Brushes
Sandpaper | Shop Towels
White Lightning (Cleaner)
Slick Stick (Bonding Primer)
Dixie Belle Mud White (Fill Hardware Holes)
Water Misting Spray Bottle
Burlap Chalk Mineral Paint (Faux Wood Legs)
Chocolate Chalk Mineral Paint (Faux Wood Legs)
Rebel Yellow Chalk Mineral Paint (Desk Paint Color)
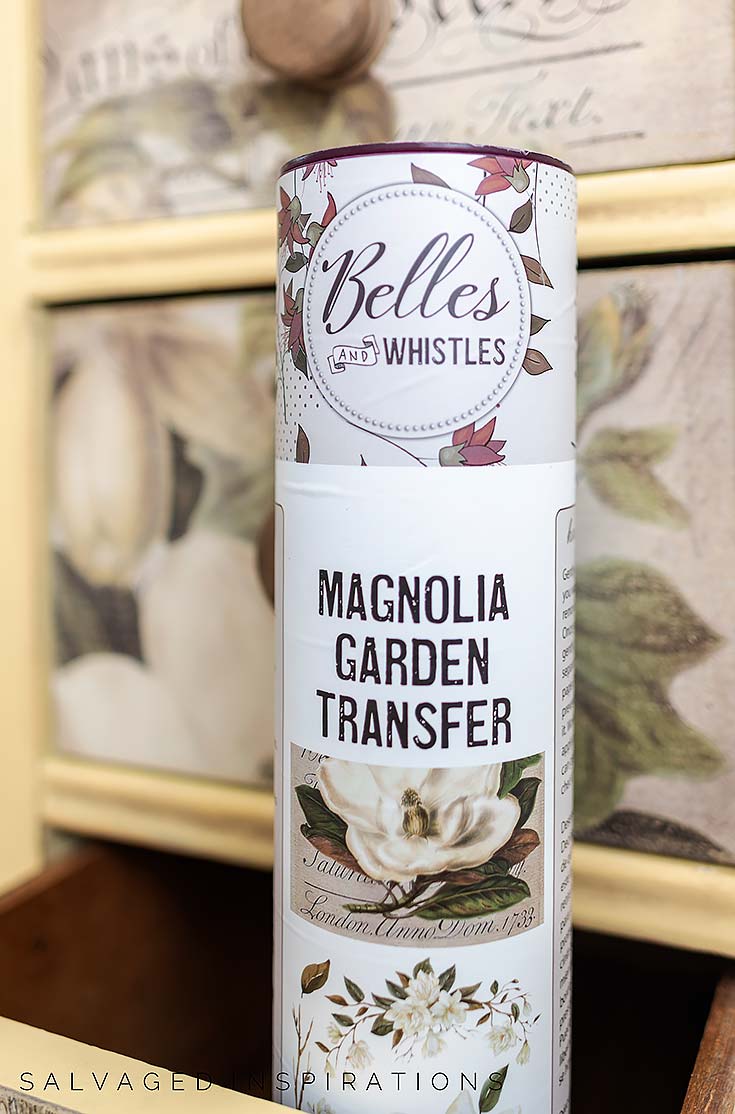
Magnolia Garden Transfer (Drawer Details)
Morocco Stencil (Side Drawer Detail)
Brown Wax (For Blending)
Satin Clear Coat (To Be Added)
STEP 1:: PREP
To prep this desk I cleaned the entire piece with this DB White Lightning. Once the piece dried, I rolled on two coats of Slick Stick. Slick Stick is awesome when you need 100% certainty your paint will adhere without sanding. This Slick Stick is a super-tough gripping primer that works on shiny factory finishes, plastic, metal, ceramic, and mirror! Just keep in mind it’s not made to cover bleed through. After it was primed, I filled the hardware holes using this White Mud.
STEP 2:: PAINT
The next day, I painted two coats of this Rebel Yellow. This paint is a little bit of sunshine in a jar! I love painting with a color that makes me smile.
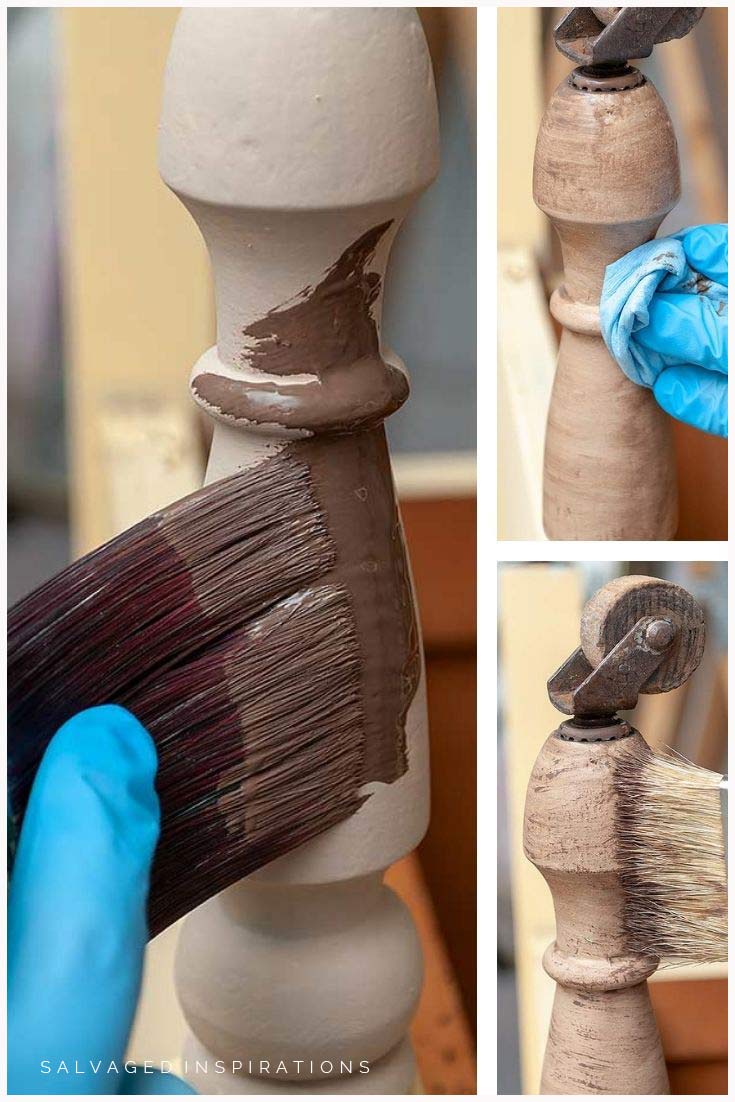
STEP 3:: PAINT FAUX WOOD
A BIG thank YOU for giving me ideas and letting me know what you’d like to see! As per all your requests to see this Faux Wood Paint Technique on a piece of furniture, I decided to give the legs and hardware knobs of this desk a natural wood finish. I painted a base coat of this Burlap color. Then I added a Chocolate color wash along with a little dry brushing.
If you missed last week’s Trash To Treasure you can see a more detailed step-by-step post including a video tutorial here.
PRO-TIP:: If the size and weight of a piece allow you to flip it over… flip it! This is an amazing way to get ALL the areas of your piece covered in paint and cleaned up on the underside!
STEP 4:: ADD DIXIE BELLE TRANSFERS
I had a difficult time deciding on which of these Dixie Belle Transfers to use. Not a bad decision to have to make, right!? 😉 It was between Belle’s And Whistles Floral Romance and Magnolia Gardens. Both are absolutely GORGEOUS!
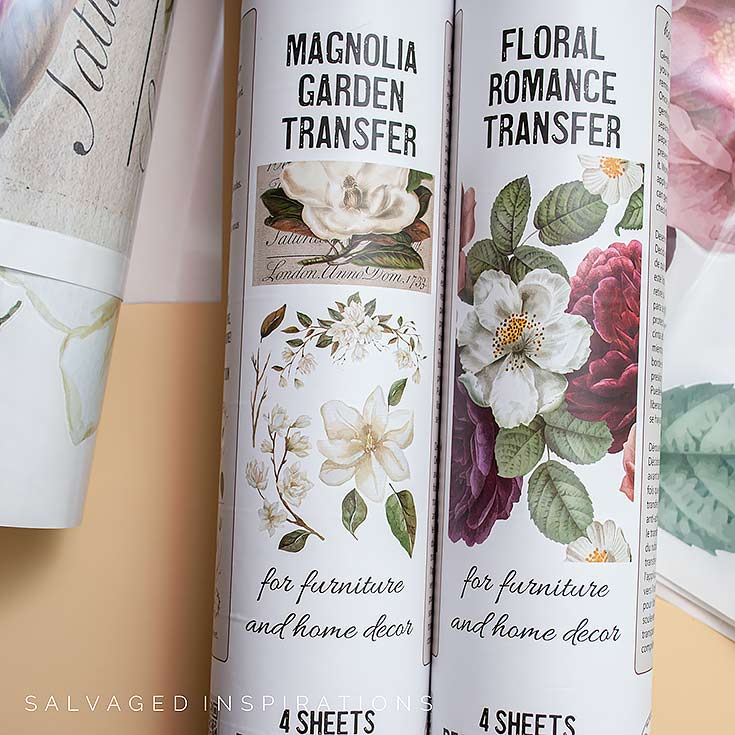
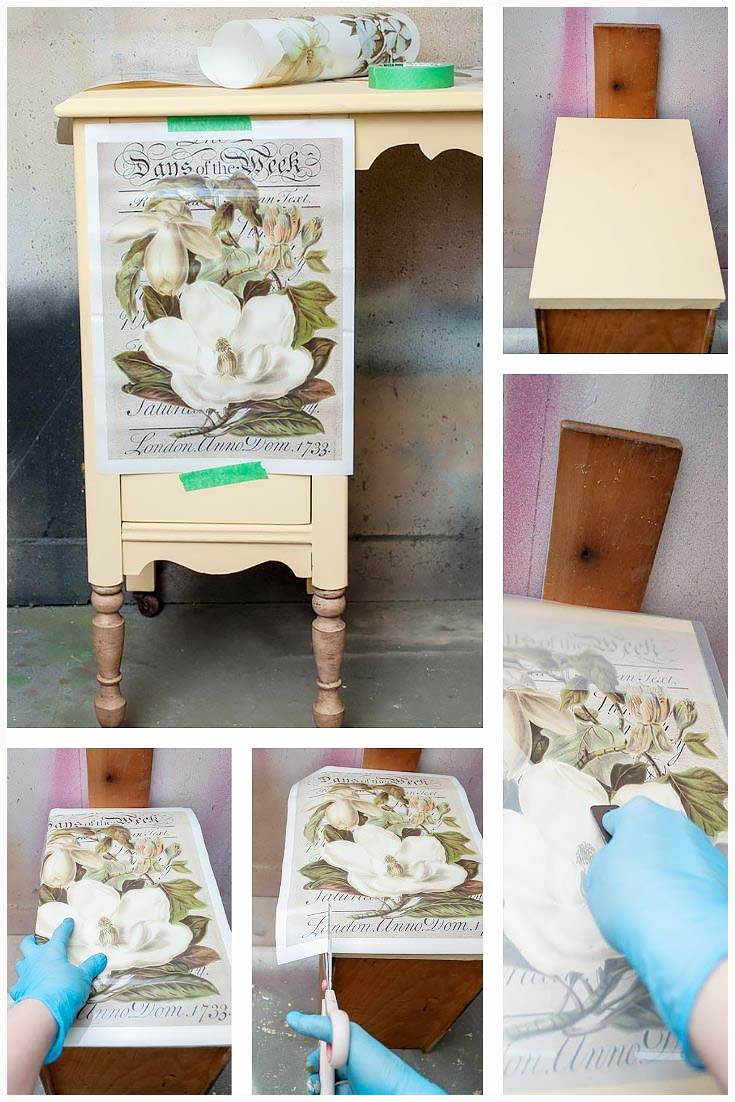
After painting the legs the natural wood finish I decided on the Magnolia Gardens. even though the design portion I wanted to use was going to be too short for my drawers. (See below for how I fixed this!)
I’ve used other brands of transfers and these seem to be a little sturdier in the application. I’m not sure if the mylar is thicker or the applicator stick is more sturdy but something feels a little more substantial and they rub on beautifully. If you’ve never used a transfer, I have a full tutorial on the Easy Rub on Method including a video here.
I used two (2) of the Magnolia Gardens designs because I wanted to place this full sheet on the front of all the drawers. As you can see in the pics below it was too short to cover the entire front. So I removed the three drawers and lined them up in order. Then I cut the transfer to size leaving about an inch of space on the top and bottom drawer. Once I figured out the placement, I removed the transfer design from the backing and placed it on top of the drawers. Using the wood applicator stick, I rubbed the design on the drawers and then cut the edges of each drawer by rubbing the applicator stick over it a few times.
STEP 5:: DISTRESS & BLEND
To blend the transfer into the drawers, I gave them a light sanding. This distressed them so a bit of the Rebel Yellow shows through. To conceal the top and bottom, I used this brown wax to darken the top and bottom of the drawers and blend in the transfers. I also used brown wax to blend and distress the corners and details of this desk.
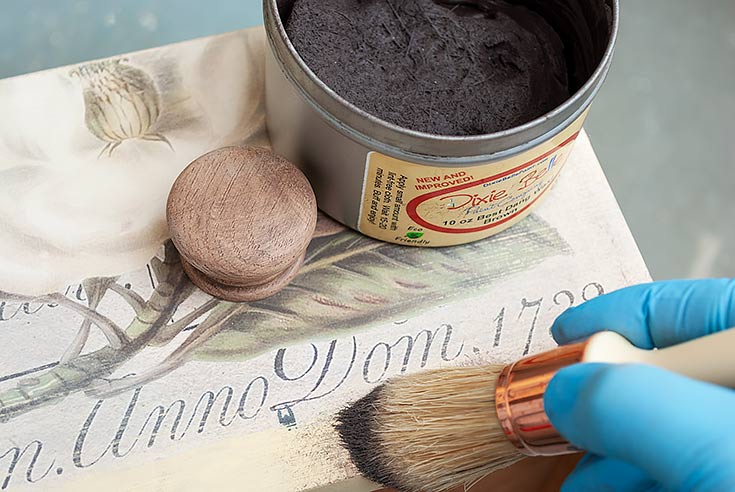
PRO TIP – I know using dark wax can feel intimidating on a freshly painted piece. If you use clear wax first and then apply dark wax over it, the wax is easily “erased” if you don’t like the looks of it.
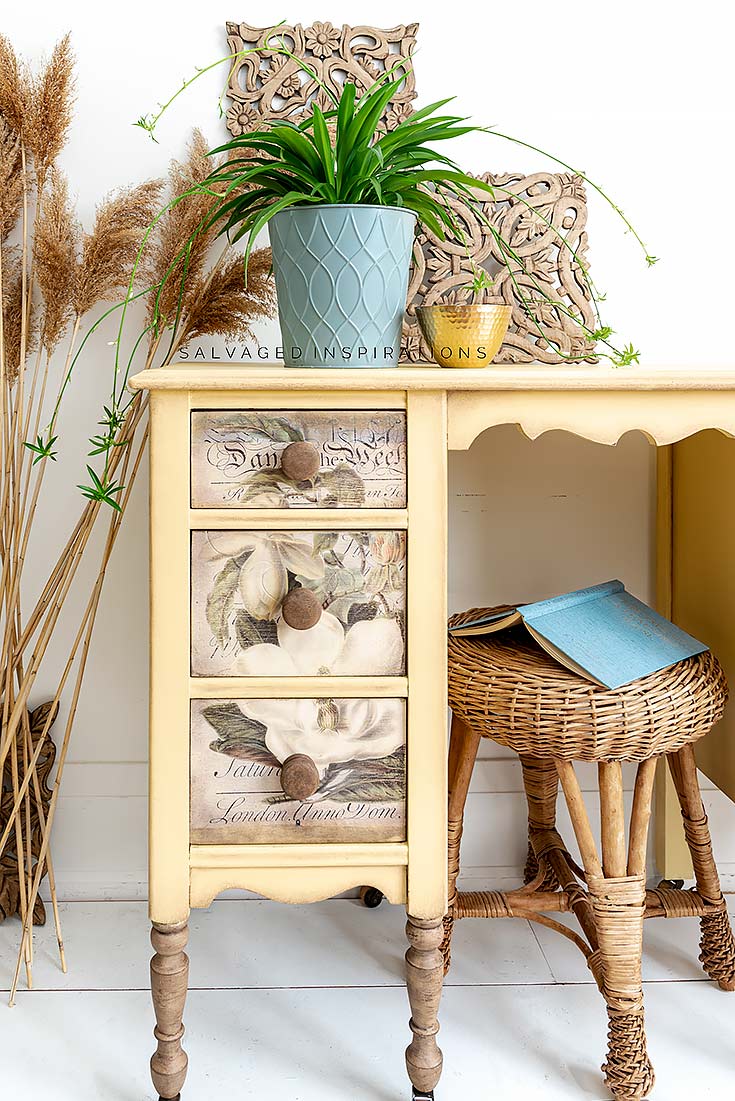
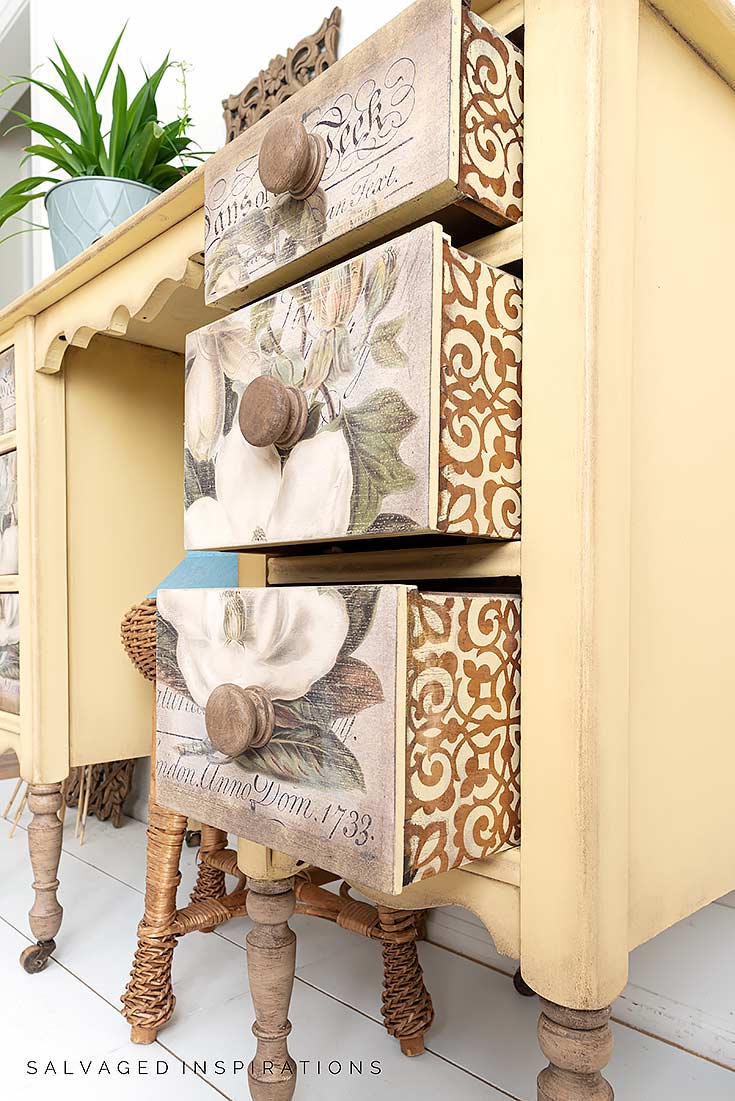
Here’s a close-up of how they turned out.

STEP 6:: DRAWER DETAIL & TOPCOAT
As the last detail, I stenciled this Morocco Stencil on the sides of the drawers.
STEP-BY-STEP VIDEO
Here’s the step-by-step on Youtube. If you have any problems viewing it below, feel free to watch it on my Youtube Channel here… and don’t forget to subscribe! 🙂
I’m going to wait until my wax is 100% dry before I protect this desk by spraying it with this Clear Satin topcoat. Once the wax dries and cures I could leave it as-is but seeing as I’ll be selling this piece, the added protection on the top gives me peace of mind.
I love the way the knobs and legs match and how they look against this transfer design!
Here’s another look at the before and after.
I hope this has inspired you to give these NEW Dixie Belle Belles And Whistles Transfers a try! If you do, please let me know how you like them! Leave a comment below and share a picture on Instagram with the hashtag #salvagedinspirations.
There’s a video to go along with this post as well but it’s not edited yet so I hope you check back later in the week. Unfortunately, I spilled a full cup of scalding hot tea on my lap earlier this week. I have first and second-degree burns so I was out of commission for a few days. But I’ll get that up for you guys as soon as I can. 🙂
And now for some exciting news!
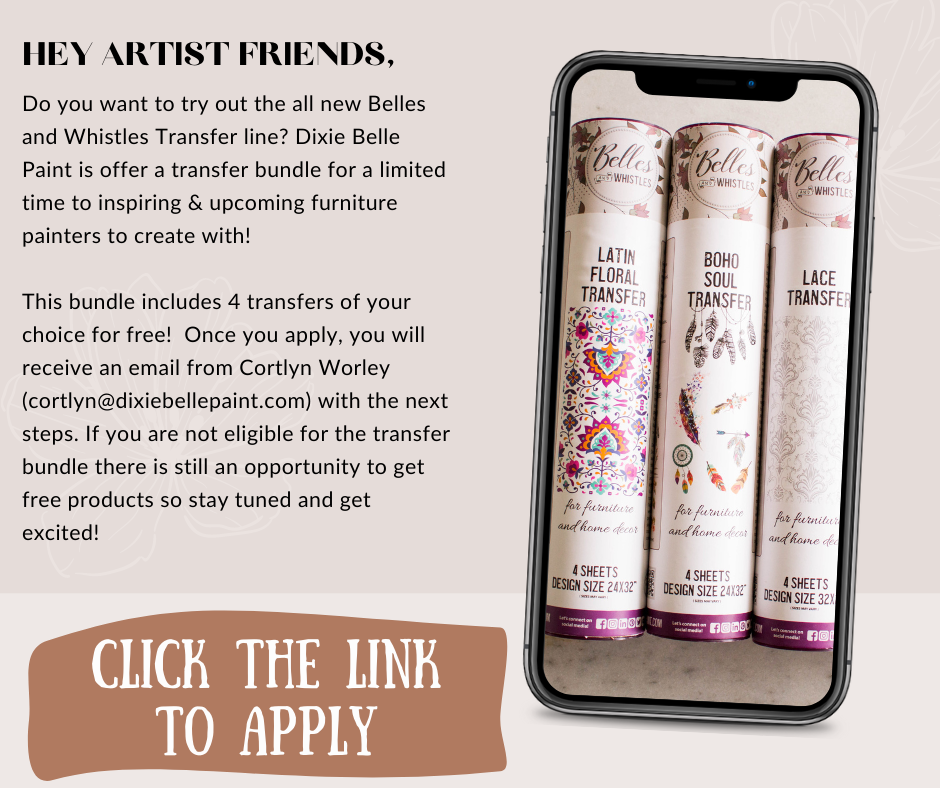
Application link: https://dixiebellepaint.com/transfer-bundle-application/
LET ME KNOW WHAT YOU THINK OF THIS DESK MAKEOVER AND THE FAUX-PAINTED WOOD TECHNIQUE ON THE LEGS AND KNOBS… OR FEEL FREE TO ASK ANY QUESTIONS YOU MAY HAVE.
I ALWAYS LOVE HEARING FROM YOU. 🙂
Happy furniture painting my friends!
Denise x
RELATED POSTS::
PAINTED SECRETARY DESK MAKEOVER
DIY FAUX DRIFTWOOD | NESTING TABLES
DIY FAUX BARNWOOD SPOOL TABLE
GREY WASH WOOD FINISH
WHITEWASHED WOOD PLANTER
PIN AND SHARE!


Gorgeous makeover Denise! Have you ever tried the transfers over raw wood that’s been stripped? I would like to paint accents but not where the transfer would go so am wondering if it would work over wood instead?
Thank you Sara! And I haven’t applied transfers over raw wood but I’ve seen some gorgeous makeovers on IG and Pinterest that have… I think it looks amazing and yes it does work!
Awesome, thanks Denise!
Such a lovely makeover, as always with your pieces. I have a question about the beautiful wicker stool in the photo.. it looks to be in pristine condition and so many older wicker pieces get dried out and brittle from the sun and heat. How do you rejuvenate wicker to bring it back to life?
Thank you for sharing!
Hi Zoe and thank you! 🙂 I haven’t done anything to this stool but you can bring wicker back to life using lemon oil, linseed oil or hemp oil.
Absolutely gorgeous!!! The colors you used are perfect for this transfer!
Thanks so much Carol! x
Just beautiful, Denise! 💛
Aw, thank my friend! XOXO
This is so beautiful!!! I love it. Thank you for sharing
Thank you Kim! 🙂
This couldn’t be more lovely Denise! Thanks so much for your ‘how to’ instructions…another one for my SI file!!
Thanks so much Clare!! 🙂
The stencil on the sides of the drawers is such a lovely little surprise! Gorgeous!
Thanks Anne! 🙂
A truly incredible makeover! Your creativity amazes & inspires me!
Thanks much, Denise, for sharing!
Mari Lynn
Thanks so much Mari Lynn! 🙂
Be still my heart! I love this piece…..sooooo perfect!
Thanks, Teri! 🤗💙💙
Omg! Absolutely stunning. Another home run.
Thanks my friend! XOXO
OMGoodness! That is absolutely gorgeous! WOW!!!!!
Honestly one of the best before/.afters furniture redos I have ever seen. Well done, ma’am!!!!
Awww, thank YOUUUUU!!! I’m so glad you like it! XOXO
This is beautiful. I love the knobs and legs. The colors blend so nicely together.. I think it would make a cute vanity. If I lived close I’d buy it in a minute. I’m so sorry you are hurt. No rush to work. Get well first. See you soon.
Thanks for your kindness Kathy and glad you like the piece. I think this was a vanity back in the day because of the ledge for a mirror. There are so many people and kids and adults working from home now tho, I figured turning it into a desk is better for selling these days. And thanks for your kind words. Next Tuesday I may take off as it’s a long weekend for us and I could use the downtime for my leg… but I’ll be back on Thursday with my Furniture Fixer Upper Crew. See you then. 🙂
Oh that desk is so darn cute!
Thanks Deanna!
Absolutely love everything about this piece. It’s an inspiration for my whole house. Love the yellow love the wood tones love the transfer really gorgeous bright yet soothing
I’m in love with this yellow as well. I dito everything you just said…lol
Absolutely beautiful!
Thank you Cheryl!! x
Hi Denise. I’m dazzled by this beautiful little desk transformation. It makes me think of warm summer days and meadows. Absolutely precious. I hope you are feeling better and your burn is healing well.
You’re so sweet.💕 Thank you, Monique! XOXOX
This is absolutely stunning! You do fabulous work!!!!
Thanks Lori!😊
WaitWaitWairWait !!!! Sealer Over wax ? I thought that was a Never Do ….?
I am so confused. Does this really work ? Does it work with Poly ?
I love the look of wax, but…. just can’t bring myself to have it be a topcoat.
Please – tell me more. Does it work with Annie Sloan chalk paint / wax too ?
Also – I love your Sunny desk with faux wood paint and transfer desk reno 🙂 As always, your combined techniques are so well suited together. Such a good eye you have. The faux wood technique looks incredible.
Thanks for sharing.
p
I know it can be confusing and you are correct P. The rule of thumb is WAX IS ALWAYS LAST because most brands are NOT water-based. Annie Sloan’s line is NOT water-based either. However, the only line of wax/poly this works with (as far as I’m aware of) is Dixie Belle’s. They’ve created a water-based wax and water-based topcoats that ARE interchangeable.😊
Denise, this is absolutely gorgeous! I love everthing about it and i will be trying the faux wood look soon. Thank you for the inspiration!
Thanks Cheryl! Please let me know how it turns out for you… I’d love to hear!💕
Oh Denise! This is absolutely stunning! I think it’s my favorite so far – I love the Magnolia stencil and you really made it shine on this one!
I agree this Magnolia transfer is SO gorgeous, isn’t it! Thanks so much, I’m so glad you like it Gwen!!!🤗
Great inspiration! What grit sandpaper do you use to go over the stencils? They blend in do well.
Hi Mariann! I use a 220 grit or higher… sometimes a 320 grit. It depends on how much distressing I want on the transfer. But if you only have a 220 grit, you can always use it with a very light hand so it mimicks a 320. 🙂
That looks absolutely amazing, Denise! I love the color combo with the wood legs and that gorgeous transfer! So yummy! XOXO
Thanks my friend! I agree, this transfer is gorgeous… you kinda can’t go wrong.😉
That turned out fantastic!! I too love the yellow you picked.
Made a huge difference.. All your transformations are brilliant!!
Awww, thanks Dawn, much appreciated!💙
STUNNING!!!
Your creativity is endless!
Glad you like it! And thanks so much Cat!🤗
This is absolutely Beautiful!!! Love the color!!
Hope your burn is healing well.
Thanks Janice! And ya, it’s healing thank you. Lesson learned! I won’t be multi-tasking with a boiling cup of tea in my hand.🤕
That is nothing short of supercalifragelisticexpialidocious! I hope your nasty scalding injury gets better very soon. All the best from England’s green and pleasant land..
Love this and thanks so much Jean! And your England’s green and pleasant land is on my bucket list to visit one day. I can’t wait till we can start traveling again. 🙂
This is a stunning makeover Denise! Everything from the color, transfer decor and painted legs. Perfection! Thanks for sharing and always inspiring me. ~ Nicki
Thanks so much Nicki… I’m glad you like it! XOXO