HOW TO MAKE DIY DOLL HEAD PLANTERS OUT OF CHEAP THRIFT STORE DOLL HEADS | YOUTUBE VIDEO INCLUDED

Hi sweet SI family, I have an unusual and super fun DIY for you! Today I’m sharing how I upcycled some trashed thrift store doll heads into the most beautiful faux-clay planters. You won’t believe how authentic these DIY Doll Head Planters turned out! Perfect for styling your painted furniture or decorating your patio or home. It’s easy, budget-friendly, and a total conversation starter. I can’t wait to hear what you think of this makeover!
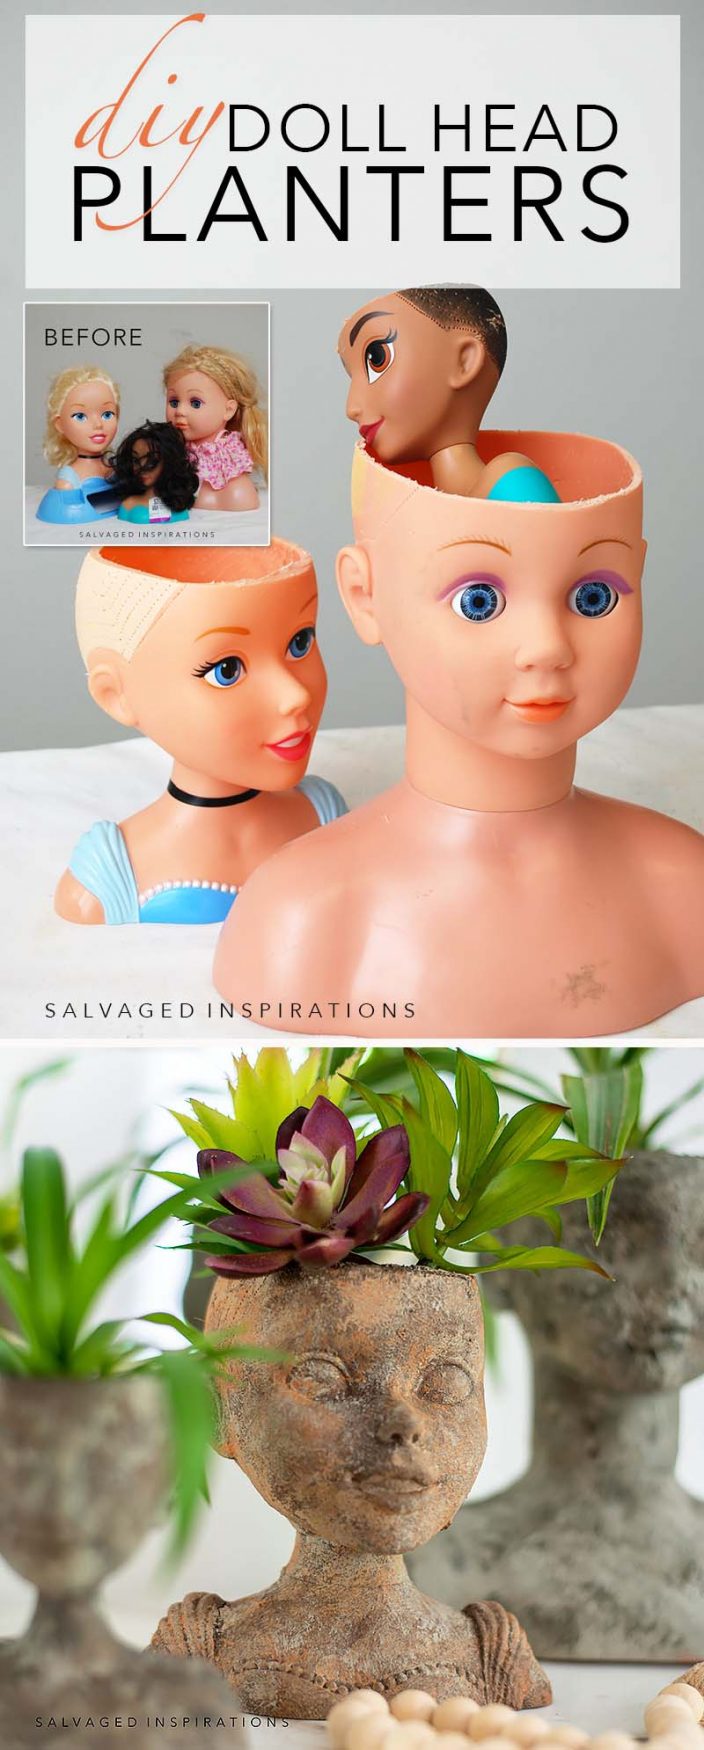
Here’s what I started with. Three thrift store doll heads selling for $3-5 each. Did you ever play with these dolls? I LOVED playing with these doll heads when I was a kid! I would spend hours creating different hairstyles and always wanted to pretend I was a hairstylist and give them a good haircut as well. hehe
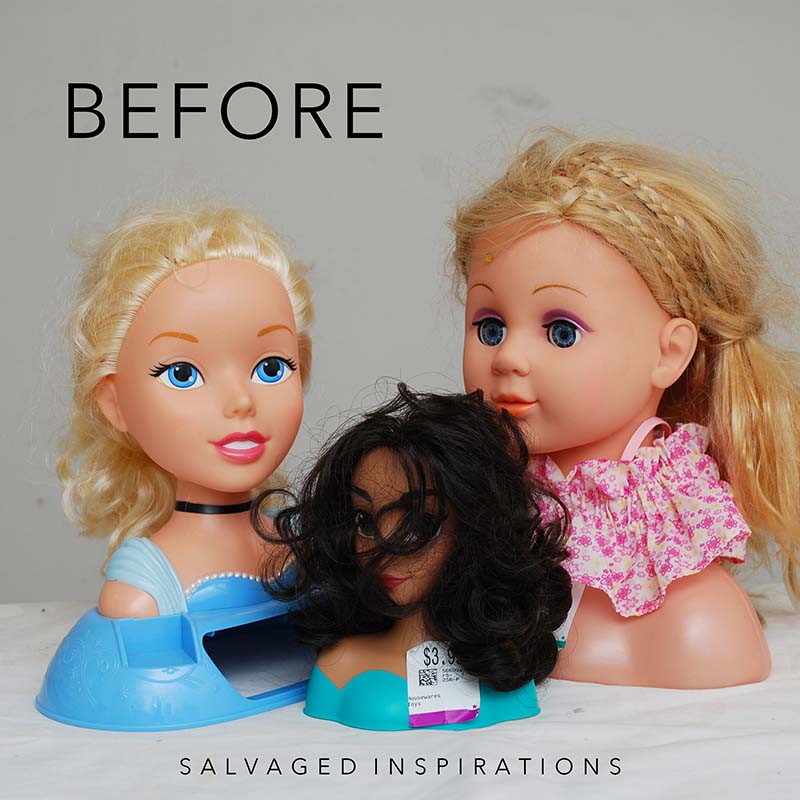
They started out as sweet-looking dolls and turned into ancient clay head planters using an EASY faux painting technique.
Even I’m impressed with how easy this was to do and how R*E*A*L this clay/concrete finish looks!
THIS POST IS SPONSORED/CONTAINS AFFILIATE LINKS TO PRODUCTS I USE. YOU CAN SEE MY FULL DISCLOSURE HERE.
SOURCE LIST
DIY DOLL HEAD PLANTERS
I used doll heads, but you can also use an inexpensive styrofoam head that can be purchased at dollar stores or online. You may remember I also used a plaster bust and turned this into a planter as well.
Here’s how it all came together…
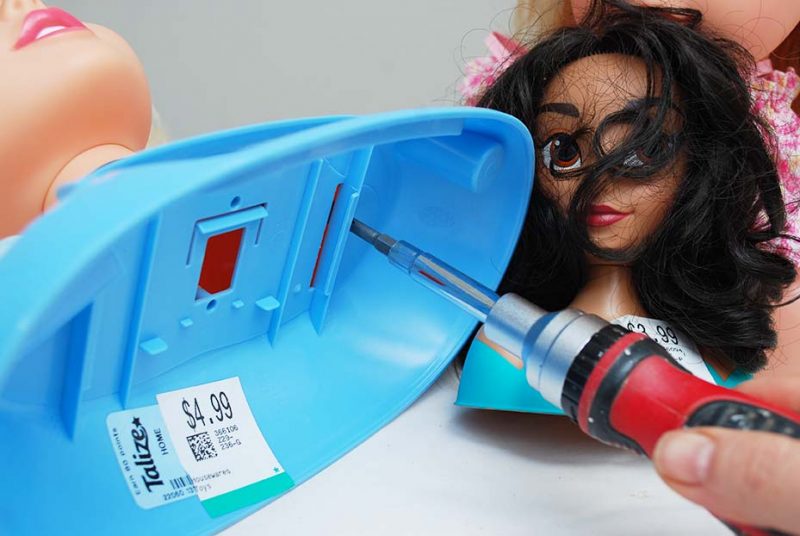
REMOVE ACCESSORIES
I started by removing all the doll’s accessories, including the clothing and necklace, and for the one doll, I removed the excess plastic base.
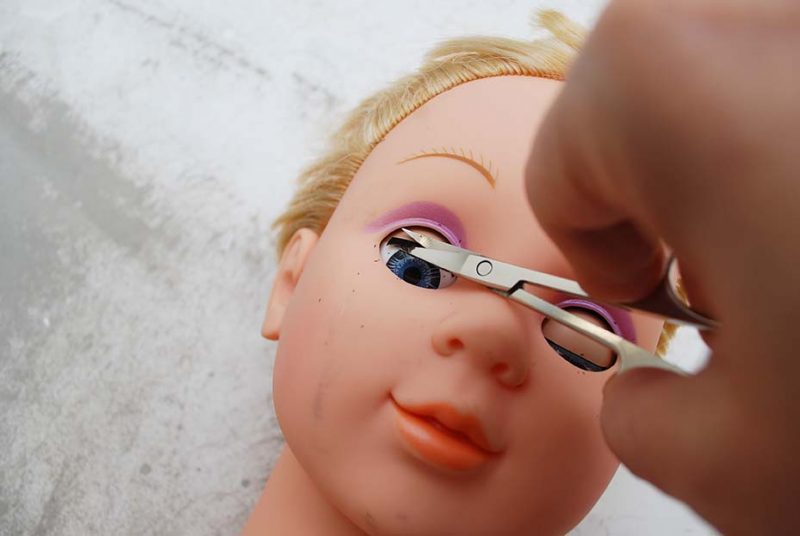
CUT HAIR SHORT
Okay, here’s a childhood play fantasy come true, lol! Once the dolls were stripped of their accessories, I took a pair of scissors and cut their hair short.

Including the eyelashes!
REMOVE TOP
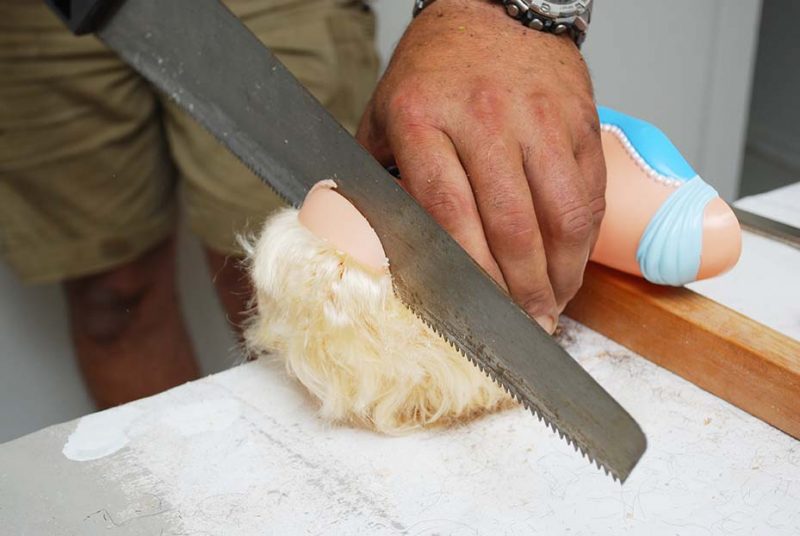
To create the vessel for the plants to sit in, a little ‘beheading’ went on in the workshop. I felt a little creepy doing it…lol. Nick had come in from cutting the bushes, so I asked him to cut the tops of the heads. Even though he would never admit it, I think he had a little fun doing this! 😉 He started with a hand saw.
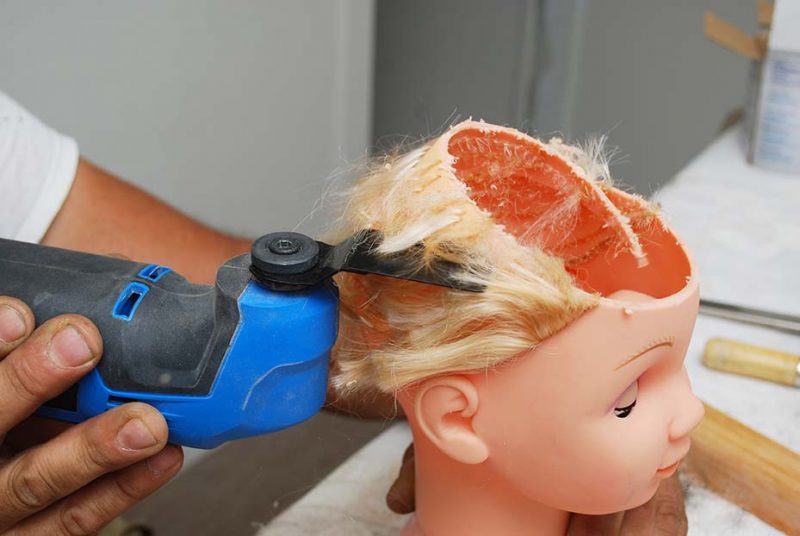
Then he leveled them out using an oscillating tool and a 12″ level.
REMOVE REMAINING HAIR
Removing the remaining hair is easy once you have access to the inside of the head. It’s EASY, but it’s time-consuming. I can’t believe how WELL they construct these doll heads so little girls can’t pull the hair out! It took me almost an hour to remove the hair from these three doll heads! I used small scissors to loosen and release the weave on the inside.
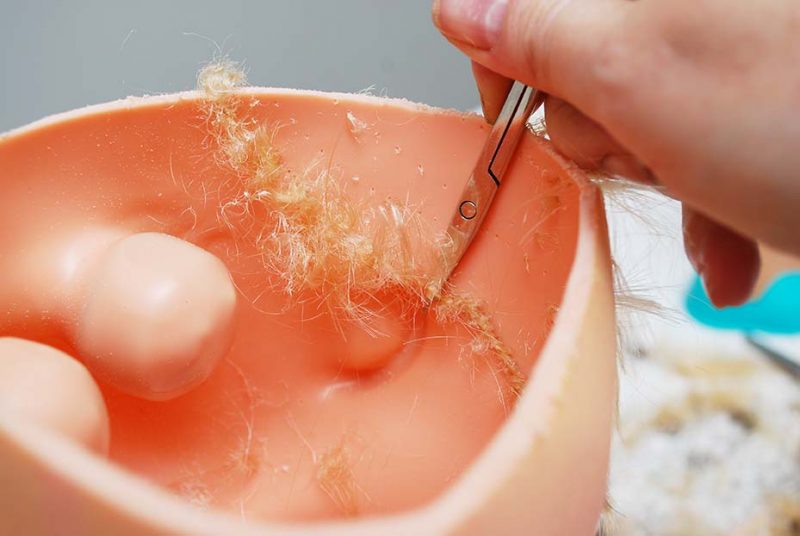
Then, once the weave is loose, the hair can be pulled out easily.

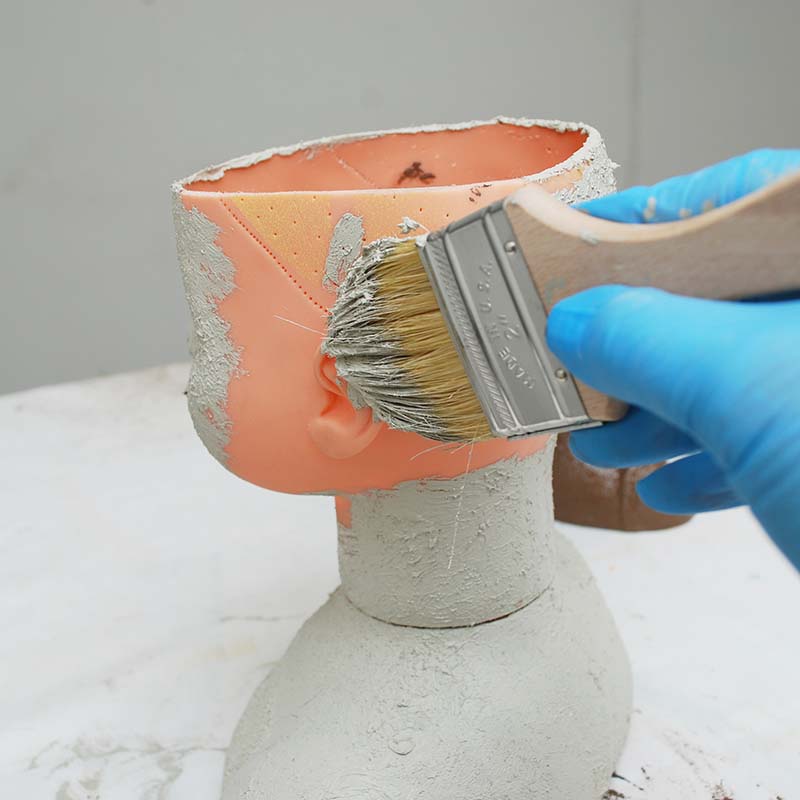
PAINT BASE COAT W TEXTURE
To create the faux clay finish, I used three base colors and this DB Sea Spray Texture Additive.
DB Chalk Mineral Paints come in 4oz sizes now which would be perfect for small DIY projects like this! (not shown below… these are 32 oz)
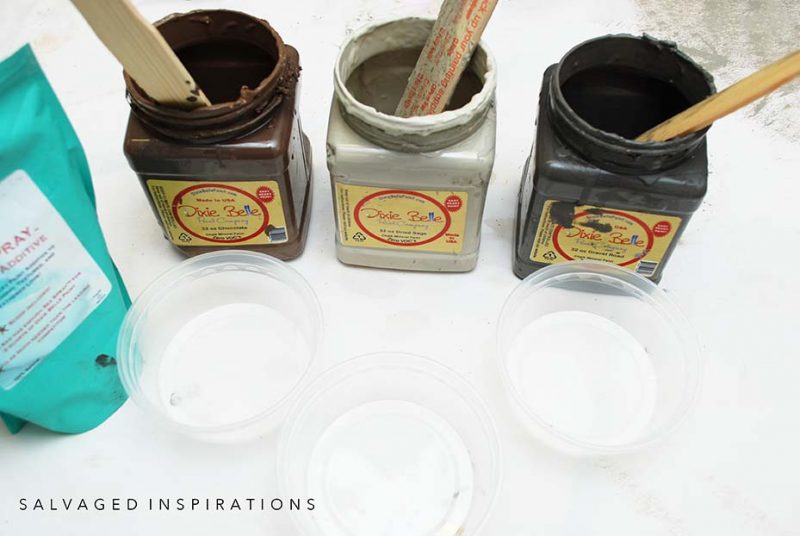
I mixed some Sea Spray in with each color and painted it on with an inexpensive chip brush.
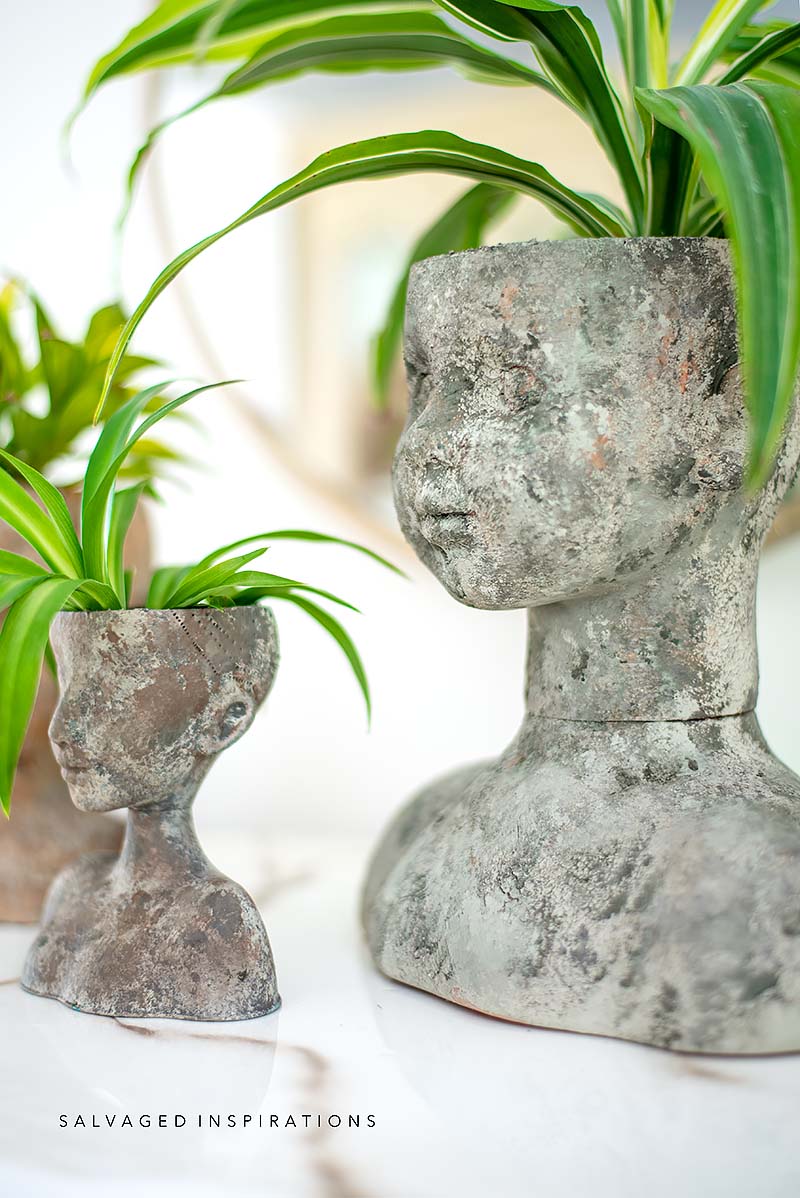
I varied the texture for each doll’s head as well. The largest doll head has the most texture, the middle-sized doll head a little less, and the smallest doll head has the very least texture.
I’m curious to hear which one YOU like the best!

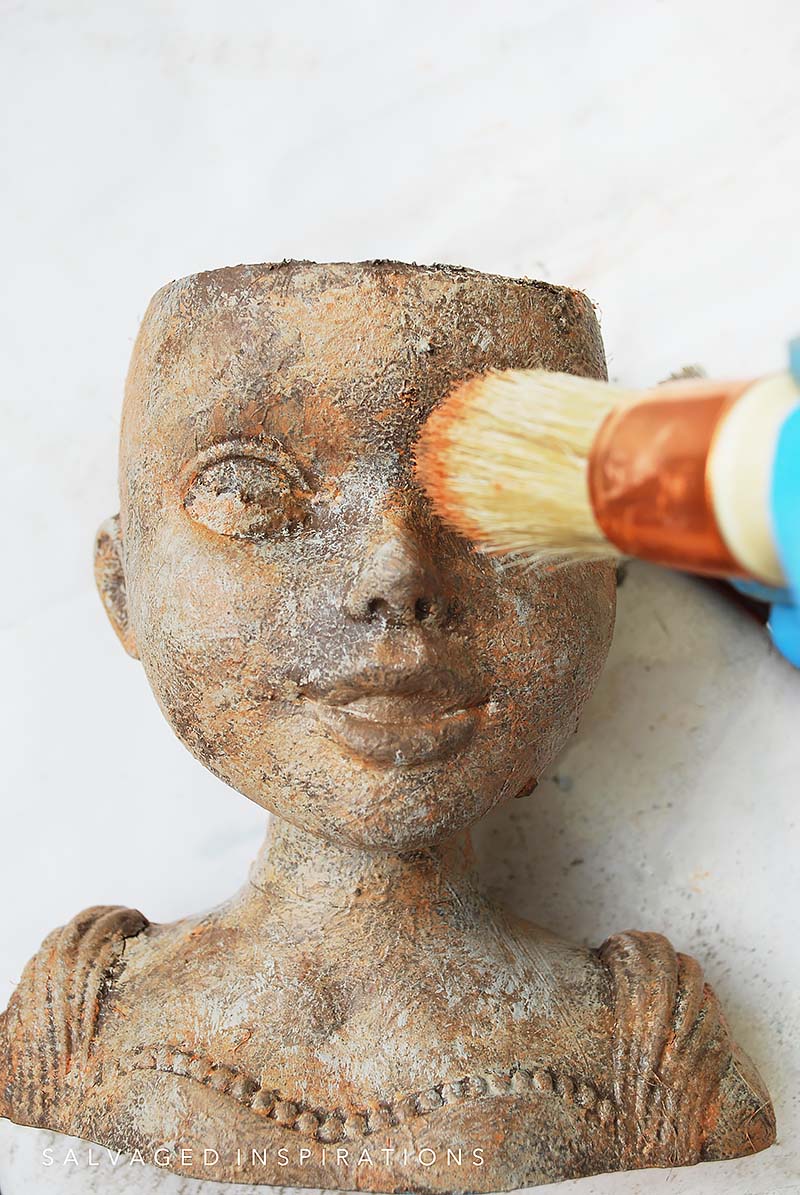
PAINT FAUX FINISH
To paint the faux clay finish goes super fast! I dipped my brush into a little paint and dabbed it onto the face and head randomly. Then taking a damp shop towel, I dabbed the wet paint and blended it in. I kept doing this with the three colors until I was happy with the look.
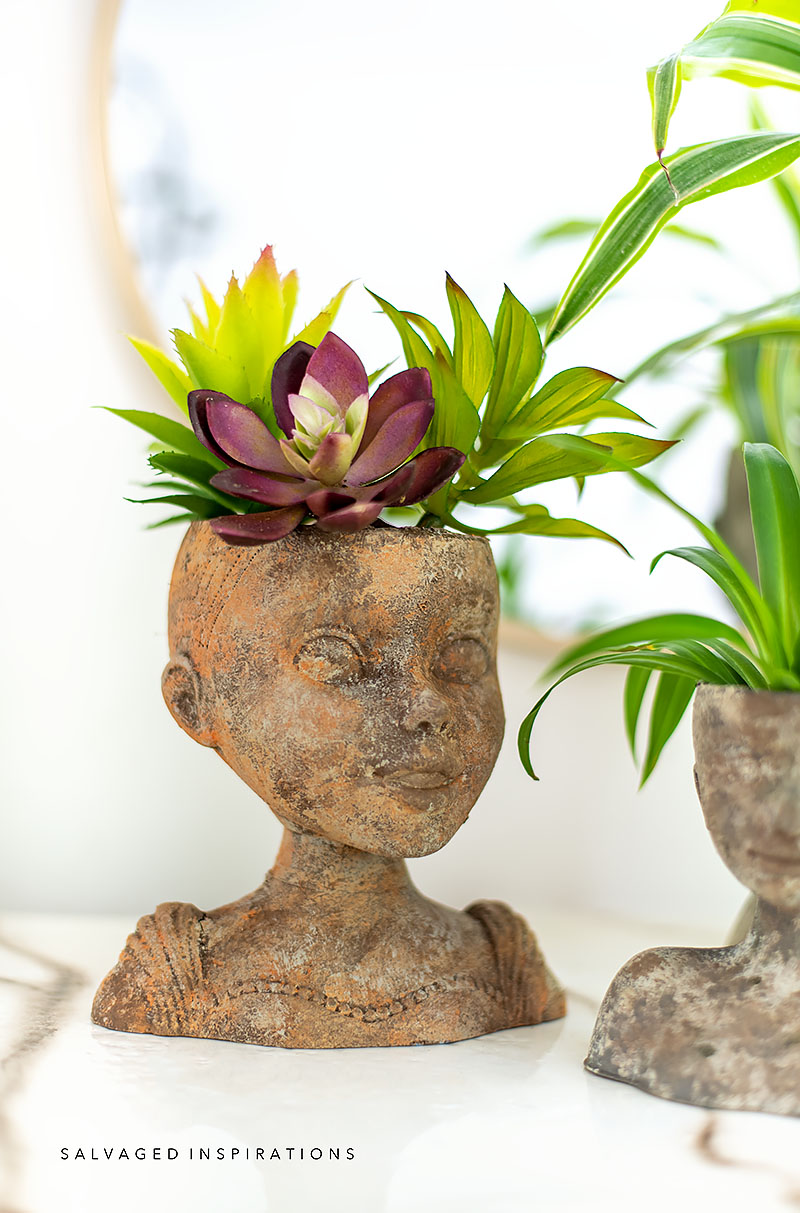
For the largest planter, I dabbed in a little Collard Greens. For this girl planter below, I added in a little Terracotta as well. It really warms up the look!

YOUTUBE TUTORIAL
Here’s a step-by-step tutorial on Youtube. If you have any problems viewing below, feel free to watch it on my Youtube Channel HERE. Our #siyoutubefamily has hit 58.2K so don’t forget to subscribe if you haven’t done so already! So exciting, thank YOU! 🙂
THE FINISHED LOOK
Once these were all dry, all that was left to do was add a gorgeous plant!
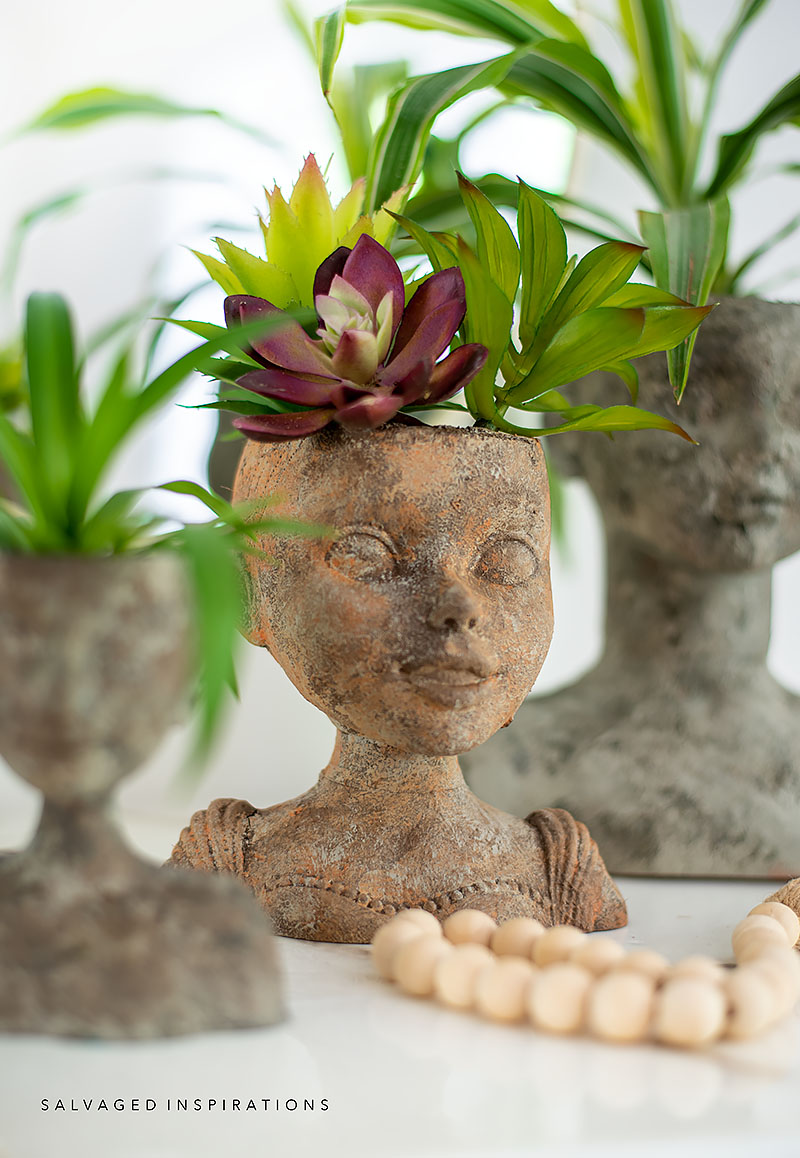
Aren’t they beautiful?!? And check out all this texture!
Here’s another look at the before and after!
Thanks for joining me today. If you love a project that is fast, super inexpensive, and fun, this one might be worth a try. I’d love to hear what you think of these faux clay doll head planters and which one YOU LIKE BEST!
Thanks for reading. 🙂
Wishing you a beautiful day and Happy Painting friends!
Denise XO
RELATED POSTS::
DIY Antique Gold Mirror
Repurposed Magazine Rack
How To Distress A Mirror
DIY Concrete Head Planter
How To Antique A Mirror – Video
PIN AND SHARE!


You are too clever! This made me LOL! Great transformation. I don’t think most would have guessed the base of these planters.
I agree, this is kinda funny AND soooo good!🤭 Glad it gave you a laugh Leslie. Enjoy your day! XOXO
Are you kidding me??? I couldn’t love this more! I can see a corner of doll head in my garden!!! 🪴 😆 Going to try this one for sure. 👍🏻 Pinned 📌 Thank for sharing your creativity. 🪴
Right!?! My sister has took one of these doll head planters. It’s sitting out on her back patio table – and it still looks amazing! She has succulents in it. It’s more weathered than when it was first diy’d (she brings it in for the winter months) and i think it looks even better. Its a great conversation piece as well.😆
Omgeeee I love these!! I can’t wait to search all the Goodwills & other 2nd hand stores!! I’m not a crafty person but these look easy enough to make! Thank you Thank you!! And to think my daughter had the Barbie one as a child, haha
I had something similar to the barbie head when I was a child!😆 So happy you love these, its a REALLY fun project!
I wasn’t sure where this was going at first but I absolutely love these! They look amazing and the cement treatment is spot on! Nice job!
Thank you!
Wow, what an amazing idea! I love the colours on the largest doll head, it looks so authentic.
Thanks Heather… it was really fun!
OMG! These doll heads came out amazing!!! Wow!!
YAY! Thanks Lily!🤗
I was skeptical when I saw the doll heads’ “before,” but good grief! These look amazing. The finishes you achieved are just fantastic. But the images of sawing the heads is going to be with me for a while, and I might lose a little sleep….. LOL [grimace] Love this project, Denise, and very tempted to have a go at it myself!
Thanks! They turned out even better than I thought they would as well! And ya, I ended up getting Nick to do the sawing for me.😊 He was joking calling it my “Chucky Project”.🤣
You know Denise, I have followed you for many years and in my opinion, you are extremely talented, and I love everything you redo but the doll heads are a bit much. I have laughed at the doll heads so much and even during the day when the heads come to mine, I still laugh.
Keep up your beautiful work. I do not mean to insult you, but I had to let you know how the doll heads tickled me.
Have a wonderful day Denise
Thanks Cathy! And I always say there’s nothing better than a good laugh. If seeing these doll heads was what gave you your daily laugh, I’m good with that! 🤣🤗
These are toooo cool. I’ve been looking at regular head planters for my new succulent obsession…might have to try to find some old dolls somewhere…I live them all the big mostly white one would be beautiful with some of my widely colorful secculents!!
Thanks Sandra, and ya, the lighter concrete finish would show off color succulents beautifully! I’m obsessed with succulents as well.😊
Texas Chainsaw Massacre meets the beauty salon! Hahaha, these are awesome. Funnily enough, I was in a nursery recently & they had these terra cotta head/face planters for sale at quite a price. Great idea, & yours really look like aged clay.
You’re hilarious Tracy!😂 Nick was calling it my “Chucky” project…lol. Have a fun and relaxing Canada Day my friend! XOXO
Hi Denise!! Well I can honestly say I have never seen anything like it. I really had to look at them to like them. You may have started something new. Brilliant!
Hi Cheryl! I’m glad you really looked at them and decided to like them…lol. The way you phrased that, you put a big smile on my face.😄
I love the first one the best. You are very ingenious.
I’m with you Margaret, I like the first one the best too!🤗 Then the largest one, then the mini one.
Love it! You are so creative!
So glad you love them Julie! Thank you! 🙂
These are really cute. I’m going to try this for a summer project with the grandchild. I confess this gave me a flashback to Sid in the Toy Story movie though.
Sid in Toy Story… I never thought of that!😂 And ya, this would be a great project with the grandchild … minus the sawing off part! hehe We don’t want to turn him/her into a Sid..lol 😉🤣
Hi Denise. How you managed to turn such creepy little doll heads into cool planters is nothing short of magic. I love how these turned out. Very artsy.
…”creepy little doll heads”…😂 Nick would agree with you. He said the one with the opening and closing eyes was creepy.🤣 Thanks so much my friend. XOXO
Wow, fantastic transformation. You are amazing.
Yay, thank you Maria!😊
These are so cool!!
Thank you Donna! 🙂
WOW! I was not expecting this when I saw these dolls in my inbox! This is crazy good!!!🤯
lol, glad I can still surprise! So glad you like them Nicki! XOXO