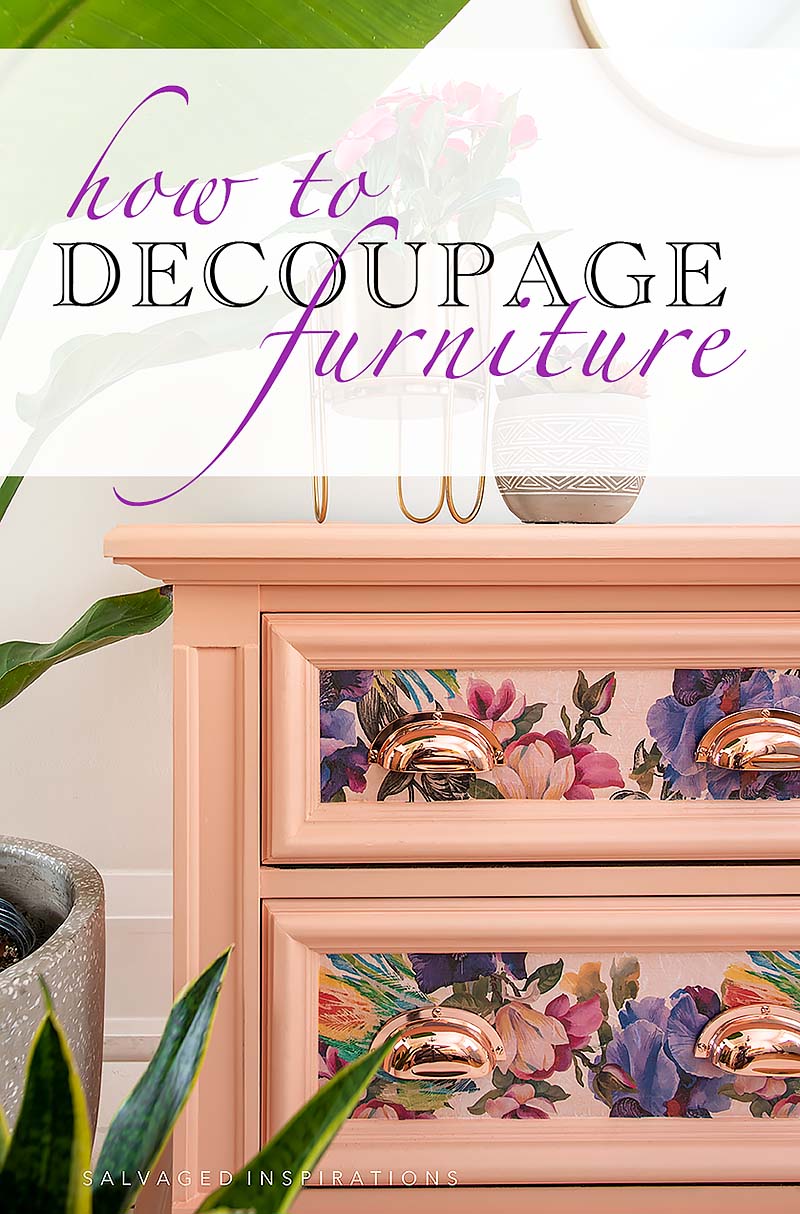
HOW TO DECOUPAGE FURNITURE | CURB-SHOPPED NIGHTSTANDS BEFORE AND AFTER | YOUTUBE TUTORIAL
 Hi sweet friends! Today I’m sharing How To Decoupage Your Furniture while working on these curb-shopped nightstands. But before we start, I wanted to thank you for all the interaction on last week’s Doll Head Planters! They had a mixed bag of reactions but you all made it super fun!
And speaking of fun, today is also Trash To Treasure Tuesday where I join four of my blogging besties as well. I’ll link to their creative makeovers below.
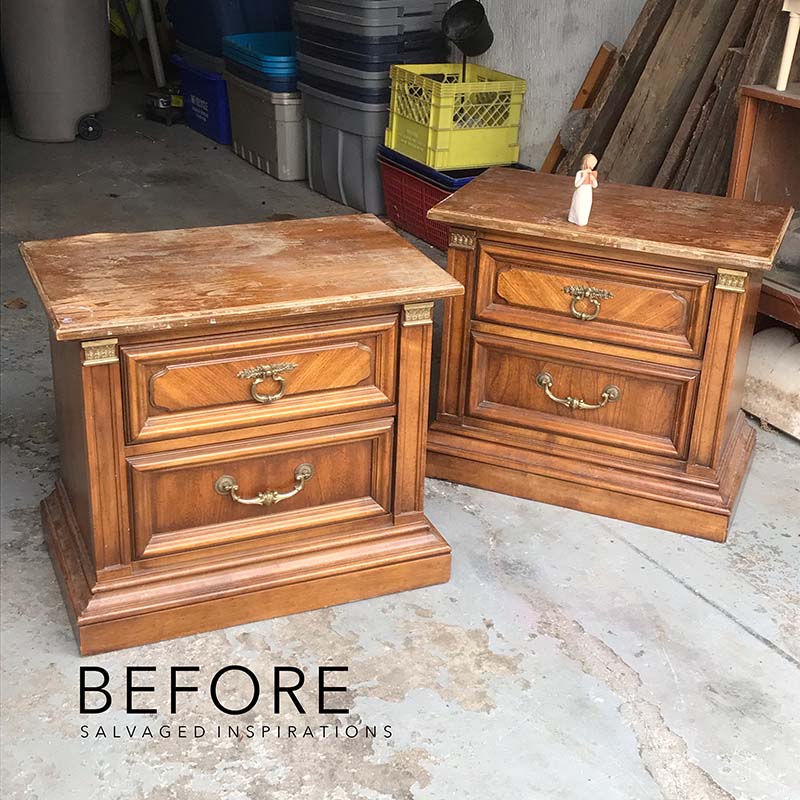
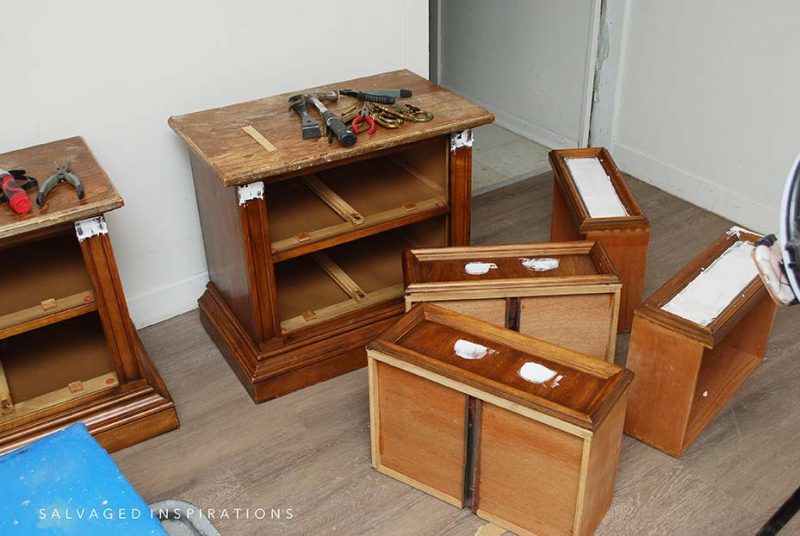
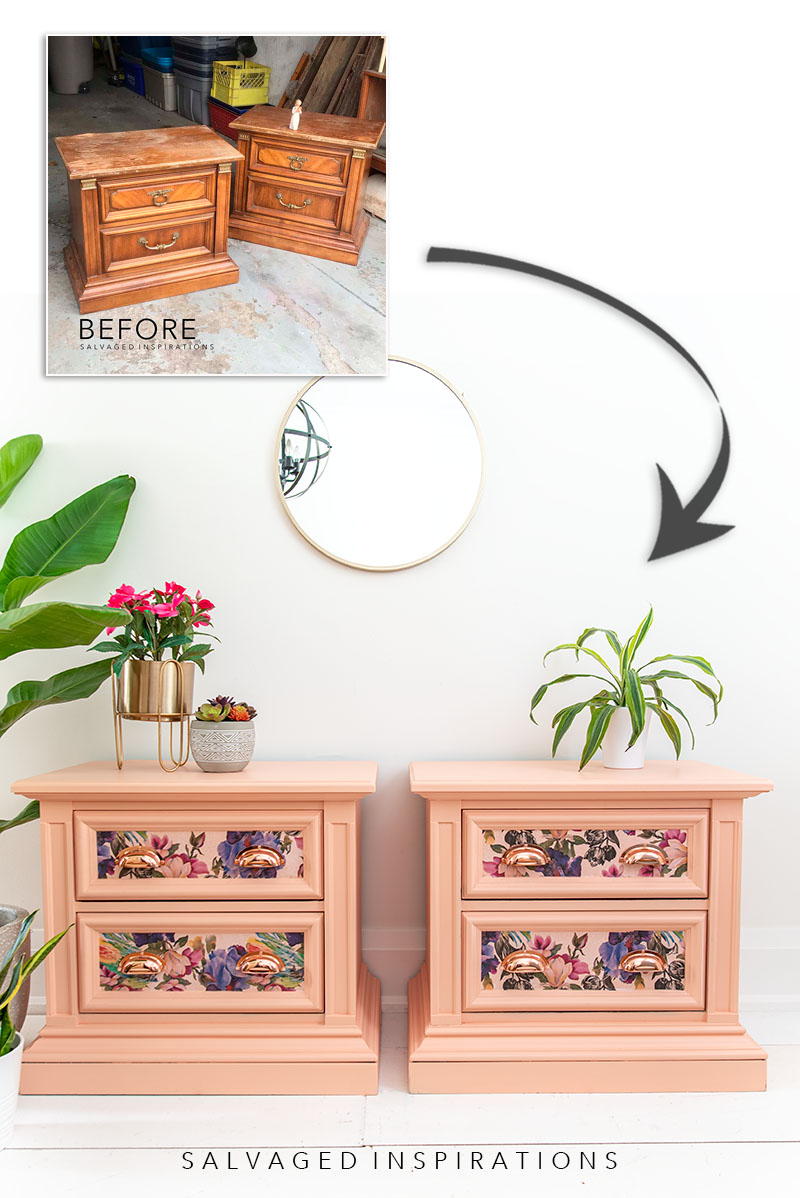
Here’s the curb-shopped nightstand set I started with. My sister was kind enough to pick them up for me. Thanks, Andrea! 💕
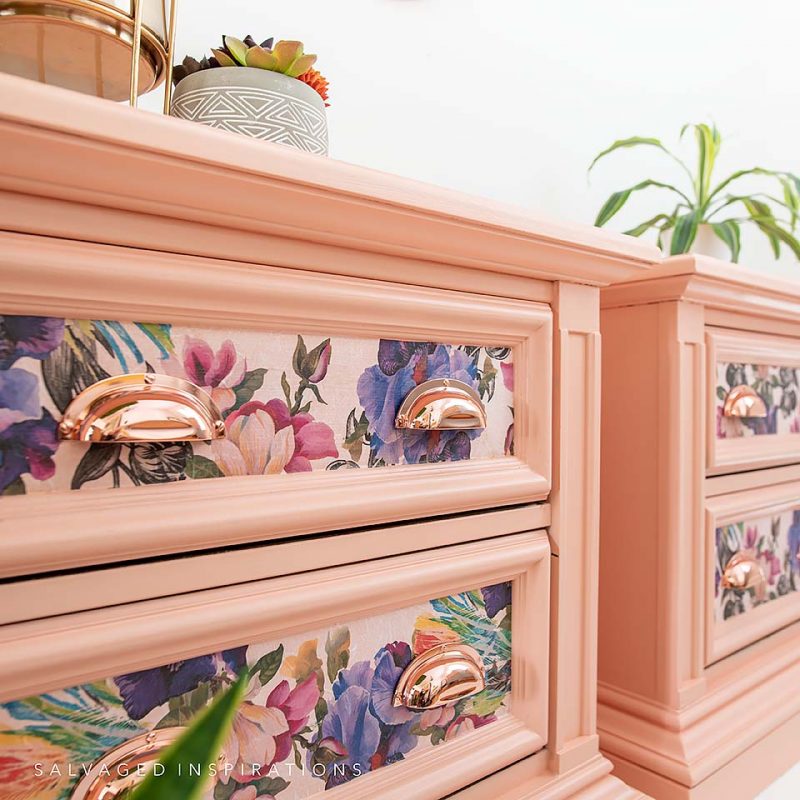
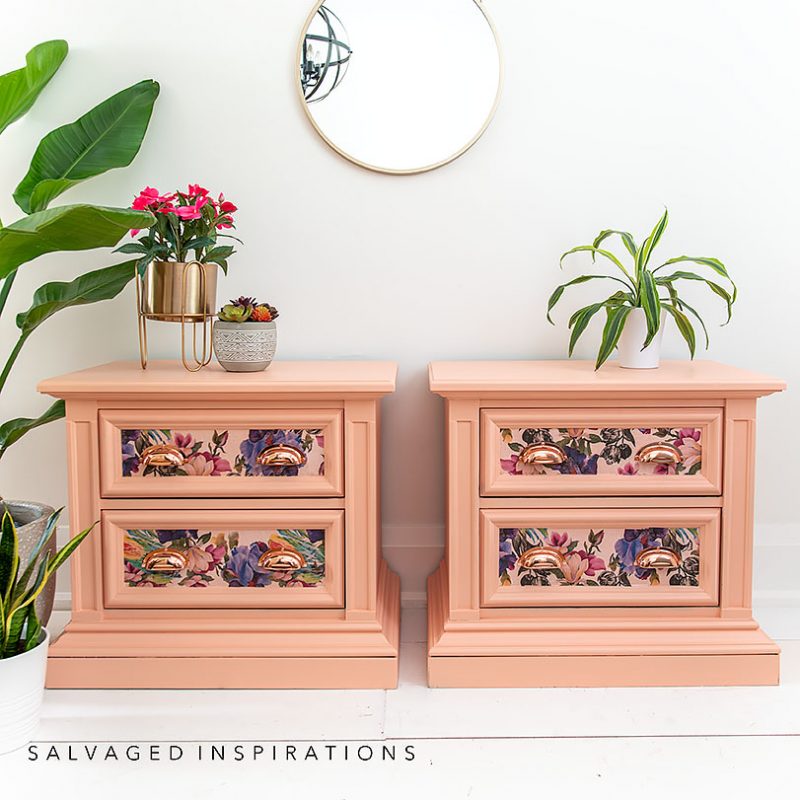
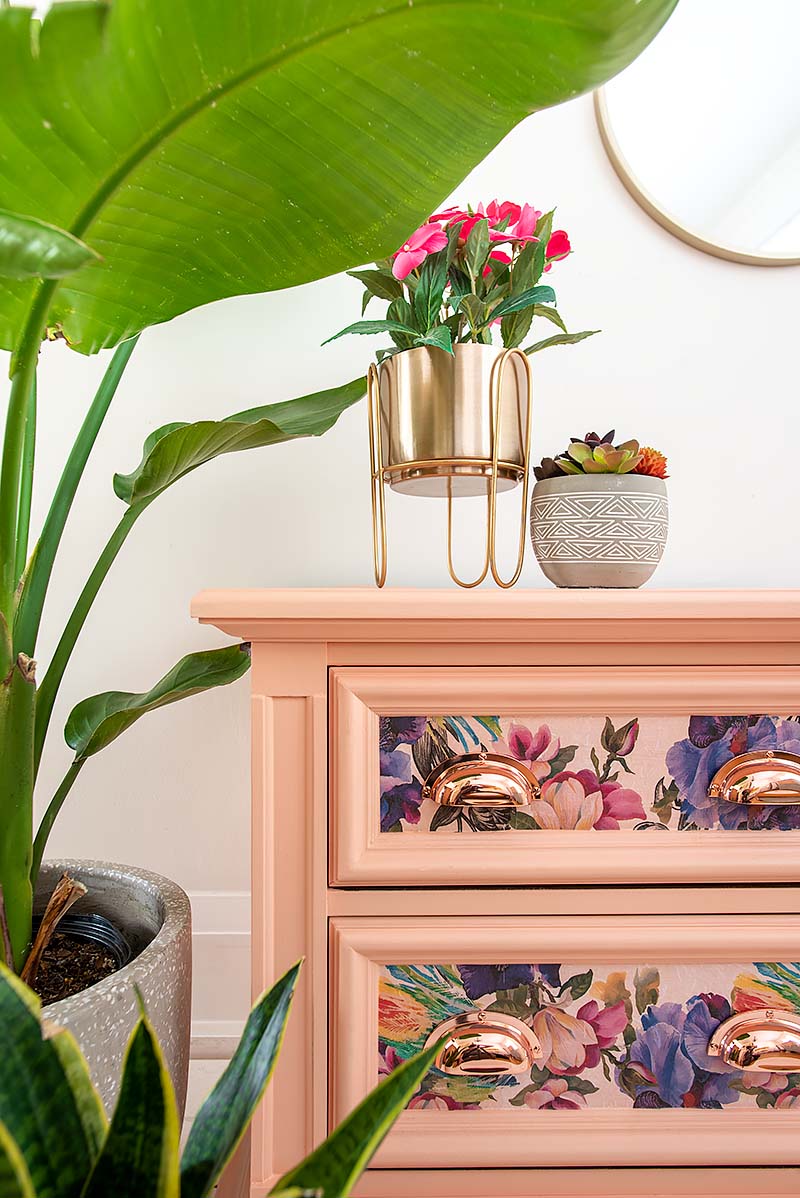
Before I get into the how-to details here are a few sneak peeks of the NEW look! What do you think?
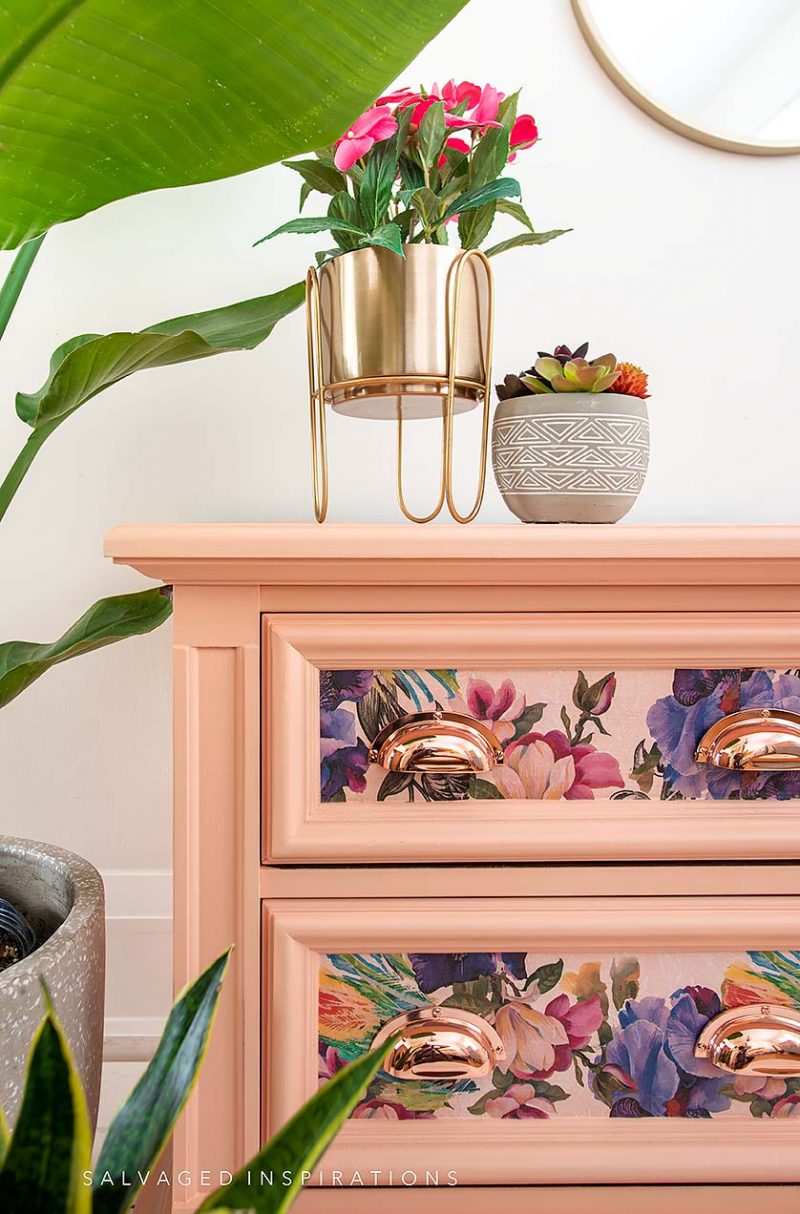
As I’ve mentioned in previous posts, I like being adventurous with curb finds as they cost me nothing so I went with a color out of my comfort zone. APRICOT with a colorful floral!

THIS POST IS SPONSORED/CONTAINS AFFILIATE LINKS TO PRODUCTS I USE. YOU CAN SEE MY FULL DISCLOSURE HERE.
SOURCE LIST
Nightstand Set – SALVAGED
White Lightning
Scrubby Soap
Sanding Sponge
Wood Filler
BOSS Primer
Paint Brush
Apricot Chalk Mineral Paint
Floral Rice Decoupage Paper
Satin Clear Coat
Copper Cup Handles (similar)
TOOL LIST
Oscillating Tool (similar)
Orbital Sander
Pry Bar Set
HOW TO DECOUPAGE FURNITURE
I’ve included the full tutorial on this nightstand set but if you’re here for the decoupage instruction only, feel free to skip to step #6. A full Youtube video tutorial is also included and timestamped at the Decoupage Chapter.
#1 PREP | CLEAN
This set was filthy. Before bringing them into my studio, I cleaned the inside and the out with this TSP substitute. Then for extra insurance and to remove all the residue I sprayed it down with a hose.
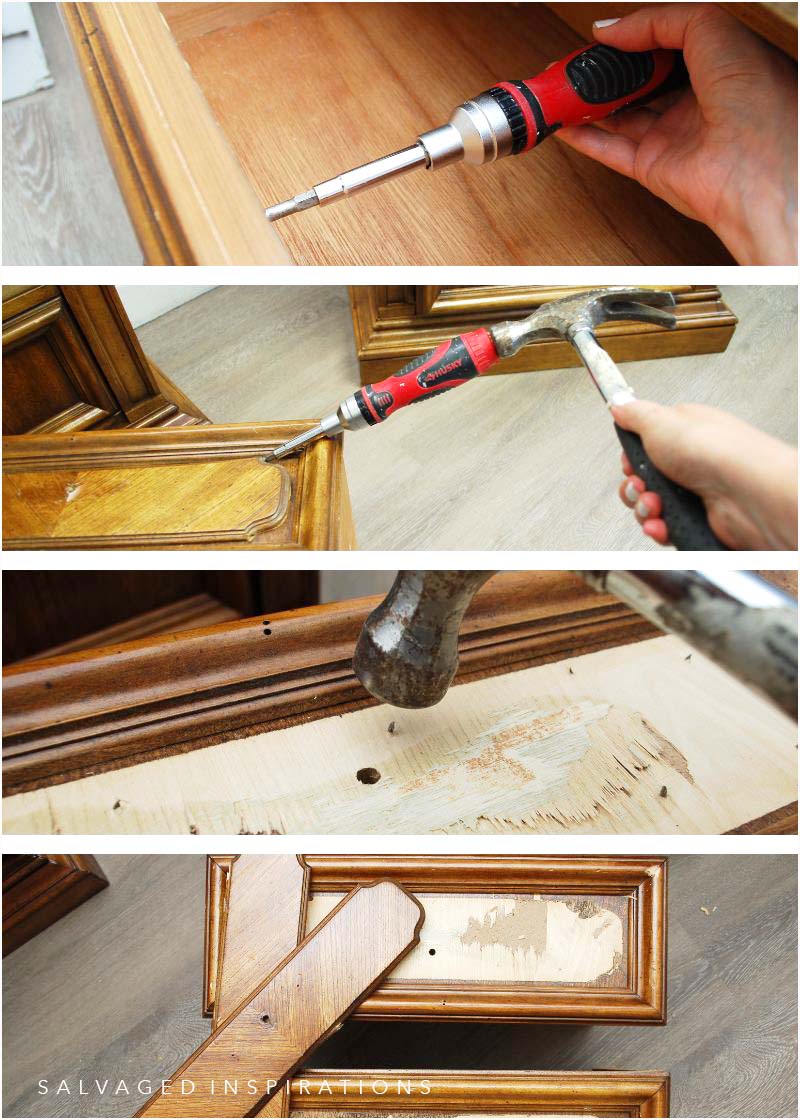
#2 REMOVE HARDWARE & DATED DESIGN
To remove the hardware I used a screwdriver. To remove the dated design on the top drawers I used the screwdriver and a pry bar from my pry bar set. It was nailed and glued and took a little force so some repair was needed. I pushed in the nails that were sticking out. Hammering IN the nails is easier than removing them but only works if they don’t protrude from the other side.
#3 FILL AND SAND
Using this wood filler, I repaired the drawer fronts and filled in any imperfections and hardware holes. Using a ‘softer’ wood filler rather than Bondo, for instance, will make it much easier to sand.
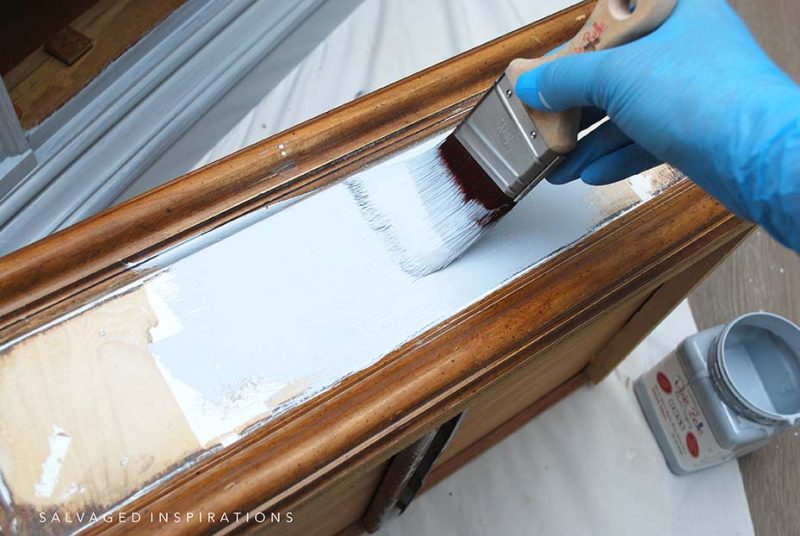
#4 PRIME
I scuff-sanded the entire set with my orbital sander and got into all the corners with my oscillating tool with the sander attachment. I’ll share more about this on Saturday’s video so you can see it in action but an oscillating tool is a must-have in my opinion. After everything was sanded, I primed the side tables with this BOSS Primer. This is an odor blocker and stain-blocking primer which comes in white, gray, and clear. Below I’m using gray because this is what I had on hand.
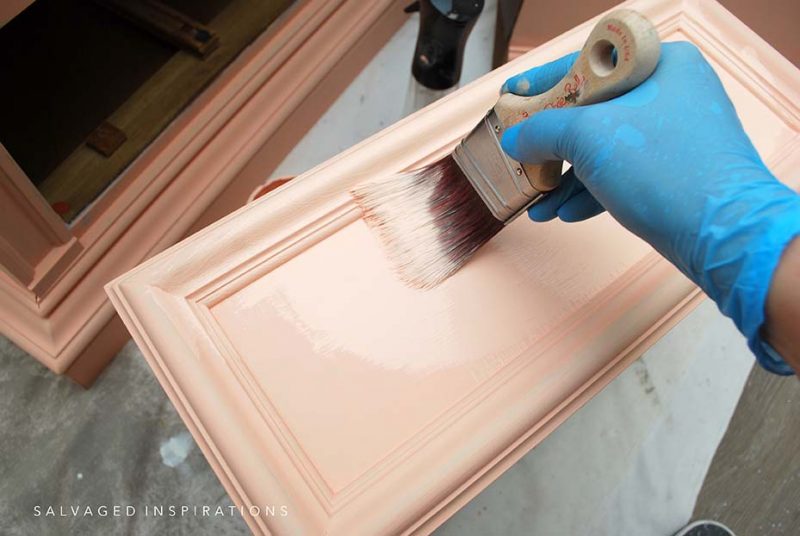
#5 PAINT
I picked a color I rarely use – this Apricot which is a pale pink-orange. I picked the color from one of the flowers I wanted to use on the decoupage tissue.
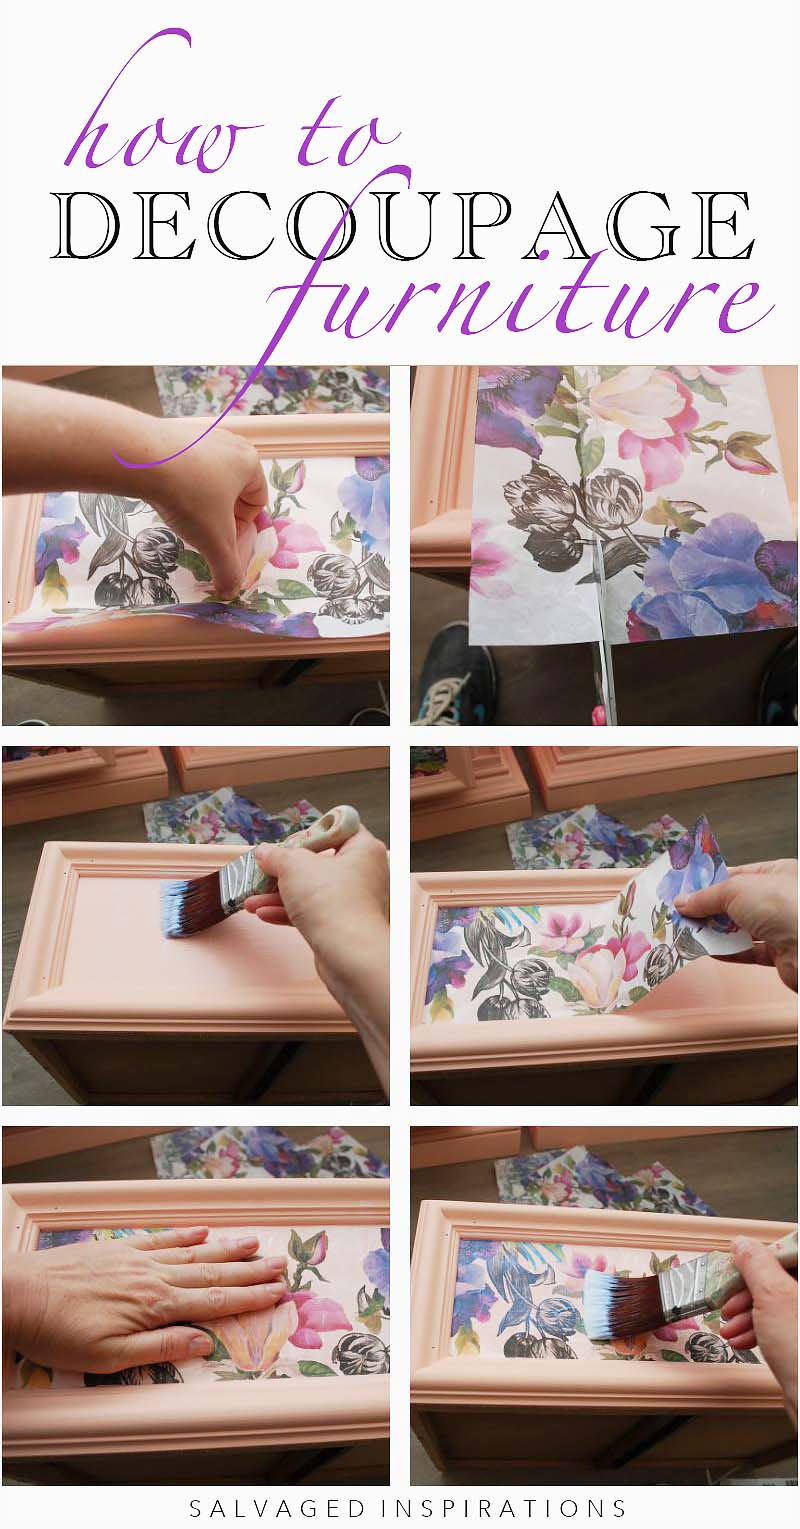
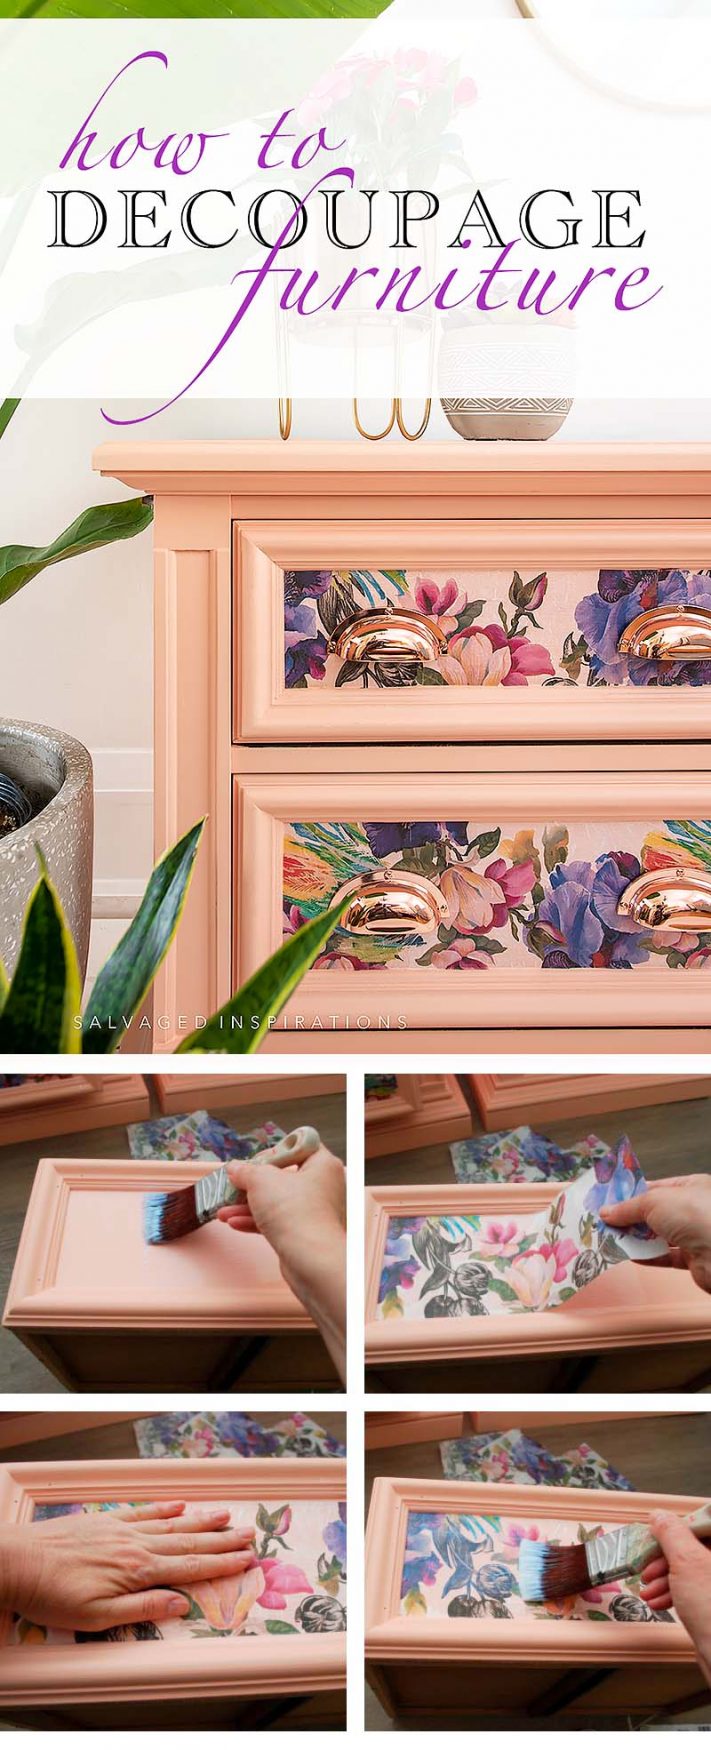
#6 ADDING A DECOUPAGE DESIGN
Now for some fun! Decoupaging furniture can be done with napkins, tissue paper, or this gorgeous rice decoupage paper that I’m using today – which is the EASIEST way to do it since these papers were made for adding to furniture. This rice paper is sheer and porous and easily sticks to furniture using any regular topcoat – no extra Modpoge or gluing products are required!
Here are the steps …
- Pick a decoupage design
- Decide where you want to place the decoupage design onto your furniture
- Cut your design to size
- Brush on a layer of clearcoat where you want the design to adhere
- Place the decoupage in position and smooth out any creases or bubbles
- Once in place and smooth, brush on another layer of topcoat
TIP ~ To blend the decoupage paper seamlessly onto ANY color of painted furniture- apply a paint wash in a matching color. I have a great example of how to do this with this Decoupage Nightstand Tutorial here!
TIP ~ Rice Decoupage Paper is a great alternative to transfers if you’re on a budget. They are less than half the price!
TOPCOAT | PROTECTION
I top-coated and protected this piece with two coats of this Satin Sealer. I usually spray my topcoats but since I had my brush out anyway I went ahead and brushed the nightstands. This clearcoat is easy to use and doesn’t leave streaks or brush marks if applied quickly.
NEW HARDWARE
I replaced the old dated hardware with these copper cup handles (similar)- so pretty!
Here’s the finished look!
YOUTUBE TUTORIAL
Here’s a step-by-step tutorial on Youtube. If you have any problems viewing below, feel free to watch it on my Youtube Channel HERE. Our #siyoutubefamily has hit 14.4K so don’t forget to subscribe if you haven’t done so already! So exciting, thank YOU! 🙂
AND NOW FOR MORE TRASH TO TREASURE FUN!
You’re going to LOVE what my creative team of Trash To Treasure ladies do! Below are their BEFORE photos. Visit the links below to see the amazing AFTERS and learn how they did it! I’m heading over to take a peek as well! x
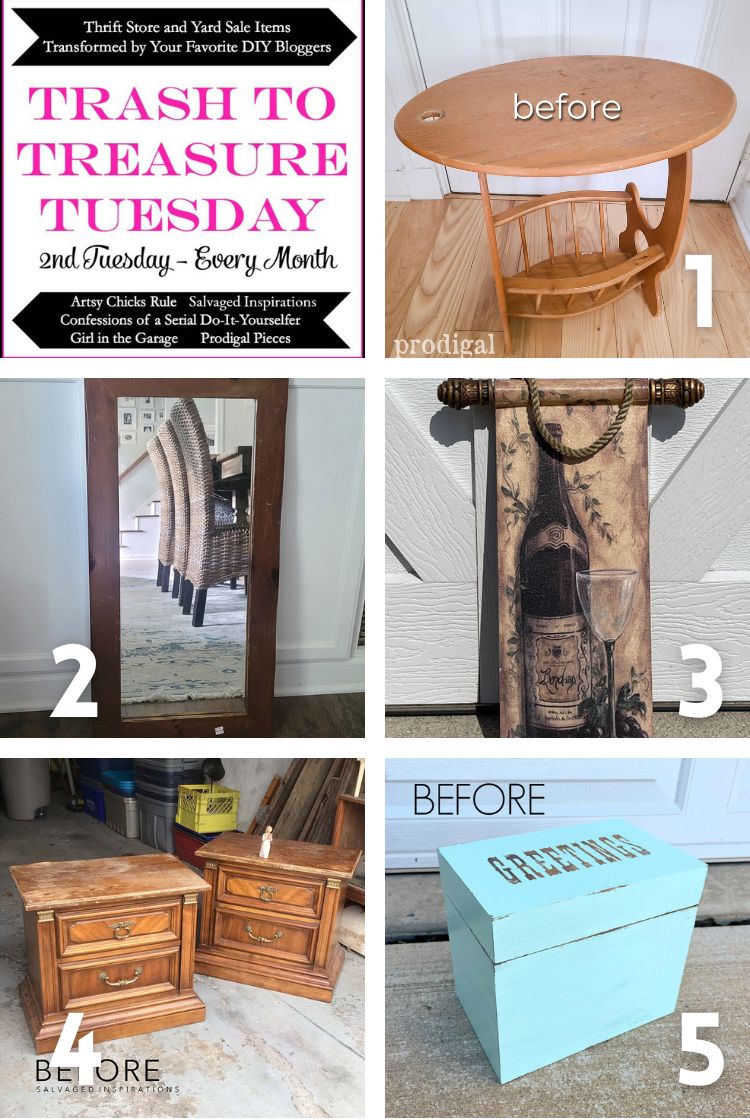
1. PRODIGAL PIECES
2. ARTSY CHICKS RULE
3. CONFESSIONS OF A SERIAL DIYER
4. SALVAGED INSPIRATIONS (HAPPY YOU’RE HERE!)
5. GIRL IN THE GARAGE
Here’s another look at this decoupaged nightstand set before and after. I hope it’s inspired you and given you some new ideas for your projects!
Let me know what you think of this curb-shopped decoupaged set and feel free to ask any questions you may have. I LOVE hearing from you… it makes my day! Have a fabulous week and see you next Tuesday! 🙂
Happy furniture painting friends!
Denise x
RELATED POSTS::
HOW TO APPLY DECOUPAGE PAPER
HOW TO DECOUPAGE WITH NAPKINS
DECOUPAGED EASTER EGGS
DIY BOHO NIGHTSTANDS
ROYAL DAMASK VINTAGE DESK
PIN AND SHARE!
JOIN THE SALVAGED INSPIRATIONS FAMILY!

So pretty Denise! Love that paper and the colors too! xo
Thanks my friend! Hope you have a great weekend. XOXO
Love your color choice and the floral pattern! Lovely!!
Thanks so much Carla!
Stunning!!! Thank you for sharing your talents and inspiration!
Thank you and thanks for dropping by Fran! XOXO
Amazing! I hope they find a great home 🙂
thanks and I hope they do too!😊
The color, the rice paper, and the handles are all SPOT ON! You did a great job….thanks for the inspo!
Oh, thanks so much Laura! XOXO
Aw, thank you Laura! I’m so glad I tried the cup handles too! It really ties everything together!
These are so feminine & dreamy. Didn’t know you could use a top coat to glue on the paper! Good trick!
Thanks my friend! XOXO Love using the topcoat for the rice paper…super easy, right!?!
Hi Denise! I love Apricot. I havent used it on a full piece but your nightstand are very Boho. When I see these papers first hand I dont like them but then I see them on a piece and I love them. Strange huh? The.cup pools just finished off the fun nightstands.
Thanks Cheryl! And I feel the SAME way about some of these decoupage designs. They seem a little bold for my liking but then once they go on the furniture – I LOVE them!
Once again, these pieces are amazing!!!!!! I love the colors and especially the handles. I am in awe of you. How do you even think of these things? Thank you.
Aw, thanks Marian! The handles were a fluke actually… I wasn’t even going to try them but SO GLAD I did!
The nightstands are truly stunning, Denise! Thank you for sharing all your creativity.
You’ve provided me with much inspiration & many great ideas over the years.
Sincerely,
Mari Lynn
This means a lot Mari Lynn, thank you! And so happy you like them!
Omg! I love the apricot/peach color you chose. Just simply magnificent. Thanks for sharing 💖
Thanks Robin!🤗
These are so pretty in peach, Denise! How nice that Andrea looks out for you with those fabulous curbside finds! XOXO
Thanks my friend!🤗 And yes, sisters are the BEST!👯♀️
I love how the apricot shows thru the decoupage paper! I had wondered how you matched the paint to the background of the paper. LOL!
Right!?!😃 This rice paper is amazing. It’s durable enough not to tear as easily as tissue paper or napkins, yet sheer and porous enough to let the base show through!
That is adorable. It reminds me (embarrassingly) omg….of a jewelry box I decided at the last minute to try to do with my granddaughter. I grabbed the decoupage, a wooden jewelry box, some cute paper with prints and went over. Well…let’s see….forgot brushes…so we improvised with plastic gloves ( and put garbage bags all over the kitchen table), then and dunked them into the decoupage which we put in a bowl, and tried to wipe the excess off into the bowl. So…in the end, the box would not shut, and had the thickness of an ad flyer! Yeah…I need some direction so thank you very much!
LOL…this sounds like SOOOO MUCH FUN! I’ll bet your granddaughter had a blast!😂
Those are gorgeous now, Denise! Wow! xo
Aw thank you! It was really fun working with this cheery color!🤗
So fresh and pleasing. These are definitely a TRANSFORMATION from boring to beautiful!
YAY! Thanks so much Fran!🤗
These are beautiful! 🌸 I wasn’t sure what you were going to do with them when I saw the before image but they look stunning Denise!
Thanks Nicki! I’m so happy you like them! XOXO
Wow, that’s amazing! I never would have chosen the apricot color, but it’s beautiful! The handles are the perfect choice and a nice finishing touch. I appreciate the tips on rice paper and the oscillating tool. Thanks for the inspiration!
Thanks, Rebecca! I really like how the cup handles add to the piece as well. I brought them out on a fluke. Put them up against the piece and WOW! lol
Hi Denise. I love the apricot color you chose for these side tables. The decoupage brings them up another level and the rose gold handles are the icing on the cake. Beautifully designed and so feminine. Thanks for the tip about the rice decoupage papers being half the price of transfers. With the rising costs lately I’m looking to pinch my pennies any way I can;)
Exactly, right!?! These decoupage papers are super inexpensive. I’ll be getting more for sure!
Aw Denise, I wouldn’t say apricot is my favorite color either, but you chose the perfect color to match the decoupaging paper! I only winced a little seeing you use what looked like a screwdriver (and not a chisel) to remove those front pieces – great choice and I would never thought to do that! I love the shiney drawer pulls too! Just an all out great job!
I think it blends perfectly with the decoupage paper as well, thank Gwen. And ya, I started with the screwdriver which was MESSY. In my Saturday video you’ll see how I swapped over to a pry bar which worked better… but I had already made a mess lol. 😉
I just love Apricot. I was so excited when a client chose that color for her dresser. These nightstands are lovely!
Thanks Dana! And ya, I can see why you got excited when your client picked Apricot. What a FUN color to work with yet I rarely see it!
What a fantastic makeover, Denise! The pulls really compliment the color and the paper.
Thanks my friend! I love what the cup pulls add to this piece as well. And funny, I wasn’t even going to try them. hehe