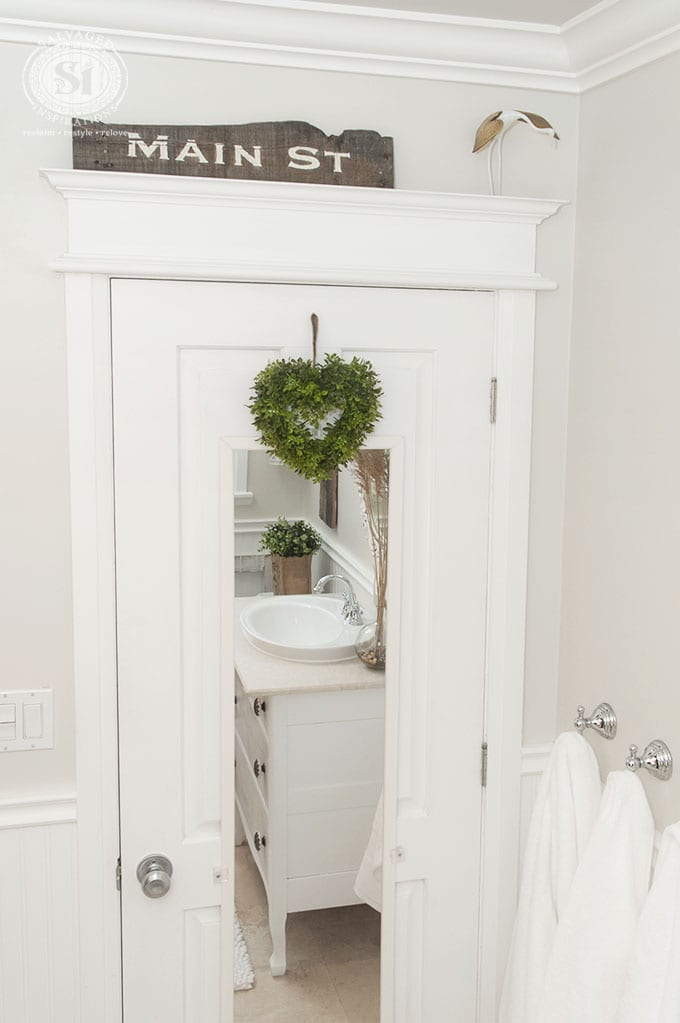
Thanks for all the compliments I’m still receiving on my Salvaged Bathroom Makeover! You’re all so kind and I love all your comments and emails so keep ’em coming!
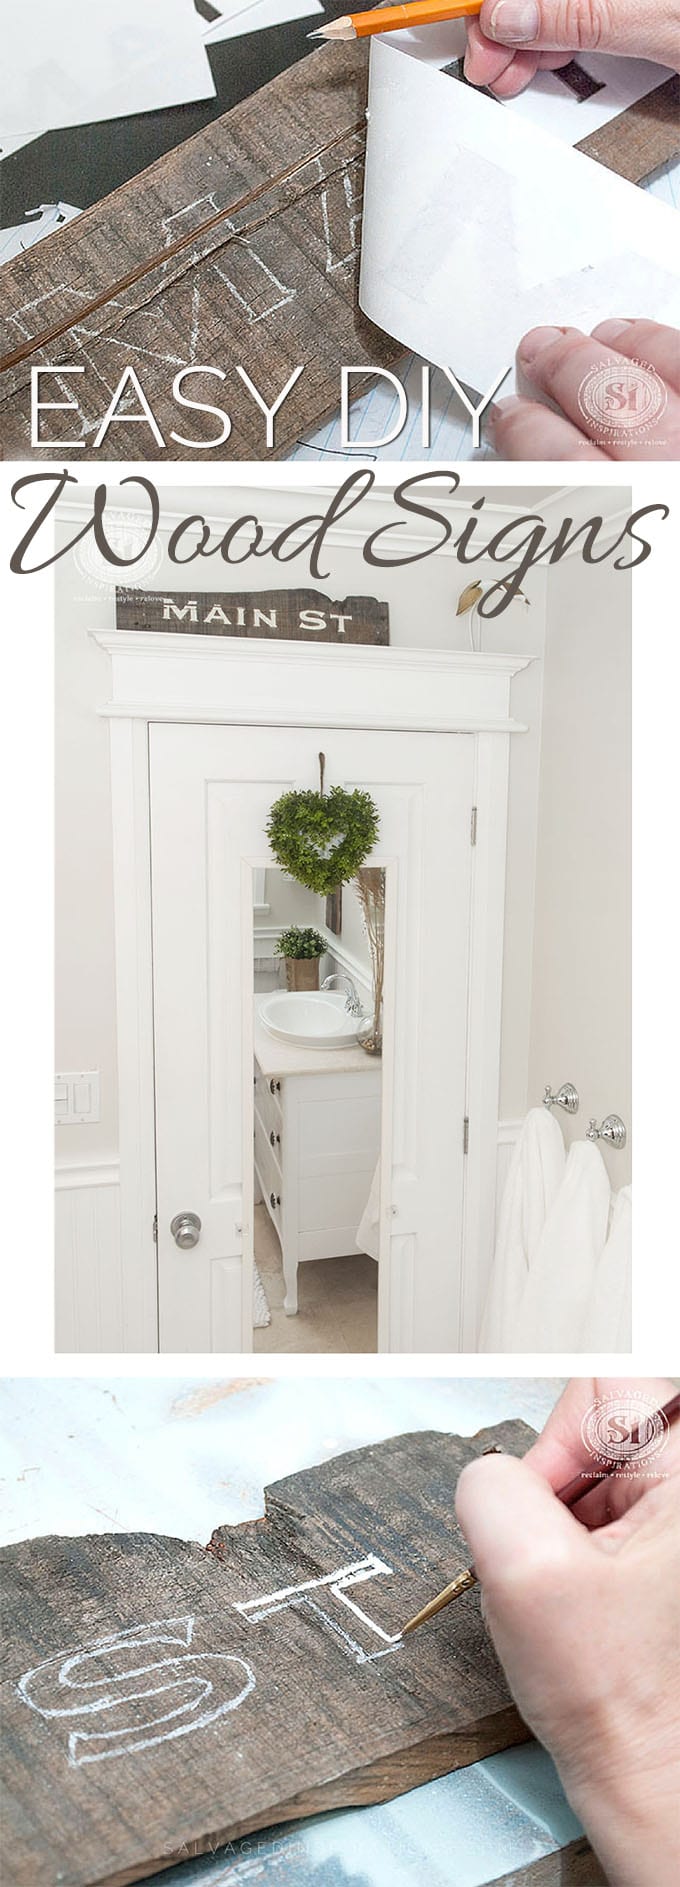
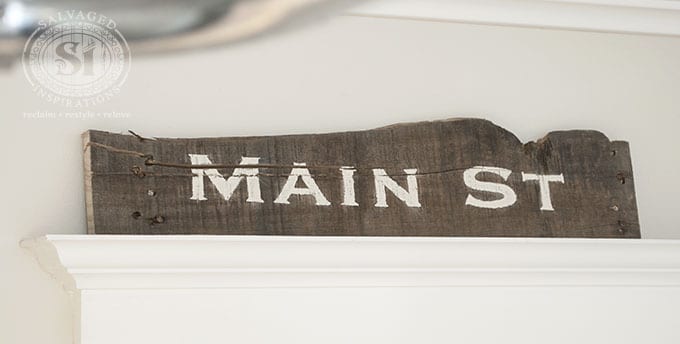
I’ve been getting a lot of questions on how I made my rustic ‘Main St’ and ‘Bath & Towel’ pallets. So today, I’m sharing how simple and easy it is to make your own DIY Wood Signs!
I’m also including 2 free printables {for personal use} at the end of this post for you! 🙂
Over the years, I’ve used a variety of methods to transfer graphics and fonts onto furniture and other surfaces. In my opinion, this transfer method is the easiest. Not only is it basic and straightforward, it also requires NO special equipment or products! So let’s start with a how-to on this Main St Wood Sign!
How To – Easy DIY Wood Sign
1. Pick the Wood boards you would like to use for your project
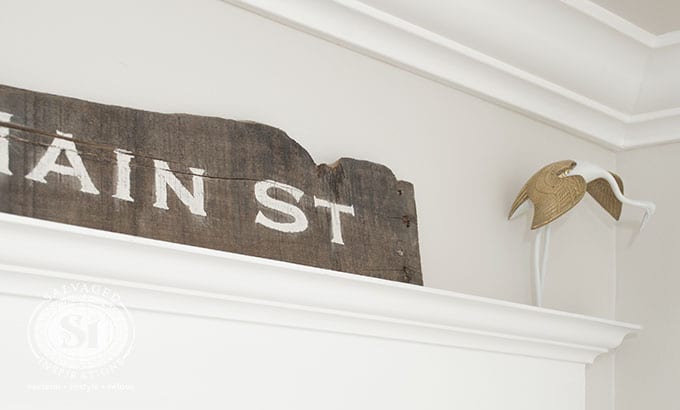
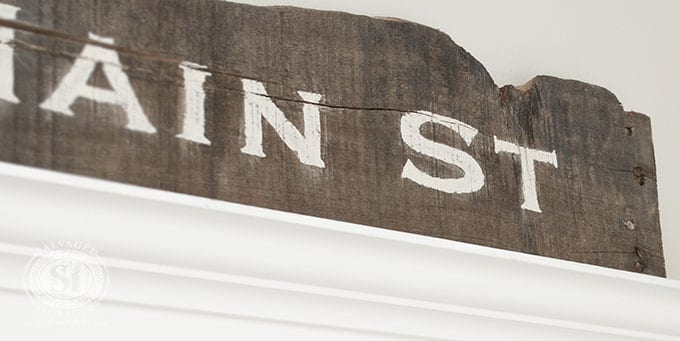
For my Main St sign, I wanted a really rustic feel. To get this authentic rustic look, my sister and I used a broken board from a pallet skid we salvaged from a nearby business. When creating a wood sign, any type of wood board can be used. The boards can also be painted, stained, or distressed prior to transferring your graphic or font to help create the backdrop for the ‘look’ you’re after.
Note – In an earlier post, an SI Reader (Zovesta) brought up a really good point when choosing pallets. Some pallets can be coated in chemicals so caution should be taken when building or creating with this wood. Here’s a great article on Pallet Safety that explains what to watch for.
2. Find Your Font or Graphic & Resize
We created my Main St sign using the ‘Copperplate’ font in Photoshop – but any photo editor will work. A few free online editors are PicMonkey, Canva or Pixlr. When I need to enlarge and resize my fonts or graphics, I like to use BlockPosters.com. Using the free BlockPosters tool, you can easily measure your board and decide how large you would like your transfer to appear. Then BlockPoster.com guides you through 3 easy steps uploading your image, enlarging it, and then printing it onto regular sheets of 8.5 x 11 paper. Once the sheets are printed out, you just tape them together and you’re ready to transfer!
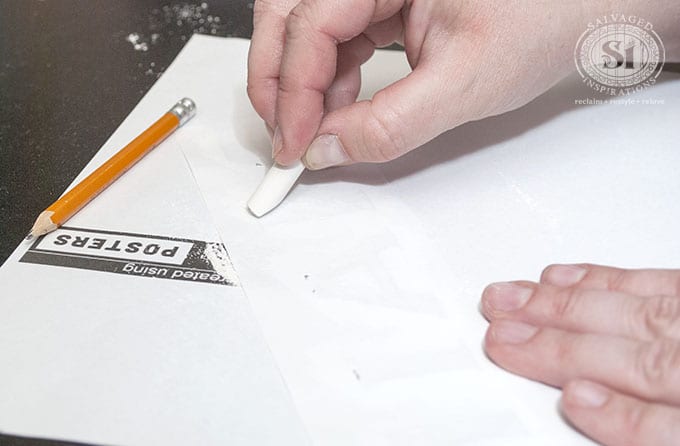
 3. Rub Chalk All Over The Back
 3. Rub Chalk All Over The Back
Now the fun part! This will bring back grade school memories! To create the transfer impression onto your board, rub white chalk all over the backside of the printed paper. We used white chalk because as you’ll see, it shows up great on darker wood. However, if you’re using a light wood, a pencil or crayon will work just as well! And just a little tip – you don’t have to color every inch of the back of the paper, but just the areas where you’ll be tracing your font or graphic.
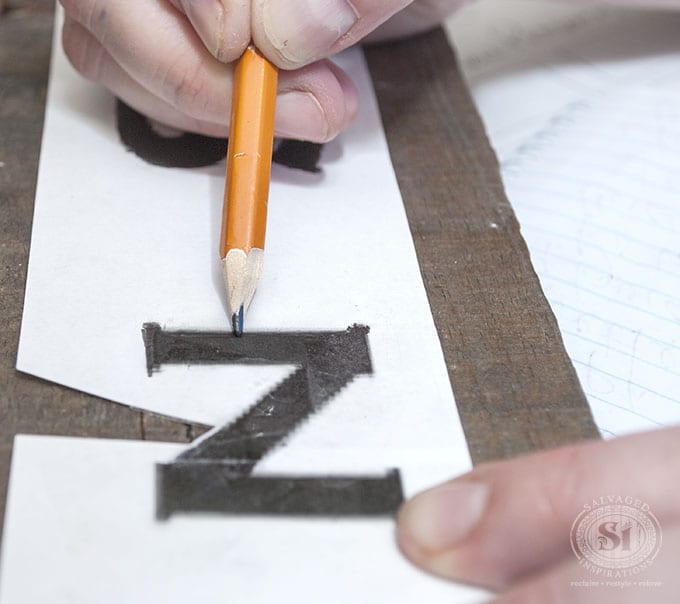
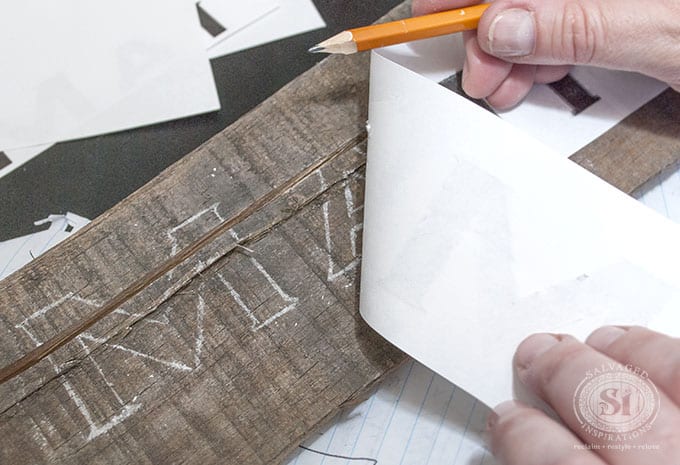
4. Trace Your Print Onto the Board
Once the backside of the paper is covered in white chalk, place the chalky side down on the board making sure the font is centered exactly where you want it. If I was doing this project by myself, I would use tape to keep it in place. But since I had my sister helping me, I held the paper in place while Andrea traced the Main St letters onto the board using a pencil. Any sharp edge including a pen or pencil will press the chalk outline onto the board.
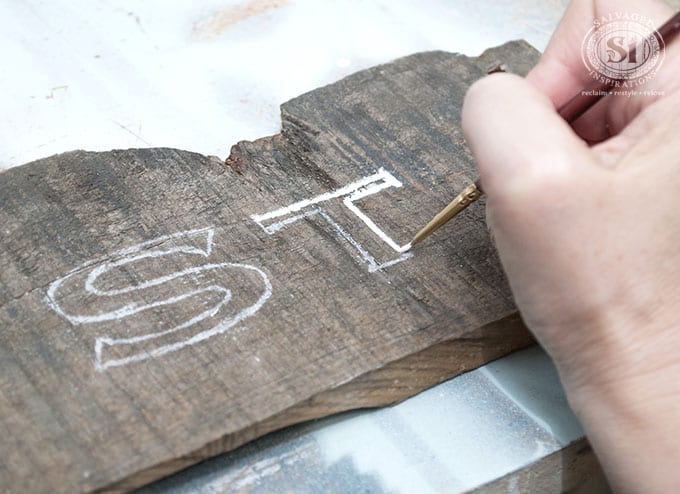
5. Paint
After the outline has been traced and transferred, the last step is to paint the letters or graphic in the color of your choice. Here I’m using an artist’s brush, but if you’re worried about not having a steady hand, paint pens are a great alternative!
Onto the ‘Bath & Towel’ Wood Sign. 🙂
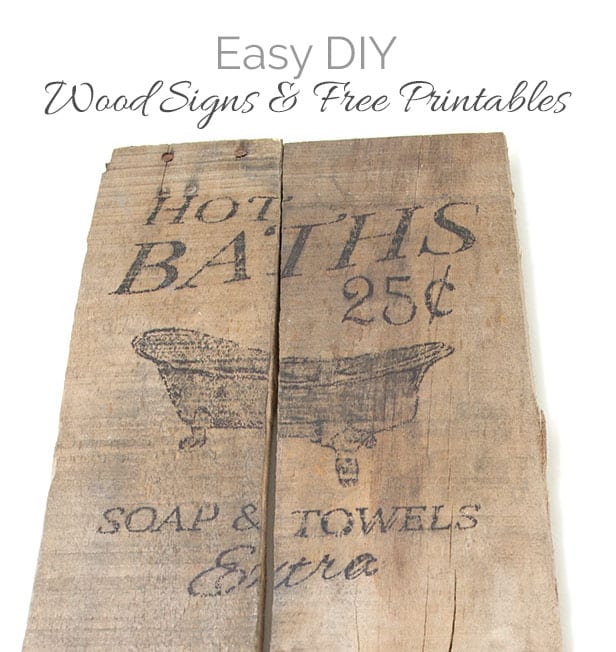
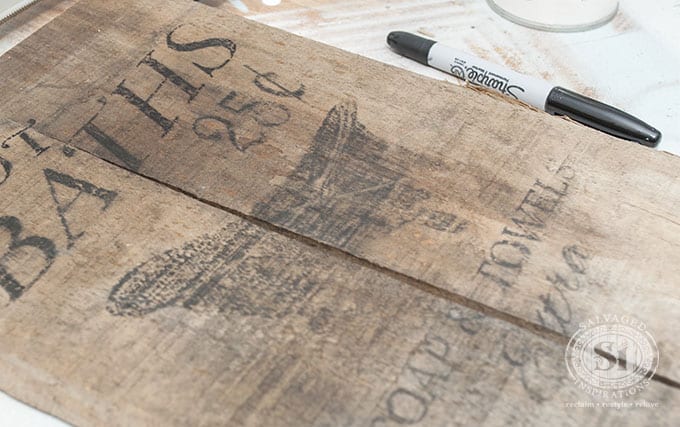
I’m not going to get into all the specifics because the process is EXACTLY the same transfer method I shared with you for my Hot & Cold Tap Indicators. The only difference is the size of the project and the surface. Because wood can be a little rough, the transfer may not come out 100% even throughout the design. To remedy this, I used a sharpie to fill in the lighter areas and give the sign more contrast.
Free Download Printables
Main St Sign (for chalk transfer method)
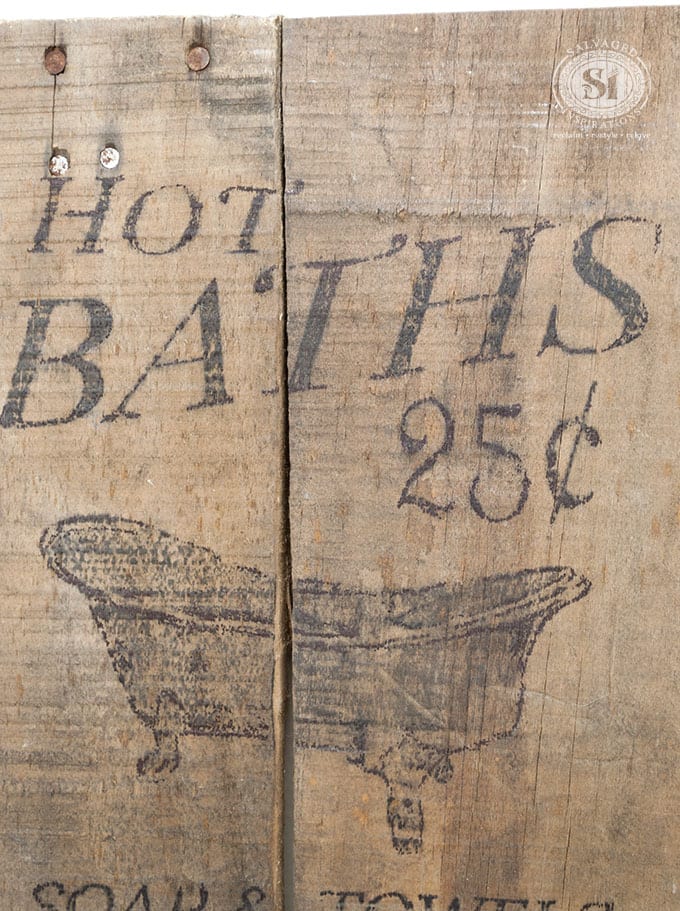
Hot Bath Transfer (for reverse graphic transfer method)
If you have any questions or tips you’d like to add, feel free to chime in! I always love chatting with you guys… it makes my day! 🙂
Have a great day and happy painting friends!
Denise x
Related Posts
Chalk Stencil Transfer Onto Furniture DIY Pallet Board Sign Graphic Transfer
_____________________________

Hello again!
If I chose to do the Hot Bath sign using the reversible printable, can it be transferred onto a painted surface? I’m thinking a white background.
Thanks!
Denise,
I love the Hot Bath printable. Is there anyway to be able to receive the non-reversable format for printing off??
Thanks!
Tara
I just came across this technique and I love it. I love drift wood and always wanted to do drift wood signs as a hobby. With this technique you can use any font any size and it saves time. Thank you!!
Hi Lisa! I’m so happy you found this useful. Have fun with your upcoming projects!
If you haven’t already lengthened your shower curtain, I vote for the linen. I think your bathroom is too elegant for a sort of “farm house” fix.
The room is lovely, Denise! Congrat’s on a great job!!
I did lengthen it and LOVE it! Way better hehe. Thanks Caye! XOXO
Your bathroom looks beautiful, Denise! I am going to be renovating my bathroom in the near future and I bought a small lingerie chest to make into the vanity. I’ve been looking at ideas for dropping a sink into the top of the vanity and, when I saw your sink, I loved it! Can you share where you bought your sink?
Many thanks, Lee
Hi Lee! 🙂 Thanks and it’s a Kohler Drop In and I purchased it at Home Depot. I really like it because I didn’t want a sink flush with the marble top – but I didn’t want a bowl sitting high on top either. This one’s perfect for me! 🙂
Would it work if I painted the board
It sure will. so long as the paint is not the same color as the chalk and you can see the chalk outline. 🙂
I love these signs. Thank for sharing.
I purchased carbon paper on Amazon and it works great.
Thanks Lori! And ya, the carbon paper is ‘old school’ but it works amazing!!!
Love this. What a pretty bath. We will be redoing bathrooms soon. Thanks for the great ideas and the great tutorials. We have plenty of pallets available to try this 😉
Thanks, Sharon! And these pallets are amazing for salvaged projects, aren’t they!? So much you can do!
Oh my gosh, I just bookmarked at least 5 of your liinks from this one tutorial! And, of course I bookmarked your site as well. Thank you so much for all the great tips
Thank you Terrie! So happy you’re finding the #siblog tutorials helpful. 🙂
Hello what paint do you use to paint the letters
Hi Lisa! Hmm, this project was done a while ago so I can’t recall exactly what brand or color I used. But you can use ANY latex, acrylic, enamel, chalk or mineral paint. Even a craft paint that you buy from a craft store will work. 🙂
This is great! Thanks for sharing.
Thanks for dropping by Grace! 🙂
Hi! Can the hot/cold tap indicator technique be used on painted wood?
Yes! 🙂
Thank you for sharing.
Love this!!!!! I already tried it a few times and works wonderful!! Can i ask what font you used for the Main st. sign?
Ha ha, sorry i guess i didn’t read your blog very well! You already stated what font you used. THanks for sharing this aweosme Idea!
Carbon paper works great to transfer as well.
Just finished a sign. It was very easy and I’m not artistic. I couldn’t find my chalk so I used some charcoal from 1920.
I didn’t care too much for Canva. It wouldn’t make the letters as big as needed.
Other than that, looks good. Thanks!!
I’m so happy your happy with your sign Lani! And brilliant improvising with the charcoal.
That is such a great idea. I am not artistic at all and I know your method will work. I live three miles from the Pacific and I am a beachcomber and sell my driftwood on ebay and etsy. I have accumulated a lot of seawood that I am setting aside to sell as “make your own sign” material. But I want to make signs also. Thanks for the idea.
This is really an amazing tutorial! I am using it for a few things, thank you so much for sharing this.
I love this chalk transfer method. It reminds me of doing etchings from my teenage years. Keep up the great ideas and I love the Bath sign. It looks so pretty.
haha… ya, it brings me back to my schools days – yet works amazing! Thanks Tracy 🙂
Hi,
Just finished renovating my holiday home and have painted a few signs as you can see if you check out my web site, BUT never thought about your transfer idea.
As a primary school teacher, who loves teaching art, do you think this method would work using newspaper headlines?
Love your blog,
Sandra.
Hi Sandra! I think this very basic method would work using pretty much anything. Nice holiday home btw 🙂
Did you use a sealer on the bath sign?
Hi Lora! No I did not.
Love this. Thank you so much for sharing.
Love this, we are getting ready to move and need a new sign.
Thank you very much
What brand of paint pen do you use or recommend?
Hi Chris! Sharpie or Uni work well but there are many brands to choose from. When I’m in doubt about a product, I like to visit Amazon, plug in the product I’m looking for, and then check out the reviews/comments. Amazon reviews haven’t steered me wrong yet!:)
a little tip..chalk will dry out sharpie markers and some paint markers..
Denise, I’m wondering if I use the transfer technique that you used for the bath sign and hot and cold taps do I have to use back ink or will it work with another color? Thanks!
Hmmm, great question Margaret. I’ve never tried this transfer method in anything other than black. But I’m almost positive it would work with ANY ink color. If/when you try it out, I’d love to hear your results!
Great! I was fortunate enough to find 5 random old wood boxes being tossed a few years ago. I displayed them on my uncovered front porch. Weather has not been kind to them and they were brought inside. Came here today to see how to make something with the pieces. They’ve darkened so making signs was what I had in mind, but didn’t know how to make a white transfer. Thank you for sharing! Can hardly wait to make my wood beautiful again. 🙂
What a great project! Thanks for stopping by Valerie, and have fun! 🙂
Do you use a top coat (polyurethane) or a wax to seal the paint and wood when finished? Or do you just leave it?
Thanks
Hi Baba! I did not topcoat these signs. I like the boards authentic look – and because both signs are on a wall and not being handled, no need. Having said that, you could topcoat of that was your preference. 🙂
When I paint my signs I use a spray clear clear polyurethane and it doesn’t gloss it up. Still looks rustic. ??
Clear matte (typo)
Haha, blame it on spell check 😉
what font did you use on the bath sign?
Hi Anna! Apple Chancery and Snell Roundhand were used on the bath sign. 🙂
What paint would you recommend? This tutorial was awesome by the way!
Hi Stephanie! Any water based paint will work ie craft paint, latex, enamel, acrylic etc. 🙂
Hi Denise. Oh my, your bathroom is beautiful. So lovely and welcoming. I’m planning to make an address sign for my front porch. Thanks for the great instructions.
Thank you – and I’m so glad you’ve found this helpful Monique! 🙂
Thanks for the tips!! On some surfaces, you can also use sewing tracing paper. Just put it under your stencil and trace!
That’s brilliant Rosanne…sewing tracing paper… I wouldn’t have thought of that! Another way to trace is with carbon paper – but carbon paper is a challenge to find these days!
I haven’t used carbon paper before and I’m using weathered, white shiplap for a sign. Will the carbon paper make for a messy project if I use it to trace my letters on the white boards?
No it should be fine Carrie. If you’re concerned, try testing the carbon paper on the back of your project before tracing on the front side. 🙂
Yes, carbon paper is hard to find. I used to bee in the printing business and one of the things we made was multiple part forms. When the carbonless paper came around it started to hurt the carbon paper makers. My good friend Ray went out of business because of NCR paper. I know this has nothing to do with making signs but I wanted to let you know you can get on ebay. Basically carbon paper is black wax on tissue paper. If you color in with the carbon paper paint may not stick to the wood.
Thanks for this Dan!
I love simple projects! Looks great in your bathroom, Denise.
After all the large pieces we paint, sometimes we need quick and easy right! 😉
Nice post, thank you.
Thanks Tracy! 🙂
Thanks so much for sharing your methods, Denise!! And I’m flattered I got mentioned, haha. I’ve gotten more ideas on how to transfer things from your blog alone than anywhere else, I swear (absolutely loving that, since I have way too many transfer ideas 😮 ). The chalk idea is especially inspired! And both of these boards turned out so perfect!!
By the way, after being inspired by some of your refinished projects, I went ahead and finished painting my little side table. It looks wonderful, I’m so happy with it! I admit I had trouble with homemade chalk paint, but that might be because I had to use the plaster of paris in the craft aisle since there wasn’t any DAP. 🙁 Trial by error is informative, but not very fun.
Heeey… kudos to you for painting your side table! I’m the first to admit, my first few painted pieces left something to be desired…ok… a lot to be desired…lol. But when we try something new, sometimes things don’t go as smoothly as we hope. Trial and error just like you mentions… and I’m so happy you’re happy with it!
Hi Denise! I used this method years ago and forgot all about it. It’s so easy too! Everything is beautiful!
Thanks Josi! And ya, it’s bringing it back to the basics! 🙂
Denise, when using the chalk method, I’m wondering if you rest your hand on the board as you’re painting, does it smear off the chalk ? It seems like it would be hard to hold your hand up in the air with the brush as you paint the whole thing. Your ideas/hints for this?
Hi Patty… great question! A few hints – when rubbing the chalk on the back of your printed font or graphic, just cover the area that you need to trace… not the ENTIRE back. This will cut down on chalk dust and leave your hand more space to rest. And even if you do rest your hand on the chalky area, because its a more generalized pressure (unlike specified pressure from a pencil or pen tip) very little will transfer onto the board… if any. If it does, it will not be as pronounced as your traced design, and you can simply brush or lightly sand off the excess. Hope this helps. 🙂