HOW TO APPLY STENCIL TEXTURE TO YOUR PAINTED FURNITURE MAKEOVERS ~ 12 EASY TIPS AND TRICKS!
From the first time I applied a textured stencil, it became a go-to technique for many of my projects. Applying a raised stencil can be intimidating though, right?! The first dresser I ever textured back in 2015, I was scared I’d mess up — so I started really small. [I’ve linked to my first try in the “Related Post” section at the end of this post if you’d like to take a look.]
If you’ve never tried a raised stencil before, I have 12 easy tips in hopes it will encourage you to give it a go!
I really hope you give it a try because it’s an amazing way to add pattern, color, and character when working with flat-faced furniture. Stencils can also be used over and over to create endless looks and designs, unlike appliques or molds.
Let’s get right into it… 🙂
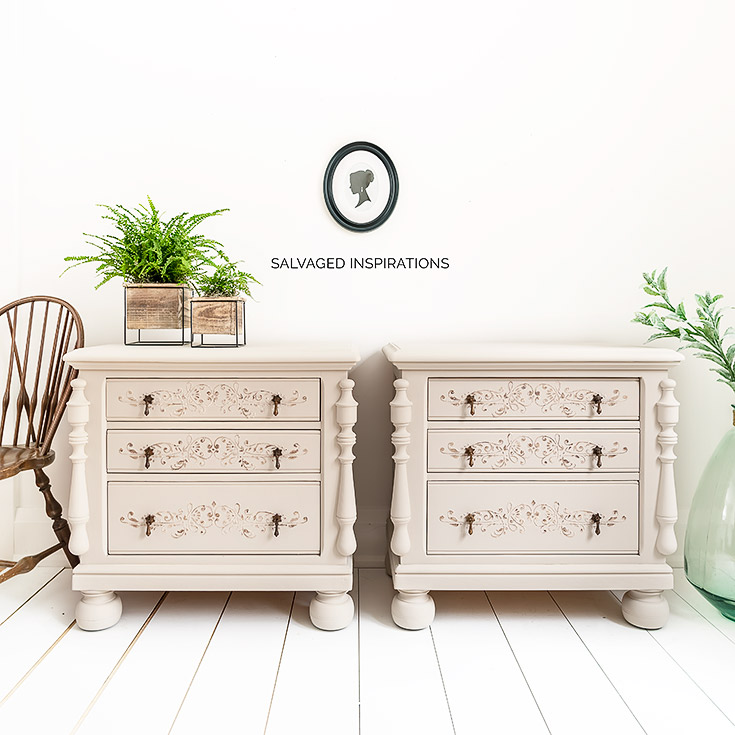
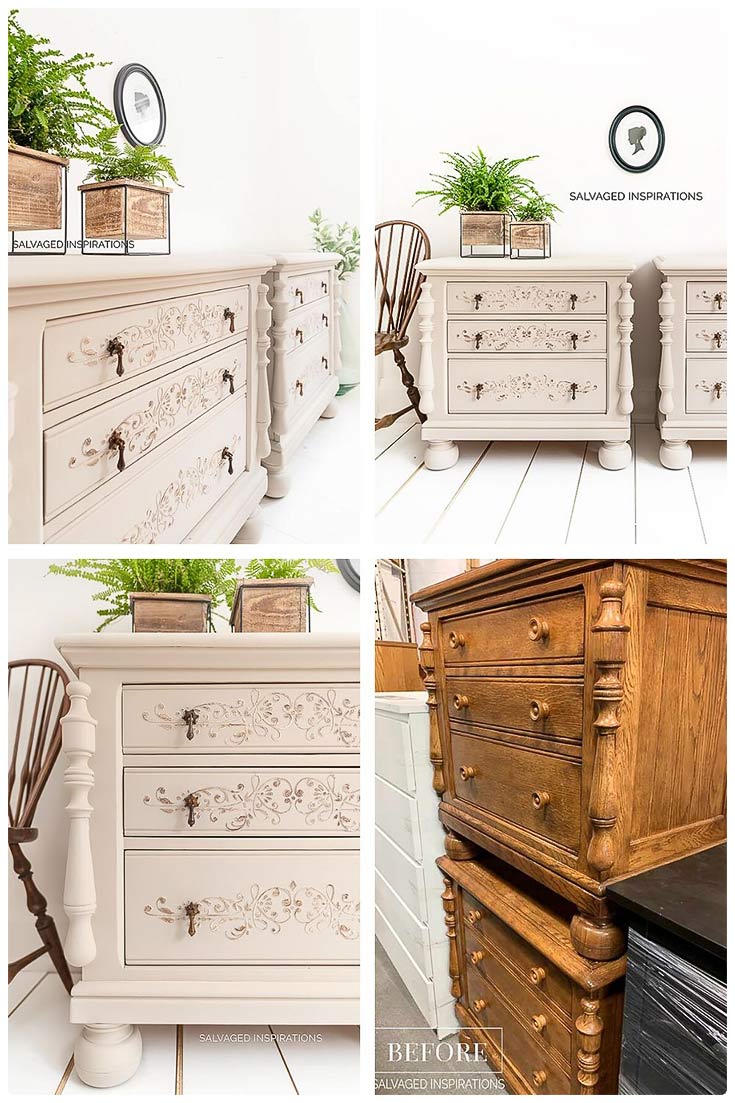
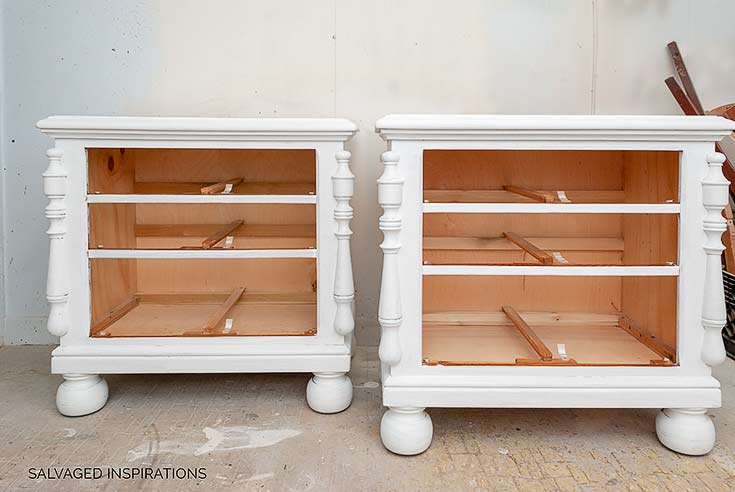
I started with these chunky nightstands I bought at my local ReStore.

I lightened them up with a fabulous neutral and made them a lot more feminine… what do you think?
THIS POST IS SPONSORED/CONTAINS AFFILIATE LINKS TO PRODUCTS I USE. YOU CAN SEE MY FULL DISCLOSURE HERE.
SOURCE LIST
12 TIPS FOR APPLYING STENCIL TEXTURE
1. Use a good quality raised stencil medium. I used ReDesign With Prima’s Stencil Fiber Paste.
2. A wider putty knife or applicator works for larger designs. It covers more area and is easier to smooth out.
3. Use a craft stick to apply the fiber paste to a wider putty knife or applicator.
4. Use green painters tape to tape off areas of the stencil you don’t want to appear on the design.
5. Use green tape to hold down your stencil while applying the fiber paste.
6. Clean off the stencil after each use to keep the details in the design crisp.
7. Wipe the water off with a towel before applying the next design.
8. Sand down the rough edges off after it is 100% dry.
9. Use a variety of finishes to get different looks. Gilding Wax, dry brushing, dark waxing, glaze just to name a few.
10. Use a stencil specific for a raised design. These stencils are thicker and have a few millimeters in height for the best results.
11. Measure your placement to be accurate.
12. Raised stencils are VERY forgiving. If you make a mistake, it can easily be wiped right off while still wet, so no worries.
MATCHING NIGHTSTAND MAKEOVER
I started by cleaning, sanding and applying BOSS primer to stop any bleed through.
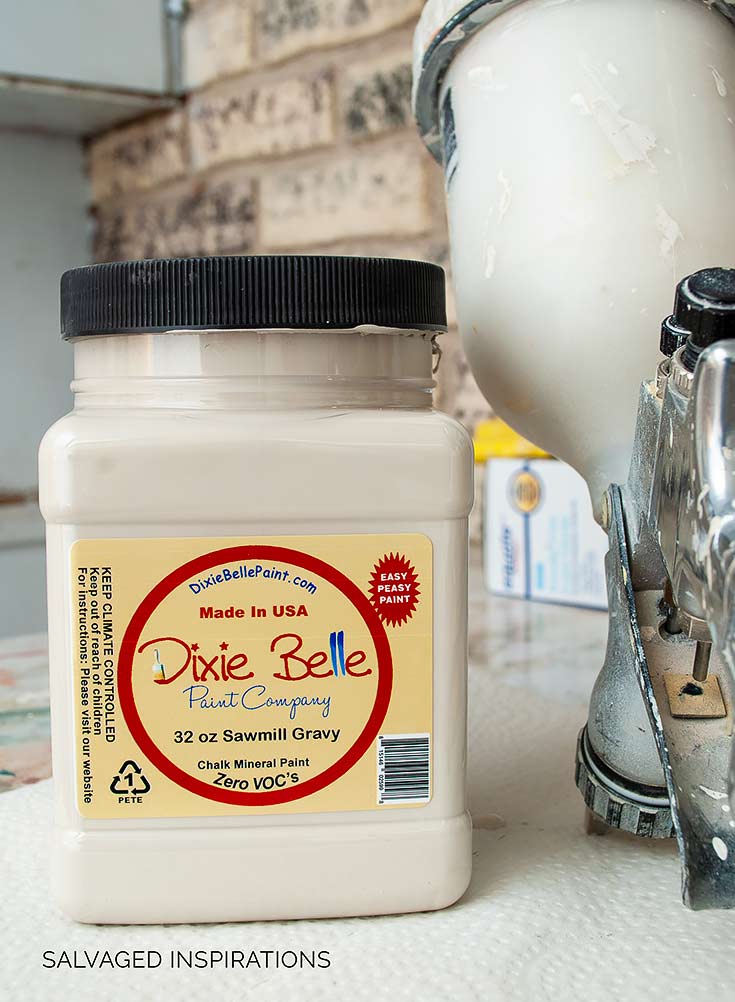
For a flawless professional finish, I spray with Sawmill Gravy – a gorgeous soft beige neutral!
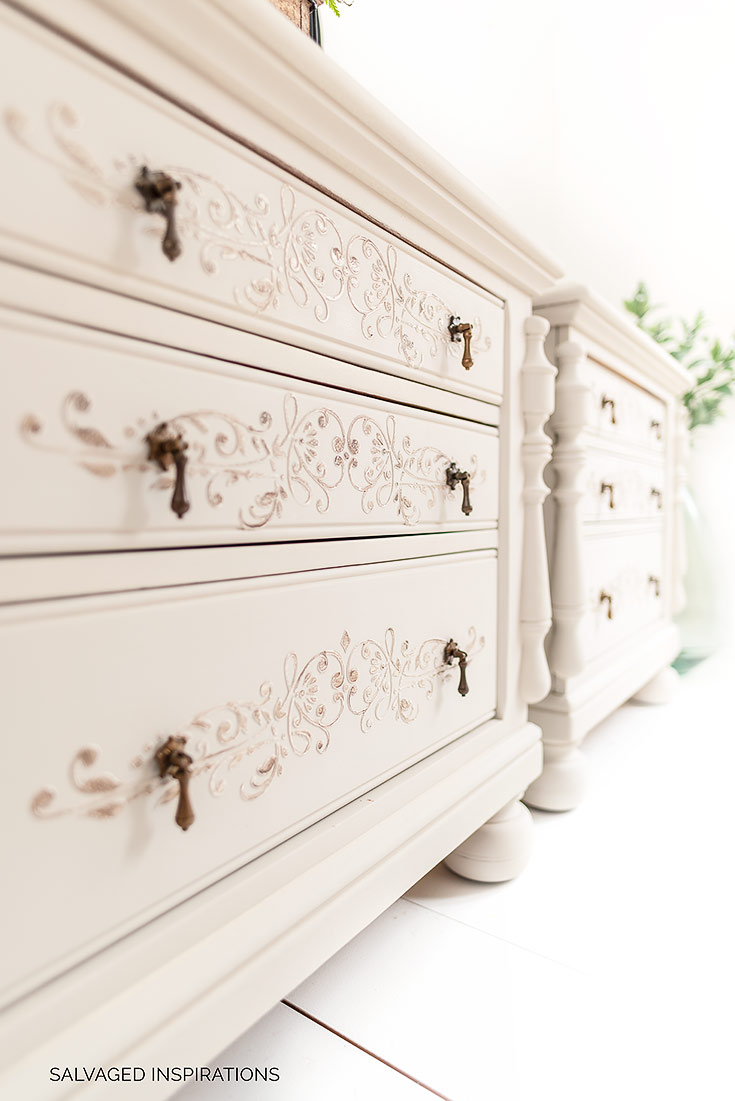
For the drawer design, I used this Dalia Crest 3D stencil. The stencil is a little thicker so you end up with a more raised/textured design.

Between stenciling each drawer, I cleaned off the stencil so my design stayed crisp and clean… unlike my work area. I thank my lucky stars that I have a designated studio/workspace that I can paint splotch without worrying about cleaning up paint!


Here’s a close-up of what the texture looks like before sanding. Really rough! To sand it smooth, I started with a 120 grit and then smoothed it out with a 220 grit. I find wrapping the 120 sandpaper around a sanding block or small piece of wood really helpful. This way it’s stiff enough to only hit the raised areas and not touch the rest of the drawer.

For the ‘softer’ finish sanding with the 220 grit, I used this sanding pad.

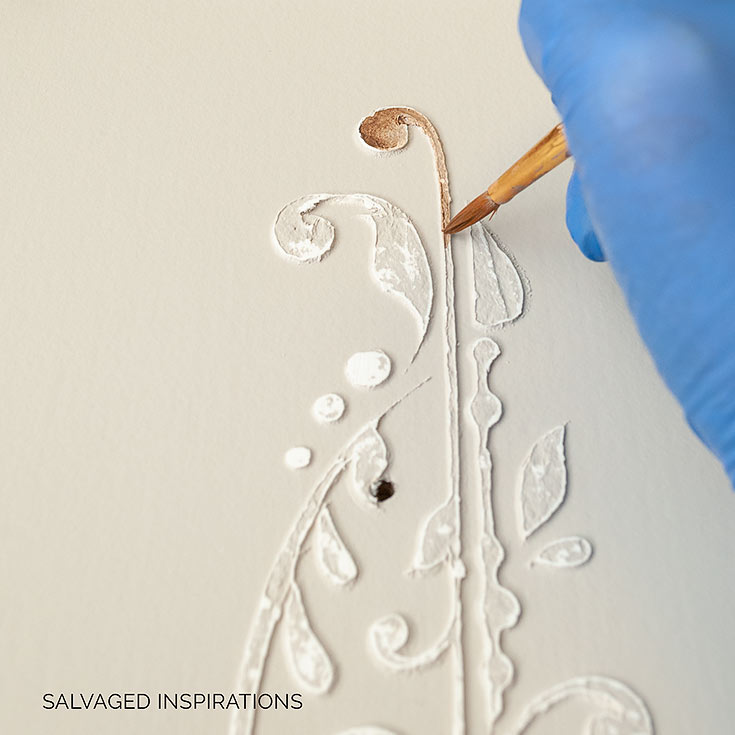
My original thought was to leave the design in white, but after I picked the teardrop hardware, I thought this rich Chocolate Brown would tie in nicely.
To give it more texture, I sanded back so there are lighter and darker areas.
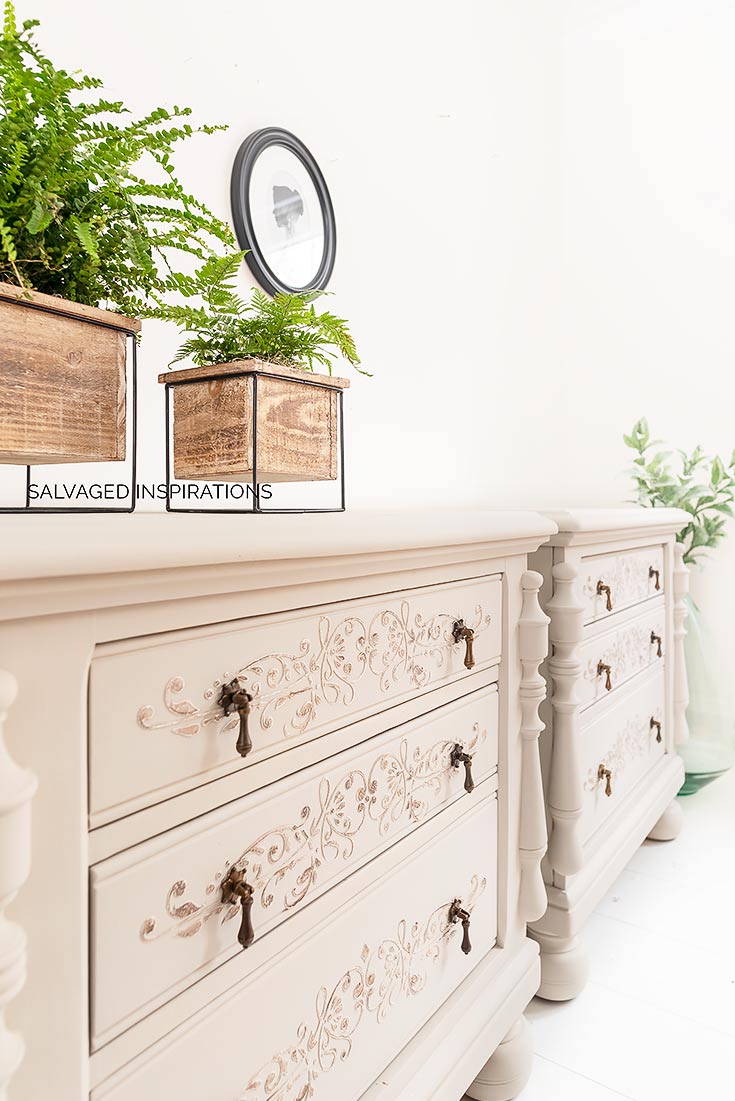
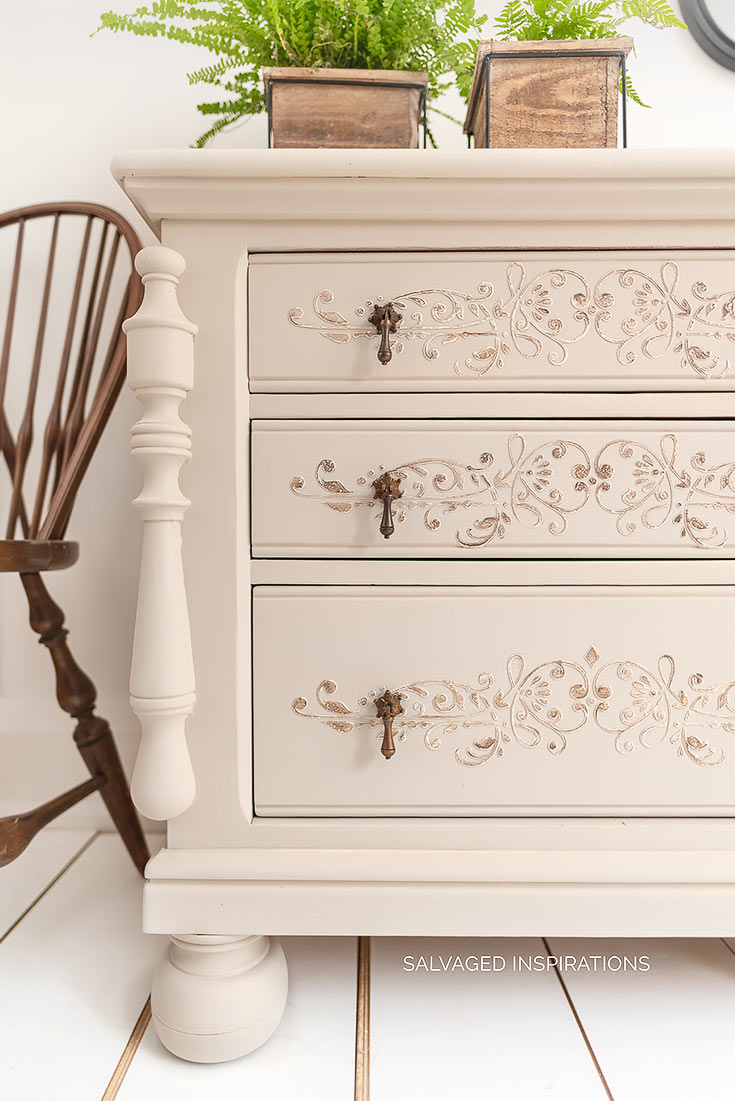
I’m guessing these nightstands will sell quickly with this pretty soft neutral beige. 🙂
And now for some FURNITURE FIXER UPPER FUN!
I know you’re going to LOVE what this creative team of ladies do. We’re looking forward to Marie from The Interior Frugalista and Kathy from Petticoat Junktion rejoining us again next month. 🙂
Below are our BEFORE photos – visit the links underneath to see the amazing AFTERS and to learn how they did it! I’m heading over to take a peek right now myself! x
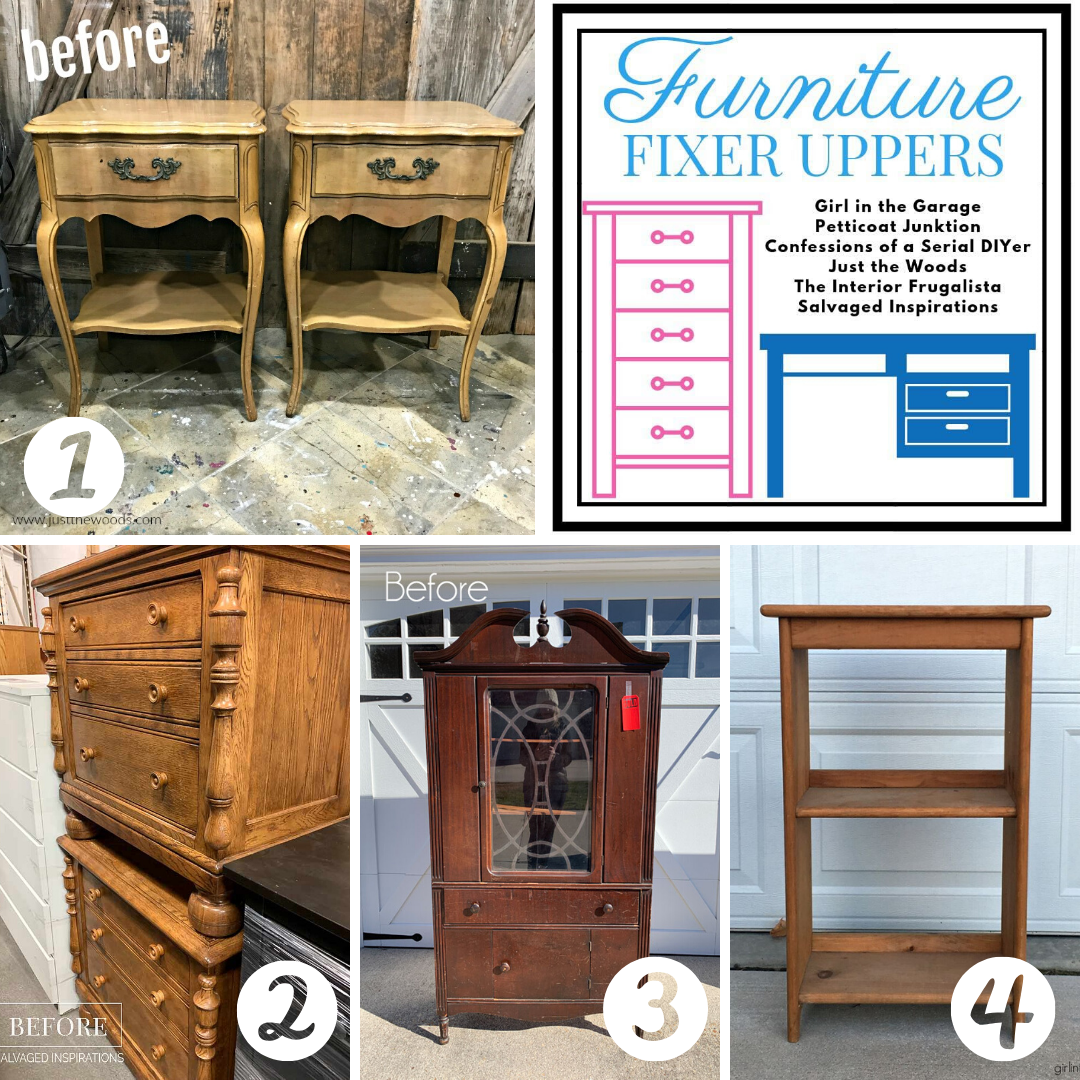
2. Salvaged Inspirations (so happy you’re here!)
3. Confessions Of A Serial DIYer
LET ME KNOW WHAT YOU THINK OF THESE STENCIL TEXTURED NIGHTSTANDS… OR FEEL FREE TO ASK ANY QUESTIONS YOU MAY HAVE… I ALWAYS LOVE HEARING FROM YOU. IT MAKES MY DAY! 🙂
Happy furniture painting my friends!
Denise x
RELATED POSTS::
How To Create Raised Stencil Design
Raised Stencils | Fancy Up Your Furniture
Painted Nightstands w Stencil Texture
Stencil Embossing on Painted Furniture
PIN AND SHARE!


Hello Denise!! I am needing to know if you need to topcoat after stenciling? Or before? Or just Gator Hyde or Clear Coat the top of the piece? Hope all that makes sense! Those are my favorite night stands ever!! So feminine… Thank you for answering this for me. I have stenciled before and did not top coat. Just checking.
Hi Kristi! The raised stencil gets applied over the paint and then I like to topcoat so its nice and durable for selling. But if it’s for your own use, it’s totally up to you. You could just topcoat the top and leave the stenciled body. Or you could use a wax on the raised stencil if you don’t want to apply a poly. It depends on how much use the piece will get and what you prefer. 🙂
When purchasing stencils on Amazon, do they specify how thick the stencil is? I haven’t noticed that.
Hi Kendra! It depends on the company/brand but yes, some of them do. 🙂
Hi Denise
Love your work. It’s so inspiring. Do you think I could do raised stencil on canvas?
Hi Rae.. thank you! 🙂 Because canvas (or any type of material) is flexible, I wouldnt recommend it if it’s going to be used. ie, chair etc. If it’s purley decorative, for sure! 🙂
Hey Denise! I have a question for you. After you have done your raised stencil is there any need to spray shellac over the raised stencil before you paint over it.? I have heard the paint could soften the stencil and mess it up. Just curious about your thoughts. Thank you!!
Hi Kristi…this is interesting. I’ve never had any paint soften my raised stencil so I’ve never found the need to spray shellac. But that’s not to say some textured mediums wouldn’t benefit from this! ??
Hello … I love these so much and am looking to recreate this look. I am going to buy the 3d stencil paste you used but am a little concerned that it will be difficult to samd once dry as i hear it sets really solid. Please could you tell me if it was difficult to sand. Thank you x
Hi Ann! The 3D Stenciling Paste is sandable so no need to worry. Some sand off very easily into fine dust and other harder versions require I lower grit sandpaper and a little more effort because they are so hard when they set, but either way, you won’t have a problem sanding them down a bit before you apply your finish/paint. Have fun. They give gorgeous character to a piece. 🙂
The table transformation is stunning, Denise. They look so pretty painted creamy white and the raised stencil adds such elegance.
Thanks my friend! And so good to have you back. Missed you! 🙂
Denise, I forgot to ask you what the difference is between the stencil pasfe you used and the Dixie Mud? I ask because I have the mud . You are amazing.
The Dixie Belle Mud is easier to sand and doesn’t dry as hard. The stencil paste is very fibrous and dries hard as a rock. For a more 3D (higher more prominent) look, I prefer the Stencil Paste. For a softer (closer to the furniture) stenciled look, Dixie Mudd works great. 🙂
Denise,
What a stunning transformation! Love it. You managed to ‘girlify’ those chunky tables. The only thing that bothers me is those huge feet! My eye keeps going to them and I wonder what else you could have put on them instead of the originals.
Thanks so much, Lisa… I LIKE these chunky feet! 😄
These are my favorite pieces you’ve redone. So beautiful, soft & romantic. Stunning!
I too have an issue w/ the bun legs, thought of them for a while & to me its to downsize the size of them.a little.
Hi Sher! I’m so glad these are your favorite pieces despite your feelings of the bun feet. hehe Funny, I really like these chunky feet. I think they’re adorable! 💜
I also love the transformation. It’s amazing how the right color can transform a piece into something so beautiful. I especially like that you highlighted the textured stencil with the chocolate color..that really sets the pieces apart.
Thanks so much Joanne! Painting the details was super relaxing too. Some ladies like the spa… I like a paintbrush. 😉
I didn’t think it was possible to turn these bulky night tables into an elegant set but you did it again, Denise. Thanks for sharing! ~ Nicki
My pleasure and thanks so much, Nicki! XOXO
Love the drawer pulls! Where did you find those?
Thanks, I found these at Hobby Lobby. 🙂
Beautiful! Ty so much for sharing!
Thanks so much for visiting Denise!🤗
What awesome luck to find that pair! I love how raised stencils add so much extra character to pieces. Beautiful work Denise! xo
Thanks so much, Jen! XOXO
LOVE them! Can’t wait to try this!
Thanks Susan! Can’t wait for you to try. Have fun!
I really like the way these night stands turned out. I would buy them in a heart beat. I really like the raised stencil. You are a true artist.
Thanks so much Marian! 🙂
holy smokes! these are so pretty! And I know how quickly you made them beautiful which is also amazing. (since Im slow like a turtle lol)
Thanks my friend! Ya, the paint has barely dried. LOL 😉
That’s some purdy texture as we say here in Texas! 🙂 The raised stencils really added the perfect touch to those nightstands. LOVE xo, Do
I love you Texans!!!🤗Thanks my friend. XOXOX
Denise , they are lovely. They would have been pretty had you just painted them white and walked away but the stencil took them to another level.. They are lovely 💕
Thanks, Shirley. And funny that you say white because that was my original plan. 🙂
OMG Gorgeous! Do you wait for the raised stencil goop to dry before taking the stencil off?
Thanks,
Sheila
Great question Sheila! NO. As soon as I smooth out the goop (I like your lingo cuz it IS goopy..lol) and get it in all the stenciled areas, I pull it up right away. No need to wait for it to dry. I’m guessing it would fuse the stencil right onto the piece if I were to let it dry.
Your nightstands turned out GORGEOUS! I love the color and the stenciling/raised design is beautiful. This is certainly one makeover where the painted finish is much prettier and superior to the old stained look. I would love to have room for these tables, but alas, don’t. I know they will sell immediately!
Thanks so much, Barbara! 🙂
So pretty!! The raised stencil really softens the whole feel of these pieces! xoxo
Thanks Christy! Love your cabinet, my friend. XOXO
These look great! Can you explain a little more about what you did with the chocolate and how you applied it?
Thanks, Jill and for sure! I took an artists brush, dipped it in a little water to keep the bristles damp and then put a very tiny bit of the Chocolate on the tip. Then I painted the Chocolate onto the raised stencil design. For this textured technique, you don’t have to worry if the paint is lighter in some areas in darker in others because once its sanded back, that’s EXACTLY what CREATES the textured look! Another way of adding a colored raised stencil is to tint the stencil paste with the Chocolate (or whatever color you choose!). This gives a more even colored raised stencil look when sanded back. Hope this helps. 🙂
Hi Denise. These night stands are pure elegance. Love the detail and soft color.
Thanks my friend! Hugs XOXOX
Chunky but elegant just like ME, LOL! These turned out fabulous. You have convinced me to try this and I have saved this post to refer to your great step by step instructions. If it is even a small success I will send you a picture! That’s for the inspiration AND the courage!💕
LOL, you’re too cute Kelly! 🙂 And ya, if you give it a try I would LOVE to see a pic! 💕
Hi Denise! These are gorgeous! I love the way you use stencils.
Thank you, Cheryl!! XOXO
Denise I am so inspired by your ability to transform so many pieces into works of art! I have a kitchen table (wood veneer) that has hot spots and scratches on top the rest is in great condition. I ask my husband to paint it with a black chalk effect like you do and of course he is skeptical more so because he’s 70 and has a bit of arthritis in his hands. Could you please recommend an easy technique that we could do to transform this table and make it beautiful?
Thank you!
Thanks so much Sharon! As for your kitchen table, it’s really hard to say without seeing it and I’d hate to give you ideas that wouldn’t apply. Feel free to email a pic and I might be able to give you an idea or two. 🙂
Wow Denise what a transformation !!! I could see a large audience that would love these to be in their bedroom.
Thanks for sharing.
Thanks so much, Julie! 🙂 I’m hoping they sell quickly! XO
Denise, your finished pieces are always STUNNING! I am so inspired by your makeovers. Not sure I’m ready to try this stencil texture technique, but I will pin it for later, because your photos and instructions make it look doable!
It’s so doable and thanks for Pinning! If you decide to give it a try and need some tips, feel free to reach out. 🙂