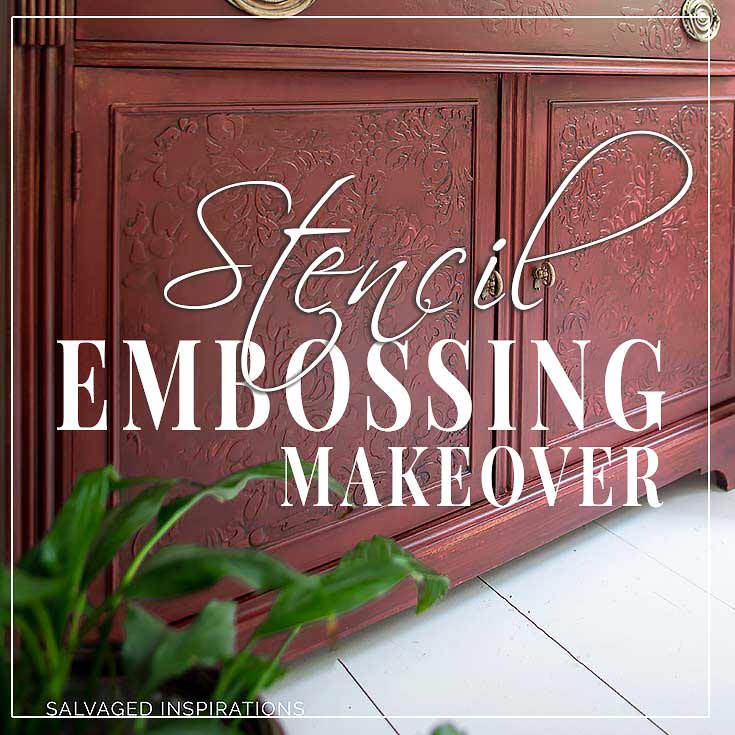
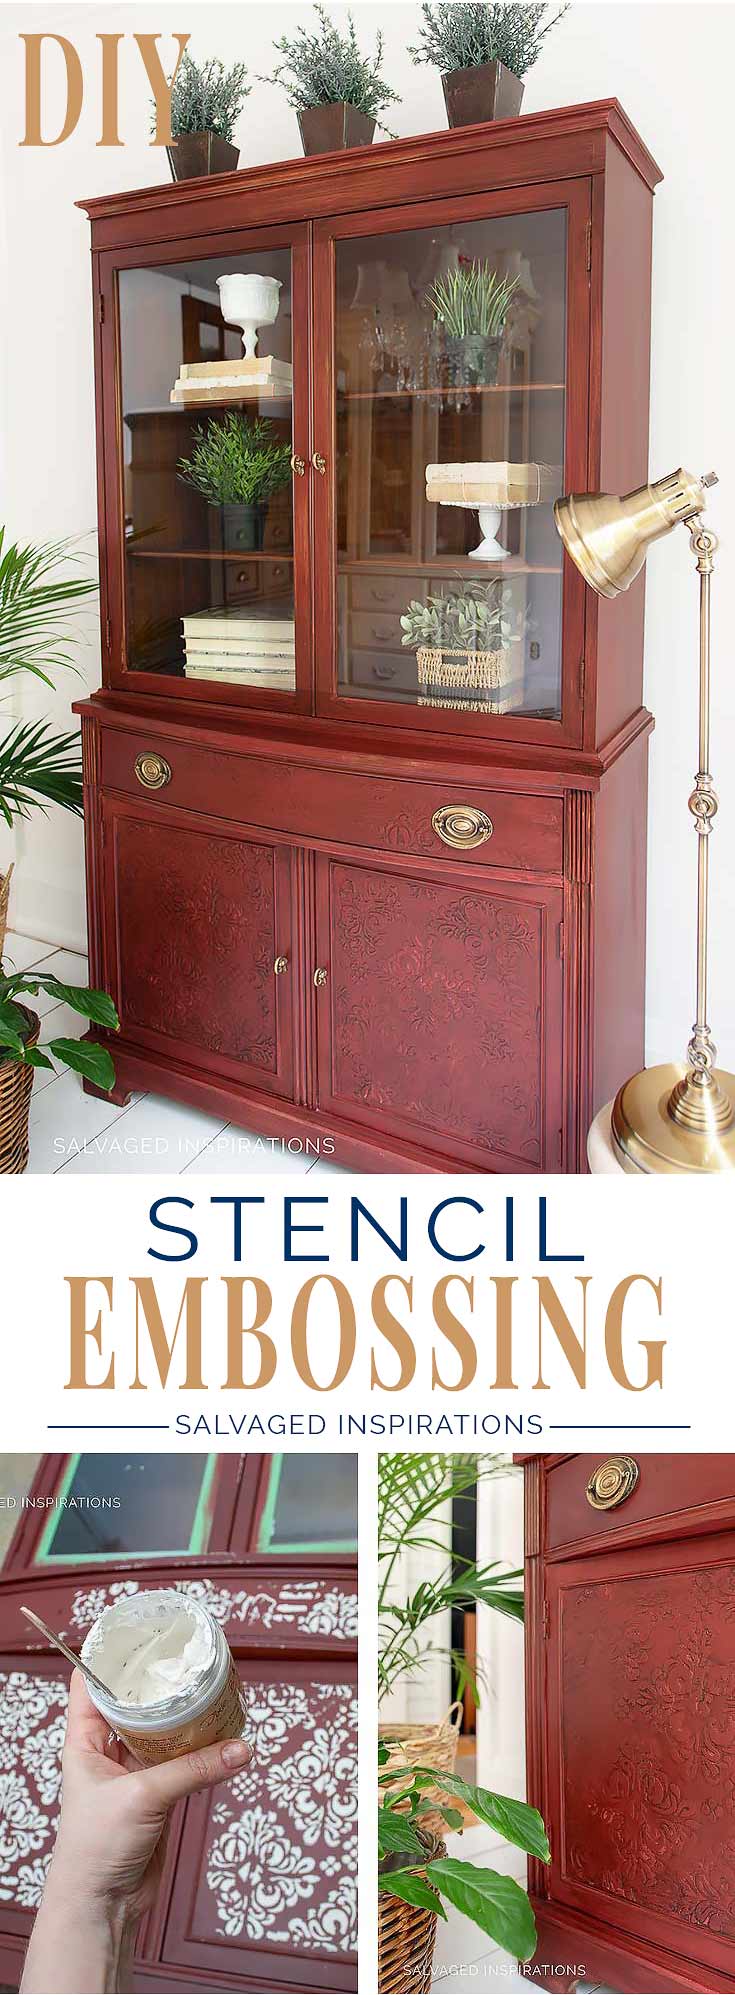
An easy step by step stencil embossing tutorial on how to add gorgeous textured detail on your painted furniture.
Hi friends, I hope your week is off to a great start! Do you believe the saying “too much of a good thing”? Due to the lack of space in my home and garage, I believe it wholeheartedly. The ReStore was having a 50% blow out sale and I couldn’t resist even though I’m trying to cut down on my furniture purchases.
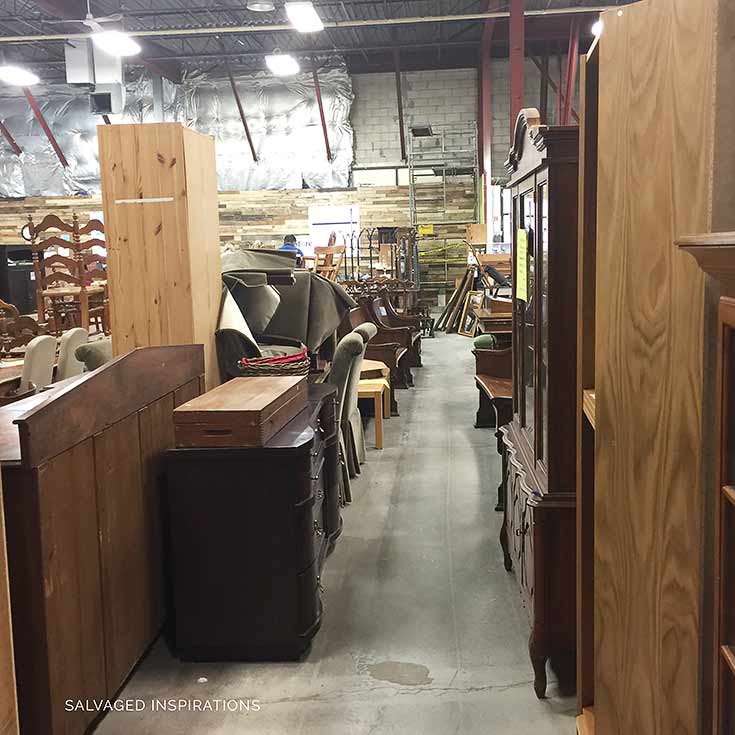
I started the year out great. I was focusing on cleaning up my inventory and actually cleared some space. But I have a realllllly hard time when I see pieces that inspire me…. or are 50% off… or are free. Or, or or…
Which brings me to this china cabinet makeover.
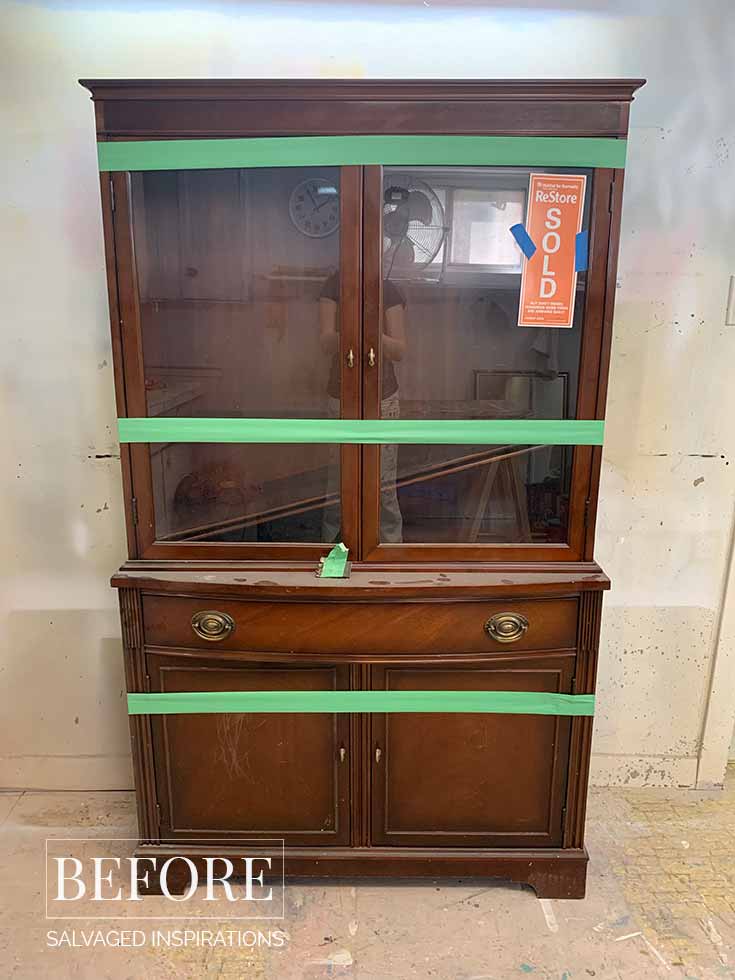
When I saw the flat surface doors I thought of stencil texture or stencil embossing. I’ve restyled a few pieces with raised stencils. I’ll include the links at the bottom of this post for you. The difference with this piece – I used a VERY large pattern on the drawer and doors and tried a totally different stenciling medium.
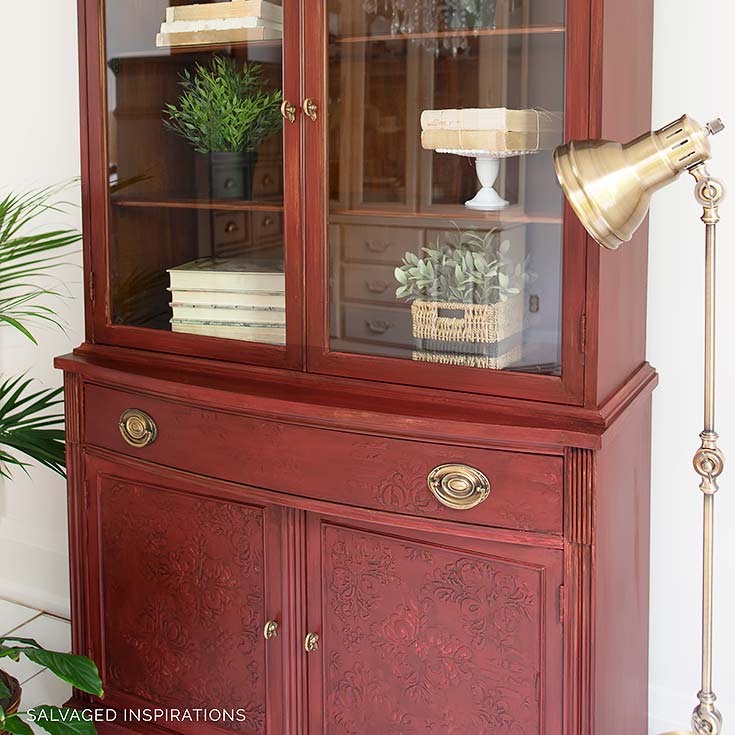
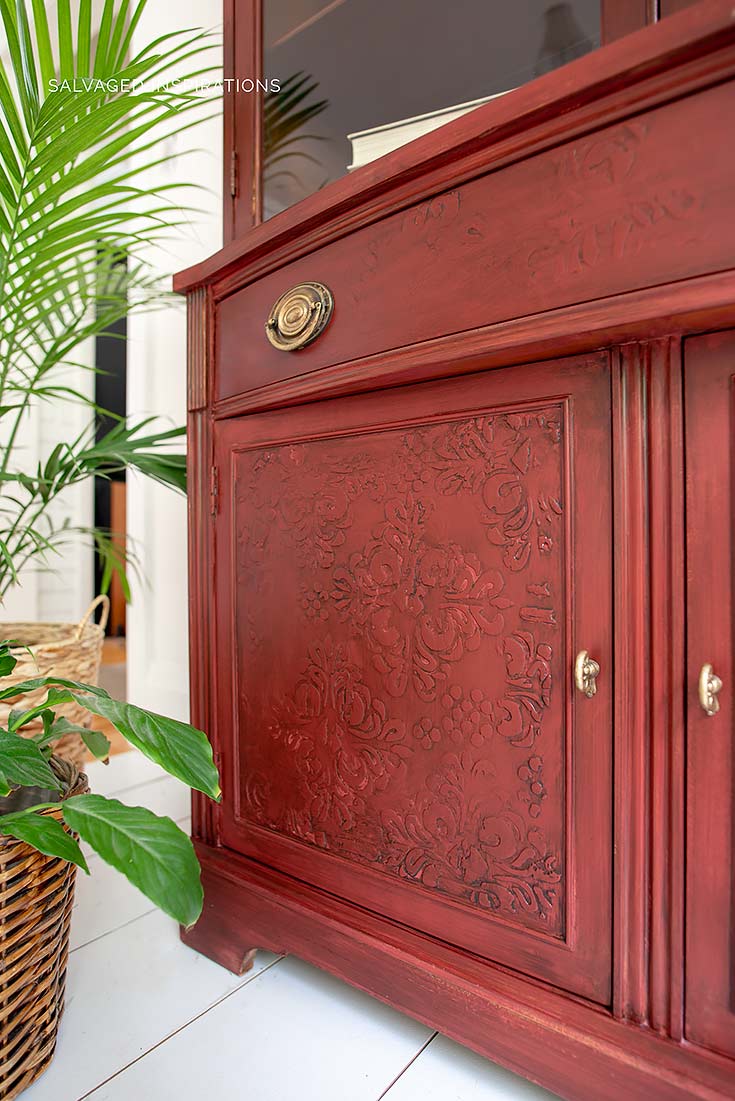
Here’s how it all turned out. What do you think?
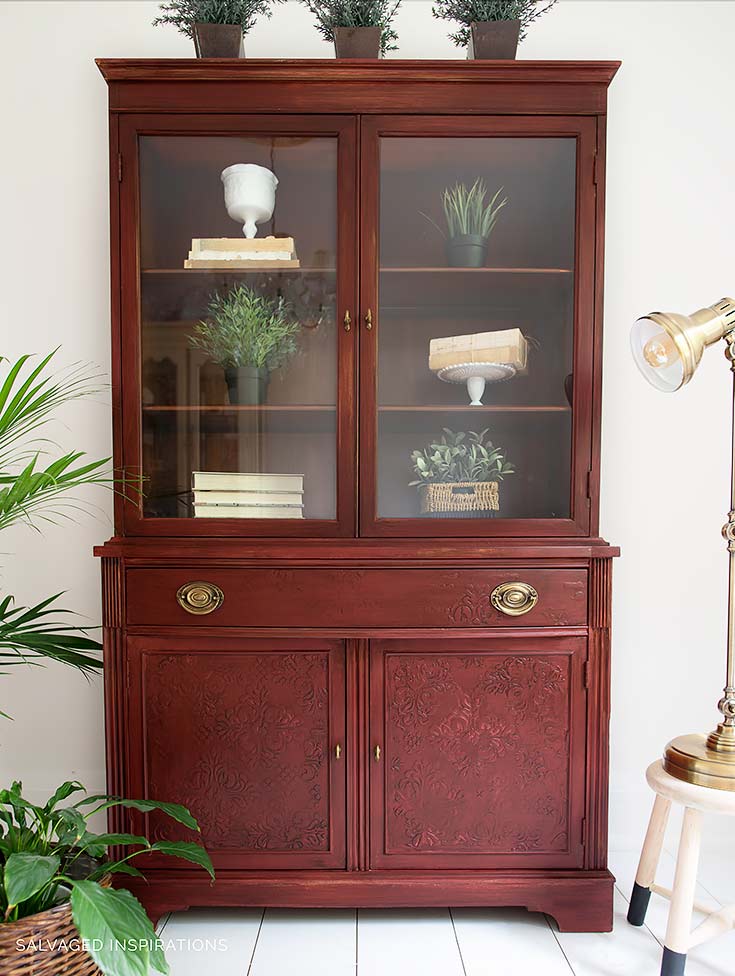
It reminds me of a rich victorian demask vintage wallpaper. Something you’d see on the walls of an 1800’s castle!

THIS POST IS SPONSORED/CONTAINS AFFILIATE LINKS TO PRODUCTS I USE. YOU CAN SEE MY FULL DISCLOSURE HERE.
SOURCE LIST::
STEP BY STEP STENCIL EMBOSSING::
Like with any technique, there’s more than one way to do this. There really is no right or wrong as long as you get the results you like. Here are the steps I took to get this look.
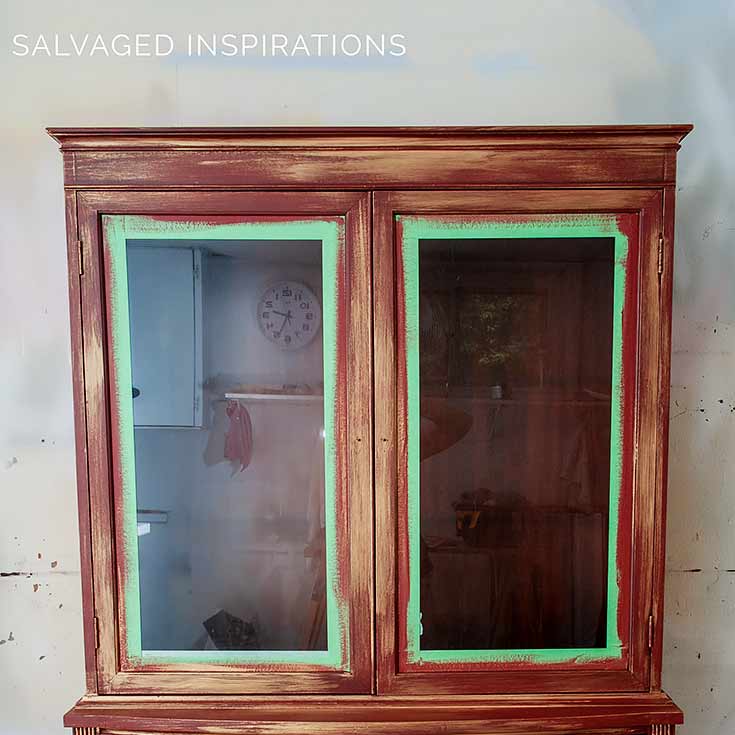
1:: PAINT
The very first step to create this look was to clean this cabinet and then paint the base color. I chose this Rustic Red for the cabinet and then added warm highlights with this Copper Patina Paint. Doesn’t look great yet but wait for it. I’ve learned you have to be patient with the process. 😉
2:: PICK A STENCIL DESIGN YOU LIKE
To cover the flat surfaces on this china cabinet, I used ReDesign with Primas Diamond Grunge Stencil. It’s a large heavy duty stencil with some depth to it – specifically for creating a raised design.
Finding a great stencil design you love (regardless of size) is a great investment. I find the designs I like I use over and over again. I also love that the look can be easily changed by using different mediums with the stencil… like paint, decor wax, or mud for instance. Or even just using a small portion of the stencil gives it an entirely new look.
3:: PICK YOUR STENCIL MEDIUM
In the past, I’ve used Artisan Enhancements VP Antico for my medium. I’ve also used DAP DryDex Spackle with the pink dry time indicator which works great. Other mediums which also work are Joint Compound, Gel Medium, Embossing Cream, Decorative Cement Mix and Texture Paste just to name a few.
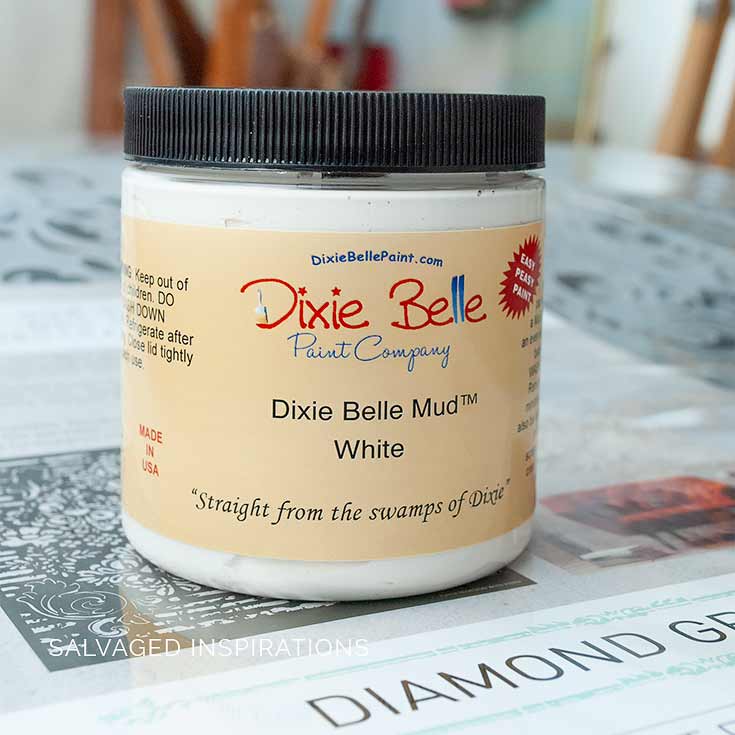
This time I tried something totally new which Dixie Belle sent my way. Dixie Belle Mud in White.
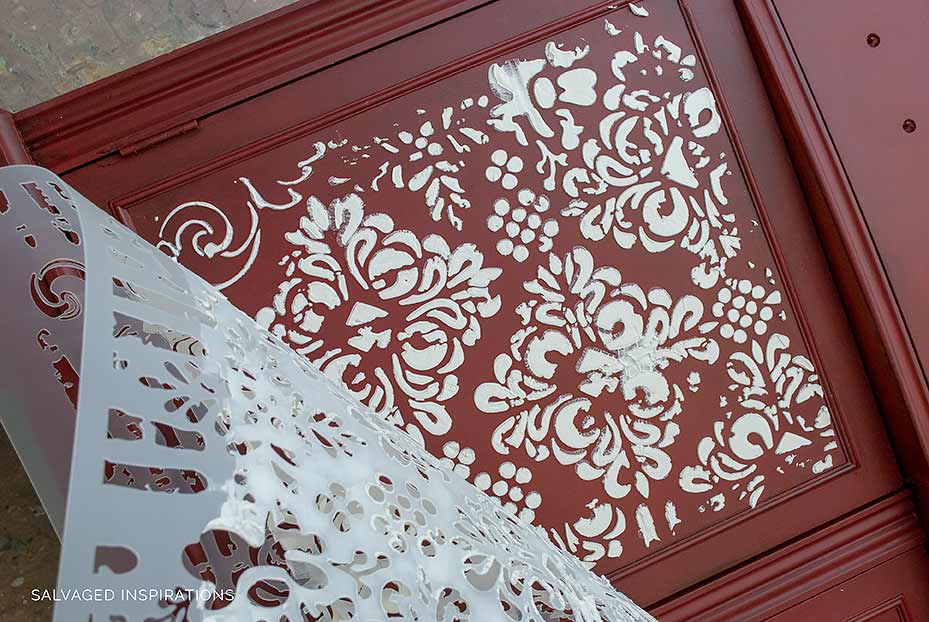
4:: SECURE STENCIL AND ADD MUD
This stencil was SO large that it overlapped my doors which didn’t make it easy to tape down flat. In fact, I couldn’t make it totally flat so I held down the areas I was working on while adding the mud with a putty knife. I used this metal putty knife I had on hand but I’ve added these plastic ones to the supply list because they are a much safer choice. Plastic ensures you won’t scratch your paint or stencil.
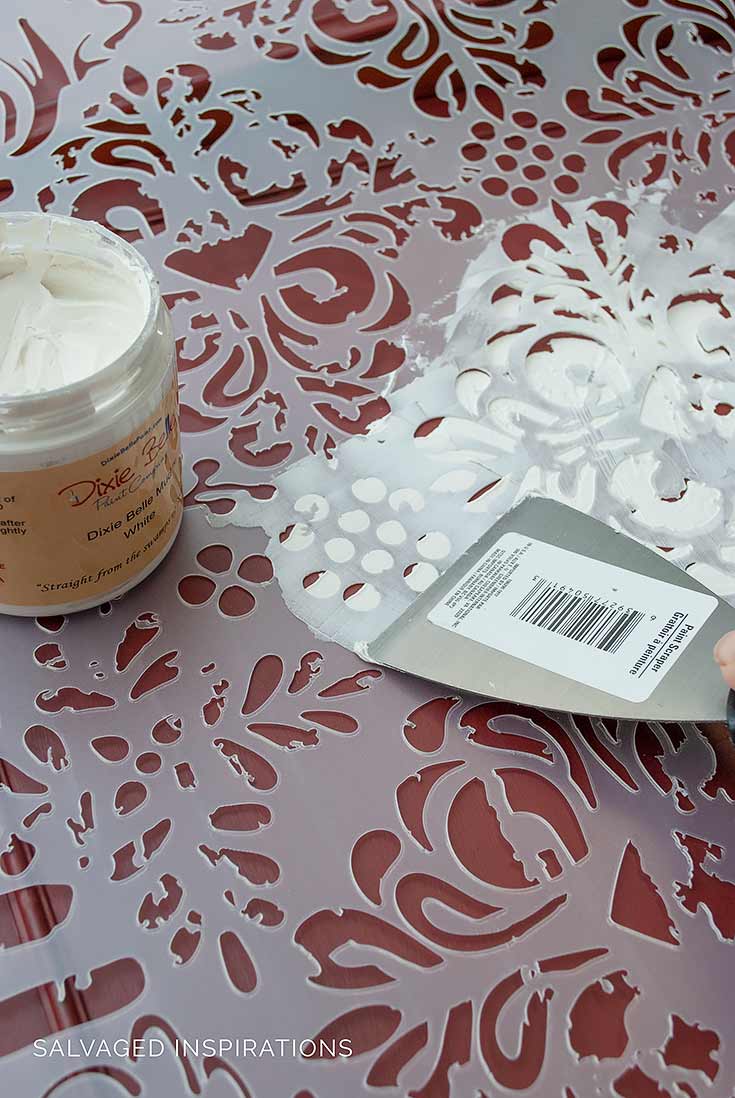
Here you can see that the design isn’t perfect because it wasn’t laying 100% flat. I’m totally okay with that because once it gets painted and glazed, some imperfections will add to the character.
This DB Mud took a good few hours to dry. I checked it after 2 hours and it still didn’t feel dry. My total dry time was 4 hours but that could be because I applied it rather thick. I’ve seen other furniture painters using this for repairs so I used in to patch up some veneer on the very bottom of this piece. Unless the repair is a minor ding, I’ll be sticking with my heavy duty Bondo.
5:: SAND EMBOSSED STENCIL
After the Mud was 100% dry, I used a 220 grit sandpaper to sand the design. This is to even out the odd peaks and valleys of the embossed design. I find this DB Mud sands down to a super fine powder very easily so make sure you don’t over sand and lose the raised effect. While I was sanding, I gave the entire piece a light sanding before adding the last coat.

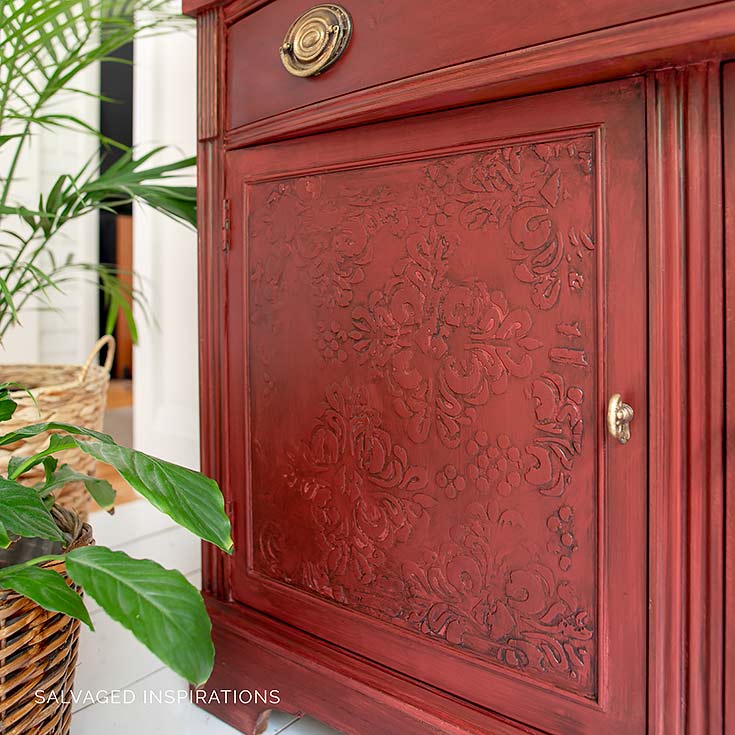
6:: PAINT AND GLAZE
For the last few steps, I added another coat of Rustic Red to the cabinet. Two coats were required to cover the white stenciling medium on the drawer and doors. After the paint was dry, I used GF VanDyke Brown Glaze to create all that vintage patina. I have a full tutorial on How To Glaze here.
I would have used the same brand line but I didn’t have anything dark enough in Dixie Belle Glazes. A question I get asked a lot is if you can mix product lines. YES! You sure can! Just make sure they are compatible – water-based to water-based for example.

7:: TOPCOAT | PROTECT
The last step will be to topcoat this piece. I was running behind on this makeover so I still have to do that. I’ll be using a clear wax seeing as it’s already out of my shop and I don’t want to lug it back down to be sprayed.
I always have a hard time photographing a piece with glass. It seems like unless you’re in an empty room with no windows, reflections are inevitable. If you have any tips for me (other than taking the glass right out!), feel free to chime in. 🙂

LET ME KNOW WHAT YOU THINK OF THIS STENCIL EMBOSSED CHINA CABINET MAKEOVER… OR FEEL FREE TO ASK ANY QUESTIONS YOU MAY HAVE… I ALWAYS LOVE HEARING FROM YOU. 🌺
Happy furniture painting my friends!
Denise x
RELATED POSTS::
Raised Stencils Goodwill Cabinet
Fancy Your Furniture w Raised Stencils
7 Furniture Stenciling Tips
How To Use Gilding Wax On Furniture
Spanish Moss Layered Dresser Makeover
PIN AND SHARE!

Just a note, I wouldn’t worry about how the glass photographs unless it’s a terrible glare, The reflections in the glass don’t deter from the effect and in fact show that the glass is absolutely clean and crystal clear! I found your site because I was looking for information on using more red on furniture, I see a lot of furniture painted blue but I am much more a “red” person. I would love to see something really shiny with a red, almost laquer-like, finish. My home has a LOT of Asian influence and I am interested in redoing a table but haven’t found much information on how to produce that type of high polish finish myself.
Thanks for this Lorri! And if/when I find a piece that lends itself to a high gloss red finish, I’ll do a tutorial. It’s a great idea and I would learn a lot too. I don’t do too many high gloss finishes.
Always beautiful work….I am really a follower and enjoy your inspiration!
Question? I have used your General Finishes Java Jel Stain( I love it ) on an exterior door, Do you have any suggestions for a finish sealer product?
Thank you,
Alice
Hi Alice and thank you! 🙂 I’ve used GF Java Gel Stain on a ton of projects but never a front door. That said, GF has the perfect outdoor protection which pairs with their gel stains beautifully. Hope this helps. 🙂
Gorgeous 💓💓
I love this and am excited to try it. I have a newer pine salvaged armoire that I’ve been undecided about – I hate to cover the wood and was considering using a Rustoleum aqua-tinted stain, but not really up to stripping a large piece right now. It has large, plain panels so I think it would be really conducive to trying this approach. The end result is gorgeous but it’s not terribly intimidating. Thank you for sharing!
Wow! Where is your store? I love your work and want to try it, but your store looks fabulous!
Hi Vee! I’m located in the GTA however I don’t have a store – I work from my home studio. I think the pic you’re referring to is the ReStore. 🙂
Beautiful embossing, Denise! It adds so much character and charm to this piece. Love how the VanDyke glaze highlights all those lovely details. Swooning over the paint color too, red being my favorite color,
Thanks Marie, it was a really fun project. These large 3D stencils are amazing and I’m sure I’ll get a ton of use out of it. And I love red too… but I don’t use it too often for whatever reason. 🙂
Love your work, and have learned so much from you. Thanks! I was wondering if I could get some anagliptca (hope I spelled it right) wallpaper to achieve similar results.
You sure can! I have an entire Pinterest Board designated to Wallpaper on furniture! They make for amazing looking makeovers!
The piece looks gorgeous! I love the texture the raised stenciling gave the flat doors!
Thanks Theresa! XO
Another beautiful piece. I have wanted to try raised stenciling. You make it sound so easy which makes me feel I might be able to pull it off. I’m always Leary about colors. I don’t have a huge following so I’m a bit afraid when it comes to bolder colors fearing I’ll never find a buyer!! Thanks again for another beautiful “inspiration”
Thanks… and you can SO do this Lisa! The raised stencil doesn’t have to be perfect (as you can see by mine) to have a gorgeous effect. 🙂 And ya, I totally get the hesitation about color because I felt the same way when I started. I stayed with very safe neutrals. Then one day I got brave with this one and I was hooked. 😉
Just beautiful and I love the color(s). I wonder if you can tint the mud? I have heard of people using bondo for the medium but I looked at a container of the stuff and it kind of looks like a product you really have to be careful with it not touching skin and not breathing in vapors?? I am really concerned that if you use drywall mud it will wash off if someone were to give it a serious cleaning?? What are your thoughts…
Thanks so much for sharing!
Thanks Mary! Dixie Belle sells this mud in black, white and brown so I’m guessing you might be able to tint “slightly” but adding too much paint will dilute and then make dry time even longer. As for Bondo, I use it ALL the time for repairs and to fill hardware holes. LOVE IT! Granted, working time is short, you need good ventilation and safety precautions such as gloves etc, but the stuff is AMAZING. Super durable and ready to sand in 15 minutes! I wouldn’t use it for a raised stencil tho. Dry time is too fast and you’d have a heck of a time getting it off a stencil once it dries. And sorry I know I’m long winded here but no, I wouldn’t recommend a ‘serious’ cleaning on a raised stencil… just light dusting or wipe… but who likes serious cleaning anyway, right?! 😉
Looks fabulous ! You American girls are sooo fortunate with the availability of supplies ! If there’s any other Aussies reading this you can use ready mixed coving plaster instead for stencilling
Hi Rita! I’m in Toronto but yes, in the US and here in Canada we have a TON of products available. And I love your ‘ready mixed coving plaster’ tip btw. I’m guess that’s the same as our pre-mixed DAP plaster which I’ve used many times. Works amazing!
Love it! Thanks for the inspiration embossing has been on my radar. Also thanks for the shot of your garage-I feel much better about my stash!
Laura…thats a shot of my local ReStore….lol…omgosh, I only WISH I had a garage that size filled with furniture… and that organized too boot. 😉
Beautiful! I’m going to have to try the embossing and then glaze; it gives so much depth! Red is one of my favorite colors.
Hi Jackie!!! Thanks. I know whatever you do it will be gorgeous! XO
LOVE! Thank you for your fantastic step by step instructions. I truly love the finished results. You are so talented and giving with your experience. THANK YOU!
Thank you Linda, so glad you like it! x
I love this piece! I favor deep reds anyway, but the embossing makes it look amazing and not “flat”. Beautiful without being overdone!
Thanks Ricci! It was kind of a ‘practice’ piece as this was the first time I used such a large 3D stencil. So, I didn’t want to go crazy in case it didn’t work out LOL.
Hi Denise. Another absolutely beautiful piece of furniture. I’m in love. The raised stencil really brings this cabinet to a whole new level. Gorgeous!
Thanks Monique… I think it looks a whole lot better too. 😉
Just beautiful! and I wish you were closer.
Aw, thanks Roseann! XO
Texture makes everything better. Well done my friend! xo Do
Doesn’t it?!! Thanks and can’t wait to see your french provincial restyle. 🙂
Such a subtle, beautiful change. It looks like it was made that way. Great job, as usual.
Thanks so much, Patricia! 🙂
Do you think I could have used DB copper base coat instead of the patina and gotten the same effect? Thank you!
For sure Linda… maybe an extra coat or two will be required if you want it to stand out a bit more. 🙂
This was a nice change from painting a color. You made it look old world, like it came from a castle. Great tipS. Thank you!
Thanks Linda! The deep rustic red, raised stencil and glaze with the warm copper undertones really remind of the furniture I’ve seen at Dundurn Castle and the George Eastman Museum to name a few. 🙂
OH WOW, OH WOW, OH WOW!!! Fabulous! You taught me something brand new today as I never knew this could be done! Thank you so much.
So glad… that puts a huge smile on my face, Cate! 😁
WOW. This turned out stunning! I like the stencil/mud effect the best when used with darker colors. This is a perfect example. Perfection!
Thanks Hope! I’ve seen it used on whites and creams and it looks really good also… I’ll have to give it a try to compare though. The Dixie Belle Mud also comes in Black and Brown. It would have been interesting to try one or the other on this piece, paint it over and then sand back. Probably an entirely different look. I’d like to try that too. 🙂
You’ve done it again Denise. I always look forward to your emails. This cabinet is elegant and the color you chose adds to the regal look. ~ Nicki
Thanks so much, Nicki! I wasn’t expected this rustic red to look quite as deep once the glaze went over – but I’m super happy with the results.
Love your work. Is there any instances of stenciling on GLASS? I have a 6×9′ coffee table of 1/2 beautifully finished glass that has become scratched over the years…Perhaps stenciling a pattern over it will disguise the fine scratches on top. ?? any suggestions??
Hi Cindy, thank you! I know you can stencil on glass with paint(s) which may work wonders to hide your scratches. That said, I’m not sure a raised embossed stencil would work well on a surface that holds things and gets a lot of traffic.
Beautiful! Love the color — makes the doors look like embossed leather from the photos. I enjoy seeing your projects and techniques. You are an inspiration. Thank you for sharing your talents.
…”makes the doors look like embossed leather from the photos”… yes… love this Lori! x
Reminds me of embossed leather especially with the color on this piece.
Yes! That’s exactly what Lori (previous commenter) was saying… love it! Thanks, Elizabeth!