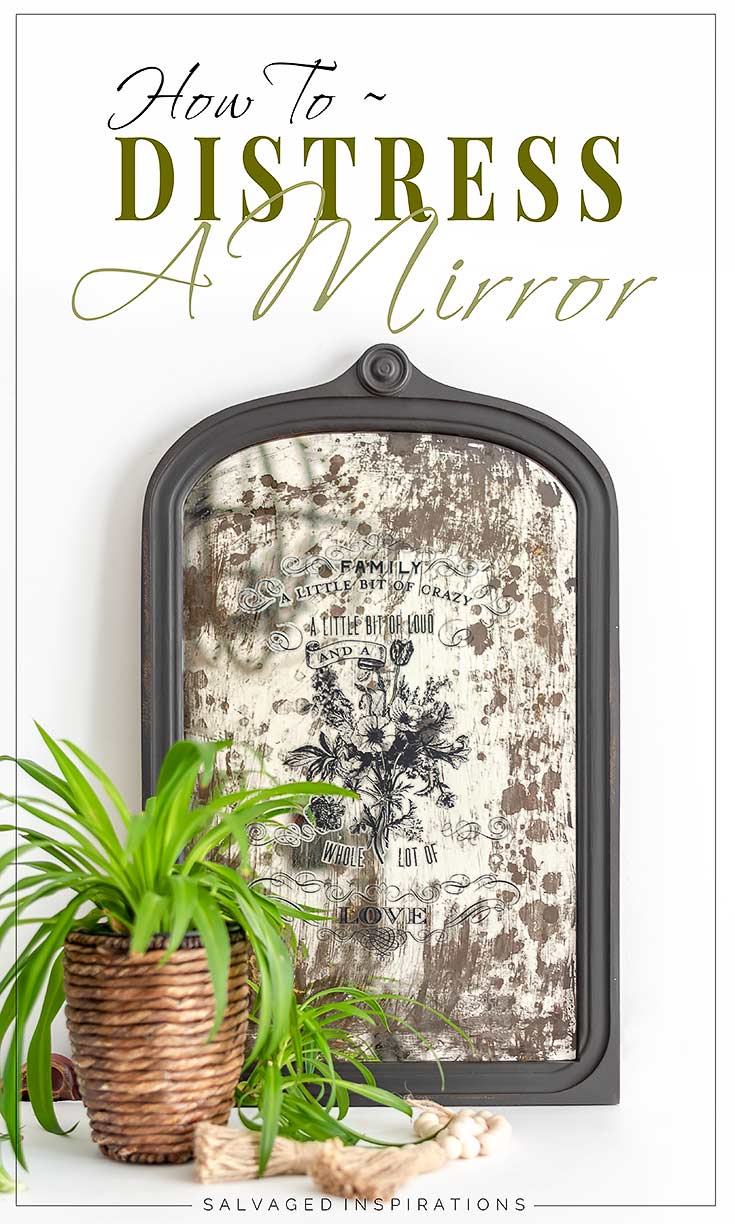
HOW TO SALVAGE AND DISTRESS OLD DRESSER MIRRORS! [VIDEO]
Hi sweet #sifamily and welcome to the first Trash to Treasure of 2021! If you’re new here, on the second Tuesday of each month, four of my blogger friends and I join together and share our T2T makeovers. I’ll be sharing links to their projects down below. But first, today is all about salvaging old dresser mirrors. If you’ve’ ever wondered what to do with your mismatched dresser mirrors, I have a FUN distressing technique for you!
![]()
I don’t always use the mirrors attached to my vintage pieces. Around my area, I find dressers usually sell more quickly when the mirror is removed. That said, I LOVE VINTAGE MIRRORS and I always keep them for future projects! Before Christmas, I put a mirror project up for sale (link included in Related Posts below) and I had a response and a porch pick-up within an hour! It got me thinking… I’d like to share how to repurpose and distress these beautiful mirrors for YOU to try in your home decor… OR for you to sell!
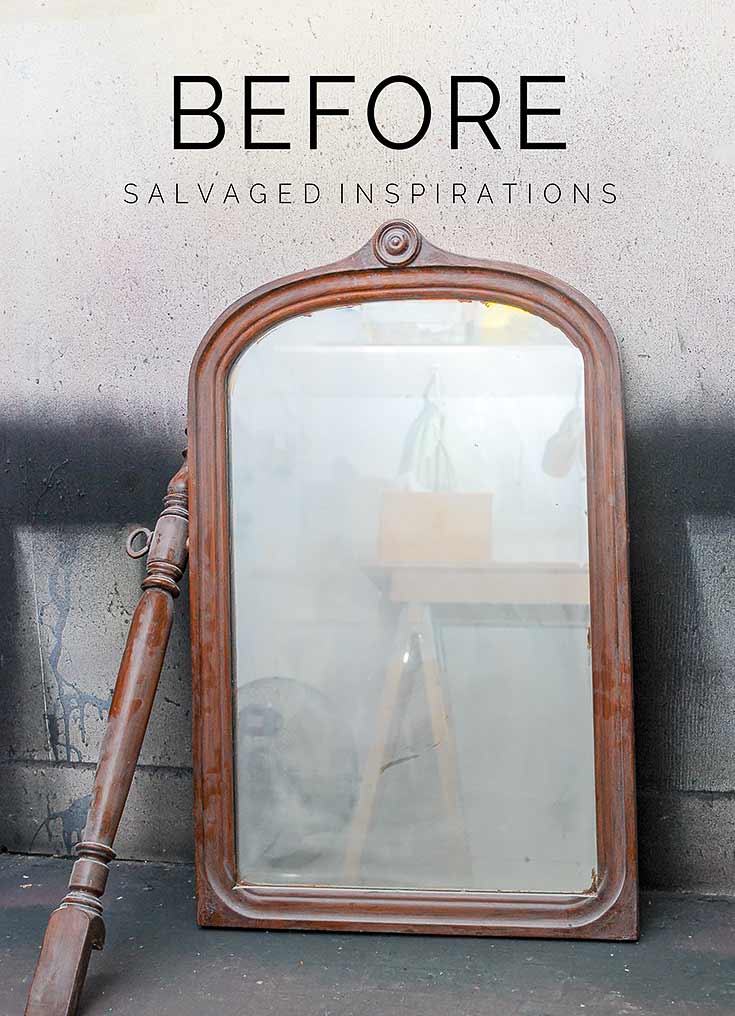
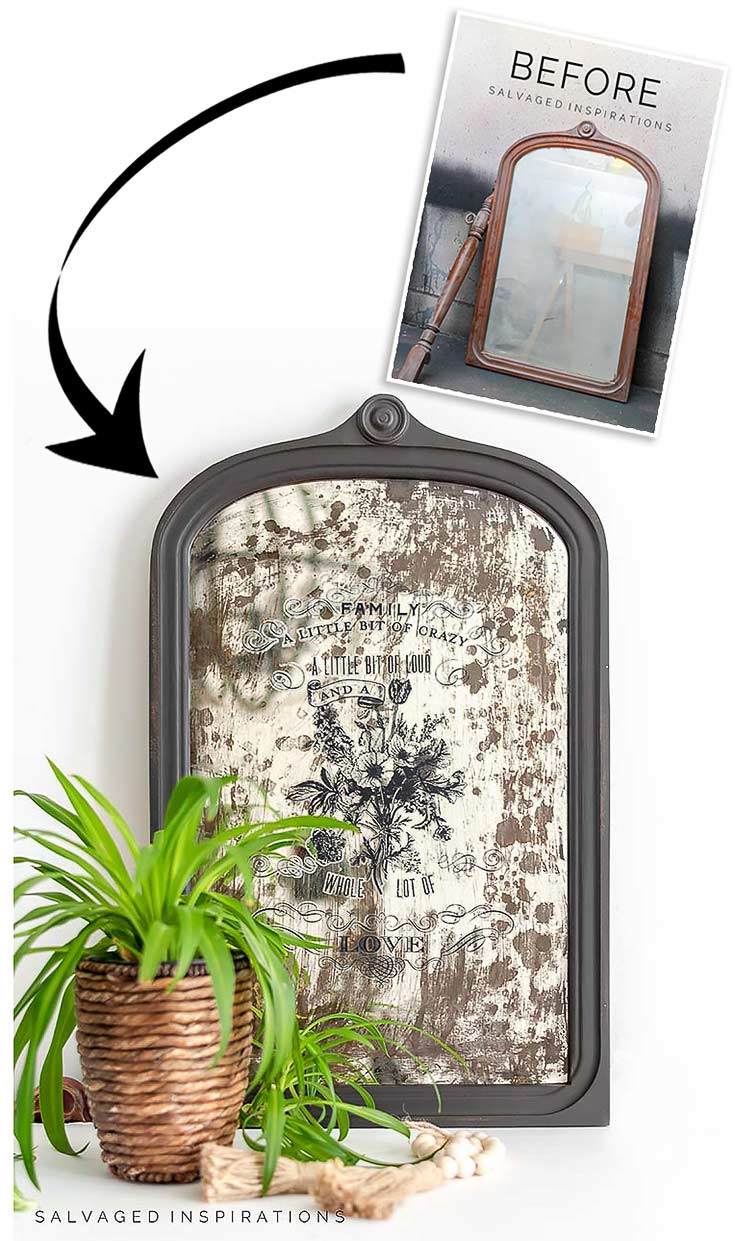
Here’s the before. It’s a little dusty but gorgeous none-the-less.
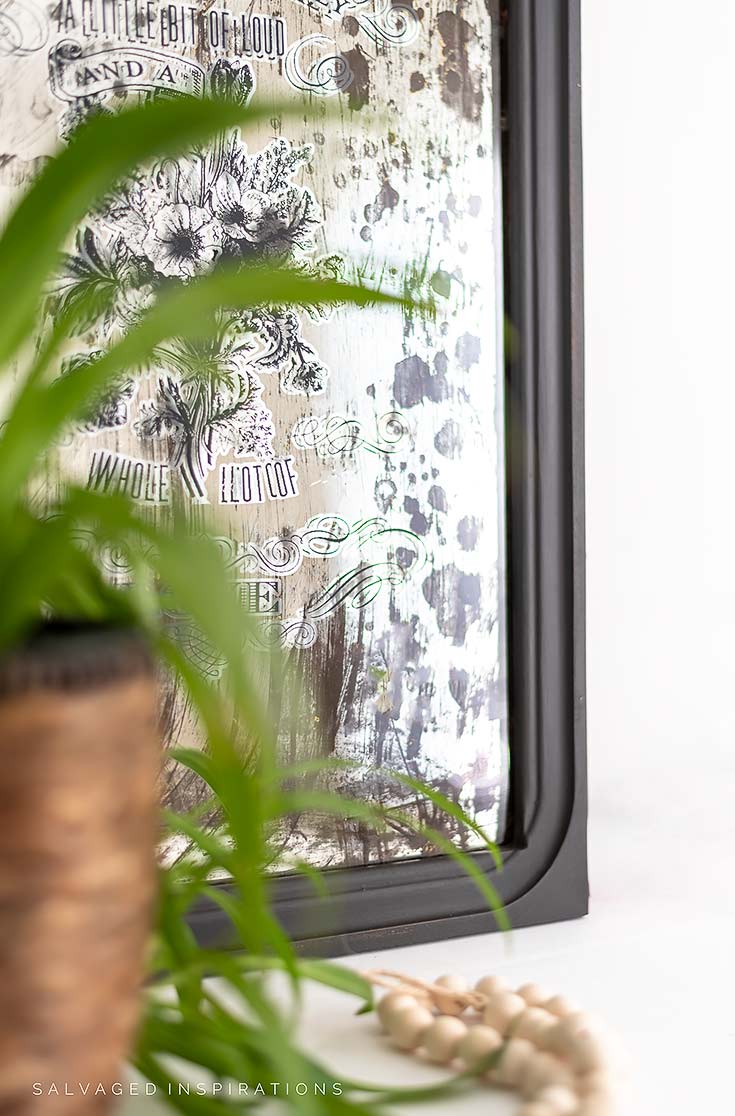
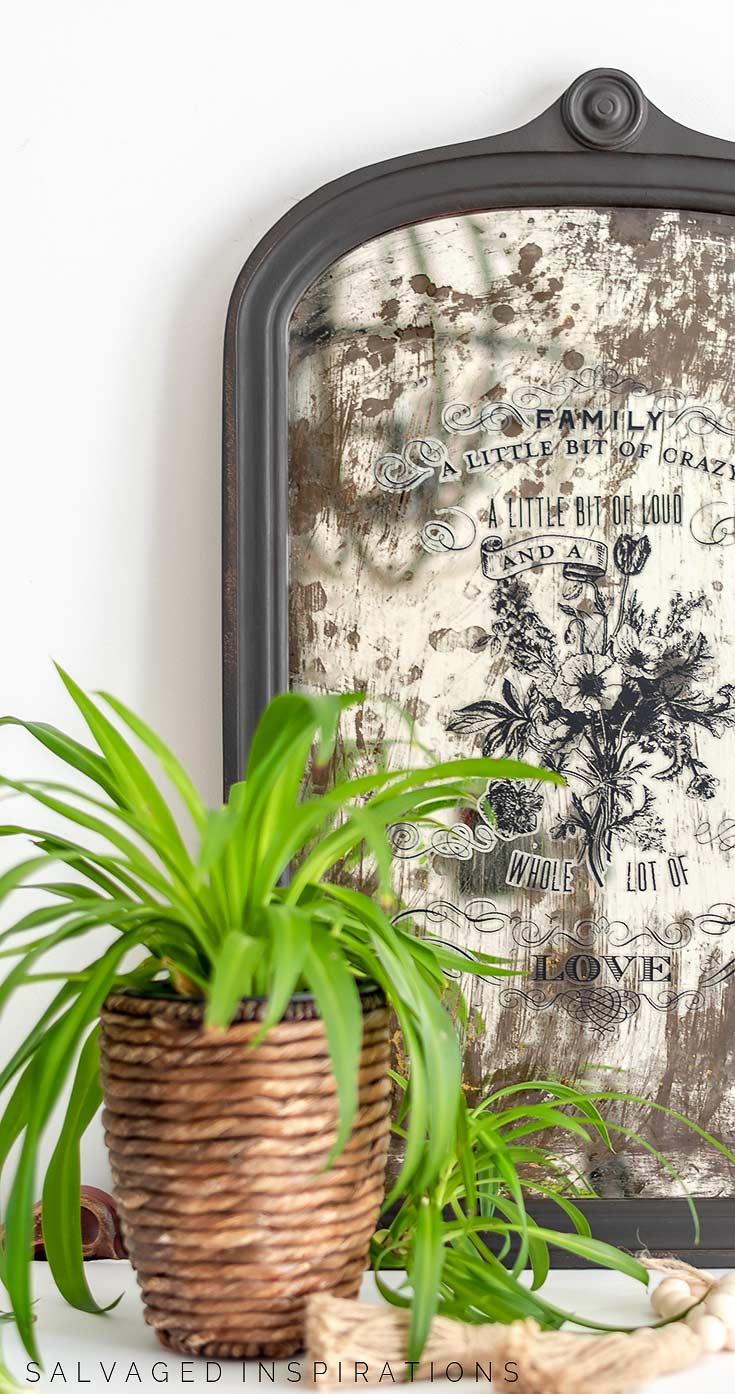
And here’s the reveal… doesn’t even look like the same mirror, right?!
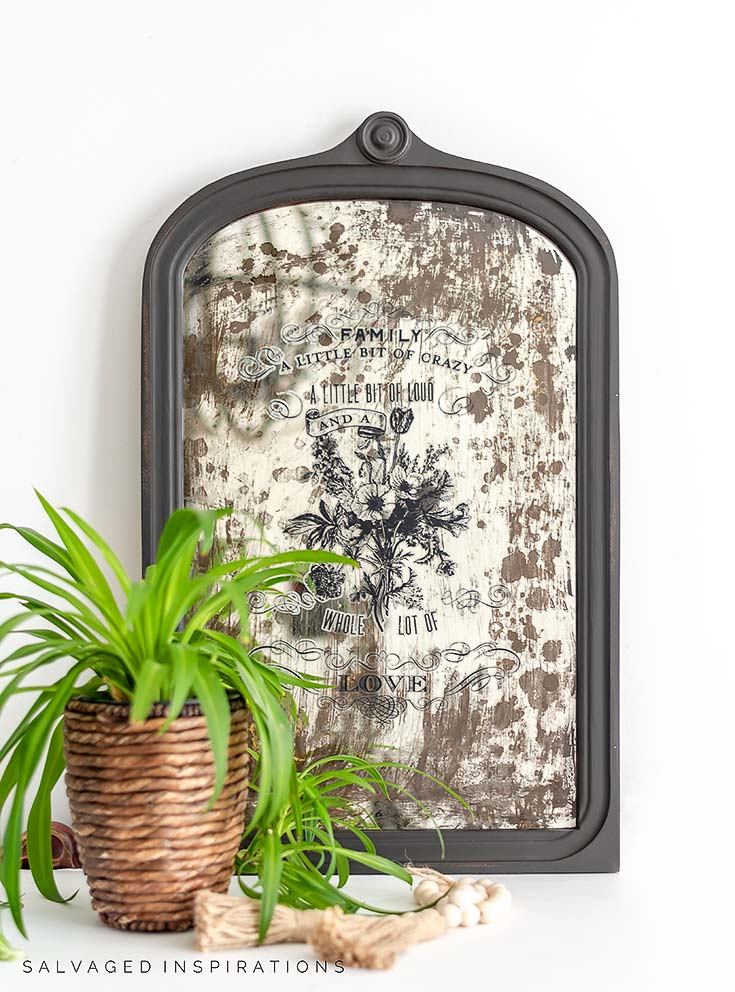
I had fun distressing and giving her a NEW-OLD look. What do you think?
THIS POST IS SPONSORED/CONTAINS AFFILIATE LINKS TO PRODUCTS I USE. YOU CAN SEE MY FULL DISCLOSURE HERE.
SOURCE LIST
-
- Vintage Dresser Mirror – SALVAGED
- Paint Brush + Chip Brush
- Sandpaper | Shop Towels
- White Lightning Cleaner
- Wood Filler
- CitriStrip Stripper
- Bleach + Water
- Gold Digger Metallic Paint
- Coffee Bean Paint
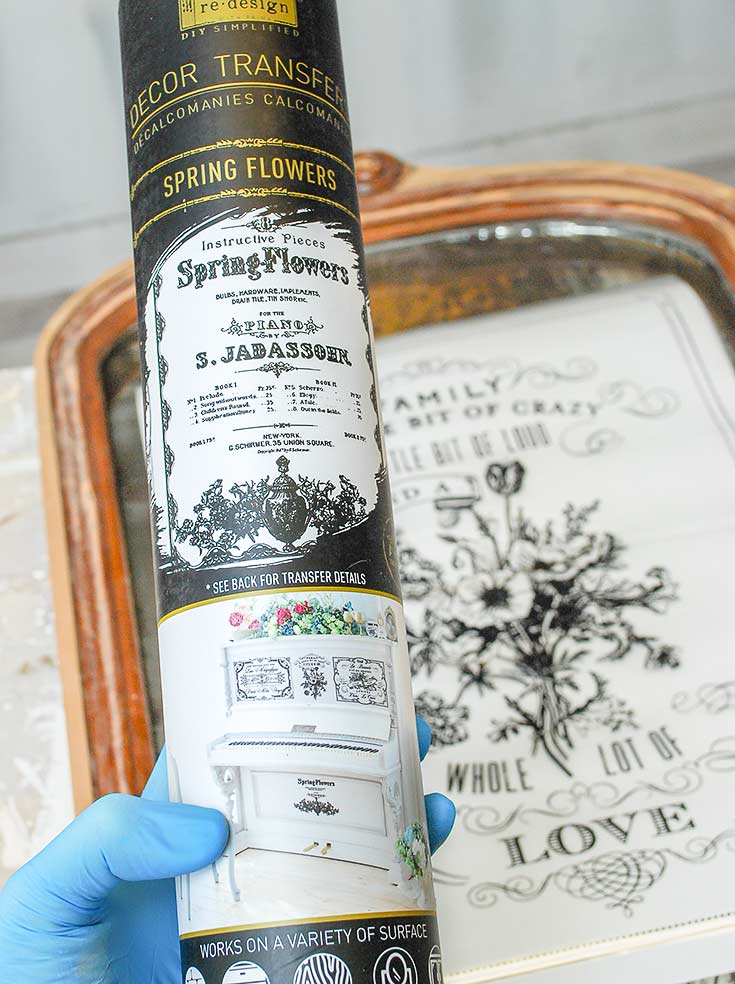
- Spring Flowers Transfer
- Black Wax
SALVAGED MIRROR MAKEOVER
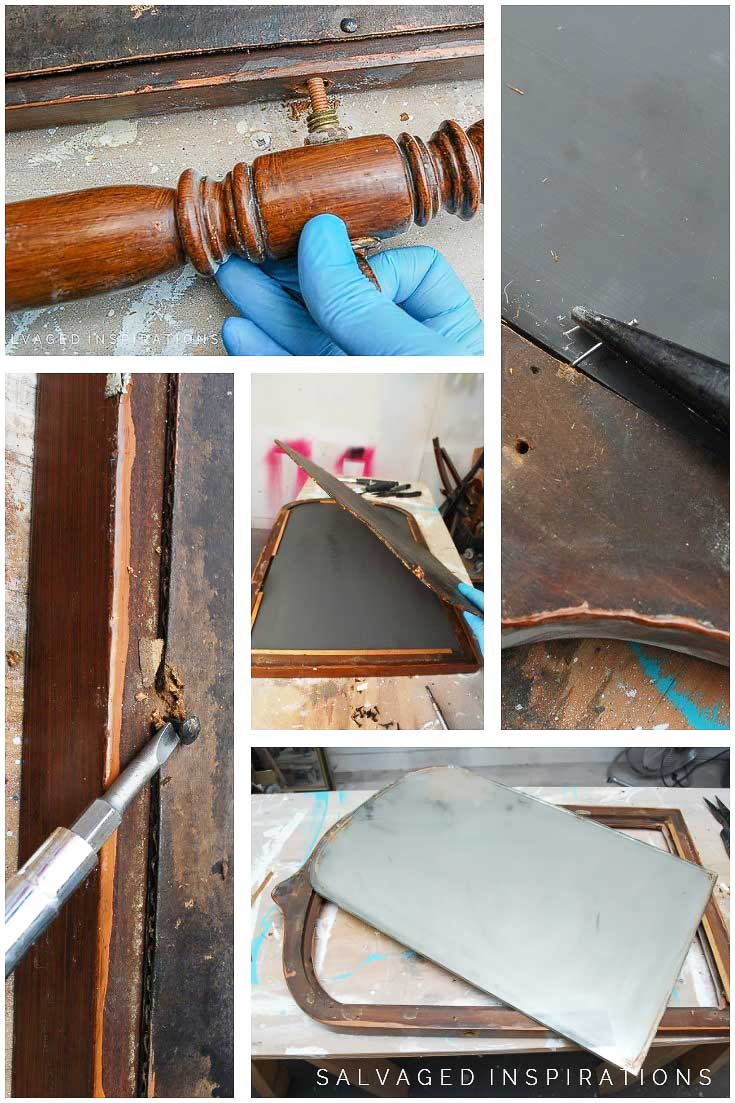
To give this mirror a brand new look, I started by removing the backing. I’m always surprised to see how well things were built back in the day. This mirror had a date stamp of 1930. It’s a heavy-duty thick mirror and the frame and backing were still perfectly in place. Impressive. I can only imagine how many reflections it’s seen!
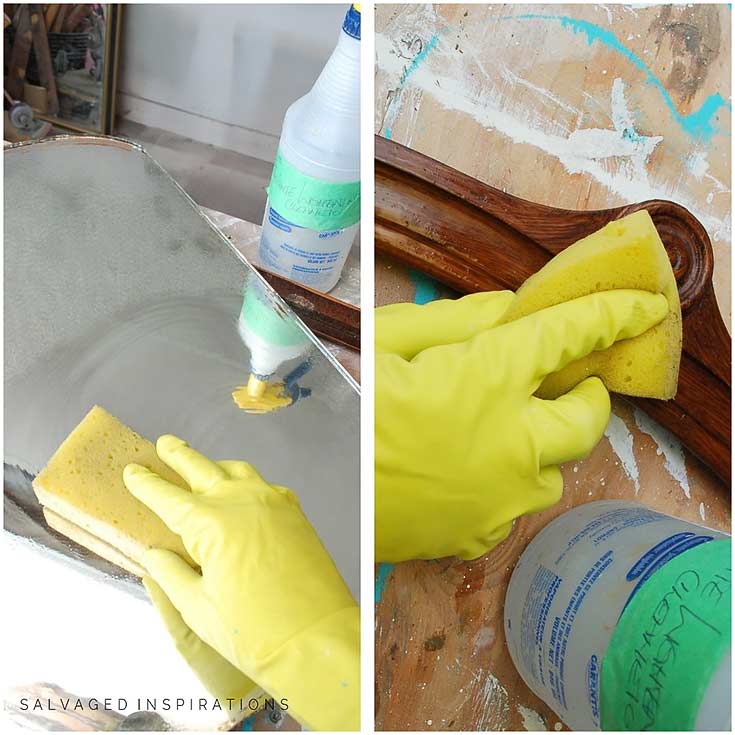
I gave everything a good cleaning with this White Lightning Cleaner.
TIP~ I find an easy way to use this heavy-duty cleaner is to mix it into a spray bottle with the appropriate amount of water. Then whenever I need it, I give it a shake, spray and wipe. This saves me time from having to mix a new batch for every project.
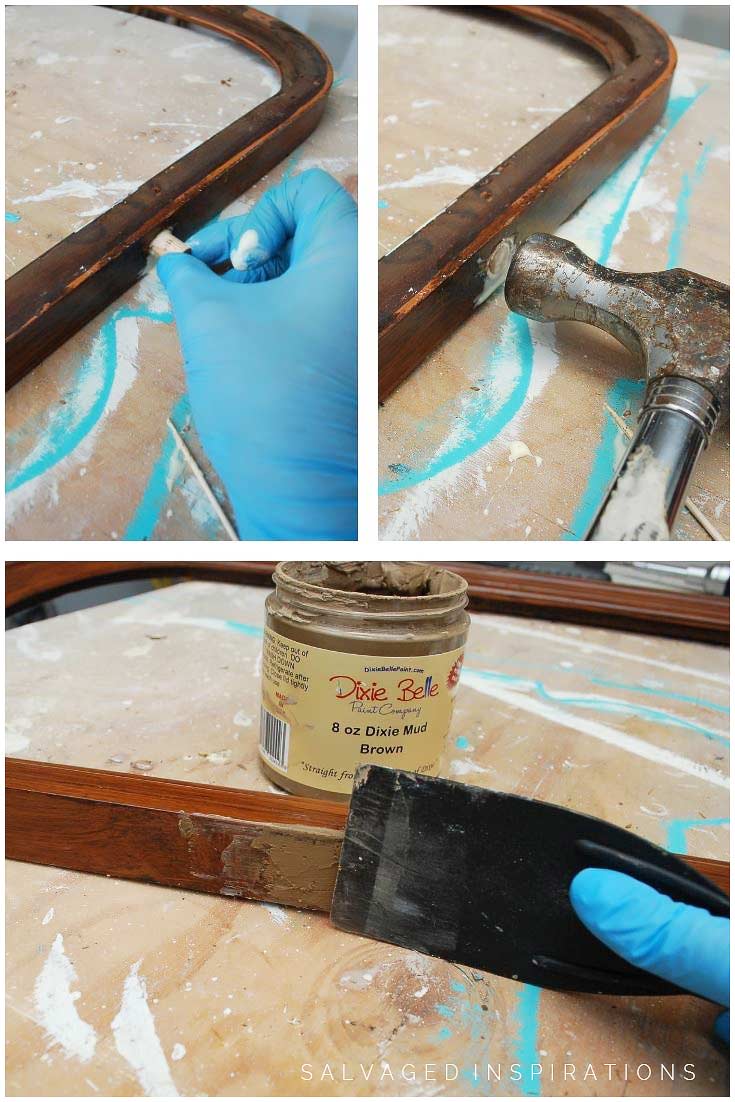
I filled the holes with wood dowels and Titebond Glue and hammered them into place. I’m still using the hammer my Dad gave me. It looks like it’s had its day but so long as it works perfectly… I’m holding onto it. 🙂
Once it dried, I filled the tiny gaps with this DB Mudd and then gave it a light sanding.
While the wood fill was drying, I distressed and antiqued the mirror.
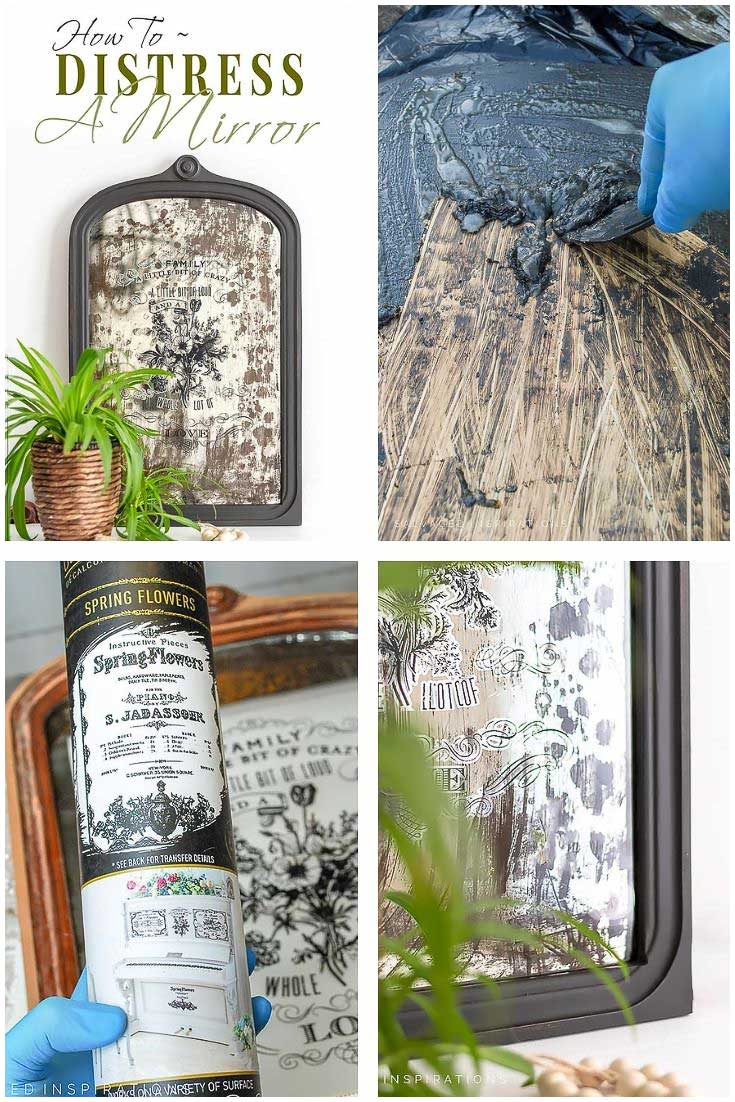
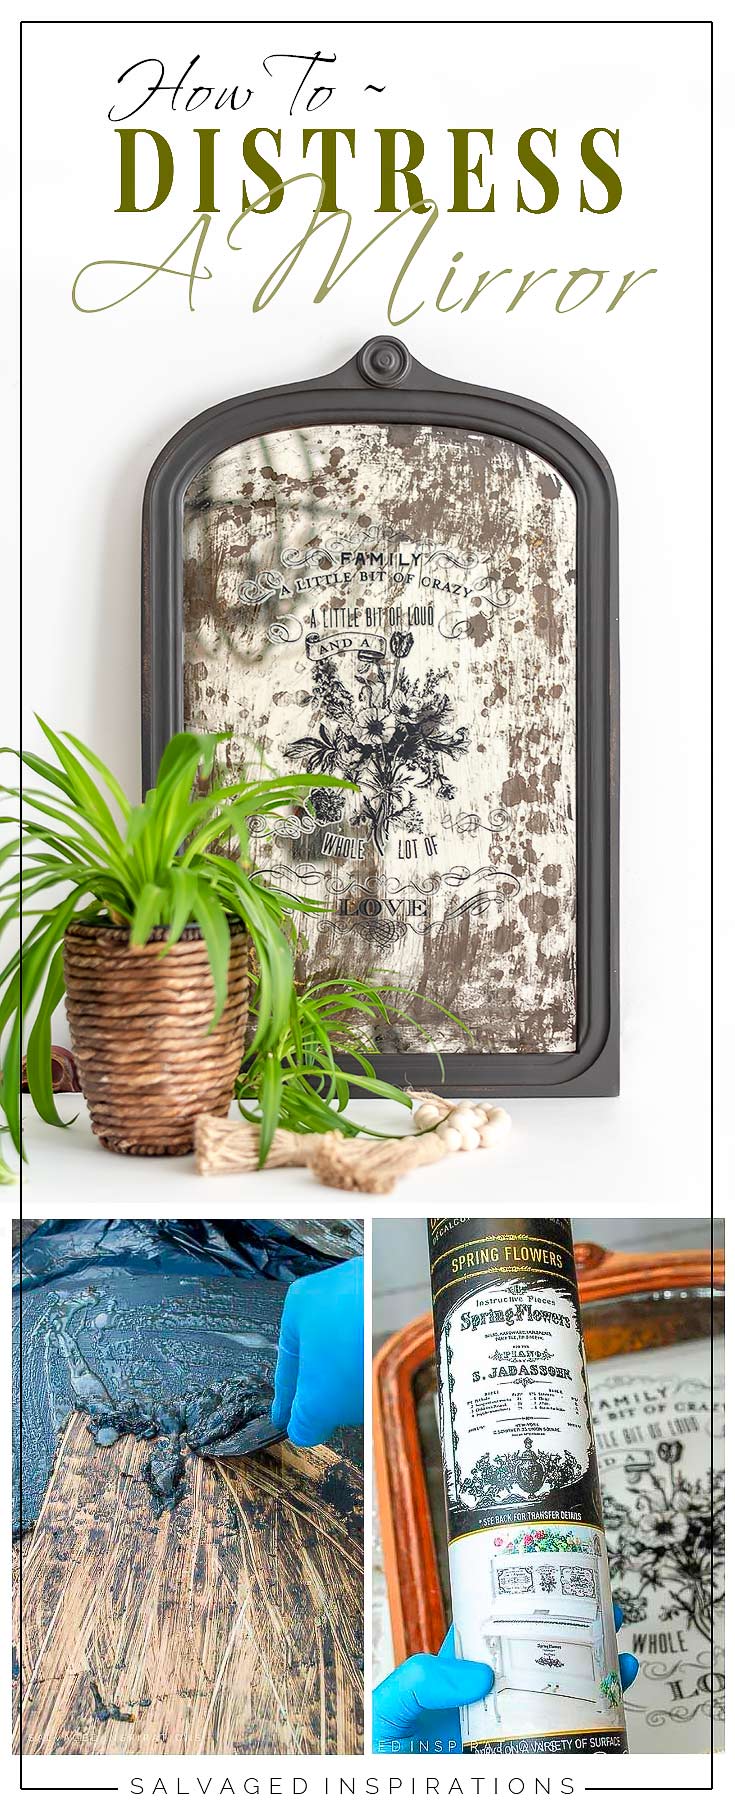
HOW TO DISTRESS A MIRROR
Here’s a video tutorial on How to Antique A Mirror on a project I did last year. The technique is exactly the same.
STEP #1 – Remove the mirror from the frame. Apply the stripper to the backing. I like using this stripper whenever I can find it but for some reason, it’s not as readily available here anymore.

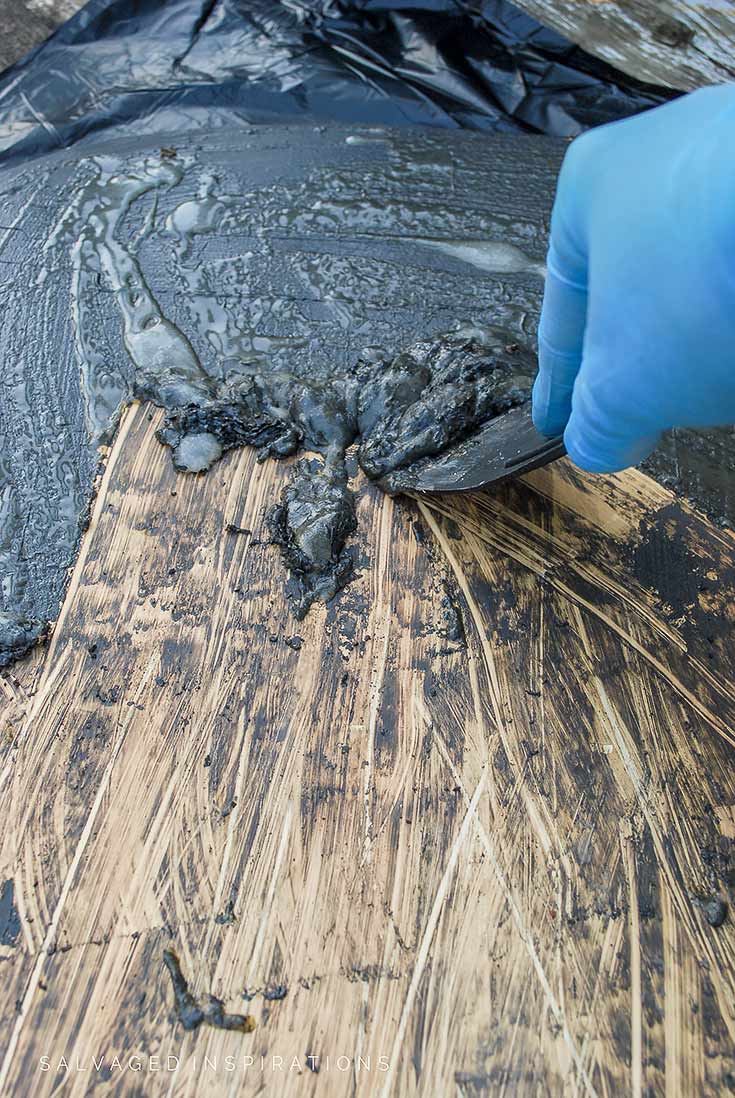
STEP #2 – Wait the appropriate time for the stripper to work its magic and remove the mirror’s protective coating with a putty knife.
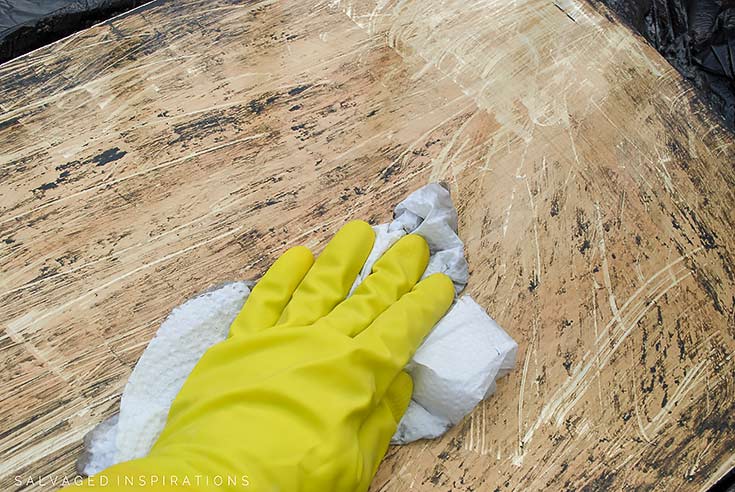
STEP #3 – Clean off all the additional stripper and backing with a damp rag or paper towel.
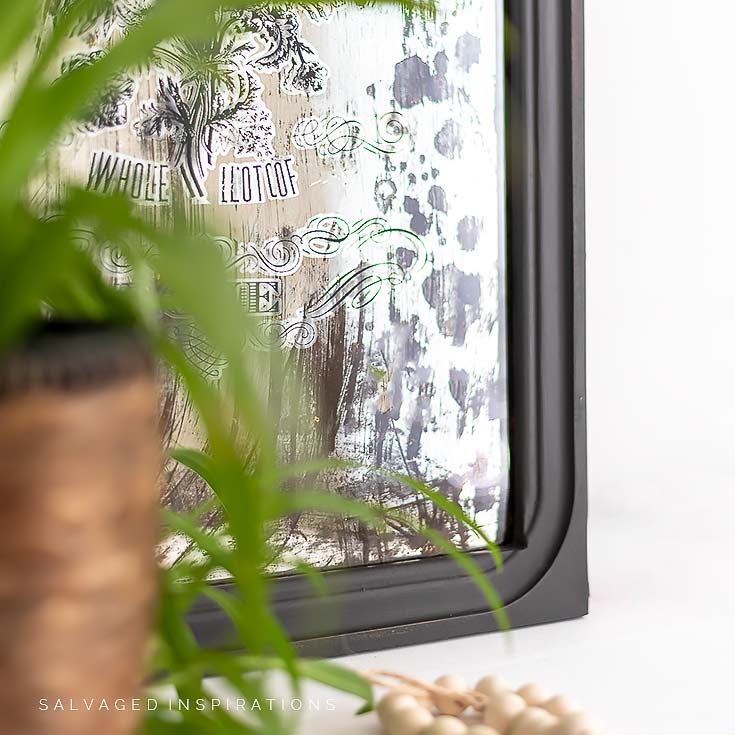
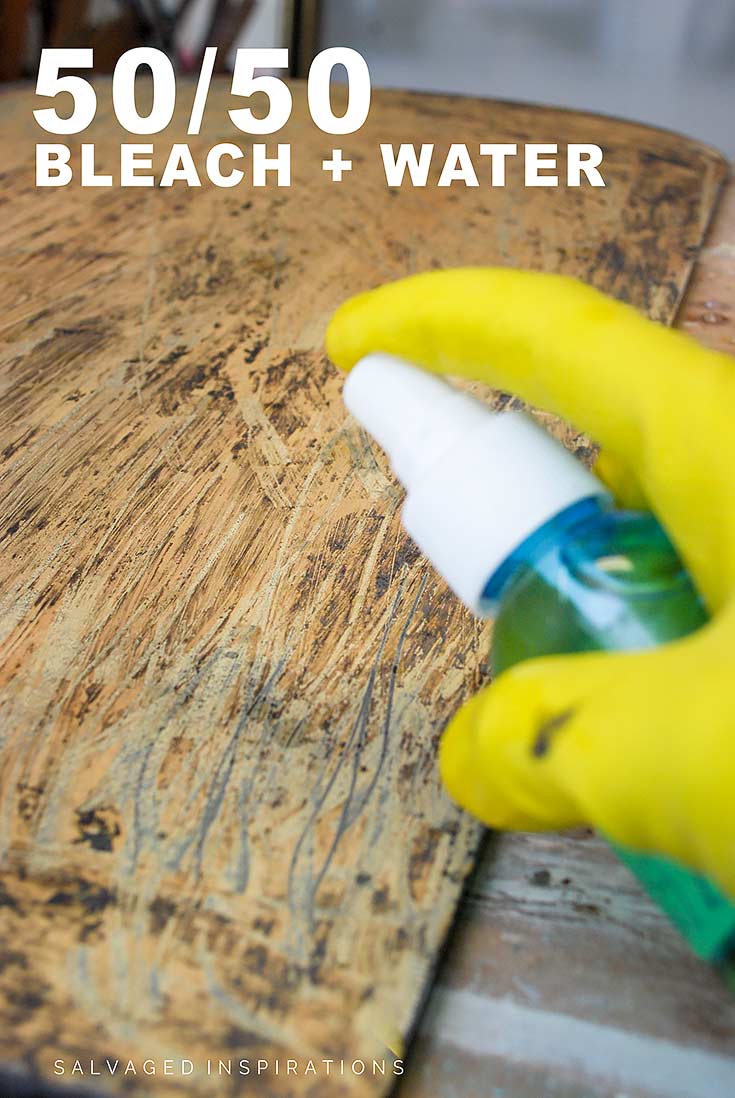
STEP #4 – To distress the mirror, I used 50/50 Bleach + Water but you could also use Vinegar. Spray onto the back of the mirror and watch and wait for the mixture to “eat” through the finish. It happens quickly so I like to stand by with a paper towel to blot it off. To get a good amount of distressing, I sprayed more around the edges and shook out some droplets all around the mirror.
STEP #5- Once the bleach and water have dissolved the backing, you can see through it on the front side.
TIP – I like holding up different colors of paint to see what color I’d like to paint the backing. This will be the color that will show through on the distressed areas on the front.
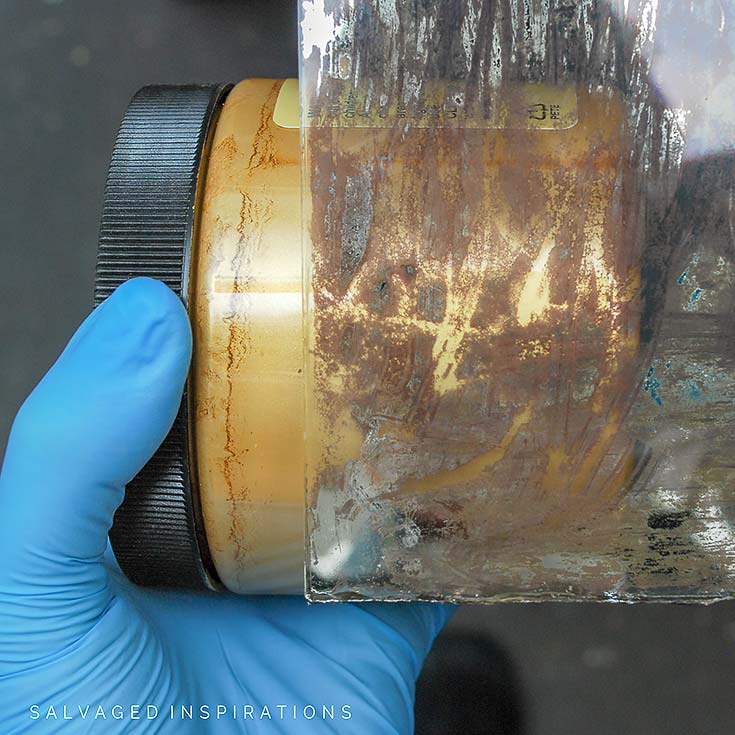
I chose this metallic in Gold Digger.

To finish my mirror off, I used this Spring Flowers transfer.
HOW TO RUB ON TRANSFERS
If you have trouble viewing this video you can see it here on Youtube. Don’t forget to subscribe! 🙂

Here’s the finished look…

To finish it off and tie everything together, the frame has been painted in Coffee Bean and top coated with this Black Wax.
And now for some TRASH TO TREASURE FUN!
I know you’re going to LOVE what this talented team of ladies share. They never cease to surprise me with their creativity! Below are their BEFORE photos. Visit the links underneath to see the amazing AFTERS and to learn how they did it! I’m heading over to take a peek right now myself! x
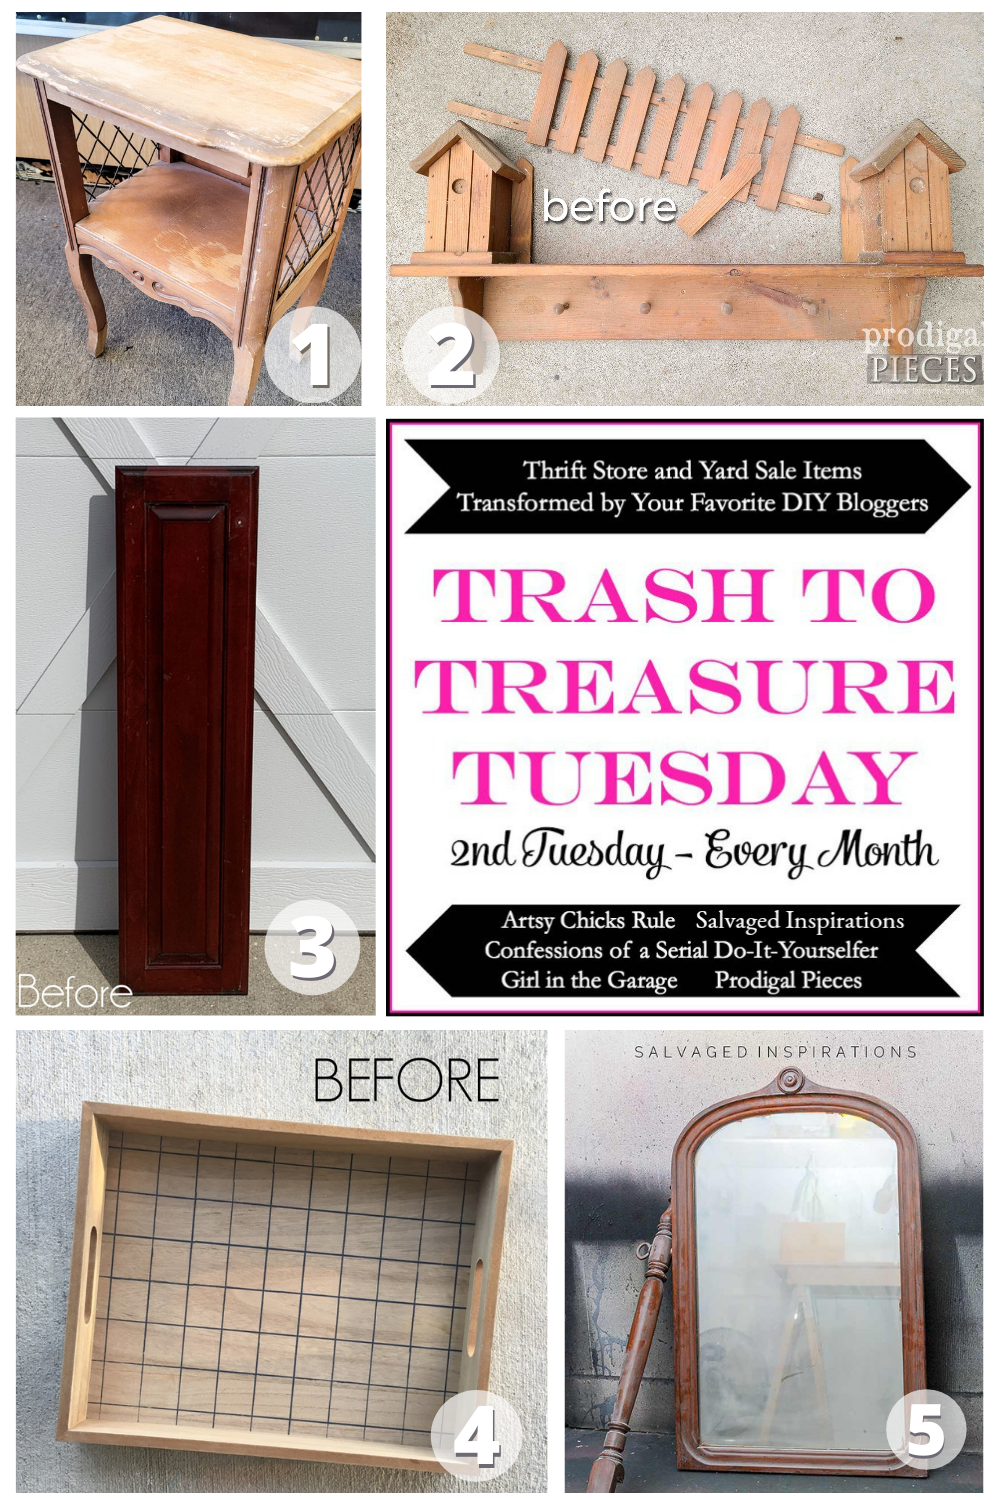
1. Artsy Chicks Rule
2. Prodigal Pieces
3. Confessions Of A Serial DIYer
4. Girl In The Garage
5. Salvaged Inspirations (I’m so happy you’re here!!)
Here’s another look at the before and after.
DO YOU HAVE ANY IDEAS ON HOW TO SALVAGE THESE MIRRORS? WHAT DO YOU THINK OF THIS MIRROR DISTRESSING TECHNIQUE? FEEL FREE TO CHIME IN BECAUSE I ALWAYS LOVE HEARING FROM YOU.
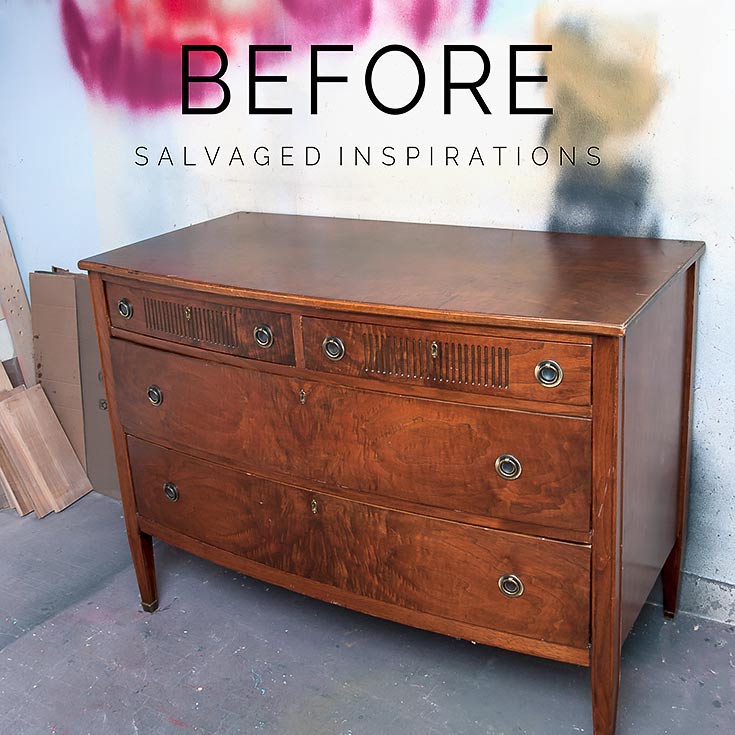
I’ll be back next week with this curb-shopped dresser makeover!
Thanks for reading. 🙂
Wishing you a beautiful day filled with inspiration and Happy Painting friends!
Denise XO
RELATED POSTS::
Mirror to Chalkboard to Profit
DIY Antiqued Mirror w Transfer
How To Cut Mirror At Home
How To Antique A Mirror
How To Paint a Mirror Frame
PIN AND SHARE!

I’ve had this tutorial saved for months and finally just got around to trying it yesterday! I was able to strip the first layer with the CitriStrip but not having any luck with the 50/50 bleach eating through the protective backing. I may try just straight up bleach but if you have any other suggestions I’m all ears! I can’t wait to see the finished product, it’s going in the back of an old secretary desk that I chalk painted and distressed.
Hi Angela! The backings differ on mirrors so it really depends. If the 50/50 vinegar-water mix is not working, you might want to try the stronger bleach solution.
Hi Denise,
I’m having a lot of trouble locating rub on decals rather than the waterslide over here in the U.K. Would you please email where you purchase yours from, or of any stockists over here…..Best Paul.
Hi Paul! I’m not sure where you would buy them in the UK but here is where I send my readers. They have the best selection!
This is one of my favourite tutorials Denise. I love love love the end result.
Carole
Thanks so much my friend! It was fun and it’s nice working on smaller projects for a change in pace. XOXO
WOW!!!! That is phenomenal!!! I can’t believe how you transformed that piece!
it is sooooooooooooooooo cool!!!!!!!!!!! And your tutorials are awesome, thanks so much.
Thanks Michele! You just put a smile on my face!😀
I’m absolutely in love with what you did with this mirror!🥰 I can’t wait to try this! I was wondering if you would share how much you sold it for? Thanks so much for sharing your project with us, I can’t wait to see what is next!!
Thanks Holly, so glad you like it and it’s inspired you to give it a try. It’s a fun project! And I haven’t sold it yet… I’m keeping it for now. 😉
Lovely job. All I have to do to distress a mirror is stand in front of it!
Omgosh Beth… LOL… you’re too funny! But I have to admit, I feel I have those days as well.🤣
So pretty! I’m obsessed with old ornate mirrors. When I see them on FB Marketplace, I have to hold myself back or I’d buy all of them!
lol…I love them as well!
So pretty, Denise. What a beauty of a mirror. I could also see it in that beautiful red you just did on a recent dresser. I love your work!
Thanks, Vallie! 🙂
Oh, thank you for this! I have so many mirrors to makeover. I personally love the way mirrors reflect light and make a room brighter and larger, but I’m not a fan of seeing my reflection everywhere, Especially at night; it can give me an unpleasant start! This idea seems like it would remove the reflection risk…do they still add light to a room? Either way this is gorgeous. Now I won’t have to turn all my mirrors into chalkboards. (Though those can be quite cool as well.)
These DO add beautiful light to a room! 🙂
It’s exquisite! Nice technique for mirrors that have flaws. I find buyers want mirrors in perfect condition which is almost impossible with real antique ones. Thanks for sharing the technique again.
EXACTLY! And most of the old ones always have dark age spots… just like I’m getting.🤣
It’s so beautiful. I’m going to try it today. When you paint the back of the mirror would it be possible to use a gold metallic spray paint?
For sure! Any paint or color will work. Have fun!
Thank You for All the great tips and suggestions.
I have learned so much on refinishing furniture from bloggers like you.
Keep up the good work.
Thank You
Thanks so much, Colleen! XOXO
Great project, Denise! I always have so many mirrors leftover from dressers!
Me too… and thanks, Jen! XOXO
Thanks so much for this fabulous tutorial! I guess since I can’t swing by for a porch pick up I’ll have to make one myself. LOL.. Thanks for the inspiration. Pinned… XO ~~ Susie from Chelsea Project
Aw, thank my friend! And maybe one day you can swing by for a porch visit instead of a porch pick up!😉🤗
You really work magic on these mirrors and I am totally going to copy you one day ha ha! XOXO
Thanks, Christy! It’s a great way to repurpose them, right!?!😊
Denise, Love your videos! Now for a question that’s probably very stupid on the transfers – can they be applied to the underside of a glass table? Will the pattern show through on the reverse side is my question. I have a glass topped coffee table and would like to put transfers on it but to protect them, I’d put them underneath showing up through. Is that doable or will the transfer be too muted since it’s reversed?
This is a VERY good question! Hmmm, well depending on the design it would show up flipped… so it won’t work if there’s any text. And I’m wondering what the “sticky” side would look like through the glass? I’m really not sure… but now I’m curious! If you give it a try, I’d LOVE to hear how it all works out.
What a cool technique! I love it, Denise! xoxo
Thanks, my friend! XOXO
Very creative! I wouldn’t have thought to do this. Thanks for inspiring us Denise! ~ Nicki
Aw, thanks so much, Nicki! These are fun projects. 🙂
This is very very beautiful! I am wondering; your post mentioned that you sold something and had porch pick up. I’m wondering where you went online to sell? I normally associate porch pick up with Craigslist or facebook. But I’m thinking you probably use something else and would love to know what it is. Thanks for all your good work!
Thanks Nancy! It was sold on FB Marketplace. 🙂
Pretty, Pretty! You could do something similar with a window and use the mercury glass spray paint. You have such a great eye! Can’t wait for next week to see that dresser!
Thanks Leslie and yeeessss… I love that idea!
Oh, Denise! I love how this turned out and I’m amazed at how simple it was to do. I watched the video and I’m excited to someday be able to try this! Question: you applied the transfer to the front of the mirror so now how do you clean it? What care instructions do you give to a buyer?
Thanks, Sharon! As for cleaning you can certainly Windex around the transfer but I recommend a light dusting/wipe down with a dry cloth right over the transfer. They are VERY difficult to remove once they adhere and Windex would “probably” be just fine but I wouldn’t chance it. Have fun if you give it try! 🙂
Hi, just a word of caution to make sure that you work in a well ventilated area (preferably outside) and wear a mask when you do this. Vintage mirrors often use mercury in the reflective surface, and when you strip the backing off, you can release the mercury either in the form of a vapor or on the surface/stripper. (I see you are already wearing gloves.) You may want to add this information to your tutorial, so that anyone following it does not expose themselves to this heavy metal.
Great point Kristen. Thank you! 🙂
Thank you, Kristen, such a great caution!
Hi Denise! Thank you for sharing this technique. I do have 2 antique mirror I would love to try this on. Wish me luck.
I’m wishing you luck and have fun with them, Cheryl. It’s a fun project with neat results. You can only control the distressing up to a point so each piece is unique and a surprise!
This is GORGEOUS, Denise!! That gold was a great choice. These old mirrors need to be salvaged. Thanks for sharing. xo 😘
Thanks Do! I have quite a few of these mirrors so it’ll be fun figuring out different designs and colors!
Hi Denise. What a fun, creative, beautiful, and artistic way to transform an old mirror. I’m in awe of your skills and imagination. Fantastic project.
Thanks so much, Monique! XOXO
Just lovely! I adore mirrors in any form and enjoy making them too.
Aren’t they fun?! Thanks so much, Larissa!