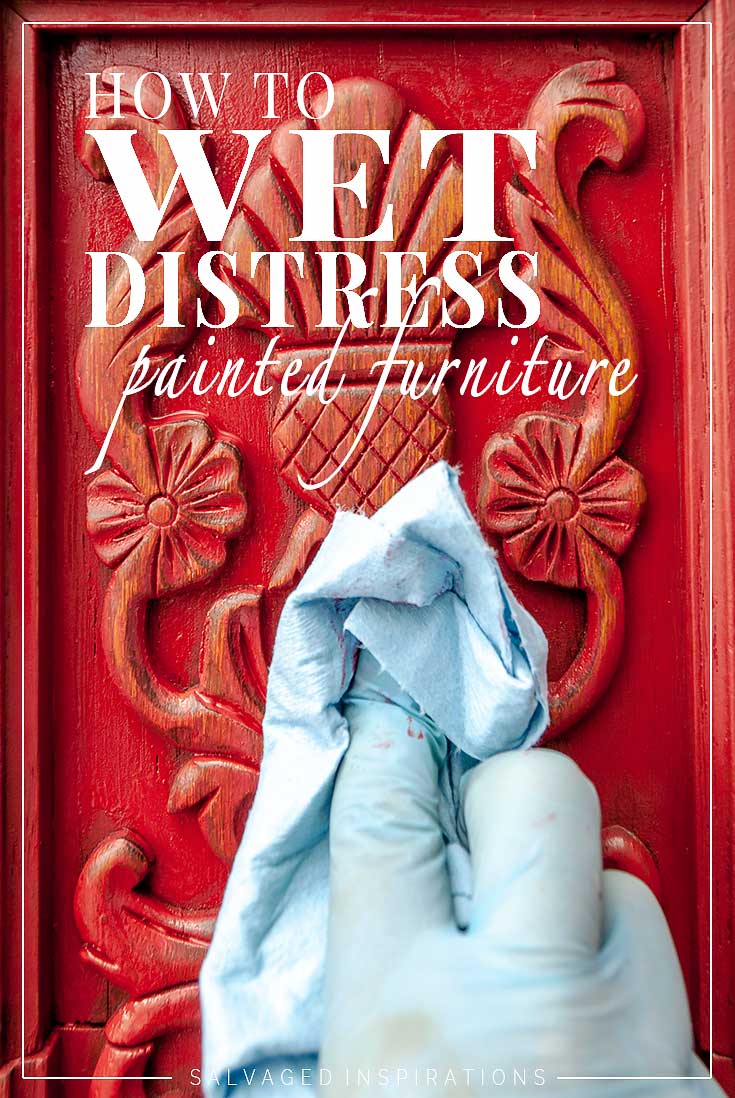
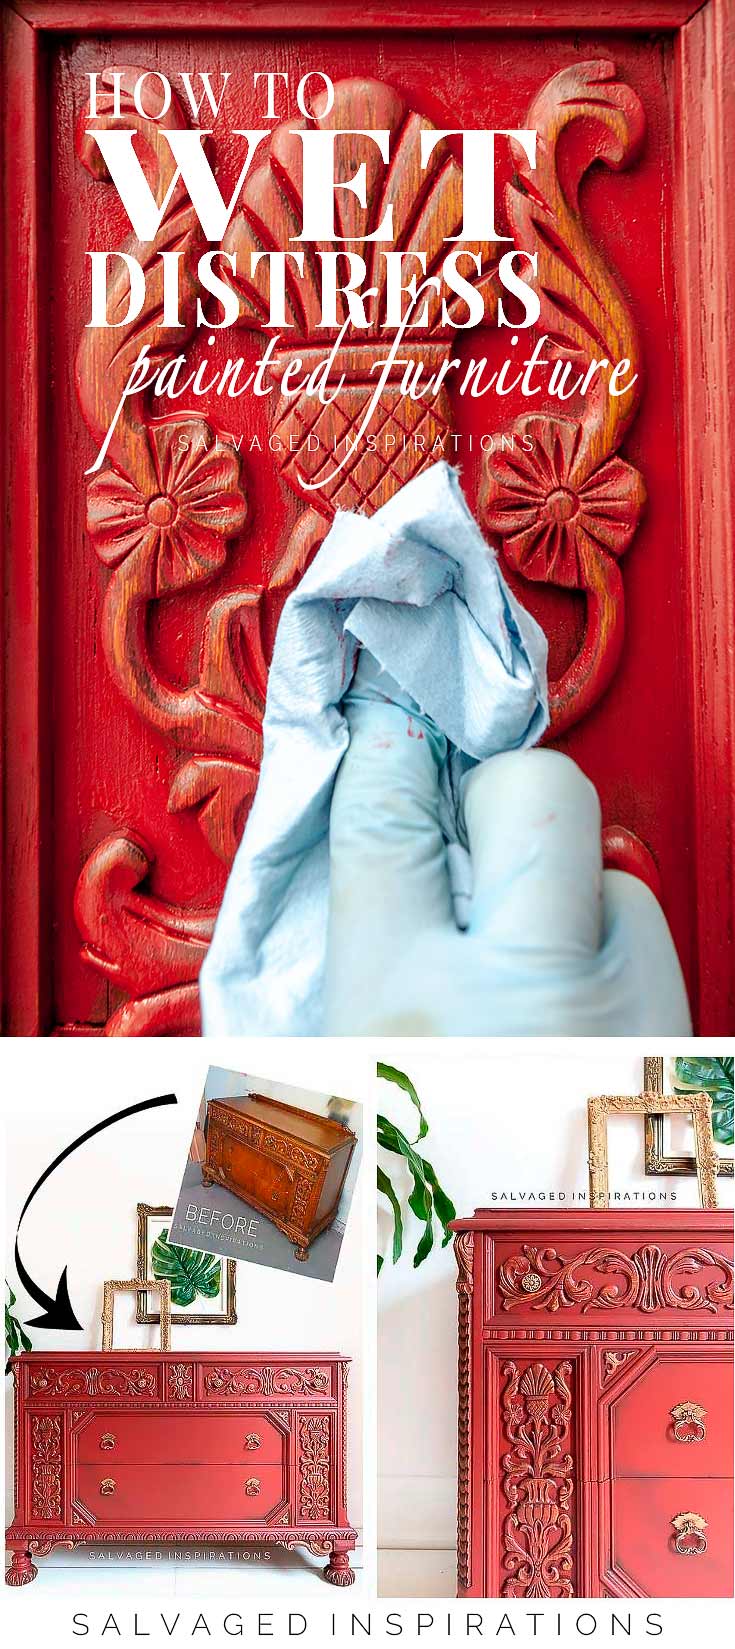
HOW TO WET DISTRESS YOUR PAINTED FURNITURE. NO SANDING REQUIRED! [VIDEO]
Hi, sweet #sifamily! I’m excited to share this makeover because I don’t come across pieces like this too often! To show off all this gorgeous detail, I decided to WET Distress this finish. WET Distressing your painted furniture can add a TON of character by giving it a more worn-in look. It’s a simple furniture painting technique that creates stunning results. As a bonus, I’m sharing MY FAVORITE way of doing it which will give you a much softer and subtle blended look. The best part, NO SANDING required!
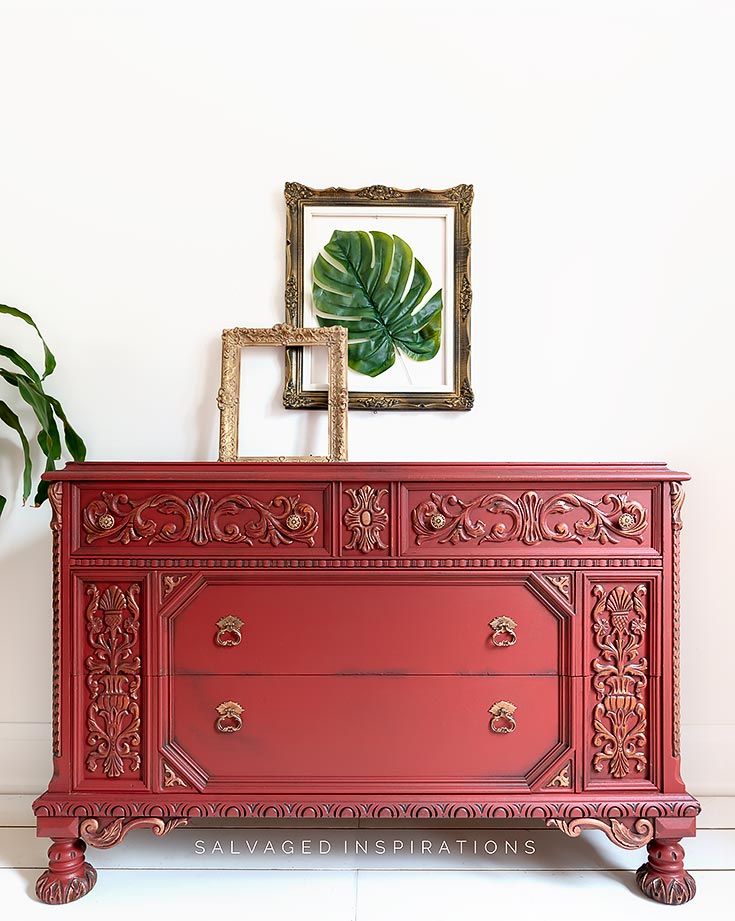
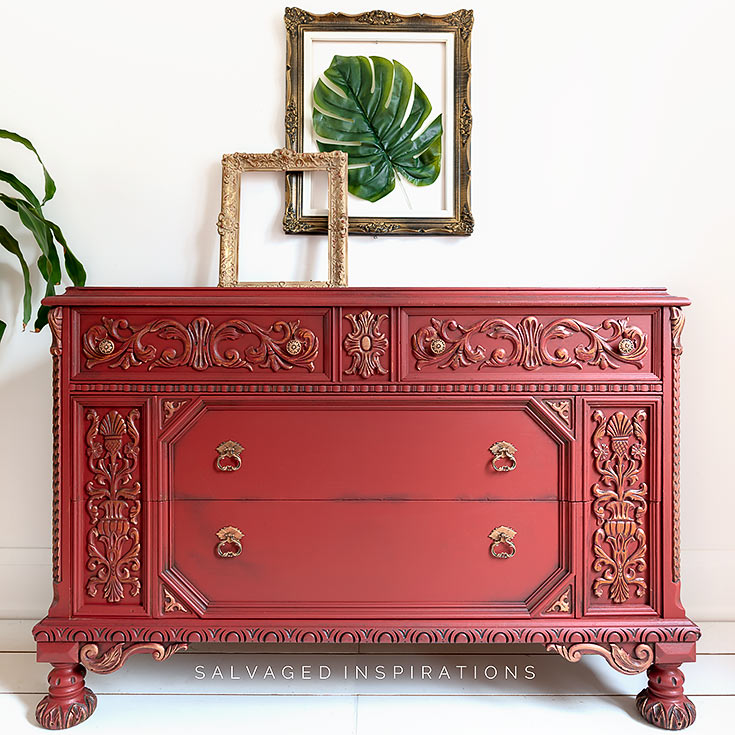
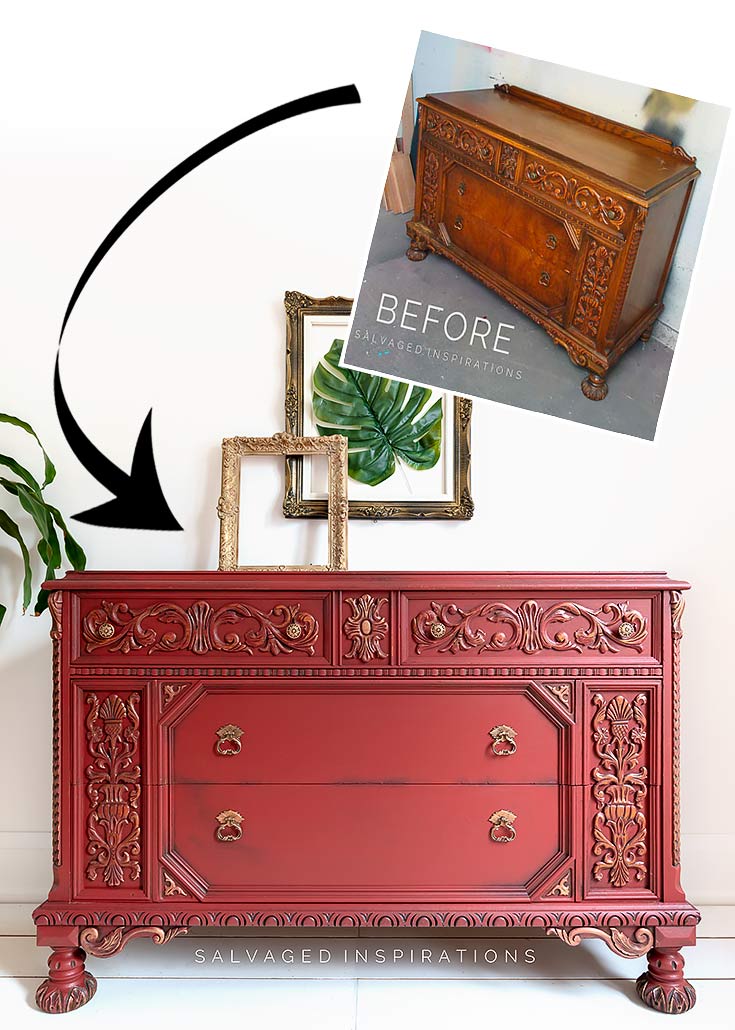
I found this ornate dresser on Facebook Market place and thought it was the perfect piece to kick off the year. Isn’t she gorgeous?

If you follow me on Facebook, you may have heard some of the color suggestions yesterday. You all know me SO WELL. I was considering Caviar Black, a green or blue but decided on this custom red. What do you think?
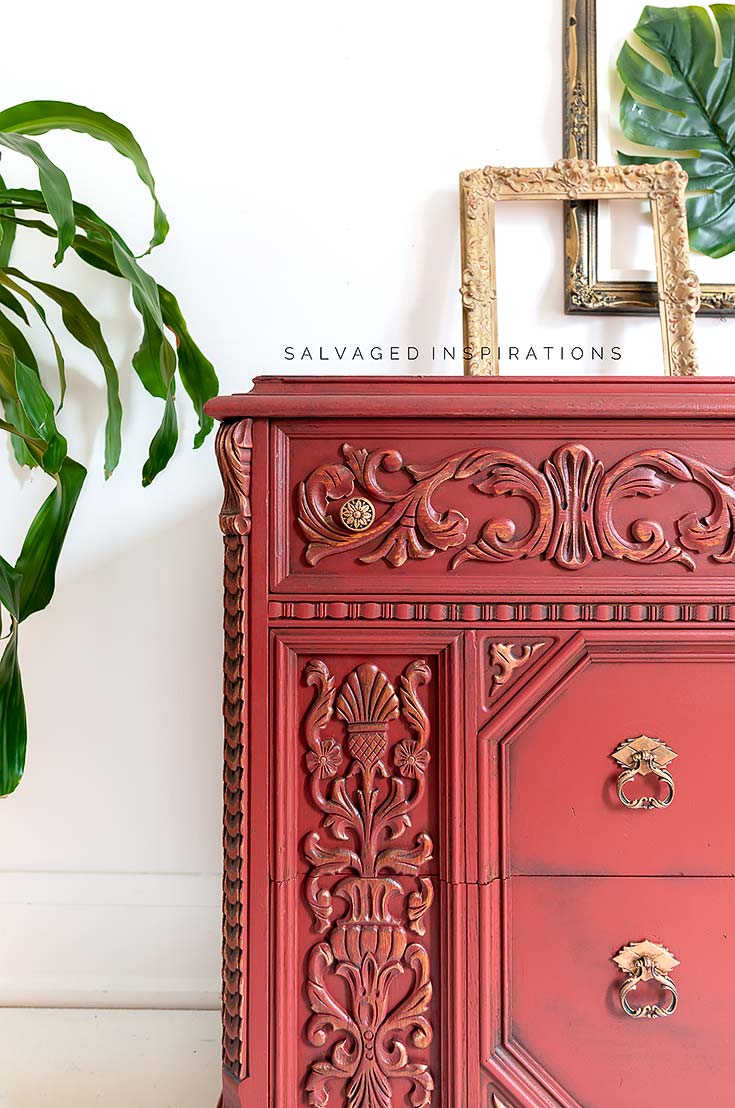
Don’t you love all these scrolly details!
THIS POST IS SPONSORED/CONTAINS AFFILIATE LINKS TO PRODUCTS I USE. YOU CAN SEE MY FULL DISCLOSURE HERE.
SOURCE LIST::
-
- Ornate Vintage Dresser – SALVAGED
- White Lightning Cleaner
- DB Mudd Filler
- Paint Brushes
- Sandpaper | Shop Towels
- Water Misting Spray Bottle
- BOSS Primer
- Barn Red 25%
- Rustic Red 75%
- Copper Gilding Wax
- Black Glaze
- Satin Clear Coat
WHAT IS WET DISTRESSING?
When I first started painting furniture and heard the term “wet distress” I thought it was some fancy type of painting technique. Really it couldn’t be more simple. And if you hate sanding, this is the perfect way to get an aged worn look without the mess. Wet distressing simply means wiping back your paint to reveal what’s underneath. This can be done using a damp or slightly wet lint-free cloth, an old sock, baby wipes, a sponge, paper towel, or a shop towel… which is always my first choice.
BONUS TIP ~ I like to wet distress WHILE my paint is still WET. You don’t often hear this but it’s MY favorite way to get a “blended” and seamless distressed look. You can also do it the traditional way and wait until your paint is dry but not cured. Usually, 1-2 hours after you have painted.
BENEFITS OF WET DISTRESSING
- No sanding required
- No dusty cleanup required
- More control *(light pressure = light distressing more pressure = more distressing)
- You can layer paint colors and wet distress to reveal the under color(s)
- Wipe back while the paint is still wet to save a step
- A gorgeous way to showcase details, trim, appliques, insets, etc.
Here’s the full video tutorial. If you have any trouble viewing it in your browser, feel free to click on my Youtube Channel here… and don’t forget to subscribe! 🙂
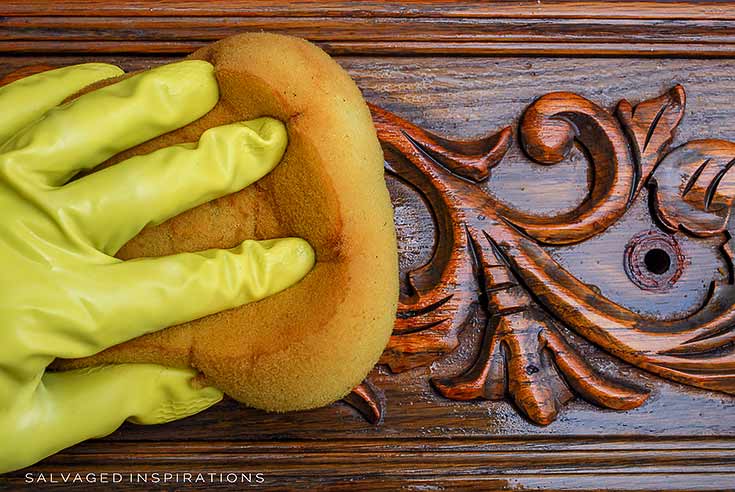
STEP #1:: Clean & Prep
I started by giving this piece a super good cleaning with this cleaner mixed with water.
This dresser was solid but the backplate needed repair along with some deep scratches on the top. I filled the scratches with DB Mudd (brown) and after sanding them smooth I used BOSS Primer on the top only. This was to hide any filler marks and ensure no bleedthrough to the parts I sanded.

STEP #2:: Paint
I had leftover paint hanging around from previous projects. To use it all up, I mixed a CUSTOM RED using 25% Barn Red and 75% Rustic Red.
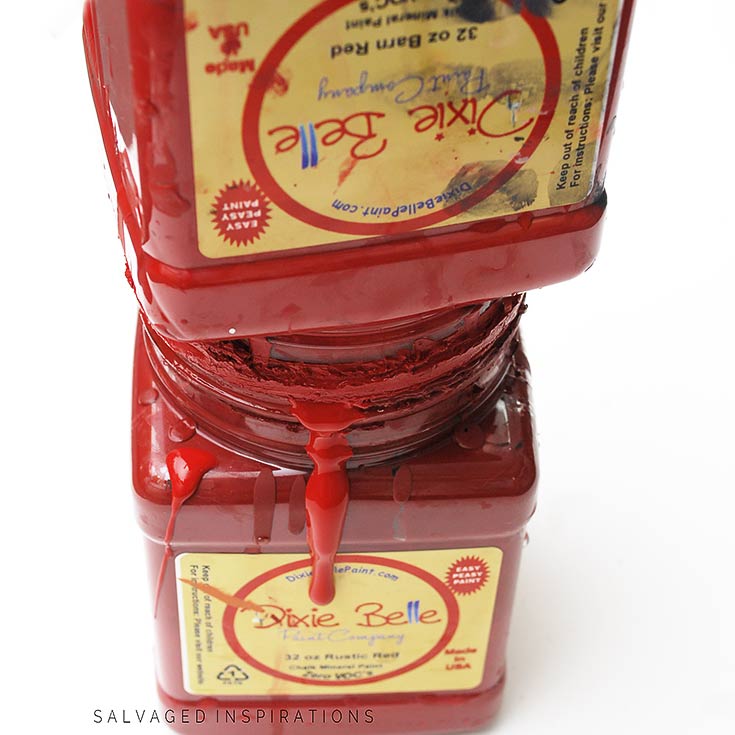
The two colors mixed well and created this beautiful vibrant vintage red.

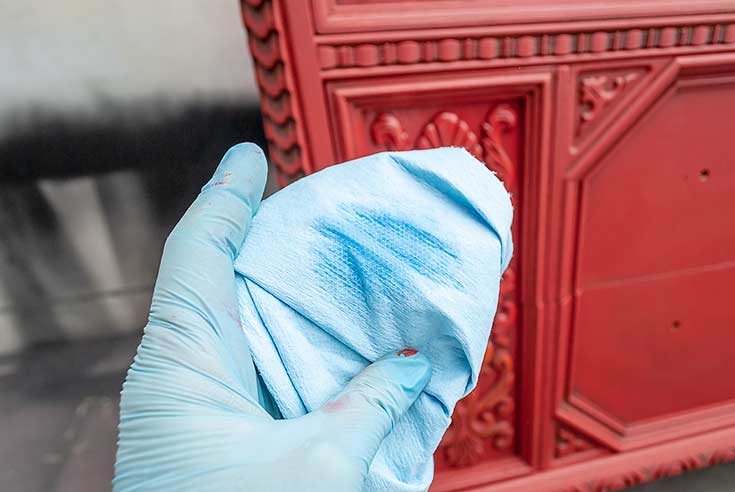
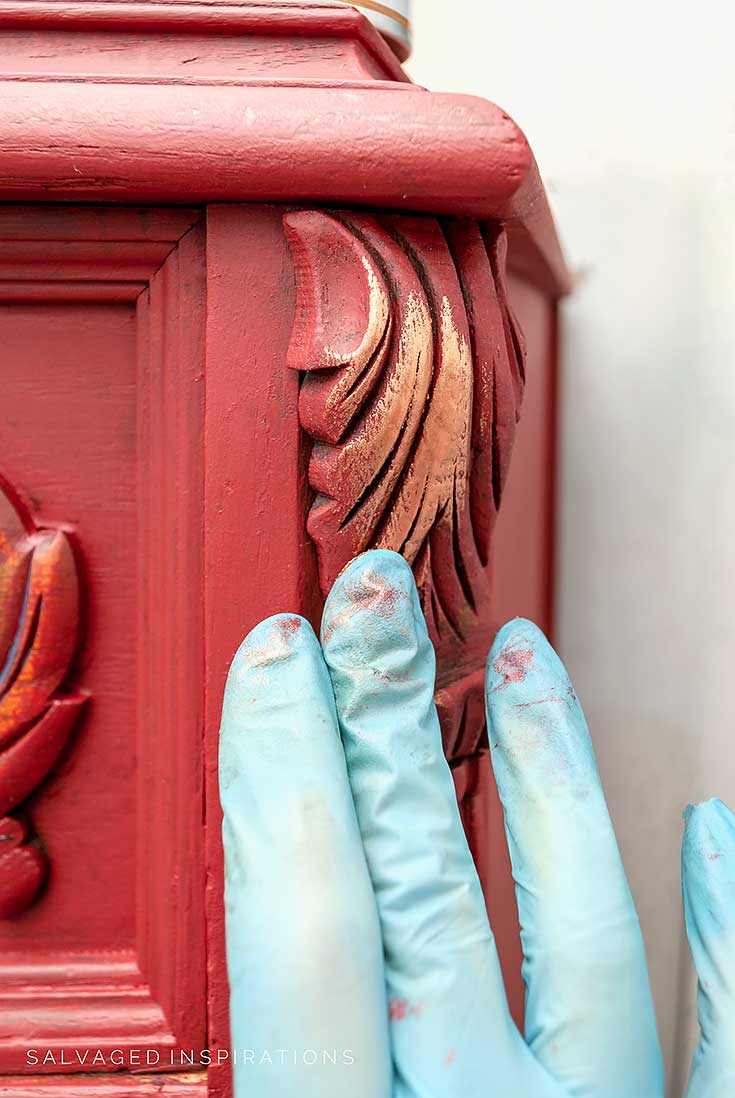
STEP #3:: Distress
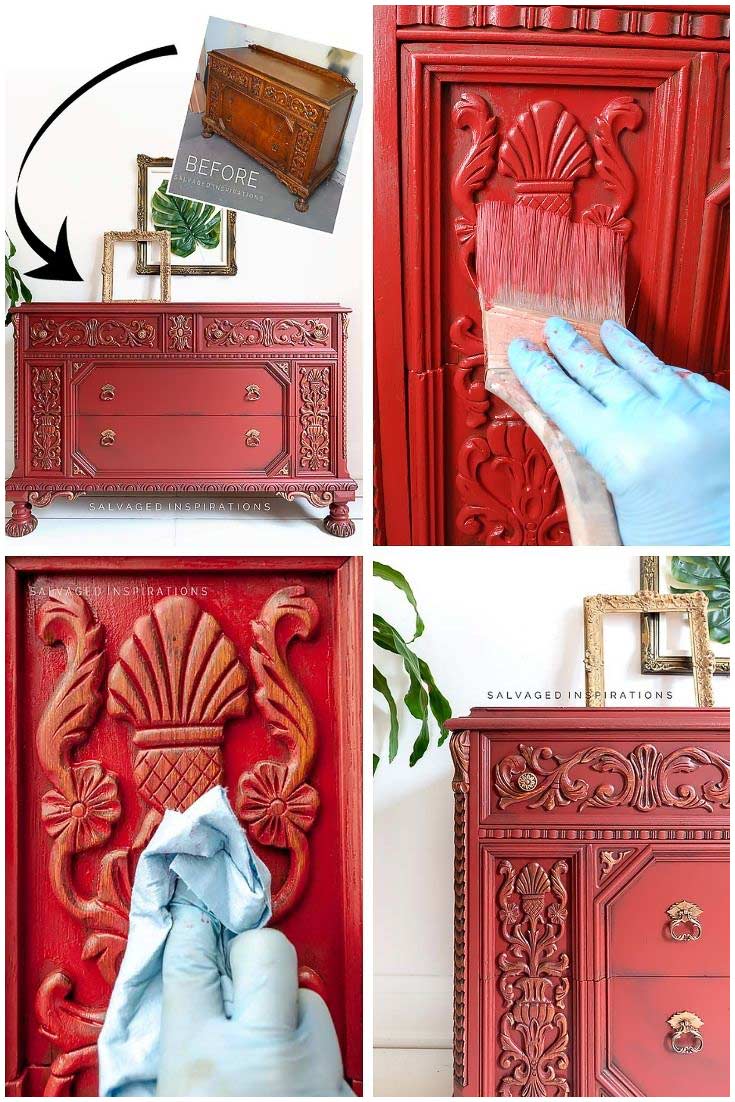
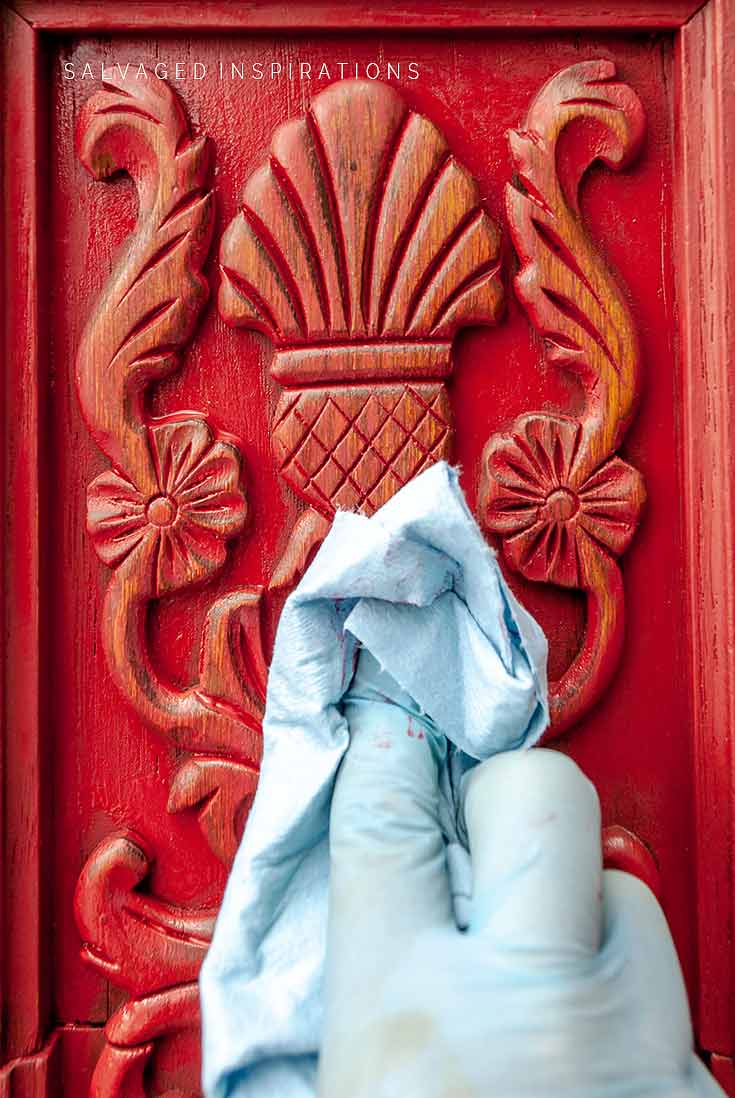
This dresser took two coats. After painting EACH coat (while the paint was still WET), I used a damp shop towel and wiped back the paint on all the details. I used this water mister to spray some water on my shop towel rather than dipping it in water or putting it under a tap because I want it damp, not too wet.
In the pic below, you can see how this wet distressing gives a softer blended look while still aging the piece.
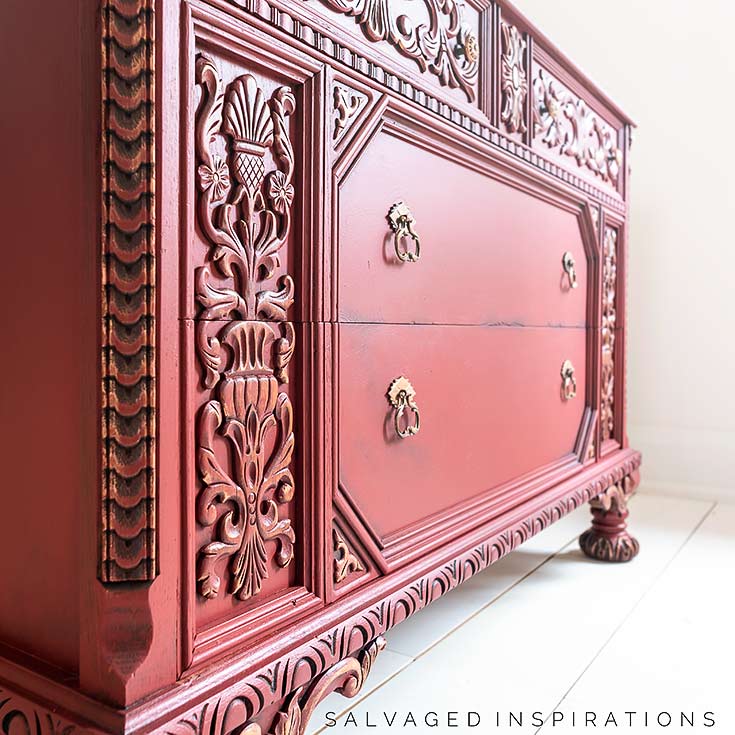
STEP #4:: Enhance Details
Don’t forget, once you’ve wet distressed, you can enhance the distressed details with glaze, gilding wax, dry brushing, dark or white wax… whatever looks good to you! For the bottom and side scrolls, I used this NEW Gilding Wax in Copper. I also applied it to the vintage hardware with amazing results!
I also used this black glaze. It was applied to some of the details to give the piece some more depth and dark aging. I focused on the sides, the feet, and along the edges of the drawers.
STEP #5:: Top Coat
Everything was sealed and protected by spraying three coats of DB’s Satin Clear Coat.
I really love this girl’s new look. I can’t wait to hear what you think!
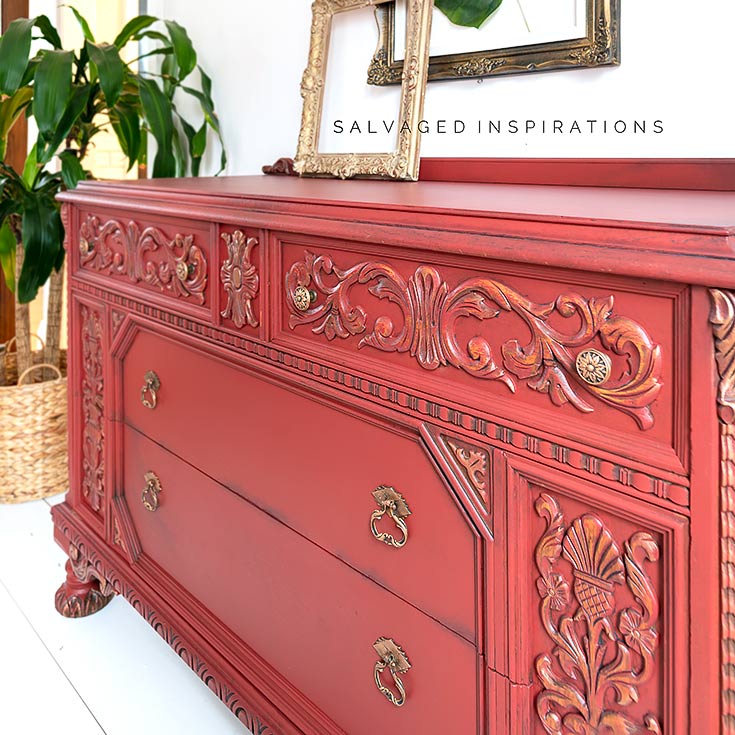
Here’s another look at the before and after…
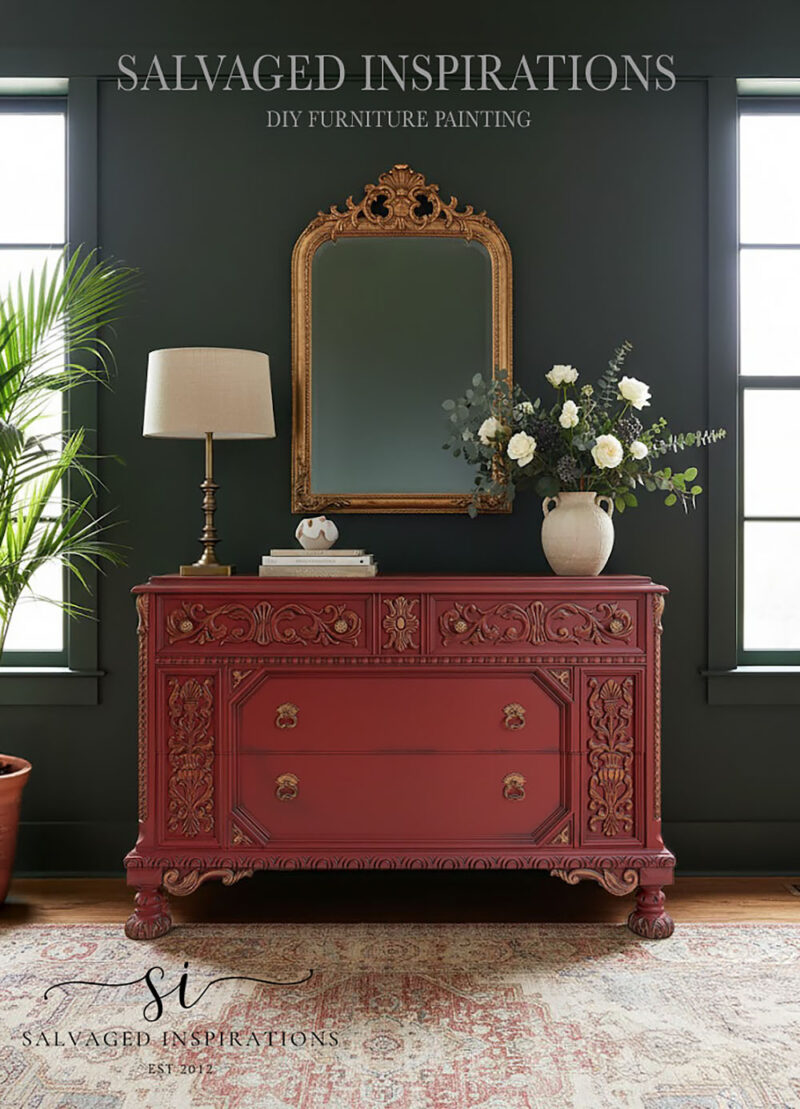
And just for fun, I prompted AI to generate a room styling with this gorgeous dresser. Here’s what it generated. I like the moody green walls in contrast with the red! I’m always amused by what it comes up with…
LET ME KNOW WHAT YOU THINK OF THIS WET DISTRESSING TECHNIQUE OR FEEL FREE TO ASK ANY QUESTIONS YOU MAY HAVE. I ALWAYS LOVE HEARING FROM YOU… YOU MAKE MY DAY! 🙂
Next week I’ll be back with my Trash To Treasure Crew with a bunch of ‘trashy’ makeovers. 😉
Happy furniture painting my friends!
Denise x
RELATED POSTS::
7 Furniture Distressing Techniques
Highlighting Furniture Details
No Mess Wet Distress!
DIY Weathered Wood
How To Create A BlackWash Finish
PIN AND SHARE!

At the beginning you discussed what colour you might use and I actually groaned when you decided on red. Well, I eat my groans, the result was wonderful. Only moan is I would have liked to see you apply the final copper? highlights. It’s now nearing 2025 and I see this was done in 2021.
I’m go happy you like the red Audrey. It sold REALLY quickly!
It’s gorgeous, Denise! I love wet distressing. Though I don’t do it often enough. Too much multi-tasking. Then I lose my window.:) Have you done the Vaseline technique, too? Not my favorite, but it works.
Thanks Kellee and ya, I don’t know why I don’t use this technique more as well!?! Yes, i have tried the vaseline technique. Just as you say, it works but it’s not my favorite either.
GORGEOUS!
Thanks Tracey! XOXO
This piece you have done is extraordinarily brilliant! Thank you for showing the wet distressed technique, its exactly what I’m going to do with my bedroom door. Thank you for the inspo x
WOW!!!! What a beautiful piece of furniture!!! Lucky you for finding it. I love it!!! An excellent and perfect choice of color. I love red and it’s so elegant. First time seeing your blog, came across it through “The Cottage Marketplace “. I will be following you from here on. If you don’t mind my asking, and decline if you want, but how long have you been refinishing furniture? Did you learn how to from someone or from books? Just curious and something I would like to know more about. Your tutorials will teach me a lot. Lol. I plan to sit down and watch them all. Thank you so much for your beautiful inspirations and teaching tutorials.
Hi Cathy and a big warm WELCOME! So happy you found the #siblog! I’ve been refinishing and painting furniture “professionally” for the last 9 years but I’ve always picked up thrift finds and restyled them for family, friends, and my own homes. I’m self-taught and still learning. 🙂
so beautiful!!!!! i would like to send you a mail but i cant find it. thanks!
Thanks you! You can contact me via Contacts. 🙂
Absolutely stunning makeover, Denise, in my favorite color!
Yaaay! Thanks, my friend! Every time I paint in red I think of you now..lol 😉
WOW!! Absolutely stunning!! Love the red you got by mixing the two colors and the guiding wax was the icing on the cake!! XOXO
Thanks, Christy! And I used up some old paint…win, win! 😉
Well, that took forever to scroll down to write my comment – obviously, this is a well-loved project you’ve done and i think this is my all time favorite! the technique is actually so simple, yet elegant! i love the extra bit of gold you added to just the right places – WELL DONE Denise!
Aw, thanks so much, Gwen! I’m happy you like it… and that it took you forever to scroll down to leave a comment!😉🤣 Happy New Year to you my friend! XOXO
OH MY!!! GASP!!! That is stunning!!! I love how you chose to mix those two colors, that is beautiful!!! Plus with the wet distress letting the wood show, amazing!! I agree if I could find pieces like that it would be heaven!!!
Thanks so much, Suzanne! 🤗 And ya, I don’t come across pieces this ‘fancy’ often so it’s always a HUGE treat and privilege to work on them!
What a beautiful piece!! Love it!
Thanks so much Alanna! 🙂
You do such beautiful work! Great information, thank you!
Thank you Debra! 🙂
YAY!!! Red is my go-to color!! Absolutely gorgeous piece!!
Yaaaay, red always makes a statement! 🙂 Thanks so much Mary Ann! x
Absolutely love your work! So inspiring! and such beautiful photos!
Aw, thanks Julia! Much appreciated! x
I can’t close my mouth… what an amazing change!! “Un bellezón”, I’ve said in Spanish. It was a beautiful chest, but now it’s stunning! And the copper highlights really enhace the carvings.
I patricularly love two things about your videos: on one hand, you always seem to find the easiest way to obtain the best results and, on the other, we can see you with paint stains on your clothes, and not with a pristine outfit. Unique!!!
Thanks for sharing and best whishes for 2021!
Thanks for this Ana and thanks for the chuckle. I’m a mess when I paint..lol. I’m not sure how other furniture painters manager to look so good. 😉 Best wished in 2021 to you as well! x
This is absolutely gorgeous! Amazing job!😊
Thanks you Kaila! Happy New Year to you! 🙂
I love bold and bright red pieces. What a fun and lively transformation.
Thank you Cortlyn!!! 🙂 Happy New Year to you and thanks for all you do! x
Everything you do is absolutely spectacular! You make me want to paint more! Love this one!
Aw, thank Erica! Happy painting! xo
CRAZY GOOD! What a beautiful piece of furniture and you made it even more spectacular. I need this in my home, I LOVE it!
Thank YOU!!…it is a gorgeous piece, isn’t it? I wish I could find more pieces like this to work on… just love them.
I just love how you think outside of the box and try such creative techniques…which always yield something incredibly beautiful! Another stunning piece!
Thanks so much, Jeannie! I hope your holidays were spectacular and Happy New Year to you! XOXO
Happy new year! This piece is so beautiful! And the technique is right up my alley! Wipe off as you go, and voila! No extra steps later! 💕 (It feels a bit like cheating, haha! 🥰)
It DOES feel a little bit like cheating but how great is that?…lol. Happy New Year Patricia. I hope your holidays were magnificent. XOXO
What a great technique! That chest turned out beautifully. You have such a good eye for finding and transforming old ugly pieces. I’m wanting to try this soon, Thanks and Happy New Year!!
Thanks so much, Desire and Happy New Year to you! 🙂
Is this beautiful or is it BEAUTIFUL !!! Thanks for sharing
Thank you Harjith!!! xo
VeryVery nice !!
Your tutorials are soooo helpful Thanks for sharing !!
I’m not a huge fan of red… usually, but this is wonderful.
p
Thanks so much and it makes me SO happy you’re finding the tutorials helpful! 🙂
Happy New Year, Denise. I just love this piece. You did a fantastic. job! Usually I only marvel at the things you bring back to life, but this time I am actually going to try doing this on an ornate frame. I will let you know how my project turns out. Thank you
Happy New Year Marian!!! Have fun with your ornate frame (sounds gorgeous!) and I’d LOVE to hear how it turns out for you! xo
You really scored a winner on this one – perfect complements to each other. The ornate style plus the detail distressing and highlighting are beautiful. Love, love the red. Thank you, too, for publishing something new for your first post of the new year. Not a lot of that going in the blog world and as a reader and fan, I really appreciate the effort this took. You are a true professional.
Aw, thanks Carol!!! XOXO I really did score big with this one. I wish I could find more pieces like this to work on. 🙂
Happy New Year Denise! Nice to have you back and this piece is SO elegant. Well done!! ~ Nicki
Thanks so much and Happy New Year to you Nicki! XOXO
Perfect colour for this piece! And wet distressing is my favourite way to distress also. Nice job Denise 🙂
Awww, thanks, my friend! Hugs XOXO
Beautiful! I love the red, and the wet distress finish. What a pretty piece! Happy New Year, Denise!
Thanks Marcia and Happy New Year to you!!! I hope your holidays were wonderful! XOXO
Simply beautiful… and that gold does it for me every time. xo 🙂 Happy New Year, my friend!
Thank you and Happy New Year Do!!! Wishing you ALL the best in 2021. XOXO
I really like what you did to that old dresser, It looks so easy,and fun at the same time. I have this really old sectaries desk I’ve been carrying around with me for years, waiting to find some way I’d like to refinish it.Well I think I just found it.Thanks for the inspiration. Love your site
Thanks so much, David! And I’m glad it’s sparked some ideas for your old secretary desk. Those are such beautiful pieces!
Gorgeous!!!
Thank you Jane! XOXO
Happy new year Denise! Awesome transformation of course. Everything you do seems so effortlessly.
Looking forward to what project she you have in store for 2021😊
Happy New Year Rosie!! Thanks so much and I’m looking forward to another year of inspiring makeovers. Each one seems to teach me something new. 🙂
Wow!! That is stunning! I’m not even a fan of red but this piece changes my mind.
Thanks Julie! And you remind me of my sister… she not a ‘red’ fan either. She says it scares her..lol.
Gorgeous!! I LOVE red with the black contrast. As always your step by step tutorials are greatly appreciated and helpful. They keep me inspired to do more projects. The different techniques for applications is good to know. Thanks! Keep them coming!!!
Thanks so much Gail! xo
Wow! Absolutely beautiful.
Thank you June! 🙂
Hi Denise. Happy New year. Wow..this dresser turned out beautifully. What a classy, upscale piece. The vintage red paired with the wet distressing and copper highlights show off all the ornate details. Absolutely stunning!
Happy New Year my friend!!! I hope your holidays were fun and relaxing. And thank you! I don’t often come across pieces like this so it was a real honor and privledge to work on it!