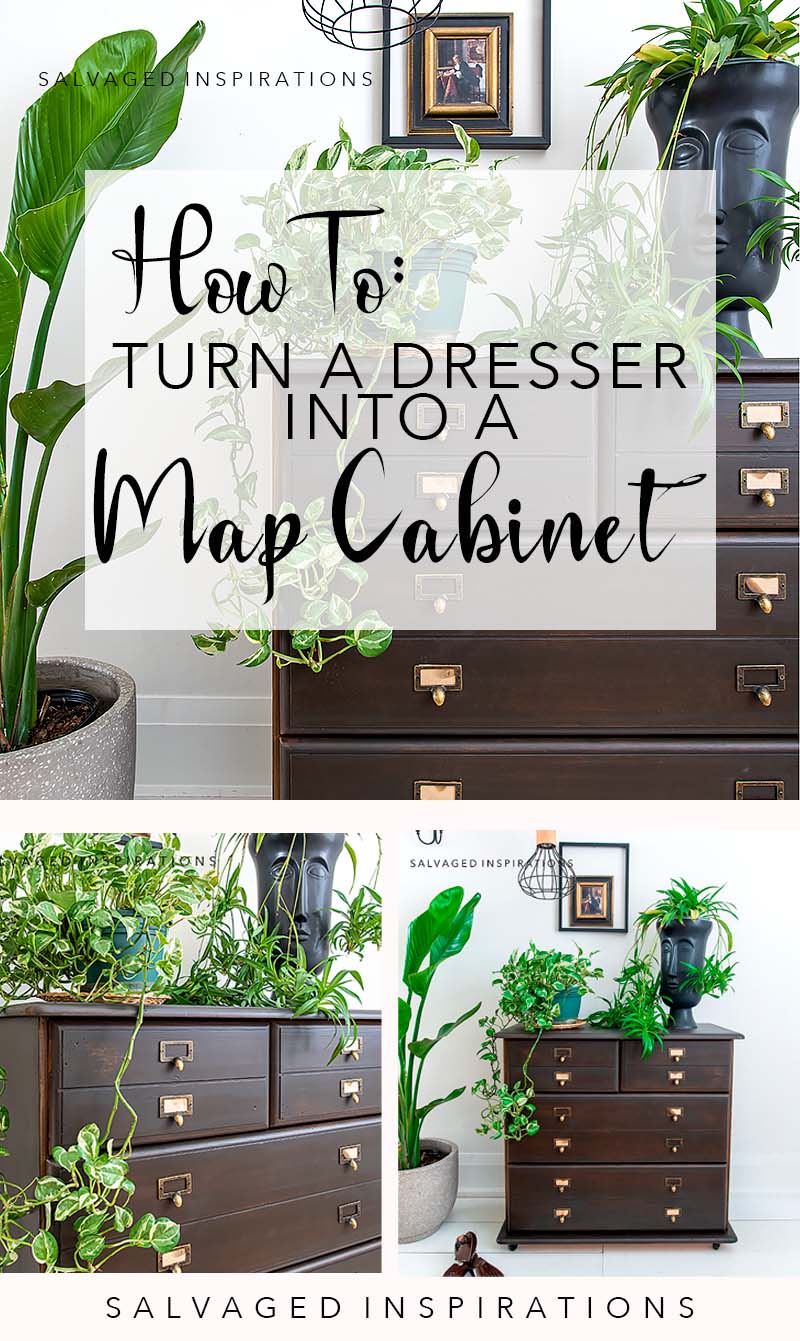
HOW TO TURN A DRESSER INTO AN ANTIQUE MAP CABINET | YOUTUBE TUTORIAL
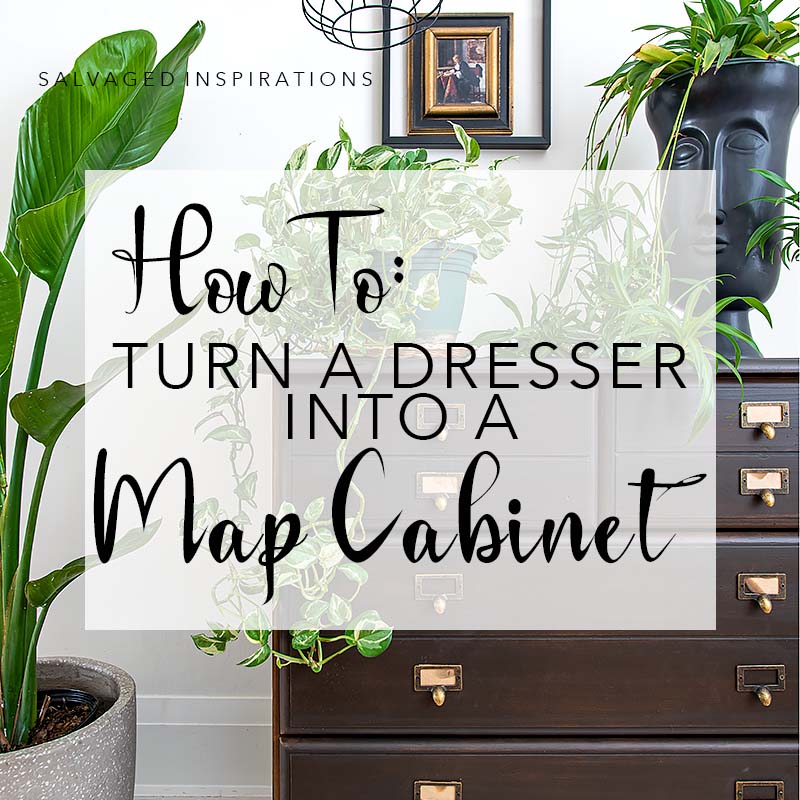
Hi, beautiful #sifamily! Today I’m sharing how I turned this $30, Ikea Dresser, into this Gorgeous Antique Map Cabinet!
I’m also sharing…
How To Achieve an Oil Based look with Water Based products
How To Create Wormholes
How To Use “Lazy Sanding” to your advantage
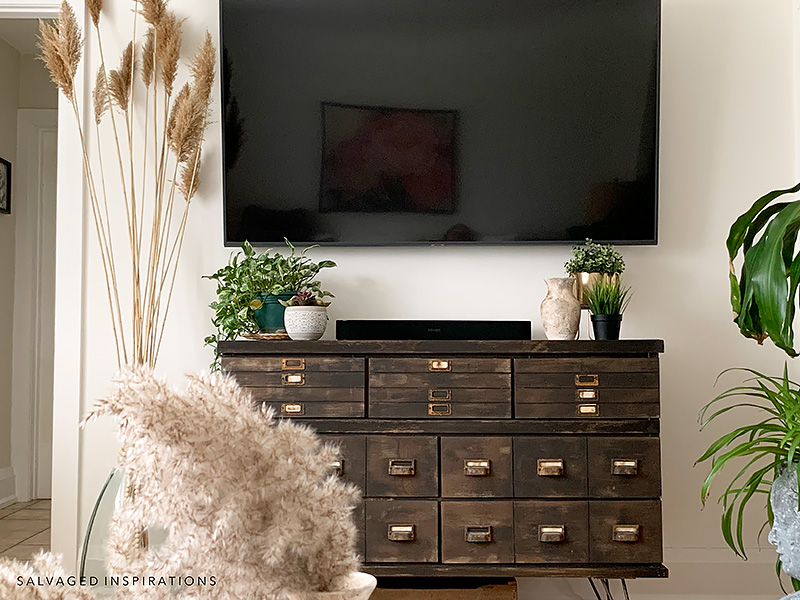
This is the second apothecary-map-type cart I’ve restyled. I loved the first one SO MUCH I couldn’t sell it. I’ll share where it is in my home at the end of today’s post!
I can’t wait to hear what you think… 🤗
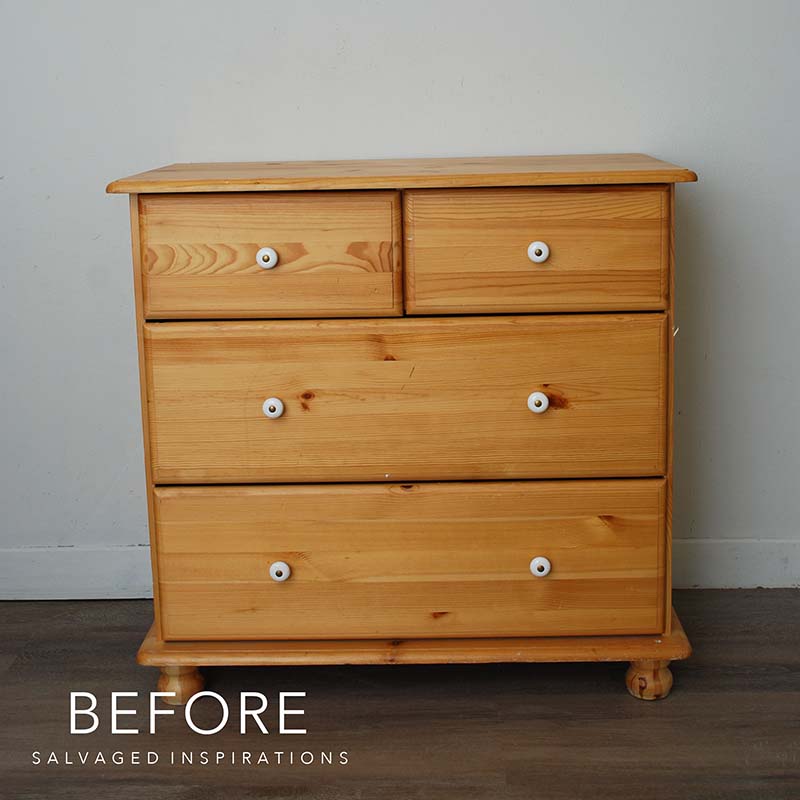
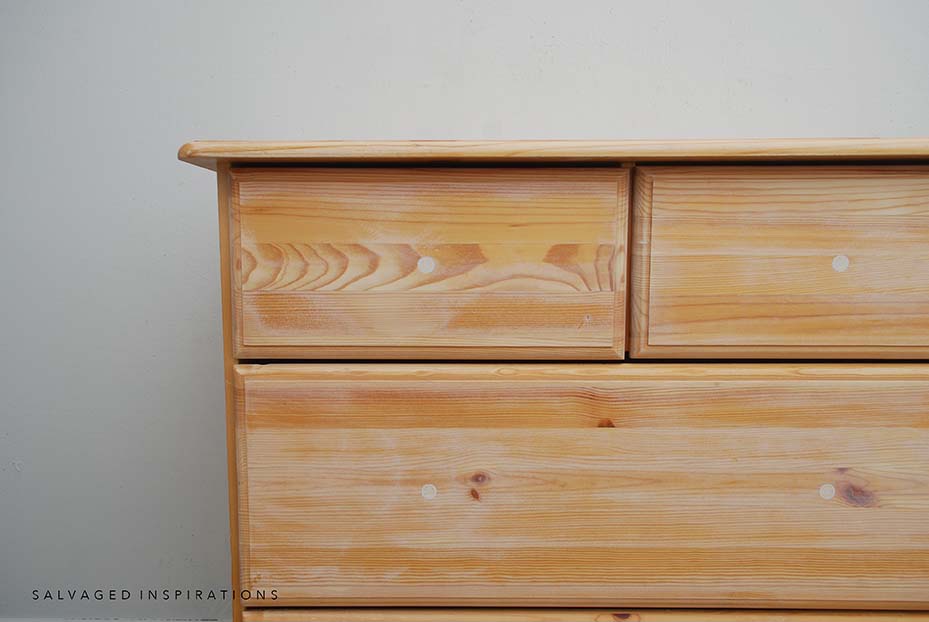
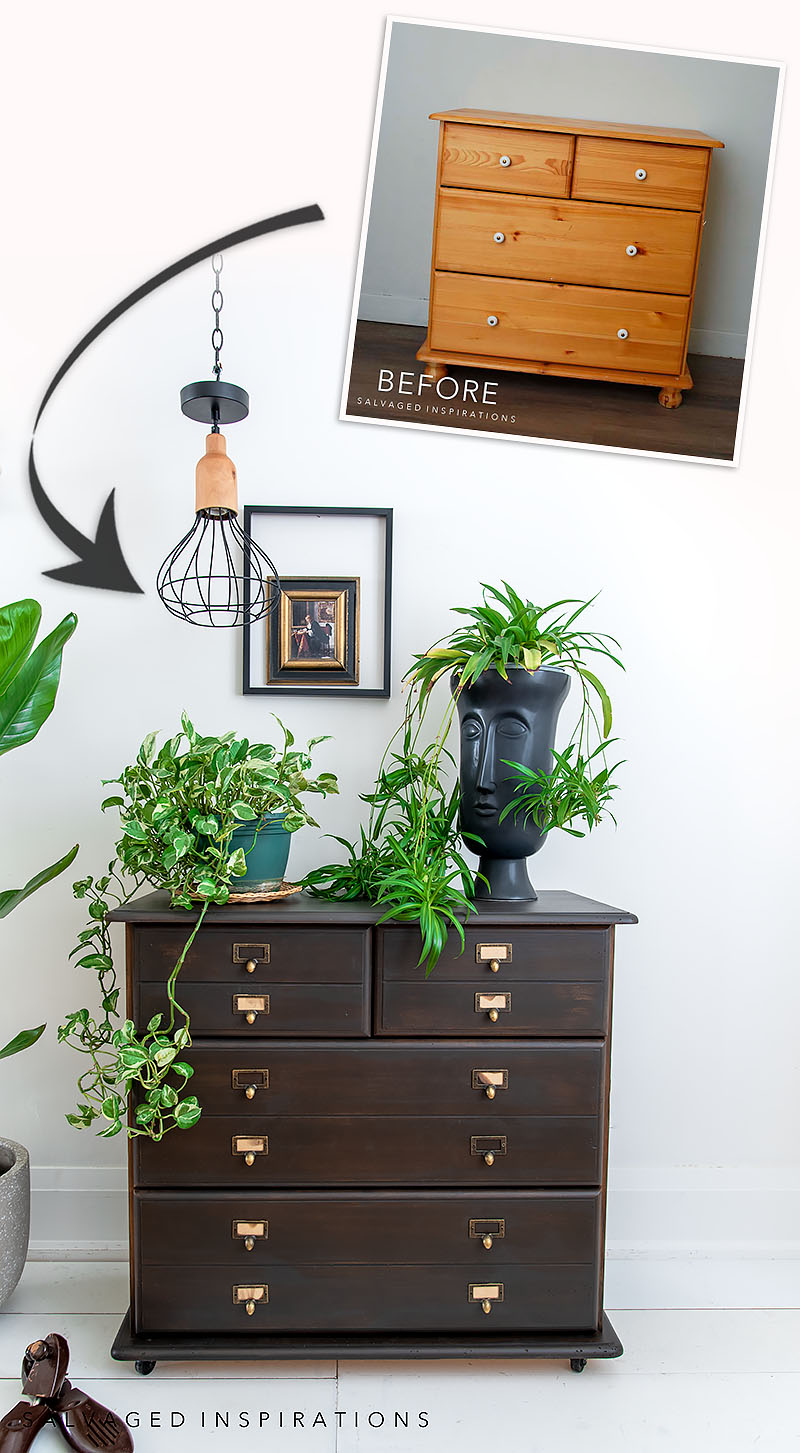
Here’s the salvaged dresser I started with. I found this at my local Restore selling for $30. It’s an older Ikea Dresser made of soft pine. It did have some dings and scratches but that’s exactly what I wanted for this old-style map cabinet look.
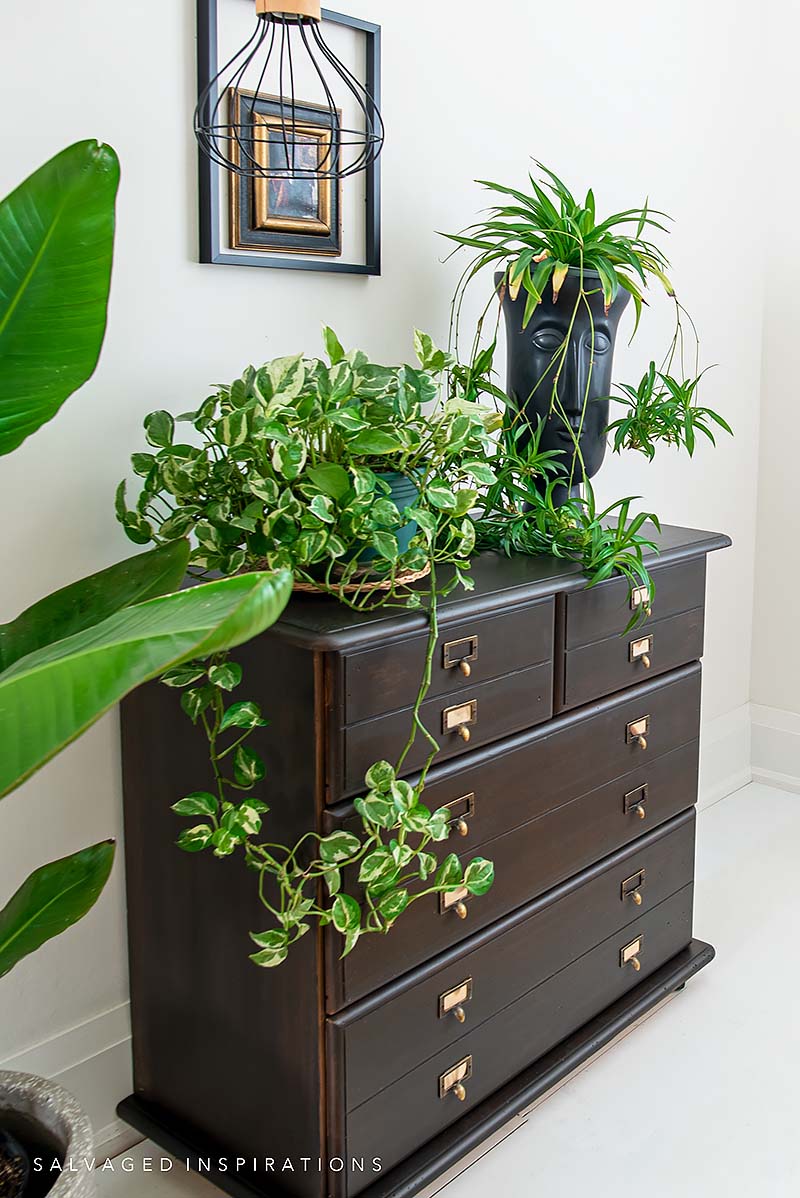
Before I get into the how-to details – here’s the NEW look. What do you think? Worth $30? This deep-rich oil-based look was all done with an easy technique and water-based products!
PIN AND SHARE!

THIS POST IS SPONSORED/CONTAINS AFFILIATE LINKS TO PRODUCTS I USE. YOU CAN SEE MY FULL DISCLOSURE HERE.
SOURCE LIST
$30 Ikea Dresser – SALVAGED
White Lightning
Scrubby Soap
Bondo
Shop Towels
Paint Brush
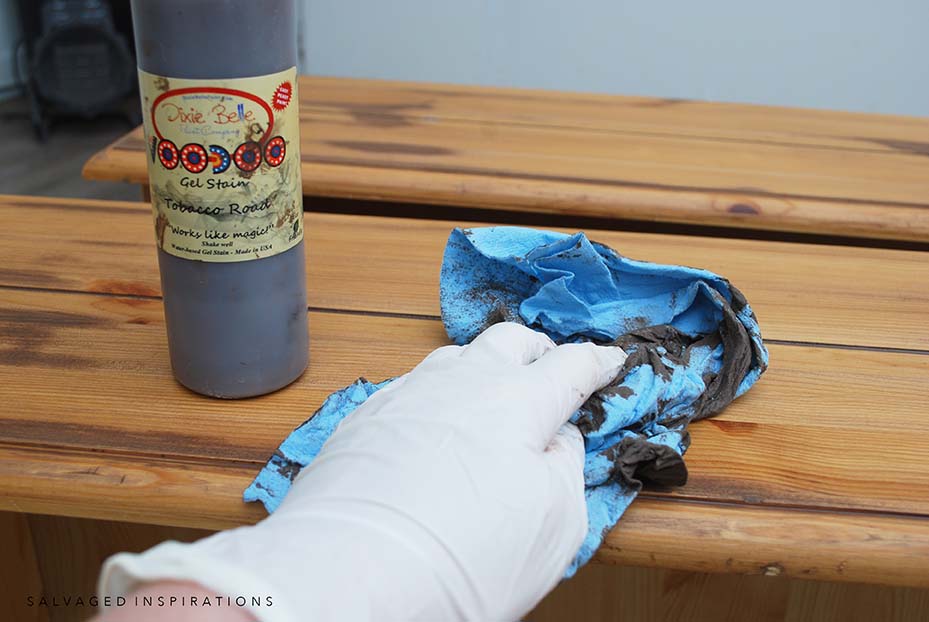
Tobacco Road Stain
Coffee Bean Chalk Mineral Paint
Satin Clear Coat
Black Castor Wheels (similar)
Catalog Hardware
TOOL LIST
Bosch Orbital Sander
Woodworking Square
Bosch Router
Furniture Clamps
Dewalt Drill
Paint Gun
HOW TO – DRESSER INTO MAP CABINET
A cartographer is a mapmaker. To hold their work, they used map cabinets which came in a variety of sizes. But one thing they all had in common was numerous long skinny drawers to hold the valuable maps. I love the look of antique map cabinets but they’re not really practical for storage.
So here’s how to recreate a similar look with storage that works for a modern home…
PREP | CLEAN
I removed the old hardware and then cleaned this dresser with this TSP substitute. I like using it in a spray bottle and wiping it down with a large sponge.

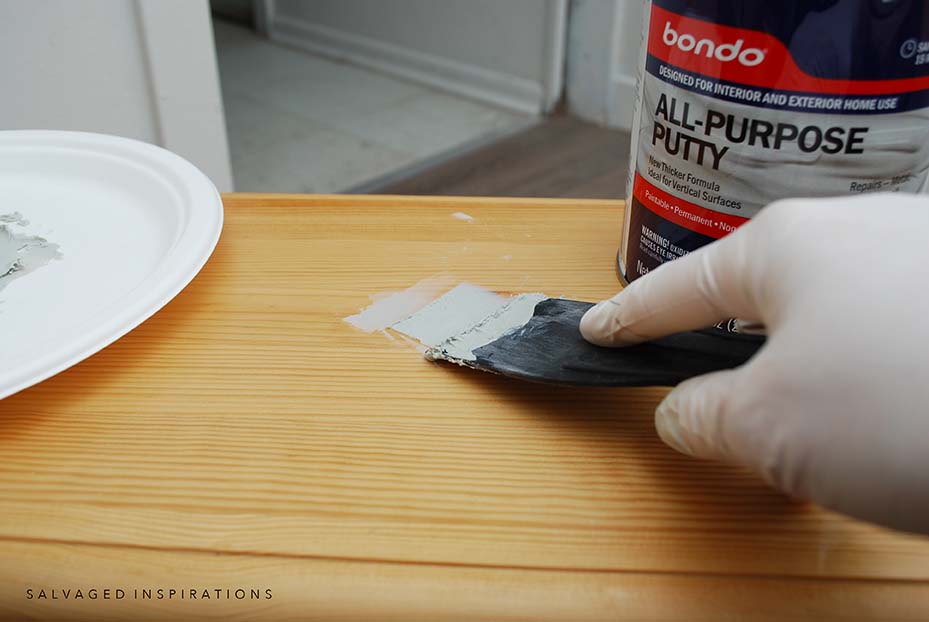
Once the piece was clean and dry, I filled the old hardware holes with Bondo. I have a full tutorial on How To Use Bondo here.
“LAZY” SAND
To get some depth and variance to my final finish, I LAZY sanded this dresser. Using my NEW orbital sander (which is AMAZING btw!) and 120 grit sandpaper, I removed part of the finish but also left some of it. This sanding technique is so easy because you don’t have to sand the finish off evenly!

Here’s how it looked after the sanding. You can see some areas are sanded down to bare wood. Other areas still have some scuffed topcoats. This is my ‘lazy sanding’ technique. You’ll see how well it works for these types of old-school makeovers!
FAUX DRAWERS
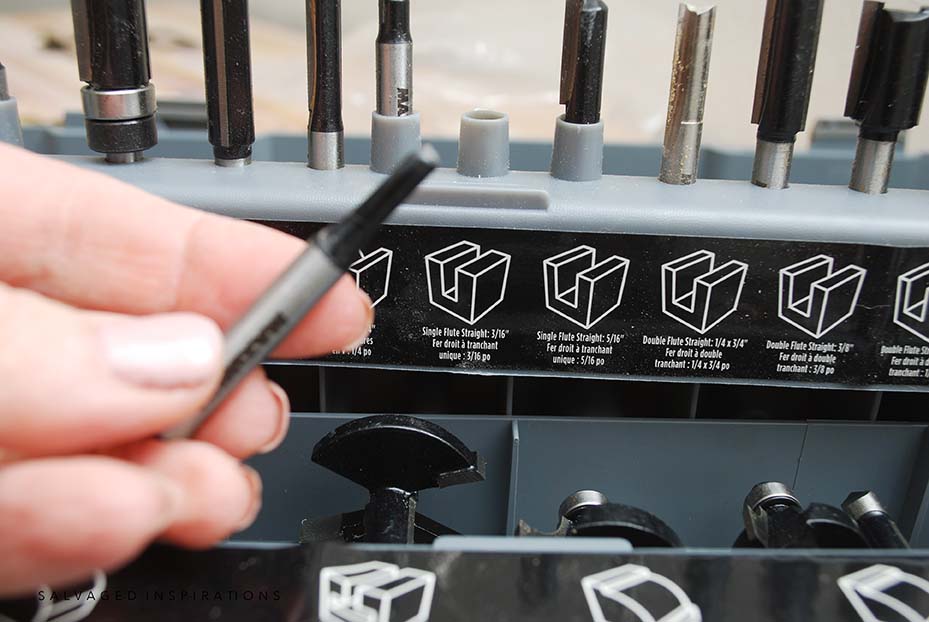
Map cabinets have plenty of long drawers. To create faux drawers, I used my Bosch Router and a 3/16 single flute straight router bit seen below.
Pro Tip ~ Test your router bit on a scrap piece of board to make sure it’s the exact profile you are looking for!
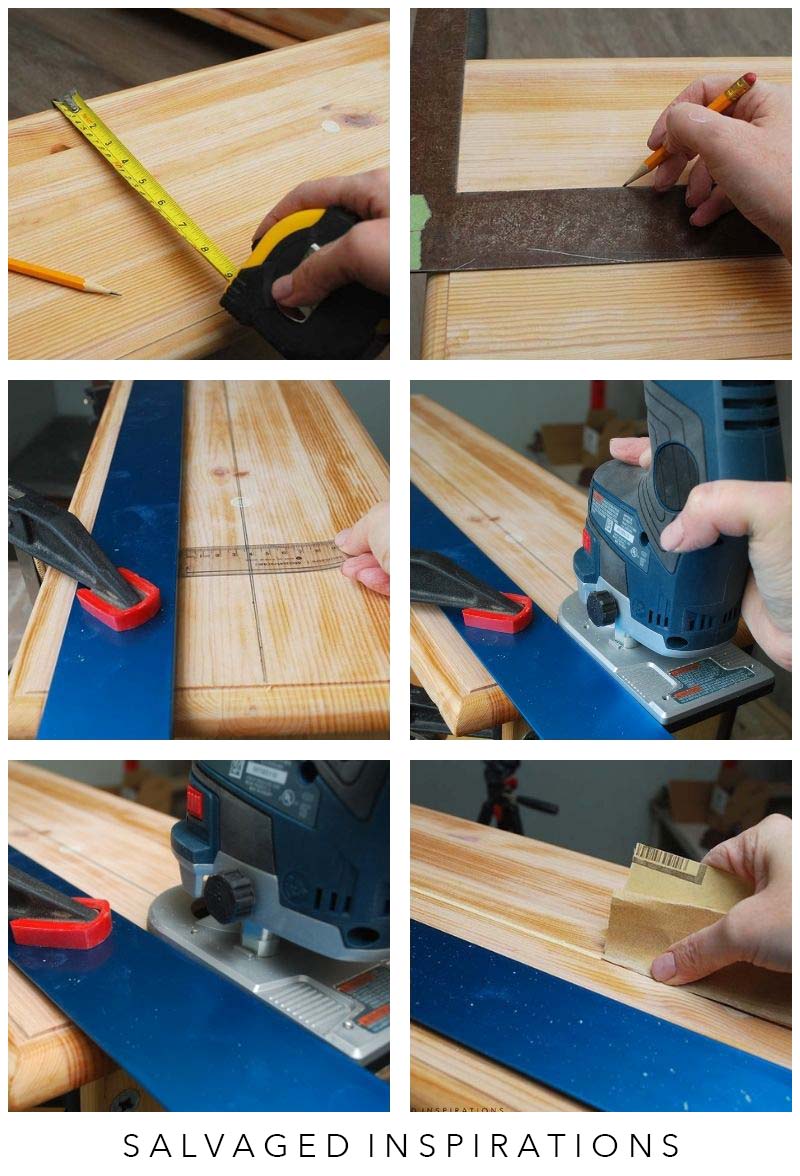
Here are the steps I used to create the faux drawers on this dresser.
- I measured the center of my drawers
- Using a straight edge square I marked the middle line
- I measured the center bit to the edge of the router plate. Using this allowance, I set up my guide with clamps
- Following the guide, I routered the faux drawer
- Then I hand sanded the sharp edges smooth
And just a side note, if you’re looking for an easy-to-use battery-charged router – this is it! This router is SO FUN to use but more importantly, fits into my hand comfortably. It doesn’t feel intimidating like the other routers I’ve tried.
WORMHOLES
This piece had some dings and scratches. To blend them in and create more character, I added faux wormholes. It’s really easy to do. I took a scrap piece of wood. Drilled in some screws so they would stick out the other side, and then banged them into the wood. In the upcoming Youtube video this Saturday, you’ll see this is a great stress reliever. 🤣
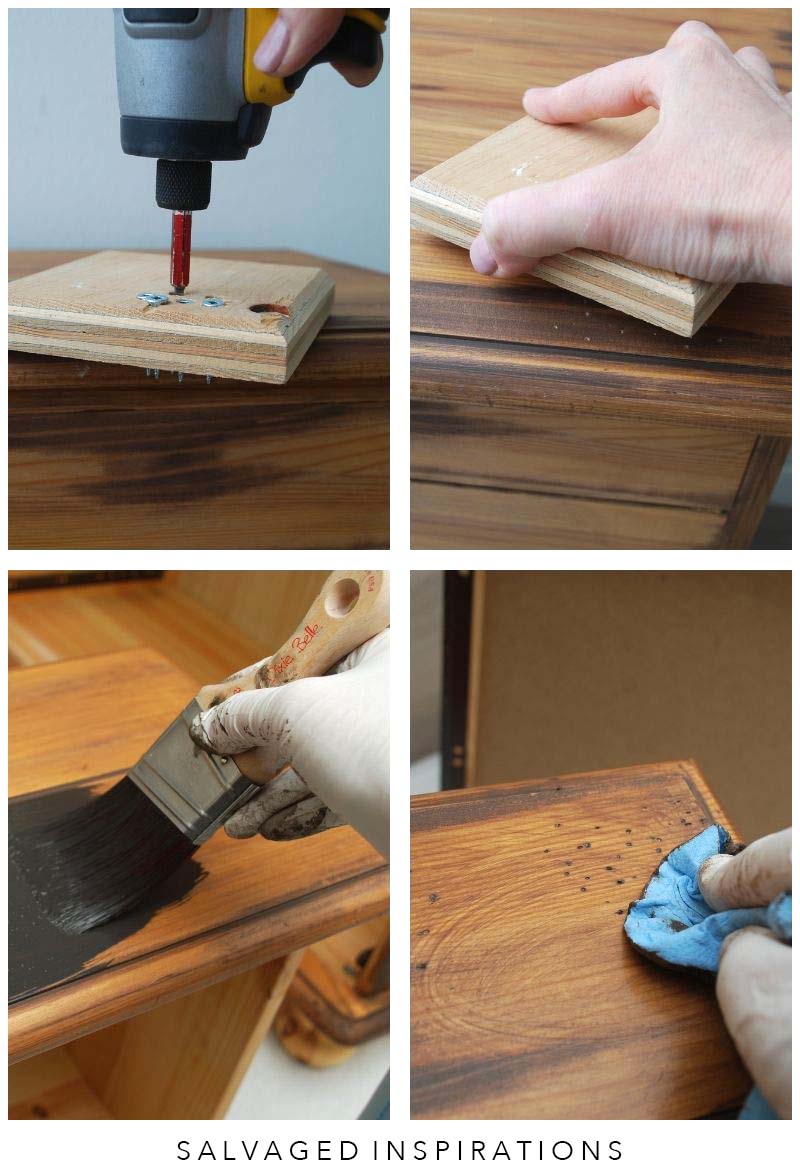
STAIN & WASH
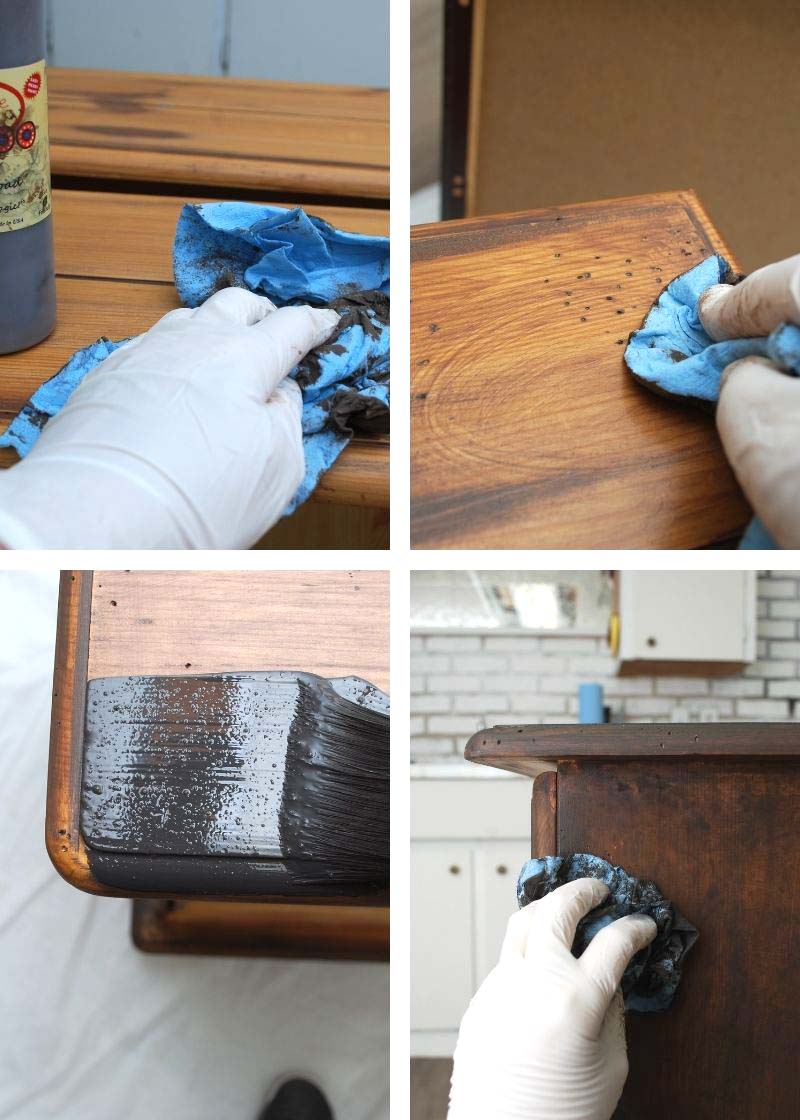
To bring out the wormholes and create a gorgeous finish, I used this water-based Voodoo Gel Stain in Tobacco Road. It’s so easy to apply and has no harsh odors. I poured some on, and then rubbed it into the wood with this lint-free shop cloth and removed the excess. Once it was dry, I added another coat to deepen the color.
Once the two coats of stain were dry, I mixed up a paint wash with a 50/50 mix of Coffee Bean Chalk Mineral Paint and water. I applied the first wash by brushing it on and then wiping off the excess with the grain. This gave the piece a nice rich color. Once dry, working in sections I applied another coat of the wash and dabbed it off with the shop cloth to give this piece an old-school look as seen below. I have a full tutorial on How To Create A Wash Finish here.
TINTED TOPCOAT
To finish achieving an oil-based stain finish using water-based products, tinting your topcoat makes a huge difference. It adds another layer of depth. I used the leftover Coffee Bean wash and added it to this Satin Clear Coat. Between 5-10% paint wash is all that is needed. I sprayed three coats of protection. Tinting your clearcoat works just as well if you brush it on!

FINISHED TOUCHES – HARDWARE
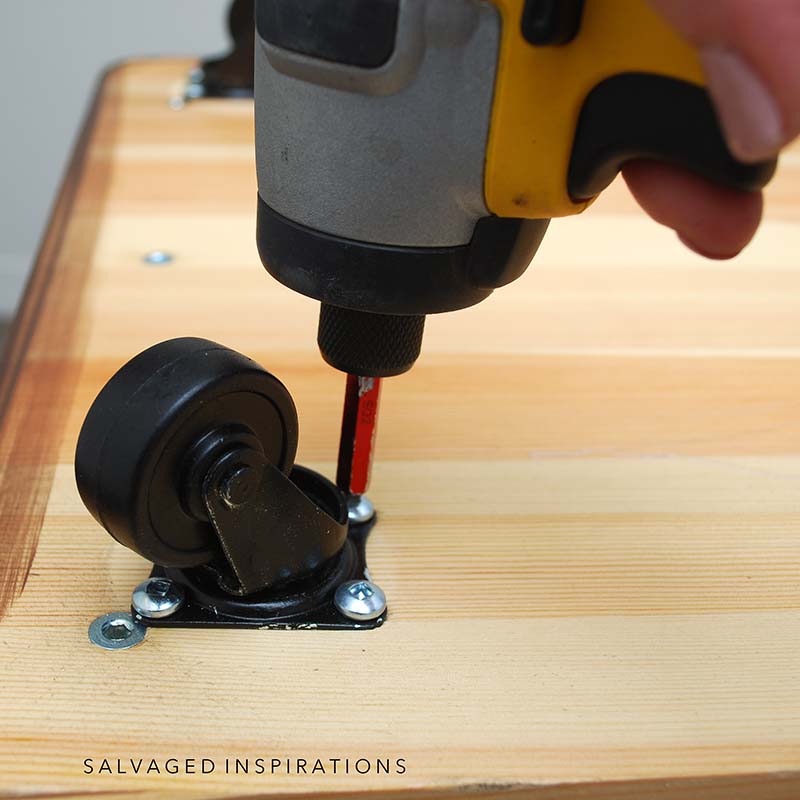
To finish the look I added caster wheels. This makes this map cabinet easy to move!
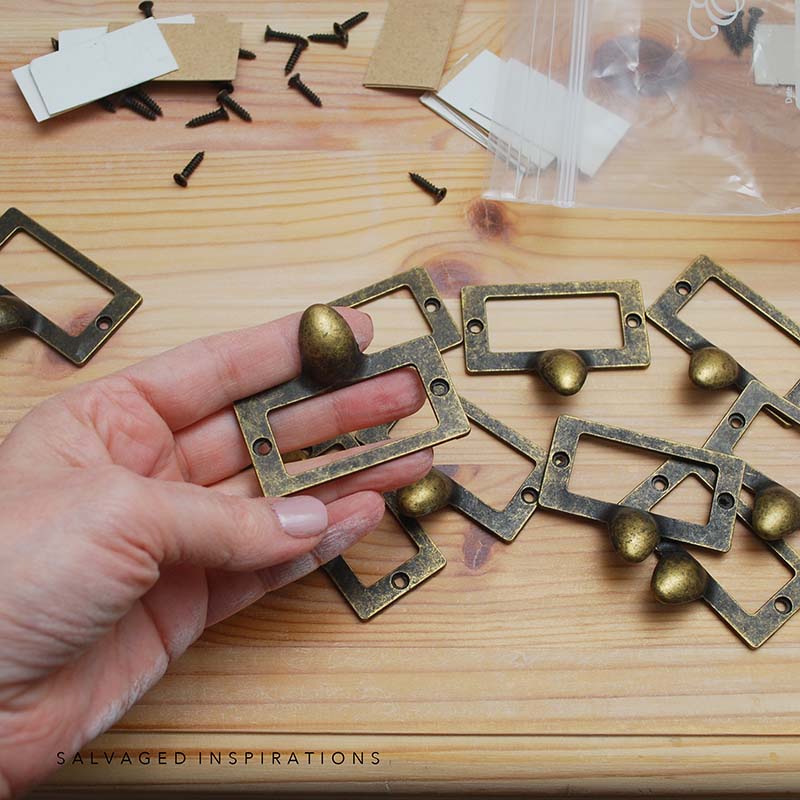
And this catalog hardware finished everything off. I only had twelve in my inventory but if I had had more, I could have made even more faux drawers on this piece!
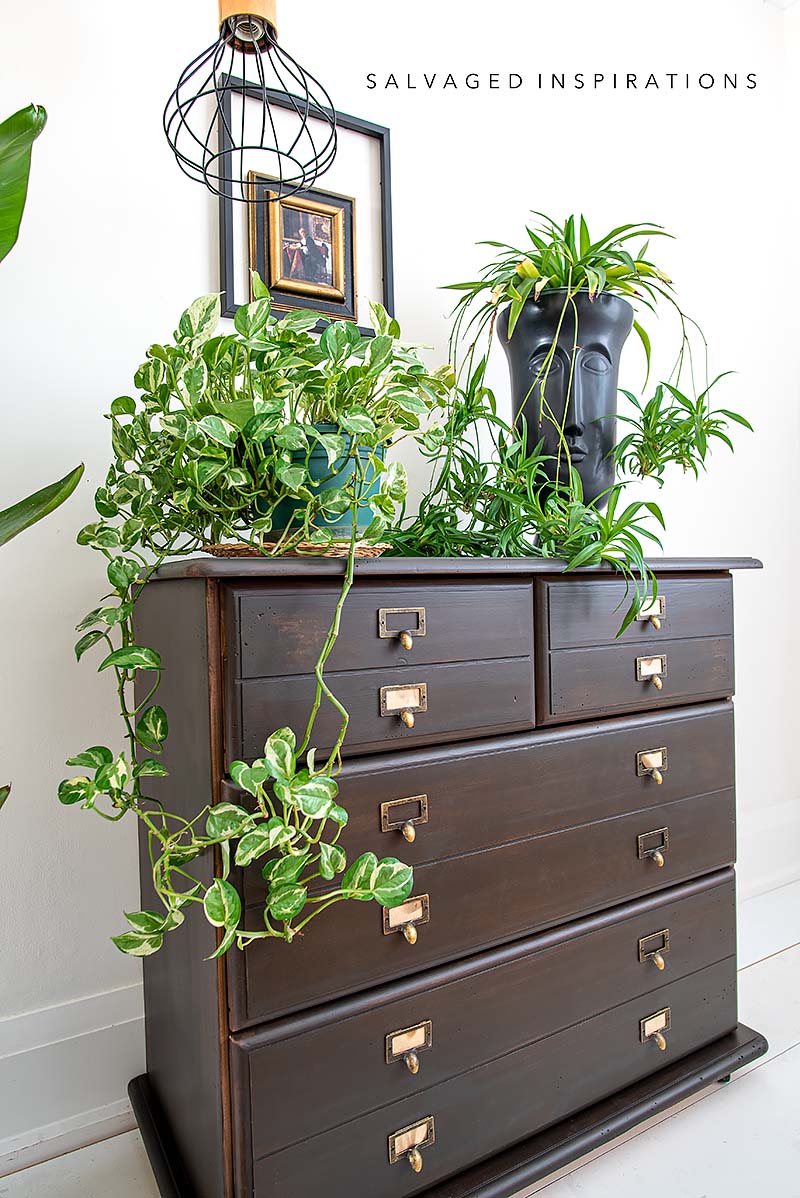
Here’s the finished look!
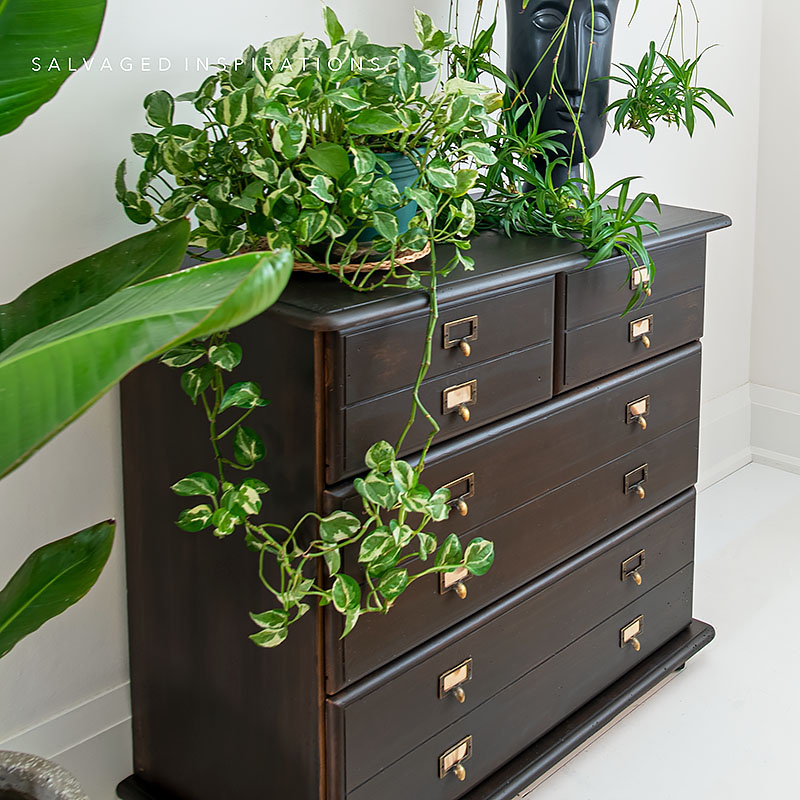
Do you see how the wormholes and variance in the finish give this piece an old rich look!

I might just have to keep this one for myself as well! 😉
YOUTUBE TUTORIAL
Here’s a step-by-step tutorial on Youtube. If you have any problems viewing below, feel free to watch it on my Youtube Channel HERE. Our #siyoutube family has hit 13K so don’t forget to subscribe if you haven’t done so already! So exciting, thank YOU! 🙂
Here’s another look at this Ikea dresser before and after. I hope it’s inspired you and given you some new ideas for your projects!
And as promised, here’s the other apothecary I restyled. The same “Lazy Sanding” technique and finish was used! It sits under my tv in my living room. I loved it so much I just couldn’t sell it. It provides perfect storage under my tv. I’ll link to this makeover in the Related Posts below.
LET ME KNOW WHAT YOU THINK OF THIS $30 IKEA DRESSER-TURNED MAP CABINET FEEL FREE TO ASK ANY QUESTIONS YOU MAY HAVE… I ALWAYS LOVE HEARING FROM YOU. IT MAKES MY DAY! 🙂
Happy furniture painting friends!
Denise x
RELATED POSTS::
DIY ANTHROPOLOGIE DRESSER
CACTUS PAINTED SIDE TABLES
HOW TO PAINT MCM FURNITURE
DIY BOHO NIGHTSTANDS
ANTIQUE APOTHECARY CART MAKEOVER
PIN AND SHARE!


This is such a fantastic upcycle! It never occurred to me to tint the top coat, and love how you achieved the wormholes! The one you kept…I can’t blame you. It’s amazing too!
Those wormholes were REALLY FUN!😆 Thanks Kim! XOXO
Beautiful Piece! You have such a vision for what you see in something average or drab and you make it a beauty! May I ask…? How much did it sell for? Just starting out and trying to look at potential. Thank you dor your inspo!
Kat
Thanks Kat! I’m on the fence on whether to sell this one or not… I might just keep it for myself. However, if I were going to sell, I’d list it for between $350-$425. I hope this helps.😊
Thank you for the information on the Bosch Sander! I burned up my old sander and was getting a bit frustrated trying to decide on a replacement that would be affordable but well built and easy to handle. Many of the other diyers recommend very expensive equipment that is just way out of my budget, Appreciate you being more realistic and down to earth with product recommendations and techniques that are attainable,
I’m sure you’d LOVE the Bosch Sander, Candie! I’m been using the same DeWalt Sander for over 6-7 years now and it’s been a workhorse but I’ve noticed the last few times using it it’s getting tired..lol. I’m SO HAPPY with this one. I have small hands and this Bosch is a really nice fit and is so comfortable not to mention it works amazing.😊 And full transparency, I’m not sponsored by DeWalt or Bosch… just love them.
Wow, impressive IKEA dresser hack, Denise!
Thanks my friend! XOXO
So excellent!!!–!
Thanks Denise!!!
This turned out freaking amazing!! The color and depth is so rich looking!! And of course the idea to route out drawers and add those pulls took it to the next level!! XOXO
Thanks Christy! I really like the way it all came together too. And the wormholes were super fun. hehe
Outstanding! You have such a gift of clarity & vision. Thank you so much for sharing the how-tos. I never tire of seeing the results of your talent & imagination. When I do a project of my own, I always consult your info for tips & it is so much appreciated.
Aw, I 💙 you Tracy! You’ve been so supportive of me and the #siblog over the years and I can’t tell you how much I appreciate YOU!
This map cabinet is beautiful Denise. Your work and staging is flawless! It’s a keeper!
Thanks so much Nicki! I’m trying to carve out a place in my office! 😉
Hi Denise. This map cabinet is so beautiful. Well done. If it were mine, I definitely would keep it.
Thanks my friend… and I’m thinking on it. It might work well in my office!
Just love this!!
Thanks Shaoron!
Love, love, love it!!!!Beautiful work.
Thanks Valerie!
You amaze me with your creative thinking. I’ve been retired for 2 years and want to find a hobby. Might just try copying you!! I love your house too. What is the color you have behind the first map chest? Love it!!
Thank you Jennifer! And funny that you brought up the l/r wall color. Just this past weekend I asked Nick if he remembered what color we used and neither one of us could remember. i know it’s Benjamin Moore. If I find the color I’ll add it in for you. 🙂
Thank you!
This is SUCH a beauty and I love all of the techniques you shared here. Definitely one to save to my favorites!
Aw, thanks so much Dana! And I so appreciated your comments on social as well! XOXO
Your work continually amazes me, Denise! Does all of this fabulous creativity come right out of your beautiful blonde head, or do you find inspiration from particular sources? I know I speak for an army of DIYers who will loudly agree: YOU are an incredible source of both inspiration and COURAGE to us lol! Abundant kudos to you for yet another gorgeous restyling — and endless thanks for being so very gracious to share your work and yourself with the masses 🙂
You’re very sweet Suzy, thank YOU!!! Pinterest is a HUGE source of inspo for me. I also like to google certain furniture styles and see what pops up. It’s amazing what’s selling out there online on, Wayfair, Anthro, Pottery Barn etc. I also like to google in different countries to get an idea what they are doing! So no, I can’t take credit for all these ideas…lol… BUT I can take credit for doing it MY way. That’s the nice thing about getting inspired and building on what’s already out there. If its a hand made piece, no two will look the same.💜
Love it! And the first one too.
Thanks Robin! 🙂
That is amazing…and absolutely gorgeous. I wouldn’t be able to get rid if them either. I love them. Wow.
Where do you get your hardware? I know I have seen them for sale aomewhere but can’t remember where.
Thank you for sharing this. WOW
Thanks so much Teresa! I bought the hardware off Amazon here.😊
I would’ve kept this too; I LOVE the look of the cataloge/map drawers. I’ve been wanting to get a router for the longest time. Is this the only one you have? Just wondering if there’s another one you like better before I take the plunge (pun intended) and buy one lol.
Yes, I linked to the Bosch Router I have and I LOVE IT! I’ve tried a few other, including a plunge router and they were too large for me. They felt awkward, uncomfortable and to be honest, intimidating. So glad you love this makeover Sara! Have a fabulous day and week! XOXO
I love your creations. You are my inspiration for painting furniture. Due to arthritis I can no longer hold the small paint brushes needed for my decorstive art but needed a creative oulet. Saw your furniture painting and l, well, you saved me. Thank you
This just made my day. Thank you Jane!!! Hugs
Gotta be one of my favorites you’ve done! Thanks!
Aw, thank Kira! So glad you love it! xoxo