Happy St. Patrick’s Day friends!
If you’ve ever passed-up an amazing piece of furniture due to peeling or chipped veneer – this post is for you! I’m living proof that these types of repairs aren’t that difficult!
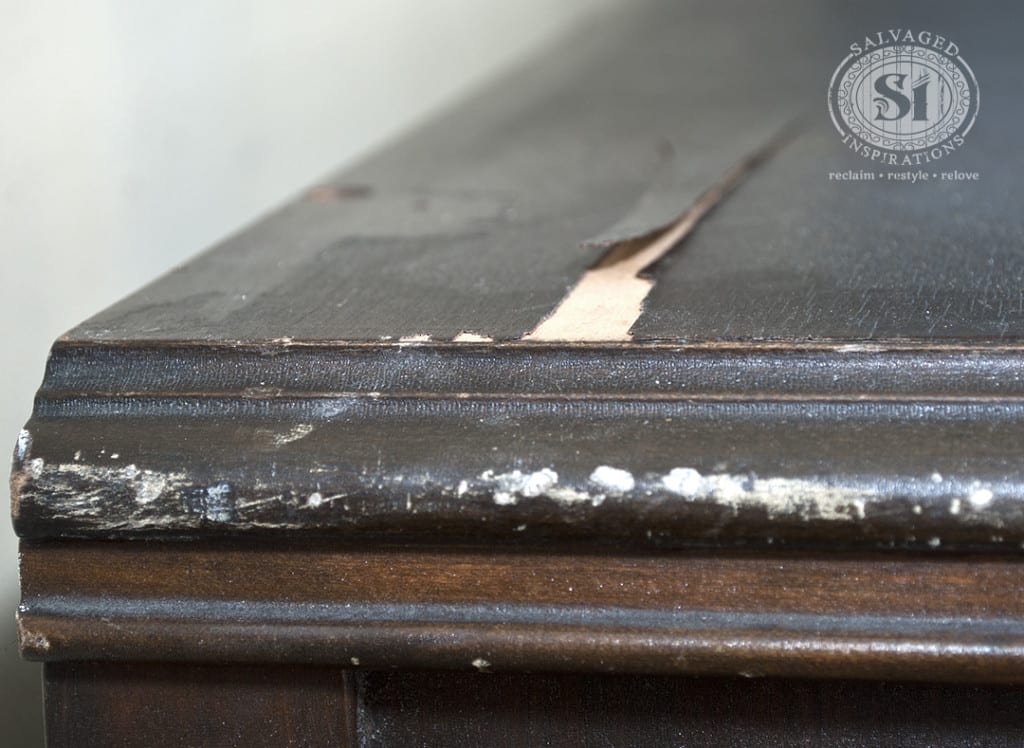
It’s a common problem with older furniture. Vintage pieces get exposed to heat, humidity, or the very worst – water. The glue holding the veneer starts to release and this results in chips, blisters or peeling.
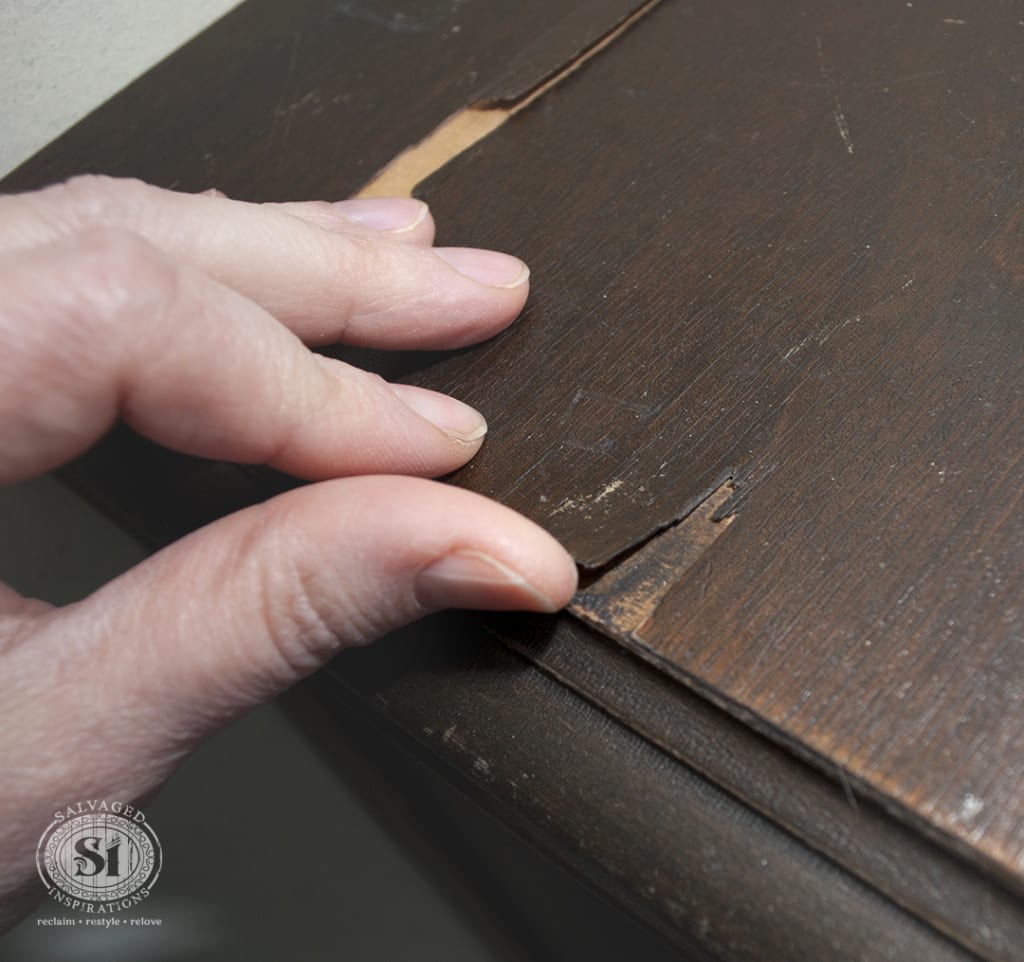
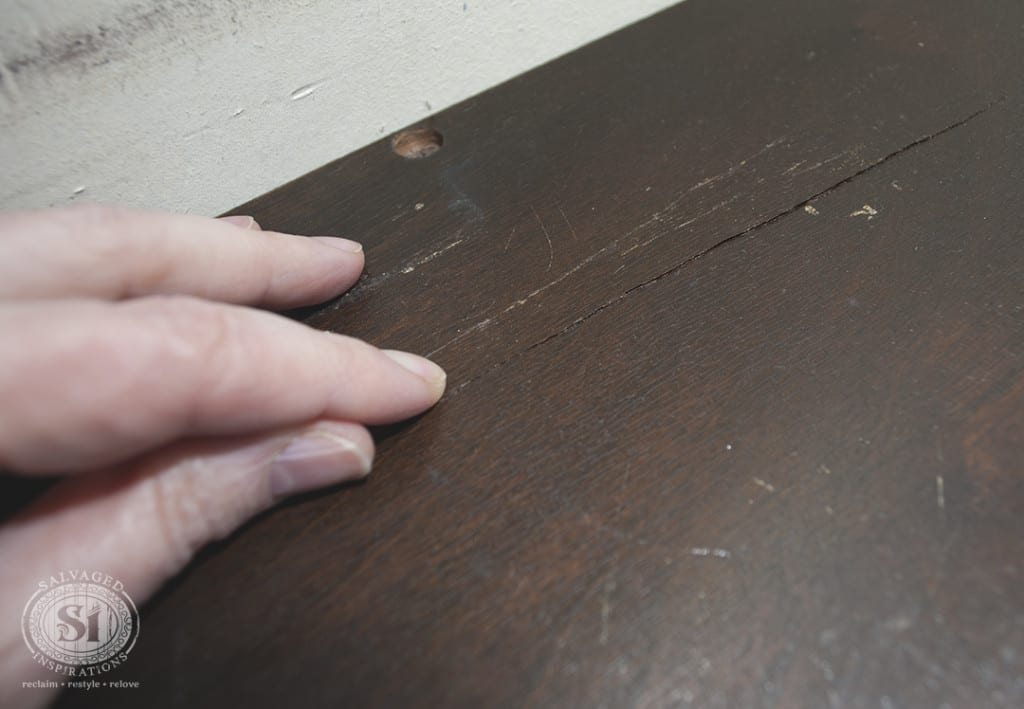
Here’s an example on this antique dresser I recently picked up. Her age is visible in the dry cracked surface and the veneer is peeling and chipping in few areas.
How To Fix Peeling Veneer:
With a piece like this, I would normally cut it off and fill it in, but I want to show you how easy it is to glue veneer down. A glue repair works best if you have a piece of veneer that’s an exact fit and matches up with the existing grain.
If it’s not a match – don’t glue!
If you do, it will be impossible to stain – well – super difficult. And even if you decide to paint, often the difference in grain makes for a blotchy looking paint job.
How To Glue Peeling Veneer:
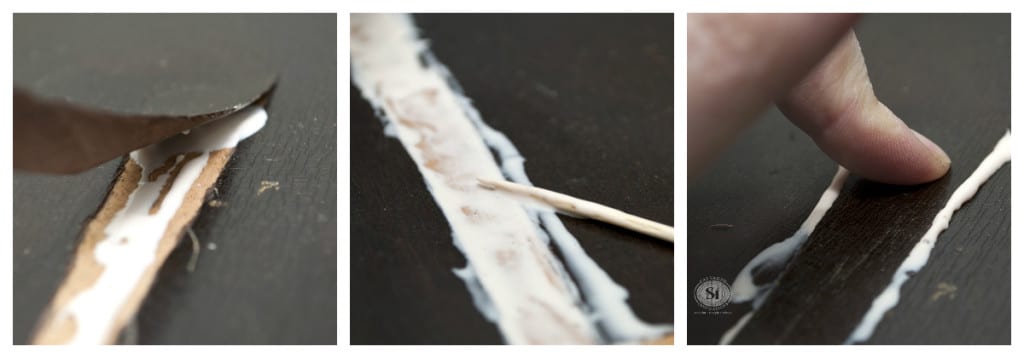
Use a good wood glue. Elmer’s, Titebond or Gorilla Wood Glue are popular brands. Here I used a Lee Valley Cabinetry Glue. When I want a short dry time, Contact Cement works nicely too. Just be aware when using Contact Cement, there’s no flexibility. Getting the pieces to join perfectly first time around is important because that stuff won’t let go!
Be generous with the glue. I’m generous with the glue and I use a small toothpick so I can spread it right into all the nooks and crannies of the repair. Then I press down with my fingers. Wipe the excess glue away, and then clamp or weight down until the glue is totally dry.
How To Fix Chipped Veneer:
When I see chipping veneer, it usually means there’s more where that came from. I give my pieces a really good once over and make sure I remove it all. The very worst thing is to miss these loose pieces – paint – and THEN have the veneer chip off leaving a big scar on your finished piece!
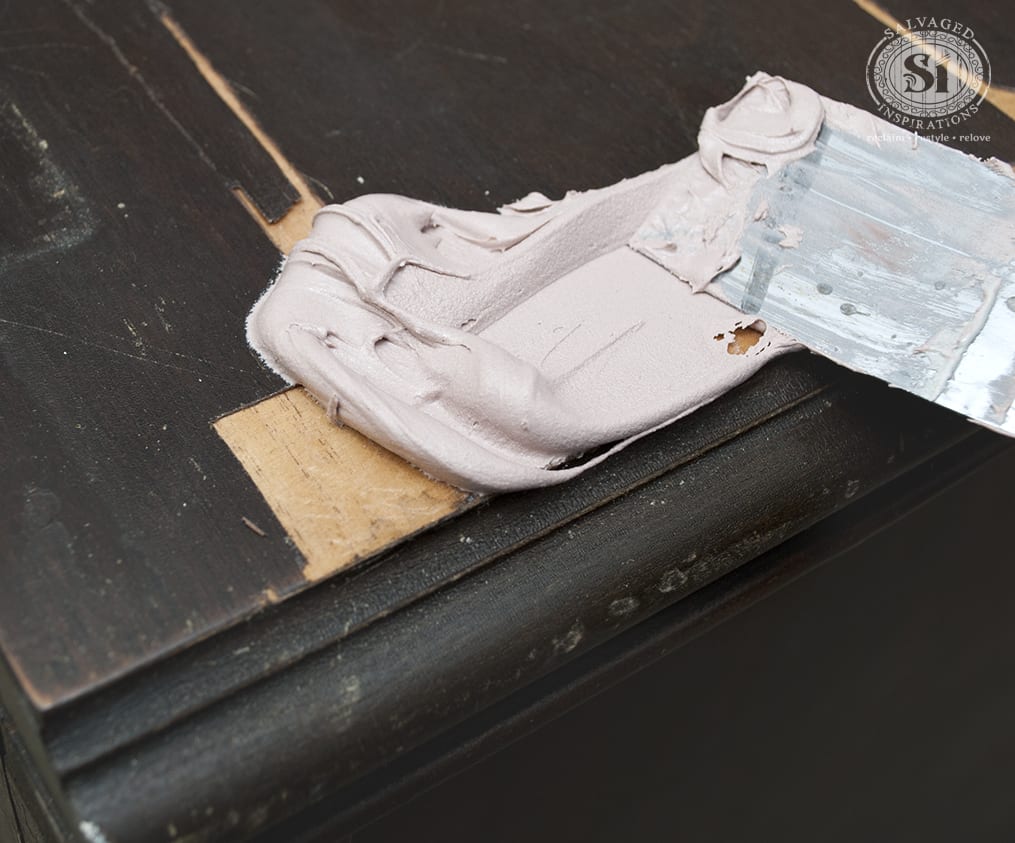
Anything that can be pulled up with a razor or sharp utility knife is best cut away. I score the veneer well above the damage where the glue is still holding. Then flake off the old chipping area.

Once all the damaged veneer is removed, I like to use this Bondo![]() for the repairs.
for the repairs.
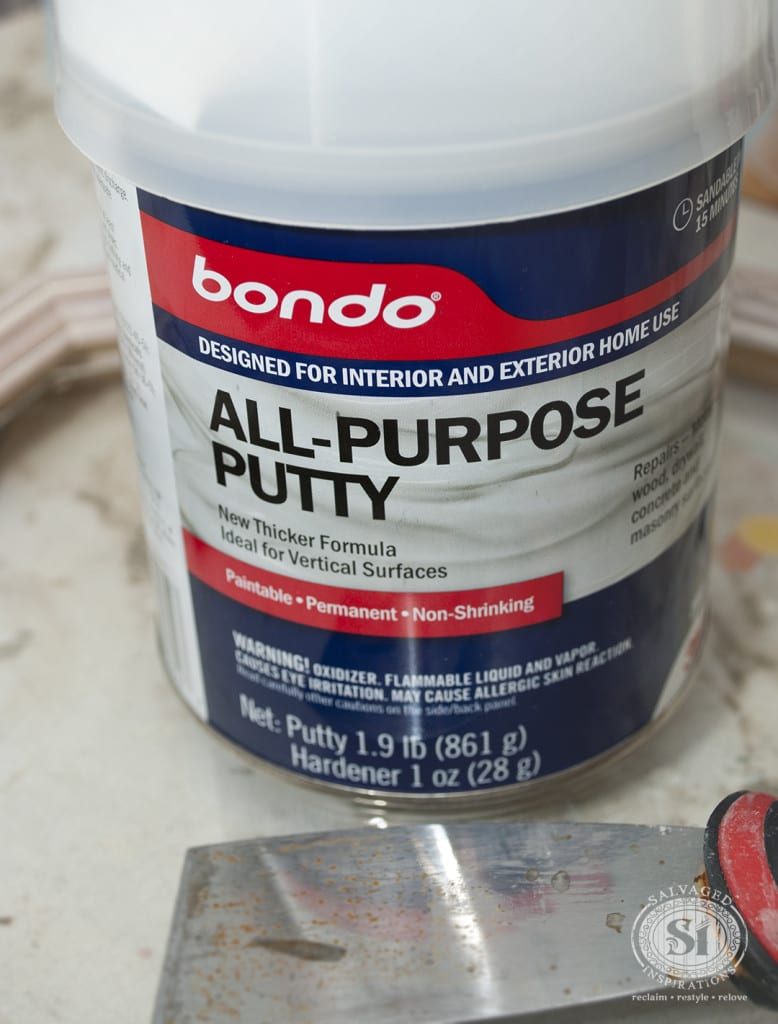
Bondo doesn’t shrink like wood filler can. It also dries faster than wood filler does. However, it’s not the easiest to sand and it’s smelly. I’ve written another Bondo repair tutorial so you can find How To Mix & Apply Bondo here.
Sanding is the last step. To get a professional finish, I sand to a super smooth finish and make sure I feel no lumps or bumps when I run my hand over the surface.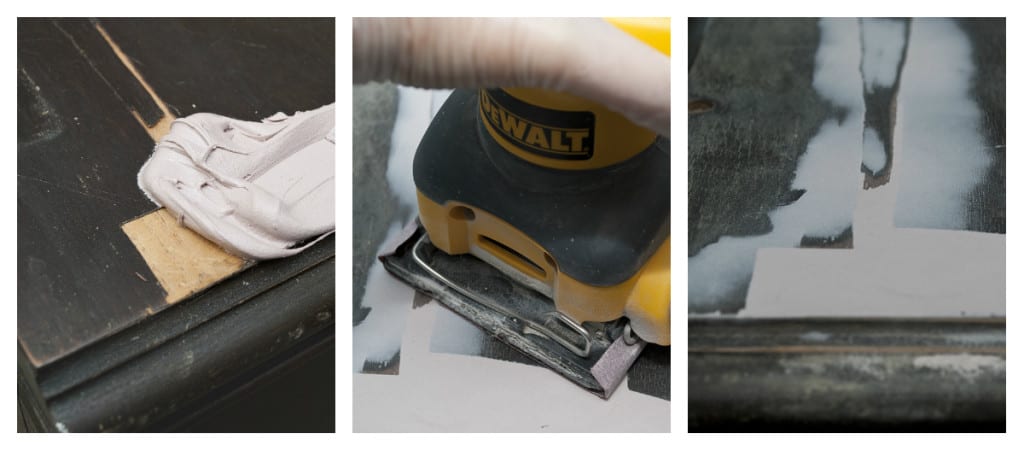 Here the dresser is all patched prior to sanding the Bondo repairs. I’m using Dixie Belle Chalky Paint (first time) so no priming or sanding is needed for the rest of the dresser!
I’ll be back on Monday to show you how everything turned out. She’s looking REALLY good!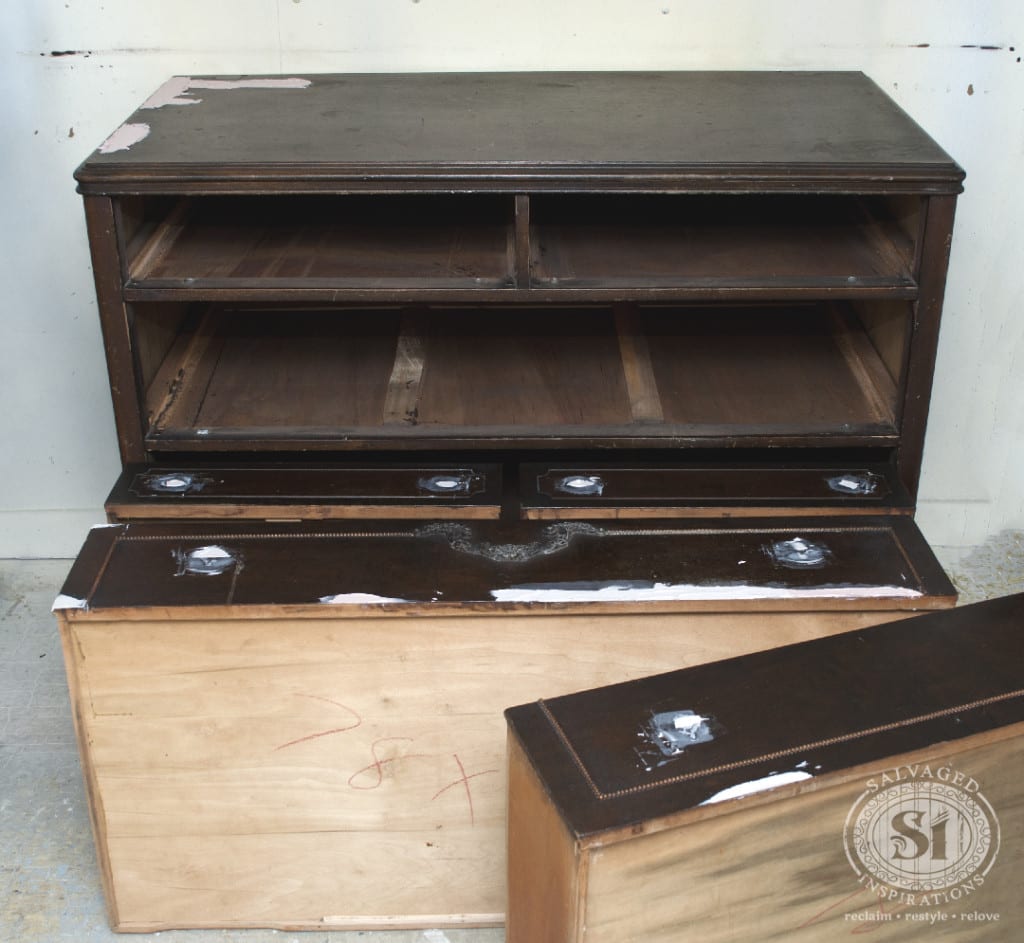
Have you ever turned down a piece because it had veneer damage? Do you have a favorite method of repairing damaged veneer? Are you heading out for some green beer? 😉
Have a great day!
Denise x

THANK You!! oh so much! been pondering an old half buffet that has been in my parent’s damp basement for 20+ years, and has now dried out in my home for a bit (not two years yet – surely!) …-side (veneer) panels were cracked/chipped/ fragile. so will replace – and have replaced the back (had no veneer, but still…) .
But the veneer top can be saved – I just was not sure how, But Now – Thank You! I have a plan!
I’m so glad this has inspired a plan Sue! I’ll bet your buffet will be looking fabulous! Have fun. 🙂
https://photos.app.goo.gl/uC5zbpqF3HrRHKDU6
I picked up this old piece and plan to gel stain the top, but paint the drawers. The veneer is peeling, cracked and brittle on the drawers so I was trying to figure out if I should glue it down or just scrape and bondo the remaining drawers since it looks like a previous owner scraped off the veneer on the top two drawers. What’s your opinion?
It looks like the veneer on the drawers have quite a bit of bubbling and warping with the top two drawers already having the veneer removed to bare wood other than the little bit around the hardware on the right side. I would throw a damp towel on the drawer fronts – let it sit to loosen up all the glue – then use some heat from a heat gun or hair dryer and a scraper and take it all off. If you’re going to paint the drawers, this will give you a reliable smooth fresh canvas to paint on. Primer will be required before paint unless your using a paint with the primer included. Gorgeous piece btw!
Have you ever had a piece where you removed the veneer and it was particle board or MDF under it? What do you do in that case? I have a piece where a majority of it is wood, but the top is badly cracked veneer and what looks like particle board/MDF under it. I don’t think the veneer is salvageable, but I also don’t know what to do if it’s not wood underneath. Thoughts?
Hi Steph! Yes I have and there are a few solutions. Peel off the veneer where it is loose and then fill in the rest with bondo or wood filler. Remove the entire veneer, prime and paint the substrate. If it’s not smooth, skim with woodfiller or Bondo, sand and then prime and paint. Hope this helps
Hi! I was gifted a beautiful antique curio that had veneer peeling off and underneath looks like it plywood. I would love to still be able to refinish this but I’m not sure how as it seems like the only real wood is on the top and the legs of the piece. Any advice on how to restore?
If it were me working on it, I would play up the natural wood parts by either giving it a natural wood stain or a beautiful stain on the top and legs, then paint the rest. The peeling veneer can be fixed up with a wood fill or some Bondo, primed, then painted. 🙂 Hope this helps.
I hope you can help educate and inspire me! My husband and I have two dressers that were in his bedroom as a boy. I believe they were picked up from a local hotel that sold its furniture when upgrading. We’re talking veneer-covered items that are from the ’60’s. Or maybe it’s laminate, and not veneer. Excellent workmanship on both pieces, and SO sturdy! The drawers are quite functional, in terms of opening and closing; that’s why I have been reluctant to get rid of the pieces.
However, they are dated, and the veneer/laminate is not in good shape. Even if I choose to paint the pieces, I am going to have to tackle surface repair first.
What would be your recommendation? Strip the veneer/laminate, find out what wood we’ve got, and refinish? Or…do surface repair and just paint them?
Thanks for your advice.
Hi Amy! A lot of hotel furniture is laminate over MDF or composite because its less expensive and easier to keep clean. A telltale sign is how heavy the piece is. Older solid wood pieces with veneers are often lighter than MDF covered in laminate. If you’re unsure which you are working with, my advice (just my two cents) would be to repair and paint. It would be disappointing if you started stripping and the wood underneath wasn’t a half-decent wood to paint.
Hi Denise.
Will the bondo take stain? Or is it better to try to match veneer and cut a piece as a patch?
Hi Ron! Bondo does NOT take stain. It would be better to find a matching veneer or match a faux stain paint finish.
You can color Bondo by using a polyester dye, jut add while mixing.
Omgosh, I had no idea. Thank you Jack!
I will give it a try on my new project dresser. Thanks for the lesson.
Hi I love your posts- I have an antique dresser and water stand set passed down for years and years- beautiful but has lots of peeling Vander and pieces missing- and also some bubbling from water damage- not sure if I should try to repair it or just strip the vaneer off of both pieces and pray the wood underneath is similar enough to stain- any suggestions?- these pieces are so precious to my family and I am panicked I will make it worse!
Hi Corinna! Peeling or missing veneer is fixable but water damage and bubbling veneer is not an easy fix – at least I haven’t figured out a good solution yet. That said, the wood underneath may be similar but not stain exactly like the rest of the piece. If this is a precious piece and you would like an exact match, my best advice would be to take it to a professional furniture restorer. Or you could look into other finishes, like a painted bottom and stained top, a whitewash etc… some sort of finish that would blend everything together. 🙂
I would like to see the final outcome after your painting. Can you please provide the link for it if you have already posted the update with the result? Thanks.
Hi Ana! You can see the finished piece here. 🙂
Hi, Denise, I have a dresser made of sandle-wood it has some type of laminate, I want to know can the laminate be removed, and can the sandle- wood be painted, Thank you.
Hi Deborah! Laminate can be removed and any type of wood can be painted – so the short answer is yes. Having said this, sandalwood is expensive sought after wood! If you do have gorgeous sandalwood under there, you may want to show it off. 🙂
Hi, I have a lovely vintage cabinet that has a draw with a corner missing some veneer. What is your suggestion here as I don’t want to paint it I want to varnish it? Thanks heaps!
Dee
Hi, I have a particle board dresser with what I can only assume I s a veneer finish a family member ducted taped the drawers shut during a move and now there are pieces of the veneer missing down to the wood . I dresser has a beautiful marble top and I really don’t want to throw it away. How can I fix it to paint? Any suggestions b of b instructions would be greatly appreciated. I really don’t want to get rid of it but can’t stand to see it torn up.
Thanks,
Dottie
What about when the veneer isn’t chipped or pulled away but is bubbled up in some places? Would you use the same method and cut out the area? I have a dresser I just purchased and it has an area on the side that is about 4 in X 6 in. that is warped/bubbled up. I also have a secretary my husband wants me to get rid of because the whole top is bubbled. Can I remove the whole piece of veneer and replace it with new veneer? I’ve always wanted to refurbish furniture and these are my first 2 projects!
Hi Paula! Yes, you can carefully cut out the bubbled area and then use bondo or wood fill to fill in the missing area. As for pulling all the veneer up and then replacing it – you can – but often the wood underneath is a nice surprise and you can easily paint and or stain it. 🙂
How do you fix the bubbles that seem to show the wood underneath the laminate before you paint?
Hi Cindi! If I’m understanding your question correctly, you cut the bubbles out and then apply a filler (wood fill, Bondo or plastic wood – a filler of some sort) to cover the wood underneath. Then sand to create a level surface.
Hi I’m glad I saw this post! Thanks! Does the bondo stain well? Of just paint works well with it?
Thanks!
Great questions Hailey! Bondo does NOT stain well at all! Best for paint. 🙂
I recently purchased a drum table and the veneer on the top is starting to pop off all in one piece and I am considering just gluing that down. What are your suggestions on that?
Hi Jamie! Yup, a good wood glue and clamps should do the trick. 🙂
I have a table with a walnut veneer top. The veneer has come off in little ragged pieces here and there. I want to repair the veneer. I guess I’ll need walnut veneer, bonds, and an exact knife to get it right. The table is beautiful walnut. What are your suggestions?
Glad I found this. Some one placed antique dining table to throw away by the road. It is in great condition and has just a small area of veneer gone. I can clean it up use this technique for repair, refinish the table and I will have an awesome find.
I noticed you put something in the drawer-pull holes (bondo?). What is it and then how do you re-open the holes when dry (small drill-bit?)? Just want to confirm as I am starting my first project on a dresser that is in serious need of help and updating! Your site is great…beautiful work and great ideas.
Hi Katie! Yes, the original hardware holes have been filled with Bondo and painted over so they are no longer visible. Then new holes were drilled for the new hardware. The only time you would do this is if you needed to relocate the holes for new hardware. If you have knobs that fit the original hole (or you are using the original hardware), no filling is needed.
I wish I would have seen this post a few years ago. I threw out an old dressing table that had damaged vineer. I went to see if I could get someone to repair it and it was too costly. Now that I know how to do the repairs myself, I will be looking for another one to restore. Thanks for the tips! Cheers!!
Hi there. I have a couple of questions for ya, how exactly can you find out what type of wood your furniture is made from. I just bought a hide away sewing table that has seen better days. I guess its veneer on the draws but when reading your instructions, your veneer is thin but my problem is that I have sevral layers peeling up. The wood is dry, and a small piece of decorative wood is missing. This is my first time with a project like this and I can’t be more excited. I don’t want to mess it up. So if you can help me with some ideas I would be most grateful. Thank you
Hi there Nikki! Yes, some veneer has more than one layer that can be removed like on this desk here. As for the missing decorative piece, depending on the damage, sometimes it’s easier to remove all of it. You can leave it plain or buy beautiful appliques and replace. Have fun with your project! x
Nice job! I was looking for a cut and dry tutorial for an antique buffet I want to restore. Thanks!
Thanks for your inspirations . I have a dresser or two that need help.
I am going to set time to try your method. Thank you
Mary
I just picked up an antique empire dresser and the top has some peeling veneer, as well as one of the drawers. The top also has some pretty rough edges. Not sure what I want to do with it, paint, or stain and paint. Either way, it’s a little rough! So, I guess I’ll try the wood filler? But what do you recommend fur the rough chipped edges?
Thank you!!!
The rough chipped edges can be sanded and filled with wood fill or bondo too Lori. It may take a little extra work if there are rounded edges but I’ve done it and it looks great if you are going to apply a painted finish.
What if you don’t want to paint? I’m trying to fix these places on my dresser to match the existing veneer. It’s so lovely. I haven’t been able to get the wood filler that will match;
Hi Janet! Matching an existing veneer is tricky and I’m probably not going to be much help because I haven’t had much luck with wood fillers that claim they are stainable.
I’m inspired now to repair my 100 yr old piano with veneer issues. I was planning on disposing of it because pro wanted serious amount of money to restore. Thank you so much!
Wonderful…good luck Jenson!
Thank you for this tutorial. I’ve tried fixing veneer w not so great results. But this stuff and it’s simplicity looks great. Can’t wait to try.
Yes I had because I was afraid to deal with it, but not anymore. I’m going to buy me a good can of bondo. Who knew that’s for patching cars. thanks
Great post Denise, I have just found a similar piece at the local tip so have to do a few little repairs similar to this. Thanks a bunch
I have veneer that rippled (from water damage) into good size hills and valleys on the top of an old dresser. How do I work with it? Thanks.
Blistered veneer can be repaired 3 ways Veronica. 1) Remove all the veneer and then stain and/or paint top. 2) Cut out the patches of veneer that are blistered and fill in with wood filler or Bondo. 3) Slice the blisters with the grain and use a syringe to inject wood glue. Then place a sheet of wax paper down (this is used as a buffer so the glue doesn’t stick) and then heavy weighted objects or cardboard and clamps. The key to this method is to glue down all the bumps and clamp down so it’s perfectly smooth when the glue is 100% dry.
Thank you for this! I have needed to do this so many times but didn’t know how! ?
Pleasure Khadija… hope this is helpful. 🙂