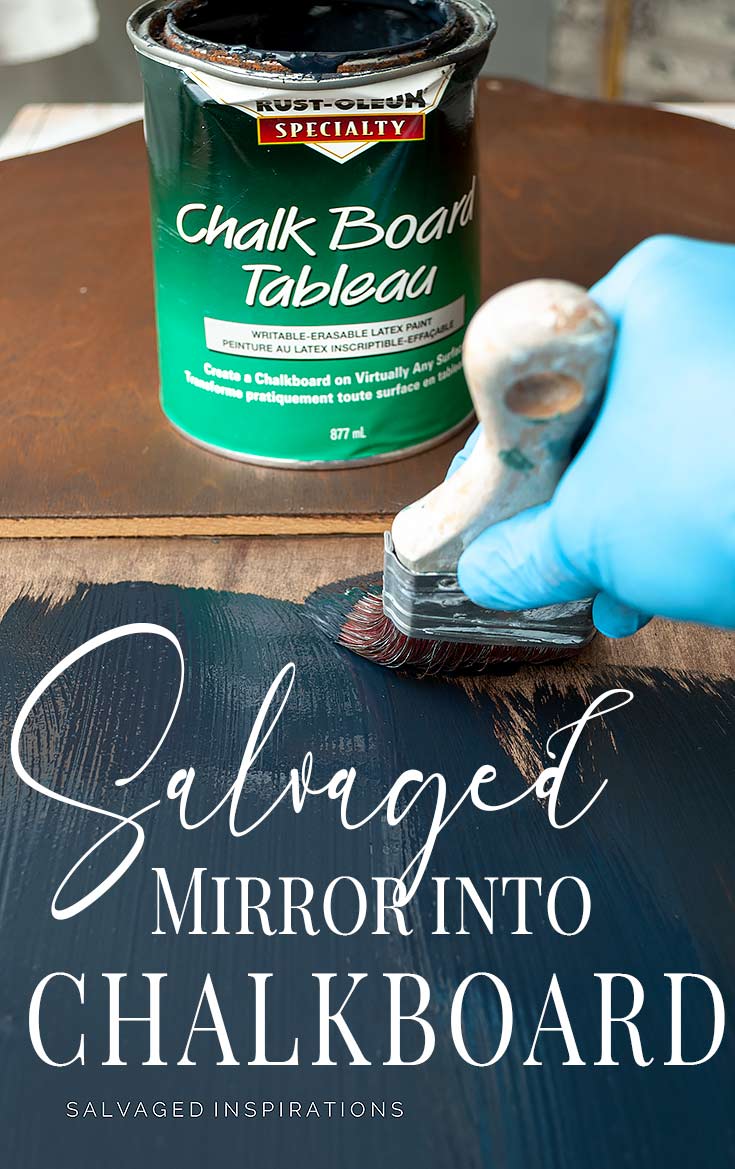
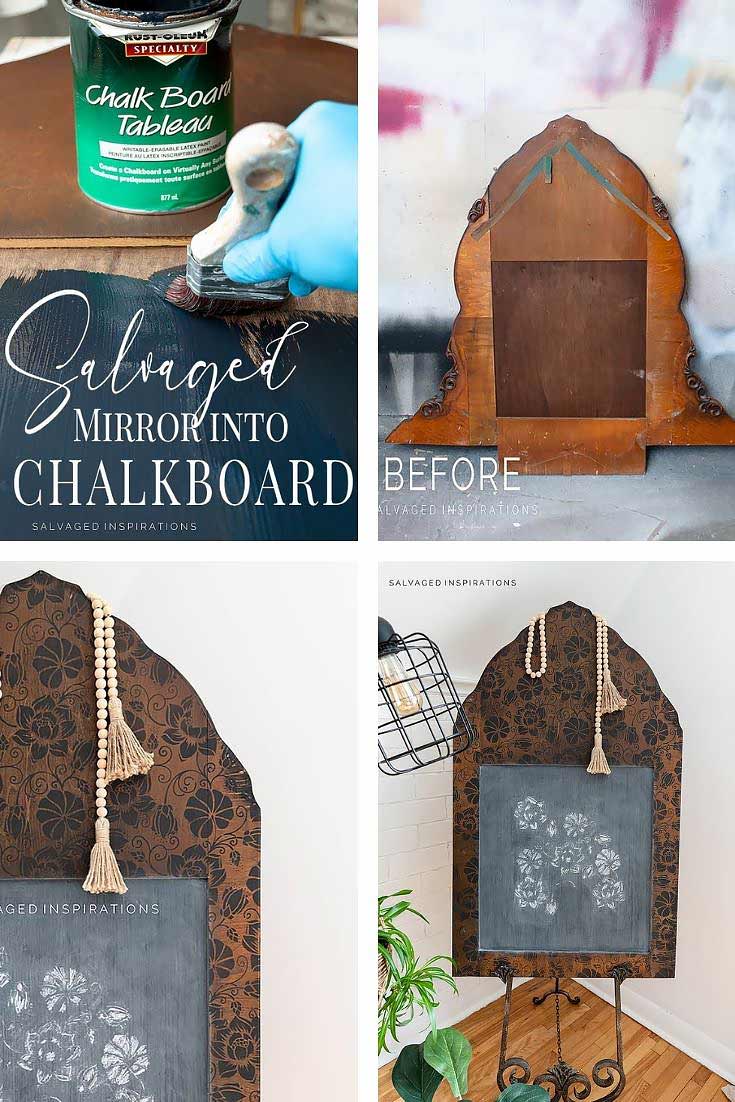
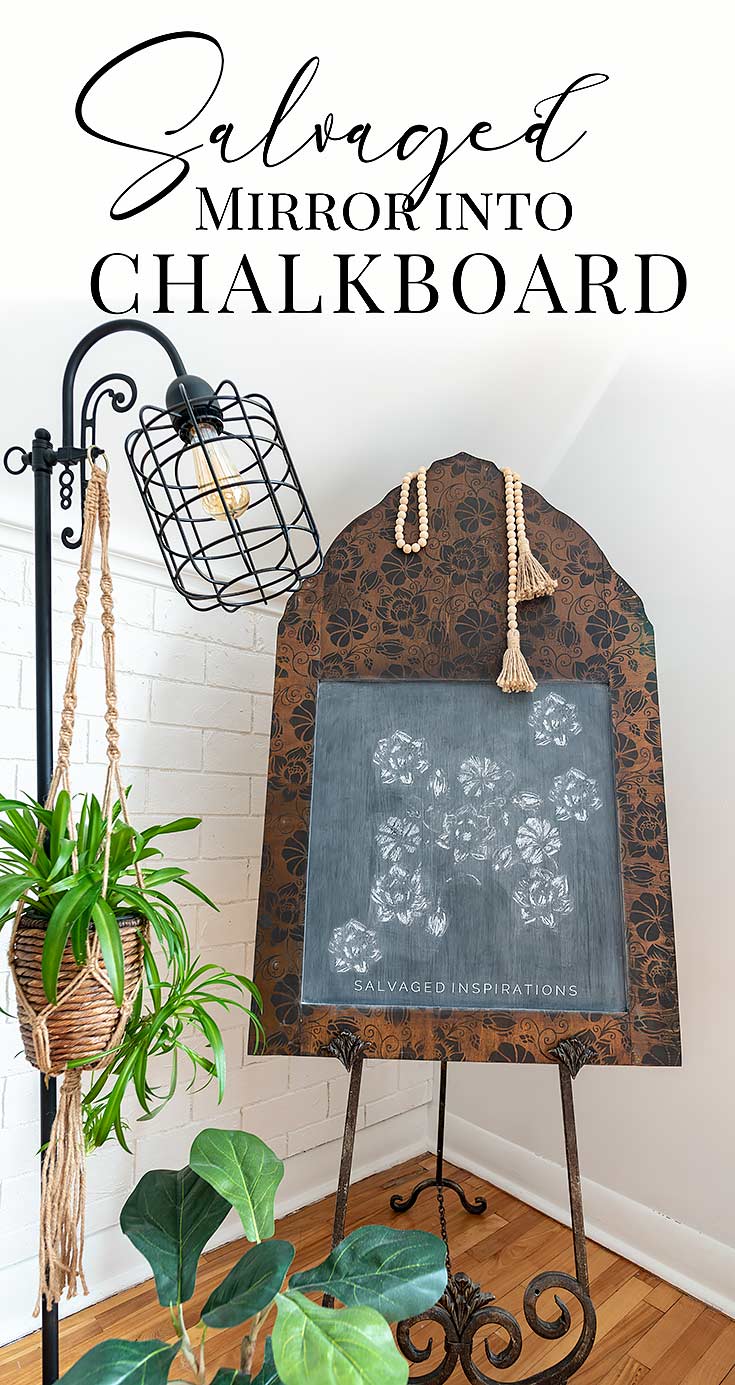
HOW TO TURN A SALVAGED MIRROR INTO A FUN DIY CHALKBOARD!
 Hi sweet SI family, I hope you’re doing well and staying safe. I have a fun Trash To Treasure Tuesday for you today. My trashy pick is this salvaged mirror that’s been turned into a fun and usable chalkboard along with a full step-by-step tutorial! I’m also sharing my favorite brand of Chalkboard paint, my go-to nonwaxy chalk, and how to season your chalkboard. My talented T2T blogger friends also have amazing before and after’s that I’m linking down below… so let’s get this party started!
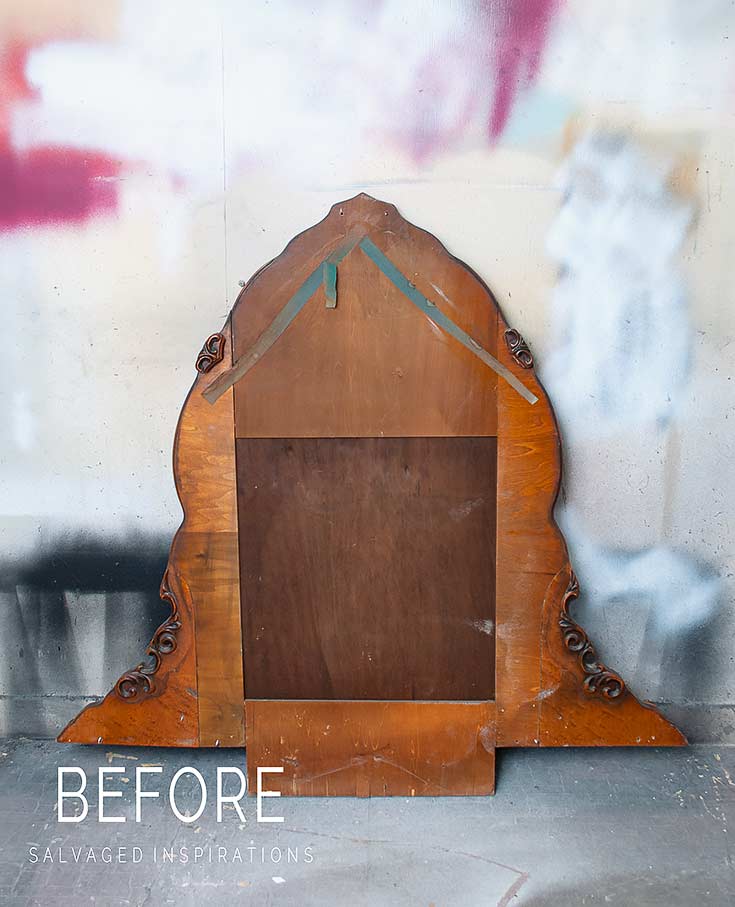
I don’t remember what dresser this vintage mirror belonged to. But I do remember the family I bought it from said the mirror had been shattered years ago which isn’t uncommon with these older frames.
Here’s her new look. I straightened the lines and added a large floral pattern.
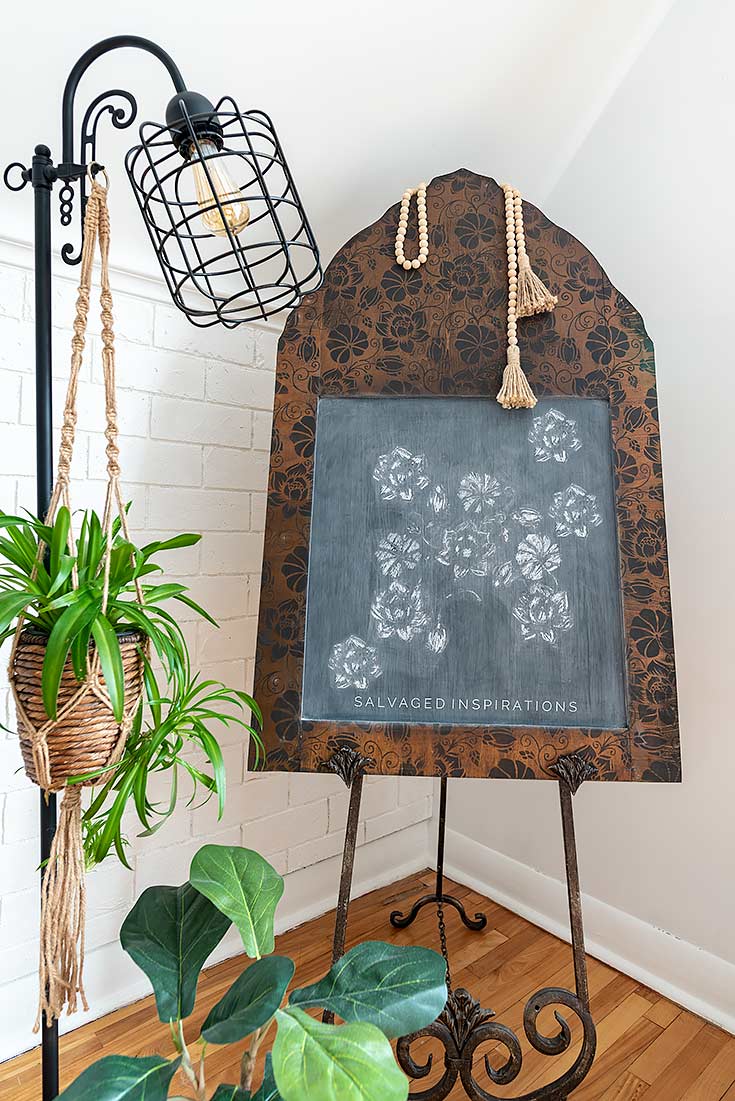
She’s been turned into a beautiful chalkboard!
I think it’s going to look great in someone’s office, kitchen, or mudroom!
THIS POST IS SPONSORED/CONTAINS AFFILIATE LINKS TO PRODUCTS I USE. YOU CAN SEE MY FULL DISCLOSURE HERE.
SOURCE LIST
DIY Chalkboard
Like so many projects, the time-consuming part was the prep before the paint!
To clean this mirror up, I started by removing all the loose veneer on the back, removing the nails, wood appliques, and screws. These old claw fasteners took the most amount of time.
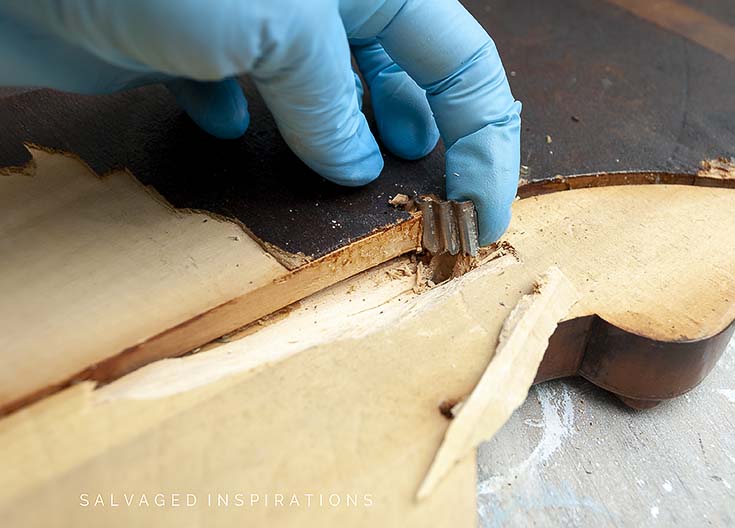
I had to drill a hole and then pry them up. I’m always amazed at how well-built these old pieces are. Years later, it still takes some muscle, elbow grease and patience to get take these beauties apart!
Once all the screws and old veneer were off, I measured a 3-inch border along the bottom and the two sides. Using my framing square, I penciled a straight line that I cut using this skill saw.
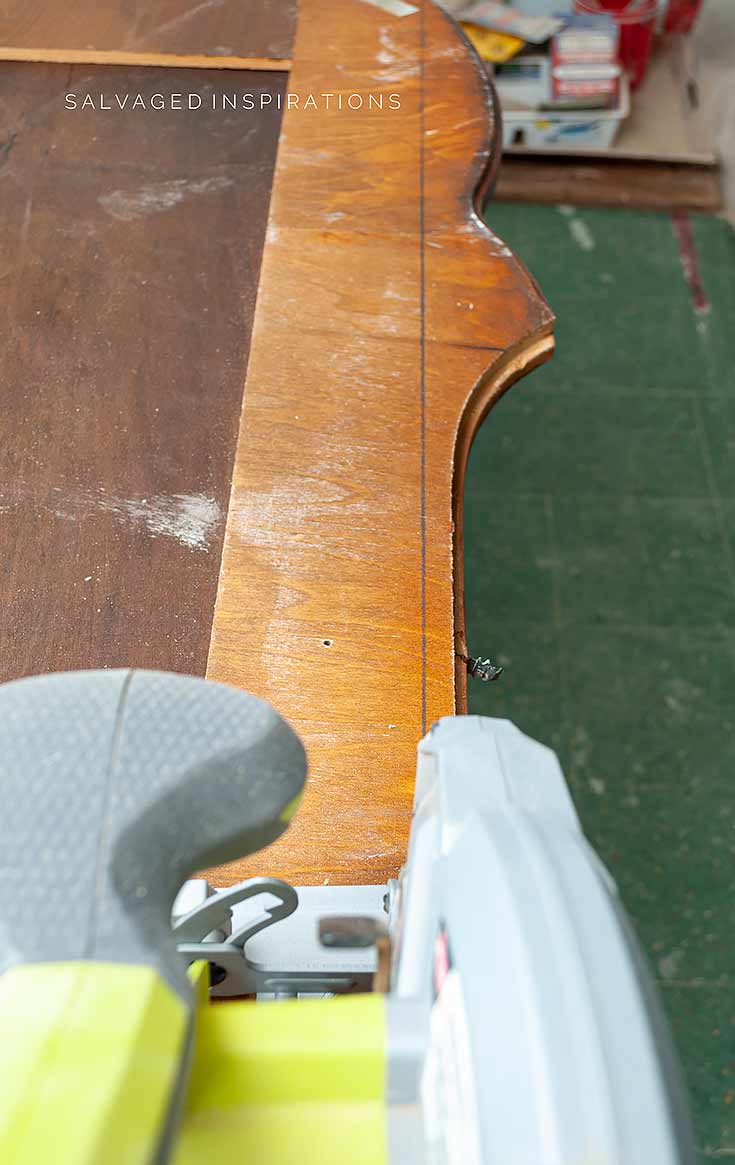
Here’s what it looked like squared at the bottom and sides. A much cleaner look.
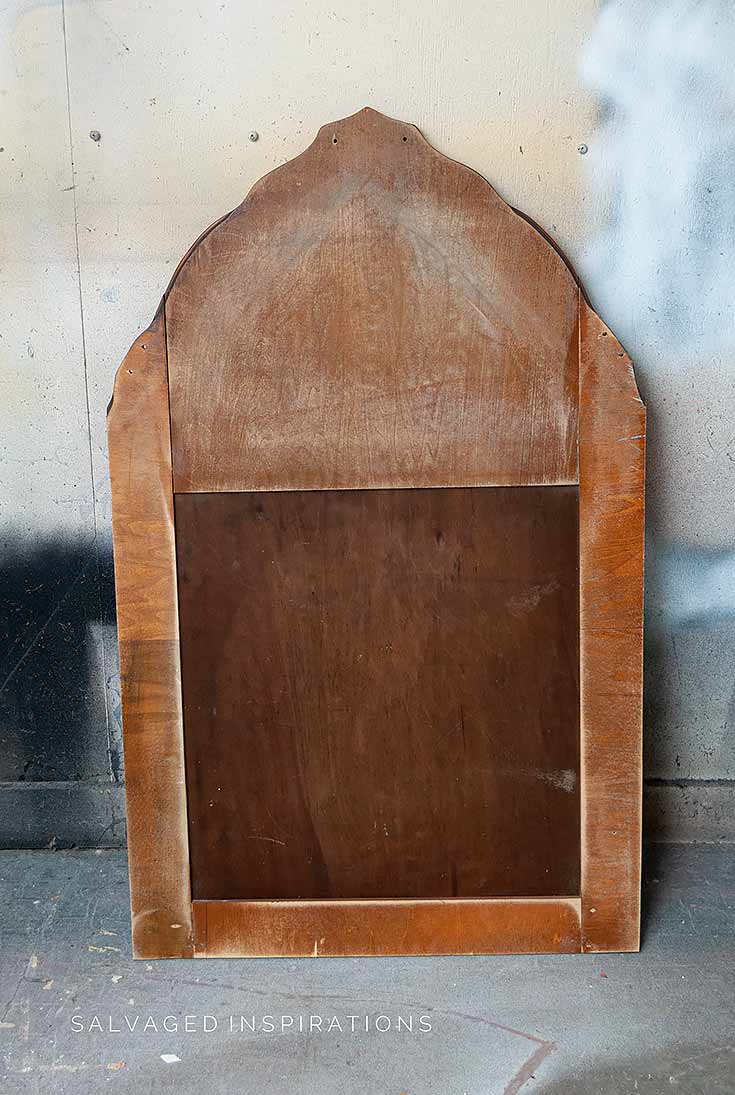
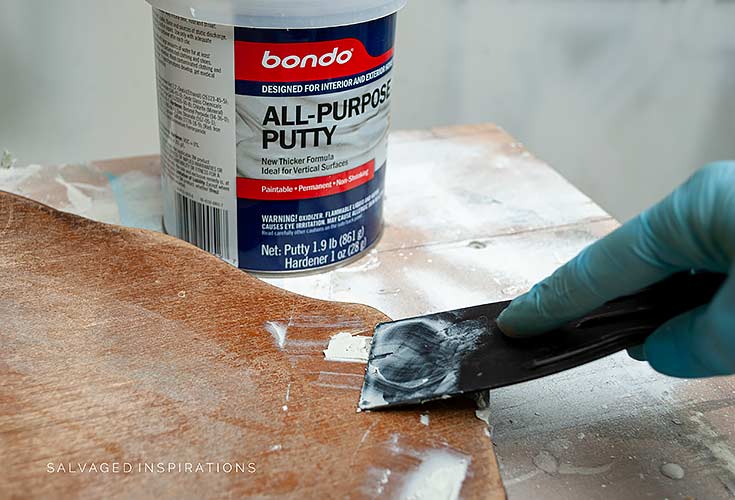
There were a few screw holes that needed filling so I used this Bondo. I have a full tutorial on how to fill holes and repairs with Bondo here. It’s the only filler I know of that dries and sands within 10 minutes!
After sanding the Bondo, I gave the entire piece a quick once over with my orbital sander and a 220 grit. This removed some of the old orange stain and topcoat so I could add a coat of Walnut Gel Stain.
Then I went ahead a primed the middle inset board using this KILZ Primer to prep it for the chalkboard paint.

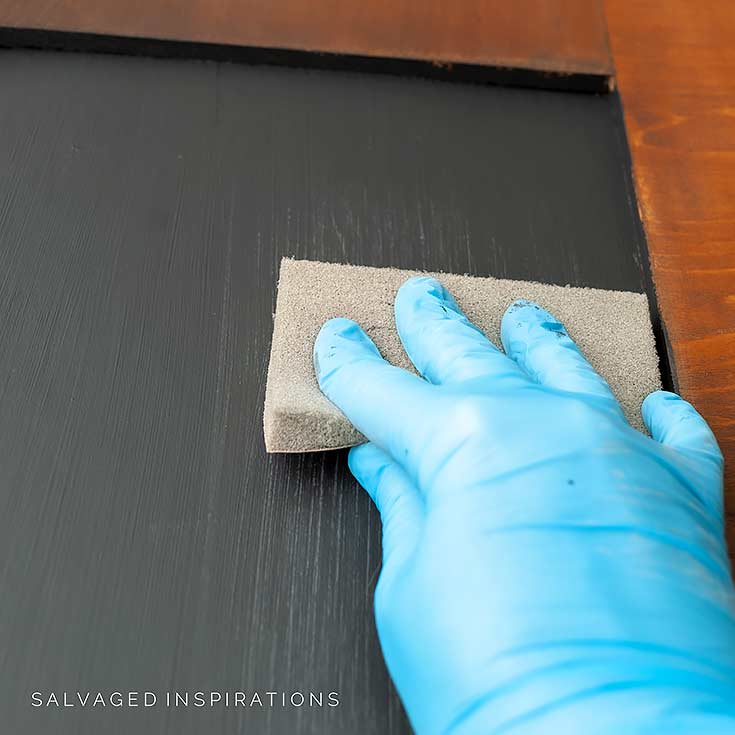
After a few hours of dry time, I painted two coats of my favorite Rustoleum Chalkboard Paint. I’ve used this brand on numerous DIY Chalkboards and it’s fabulous. It’s easy to apply, readily available at Home Depot, Lowes, and online, and gives great results. I used a brush for this project but I’ve also rolled it on with a high-density roller. Both work great.

I painted two coats for this chalkboard and sanded in-between.
Here are a few tips when using this Chalkboard Paint…
• Clean the area well
• Prime using a latex primer for better adhesion
• Stir the Chalkboard Paint thoroughly before using
• Paint 2-3 Coats of Chalkboard Paint leaving 4-5 hours of dry time in-between
• Use a good quality synthetic brush or foam roller
• I like to sand in between coats (but I don’t sand the last coat)
• Let the paint cure for 3 days before seasoning or using it.
Chalkboards need seasoning or conditioning before use otherwise when you write something in chalk on an unseasoned board, it will be hard to erase, and/or you’ll be left with a ghost image. To season or condition your board, rub the side of your chalk (this is my favorite non-waxy brand!) all over your board, and then rub it off with a soft cloth or chalkboard felt eraser. I have a full tutorial on How To Season A Chalkboard here.

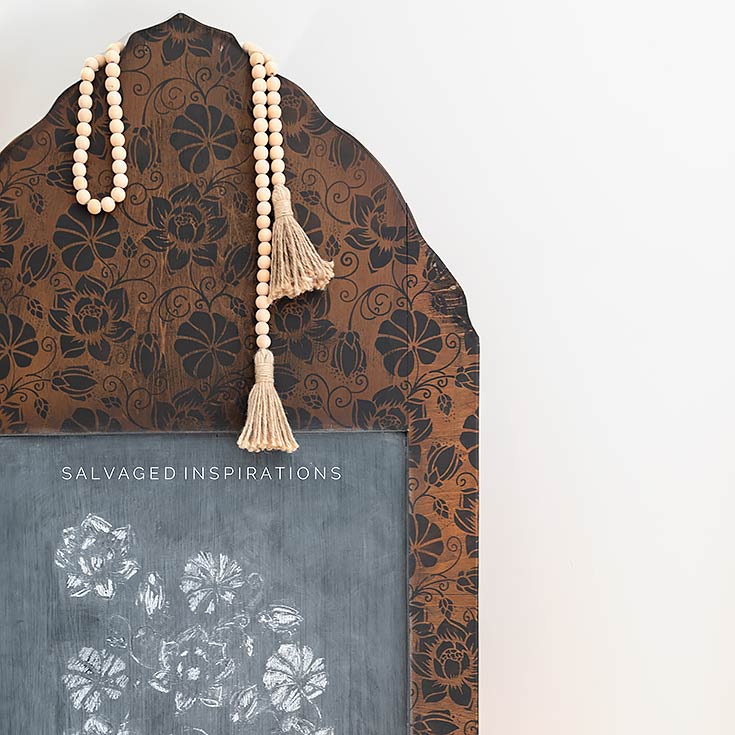
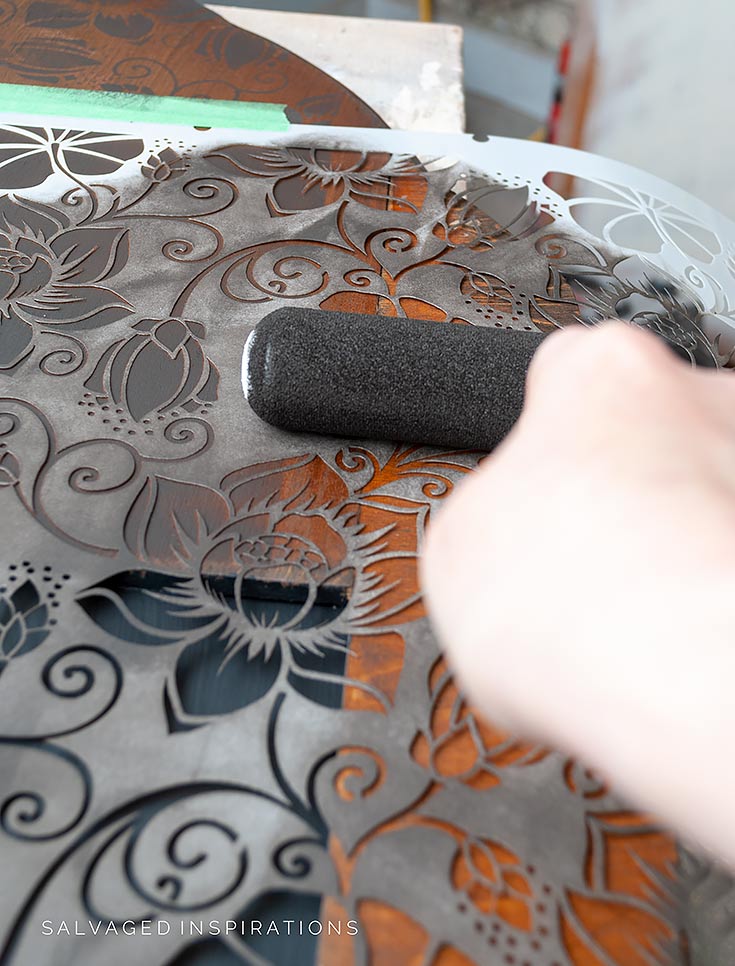
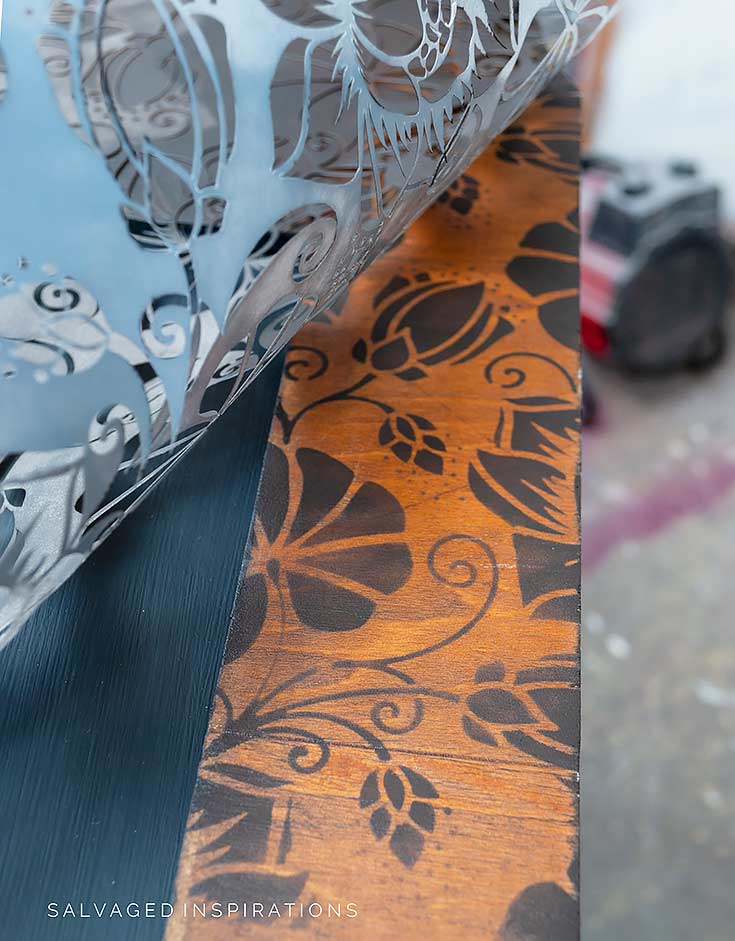
For the final step, I stenciled the frame with this bold chunky Water Lily Flower Stencil. I used this Coffee Bean Chalk Mineral Paint and my favorite 4″ foam roller for fast and easy coverage. I’m loving the dark floral on the rustic wood. It’s also a perfect way to hide the Bondo that filled in the screw holes.
This is such a fun and beautiful floral pattern!
Here’s the finished look…

ANY salvaged mirror or mirror frame can be turned into a fun and usable chalkboard. I really hope this has inspired you to give it a try!

And now for some TRASH TO TREASURE FUN!
I know you’re going to LOVE what this talented team of ladies can do. They always surprise me with their creativity! Below are their BEFORE photos. Visit the links underneath to see the amazing AFTERS and to learn how they did it. I’m heading over to take a peek right now myself! x
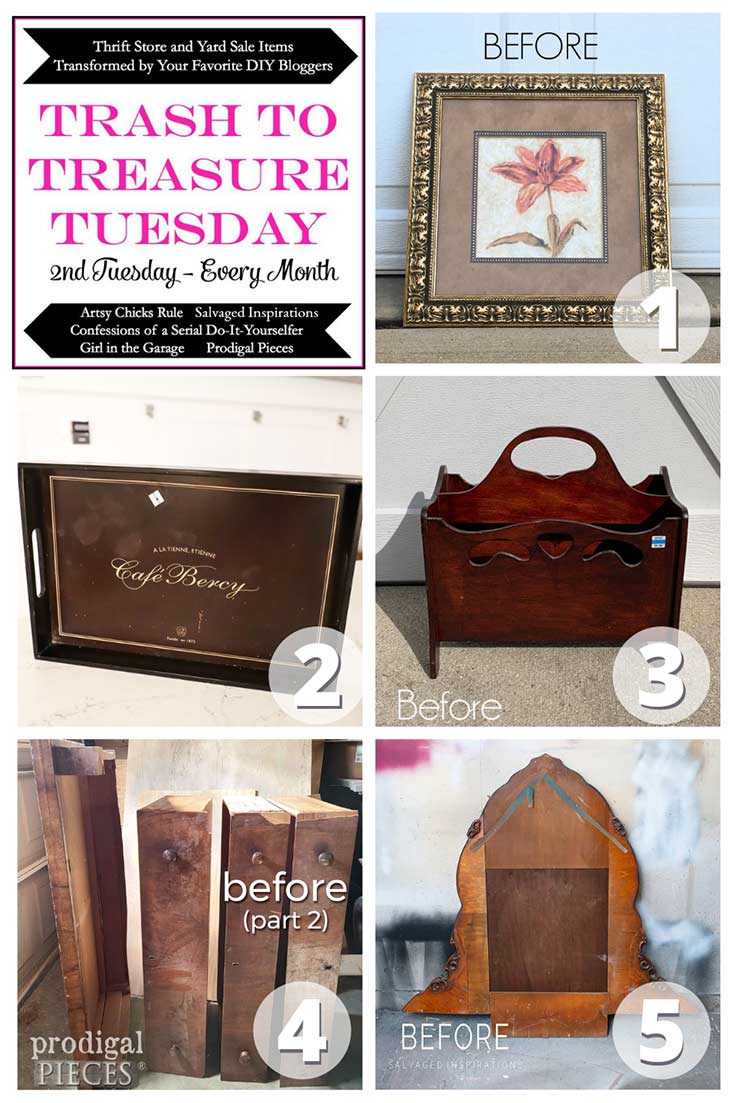
1. Girl In The Garage
2. Artsy Chicks Rule
3. Confessions Of A Serial DIYer
4. Prodigal Pieces
5. Salvaged Inspirations (I’m so happy you’re here!!)
Thanks for joining me today. I’d love to hear what you think of this mirror turned chalkboard or any tips or tricks you may have for creating DIY Chalkboard Projects. I’ll be back next week with my NEW ReStore furniture find that I can’t wait to share. See you then!
Thanks for reading. 🙂
Wishing you a beautiful day and Happy Painting friends!
Denise XO
RELATED POSTS::
How To Season & Condition A Chalkboard
Mirror To Chalkboard To Profit
How To Distress A Mirror
How to Paint A Mirror Frame
How To Antique A Mirror – Video
PIN AND SHARE!

The base it’s sitting in really makes the whole thing, where did you get it?
It’s an art easel from HomeSense.😊
Love this so much! Can you please link the orbital sander again? The link in this post goes to the saw. Thank you!!
For sure Christine. I find they sell out on Amazon fast but you can also get them at Home Depot or Lowes. I use this 5″ Orbital Sander here and love it. It’s been using the same one for around 7-8 years!
The salvaged mirror frame is a beautiful chalkboard and I love the stencil detail! I’m sure this beauty will sell quickly for you.
I had fun with this project, thanks, my friend! XOXO
You are always such an inspiration Denise. This is lovely!
Thanks so much, Carole! HUGS XOXO
What a great idea, Denise – and it turned out awesome! I love the stencil you added too! xo
Thanks, my friend! I really like this new stencil as well! 🙂
The colors are great for this Vintage mirror. I would never think to cut off the sides and bottom. I always learn something new from you ! Great tutorial.
Thanks, Cecilia!🤗
This is so so sweet!! I love it!
Thanks, Nancy! XOXO
Tho a little sad to see those ornate sides cut off, I must say it turned out really nice & wouldn’t have worked with the sides on. Again, you have great vision. Love the stained wood & floral black stencil. Knowing you, those cut off sides will be used on another project LOL. Great job!
Exactly, you know me well! I have these gorgeous sides stores away for another project! 😉
What can I say other than amazing! I am definitely going to be trying this with an old mirror I have. Thank you so much.
Yaay! Thank you and have fun Deanna! x
You have such awesome ideas! Love it!
Thanks so much Ellen! x
Denise – i LOVE the stencil and the black on wood you used! it looks fabulous!
Aw, thanks, Gwen!! I’m loving this new stencil as well…well it’s new to me. First time using it. 🙂
I have a few mismatched mirrors and this is a must-try! Thanks for sharing! ~ Nicki
My pleasure and if you give it a go, have fun! 🤗
What a great new purpose for that old mirror! I love the addition of the floral pattern! XOXO
Thank my friend… it was fun adding this stencil pattern! XOXO
Oh love the stencil and the paint color! You used. Looks lovely.. Awesome job!!
Thanks so much, Lorri!😊
What funtastic trashure save! 🙌🏻😍
Thanks, my friend! XOXO
Hi Denise. I’m loving what you did with this old mirror frame! What a beautiful project. The stencil you chose compliments the wood background perfectly.
Hi Monique and thank YOU! I’m loving my new stencil and I can’t wait to use it on another project. 🤗