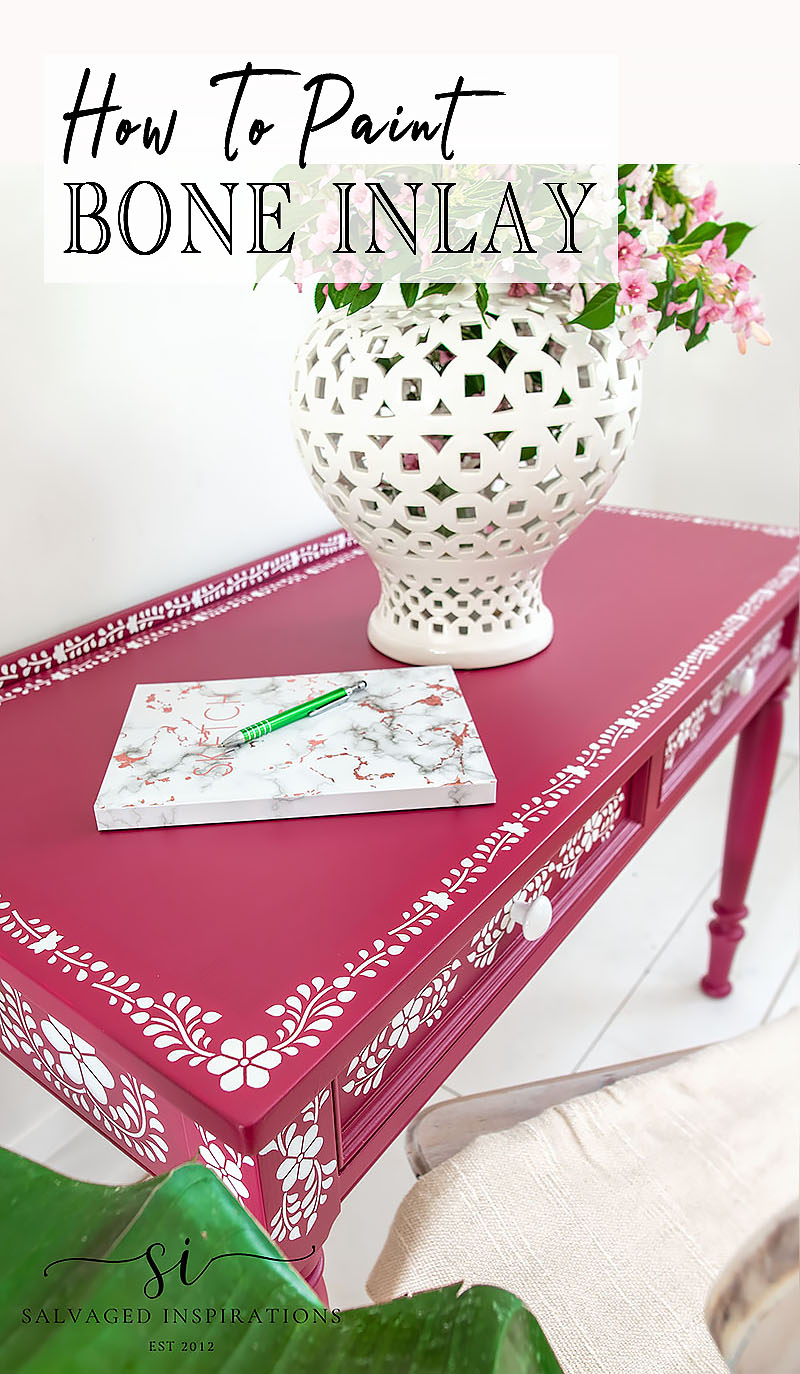
HERE’S A STEP-BY-STEP GUIDE AND CREATIVE TIPS FOR PAINTING THE PERFECT BONE INLAY STENCIL DESIGN ONTO YOUR FURNITURE | YOUTUBE VIDEO
Hello, amazing friends and welcome back! I’m so excited to share today’s stenciling project with you because it’s one I’ve been wanting to try for years… painting bone inlay on furniture! This is a fun way to add creative expression to your painted furniture in a super cost-effective way. It’s also the PERFECT way to cover up any imperfections as you’ll see by my oopsie below.
I’m also sharing ~
- How to get a CRISP SHARP inlay design
- How to STOP bleedthrough
- The BEST stenciling brush
- The TIME it takes to stencil a bone inlay… and how to SPEED up the process
- … And more!
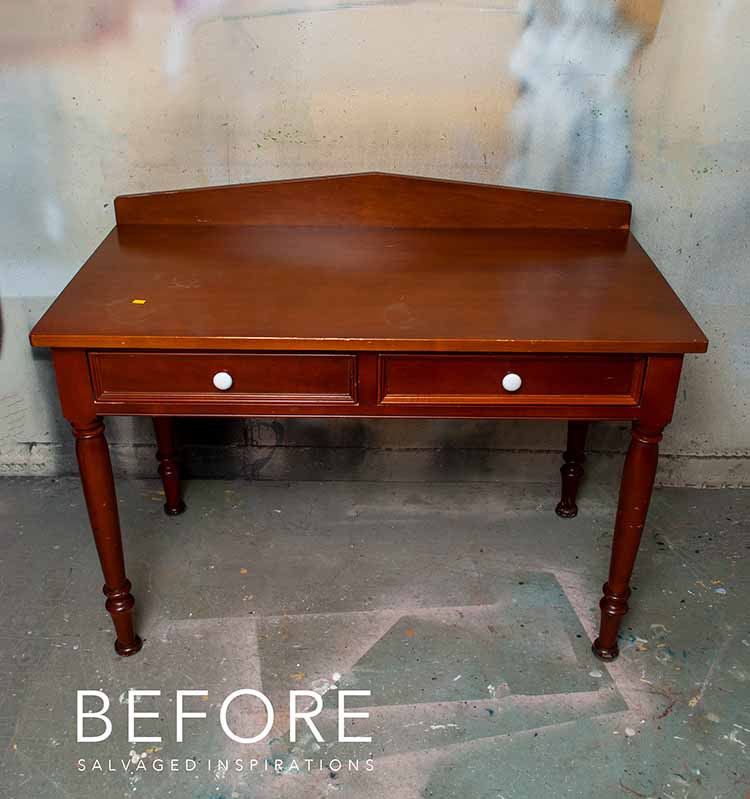
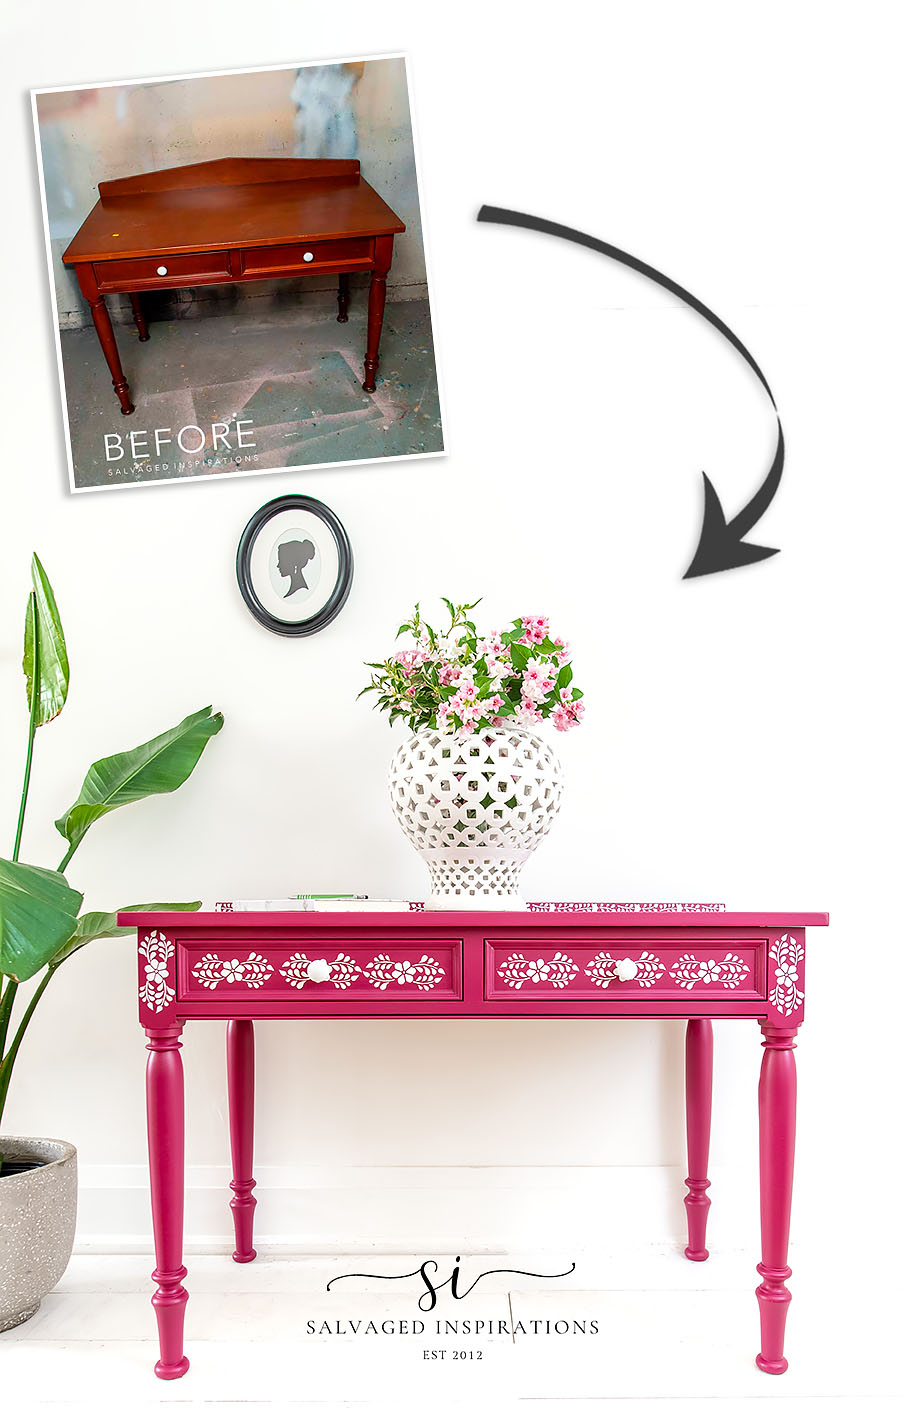
Here’s the desk in its original state. Very 90’s looking, right?!
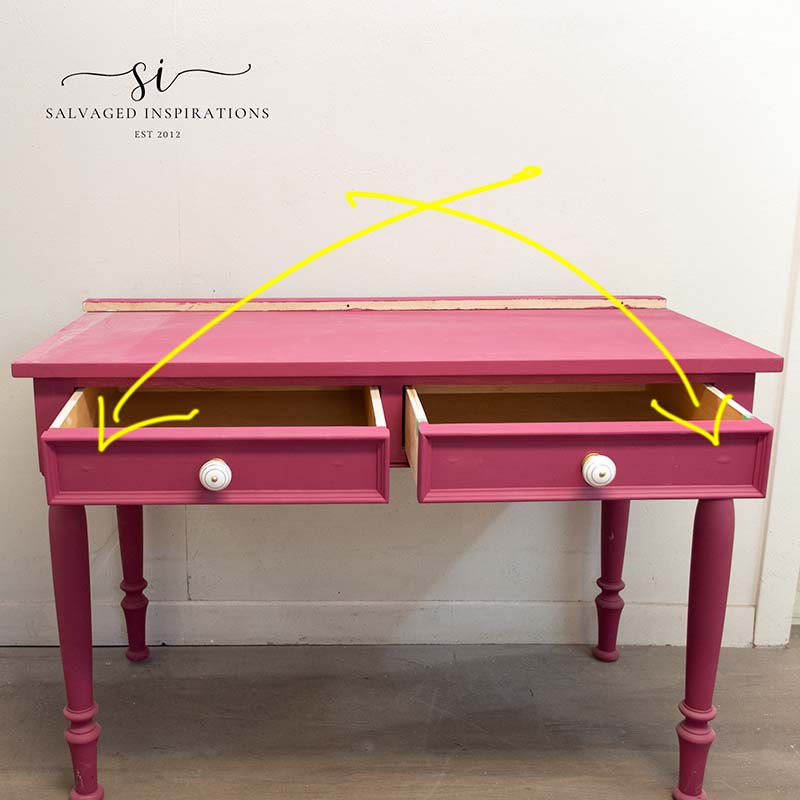
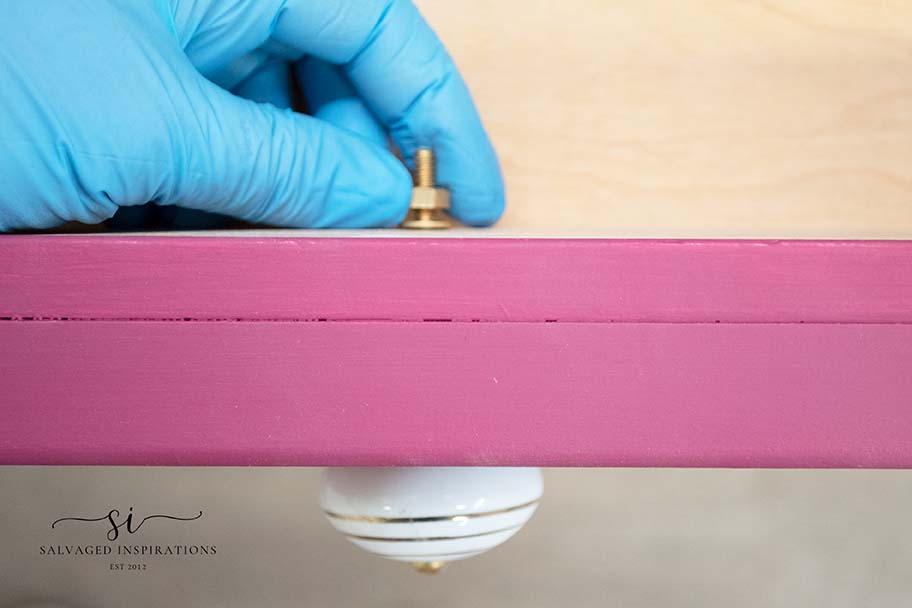
You may remember this desk was updated in 2021. It was painted in a gorgeous vibrant plum color and the backboard was replaced. Unfortunately, before I went to topcoat this desk, I tightened the screws on the back of the drawers and over-screwed them. You can see in the pic below, I screwed it so tight, the tip of the screw left a bit of the veneer protruding on the front side of the drawer. So I never top-coated and never sold this piece. Instead, it went into storage.
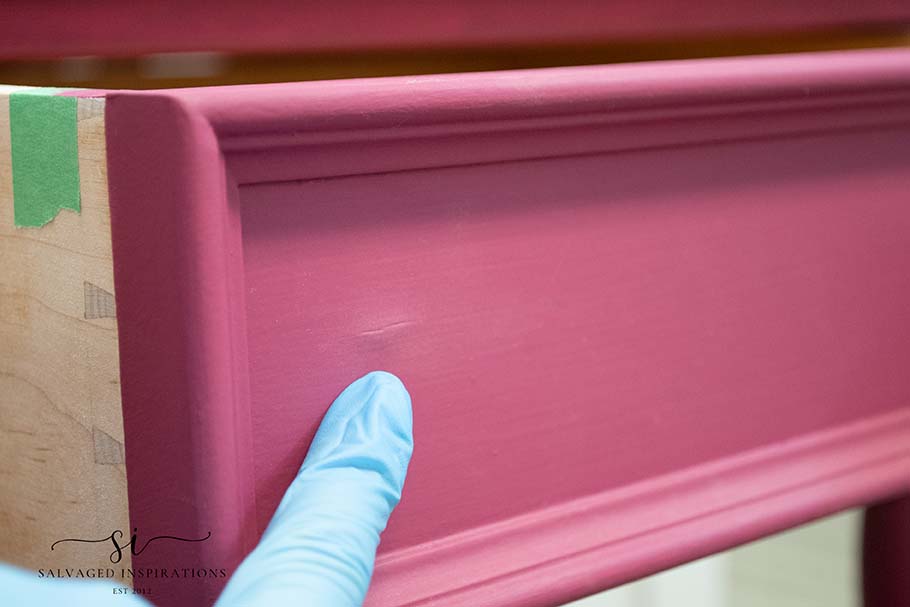
Here’s a closer look. It’s a tiny flaw that you won’t even see after we finish bone inlaying!
THIS POST IS SPONSORED AND/OR CONTAINS AFFILIATE LINKS TO PRODUCTS I LOVE AND USE. YOU CAN SEE MY FULL DISCLOSURE HERE.
HOW TO STENCIL BONE INLAY
For a crisp painted bone inlay stencil design, it’s best to use a flat piece of furniture – or at least stencil on the flat areas. If you have a piece of furniture that has raised details, moldings, or appliques, place and plan your design on flat surfaces. Otherwise, if you try stenciling over raised details, it will be near impossible to keep your painted stencil design sharp.
SUPPLIES YOU’LL NEED
Painted Desk – SALVAGED
Measuring Tape | Ruler | Pencil
Painters Tape
Heat Gun
Bone Inlay Stencil
Stencil (Wax) Brush
2″ Mini Paint Brush
Plum Crazy Chalk Mineral Paint
Cotton White Chalk Mineral Paint
Gator Hide Topcoat
CLEAN – PREP – PAINT
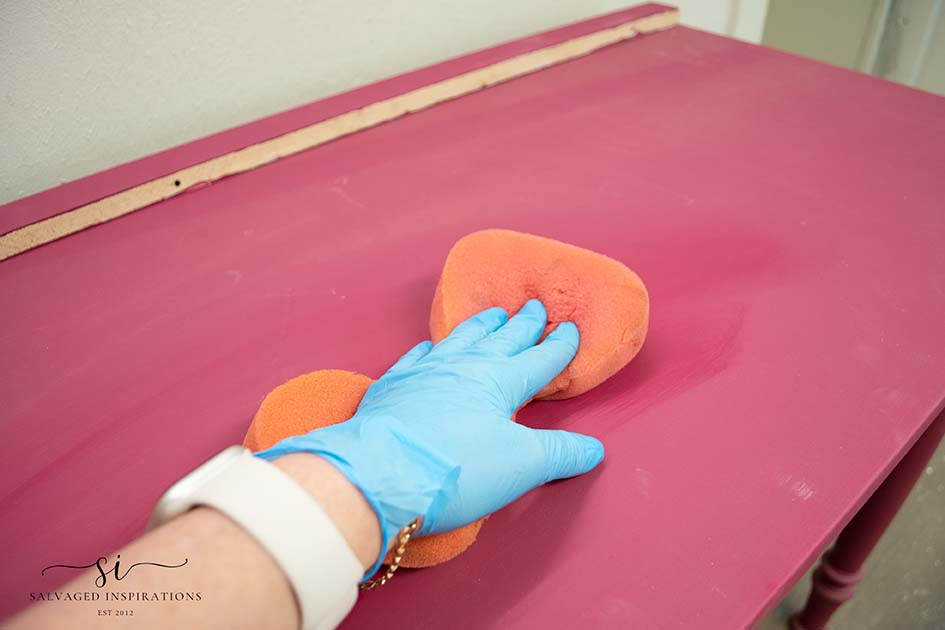
I started by removing the hardware and giving this desk a good wipe-down with a sponge and warm water. This desk needed a little paint touch-up, but I love this color so there was no need to repaint. If you’re starting from scratch, you’ll want to clean, sand, and paint your perfect base color.
PICK YOUR STENCIL
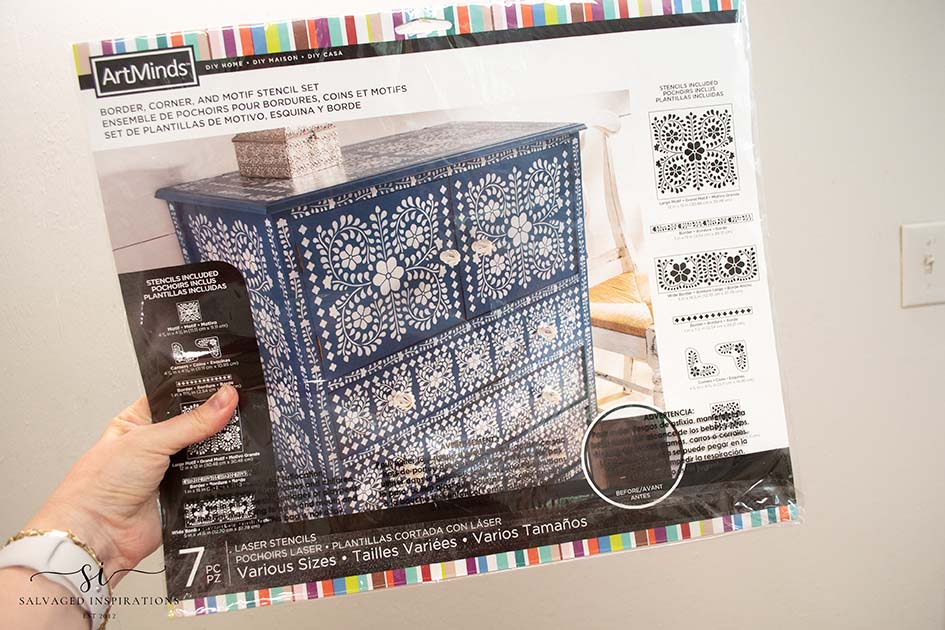
There are so many beautiful bone inlay stencils on the market. I used this ArtMinds Bone Inlay Design that I bought a few years ago. It comes with seven (7) different pieces including a thin border and corner designs. I believe bought mine from Michaels but you can also find it online here. I’ve also included some other gorgeous inlay stencils here, here, and here.
PLAN YOUR DESIGN
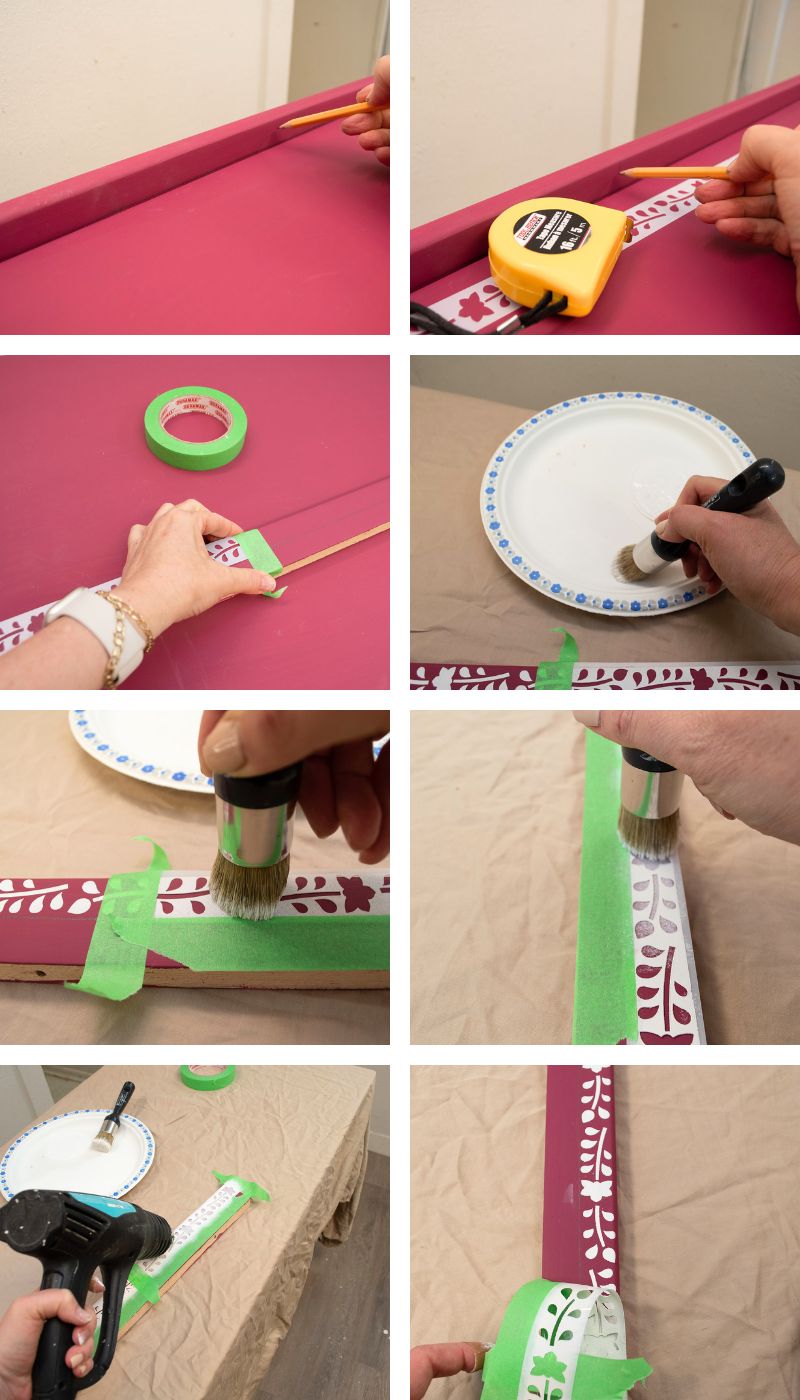
Every piece of furniture is different so planning where you’re going to place your design is important. I started by measuring the center of my backboard and then I used the border stencil to work from the center out to the edge.
I kept a measuring tape, ruler, pencil, and painter’s tape by my side the entire time and used them with every placement of the stencil. This was to make sure my designs were centered, evenly spaced, and visually pleasing.
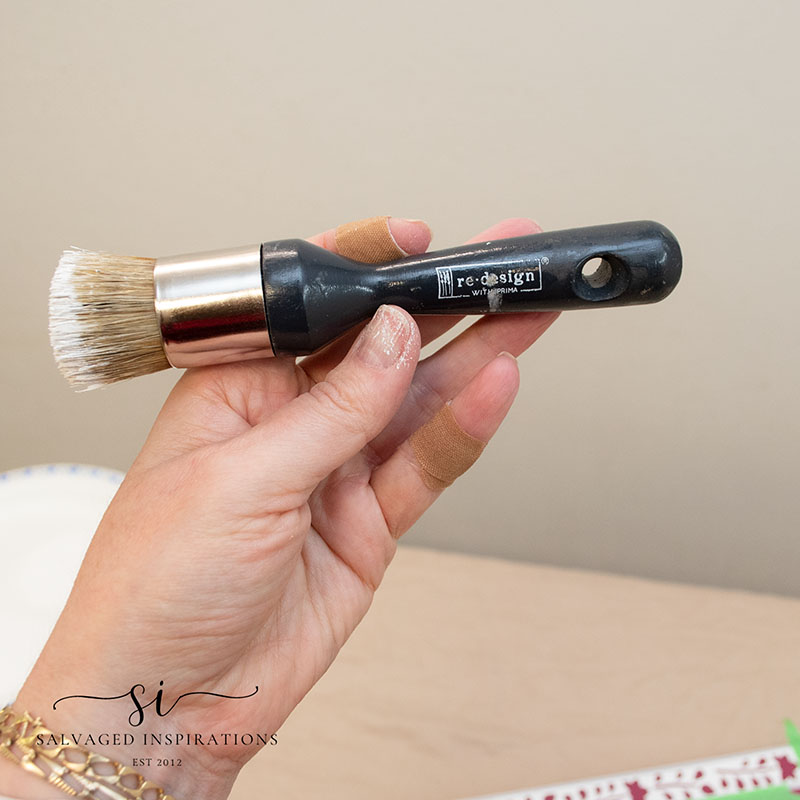
BEST STENCIL BRUSH
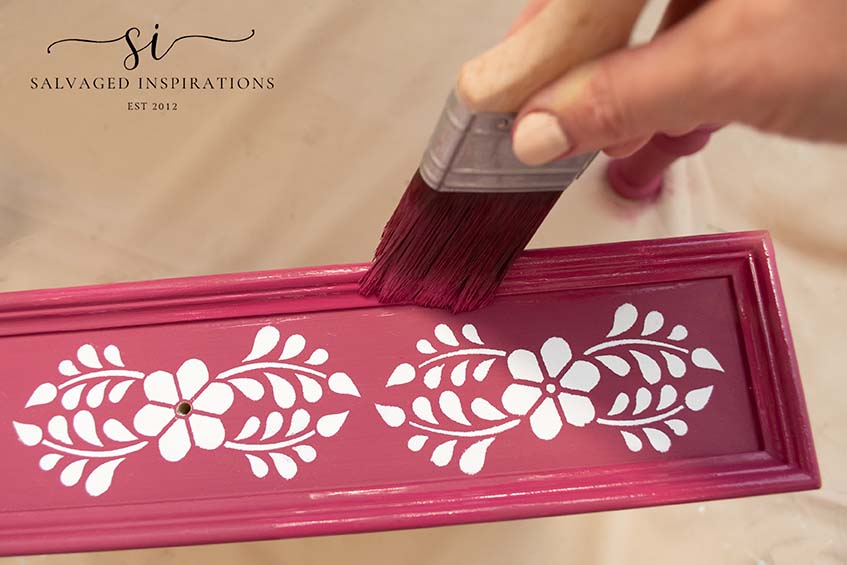
I’ve used a lot of stencil brushes, rollers, and sponges to stencil and this Redesign With Prima Stencil/Wax Brush is my favorite. The bristles are tight, compact, and strong. They don’t flare, bend, or lose any hairs as I’m pouncing the brush… and believe me, this brush takes a beating with all this stenciling as you’ll see in this Saturday’s video! If you’re going to stencil a bone inlay, I would strongly suggest investing in a good stenciling/wax brush so you get a crisp clean stencil design.
HOW TO PREVENT BLEEDTHROUGH
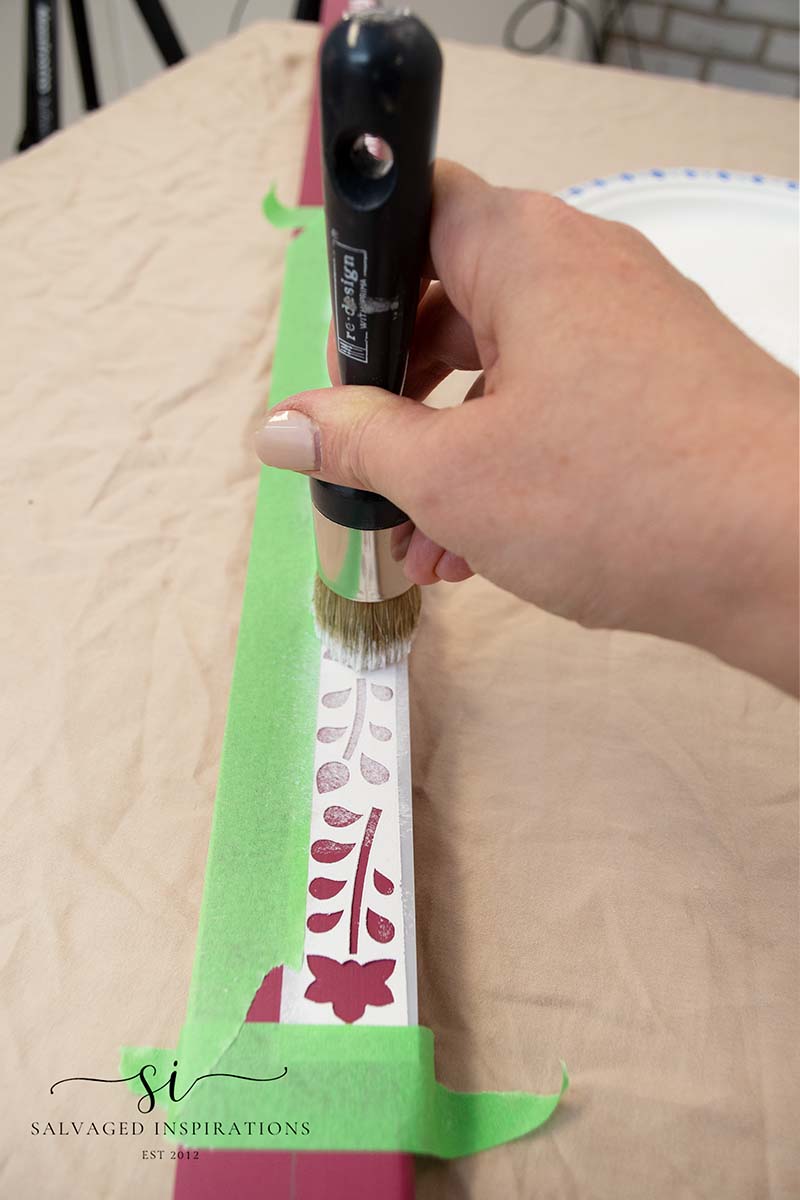
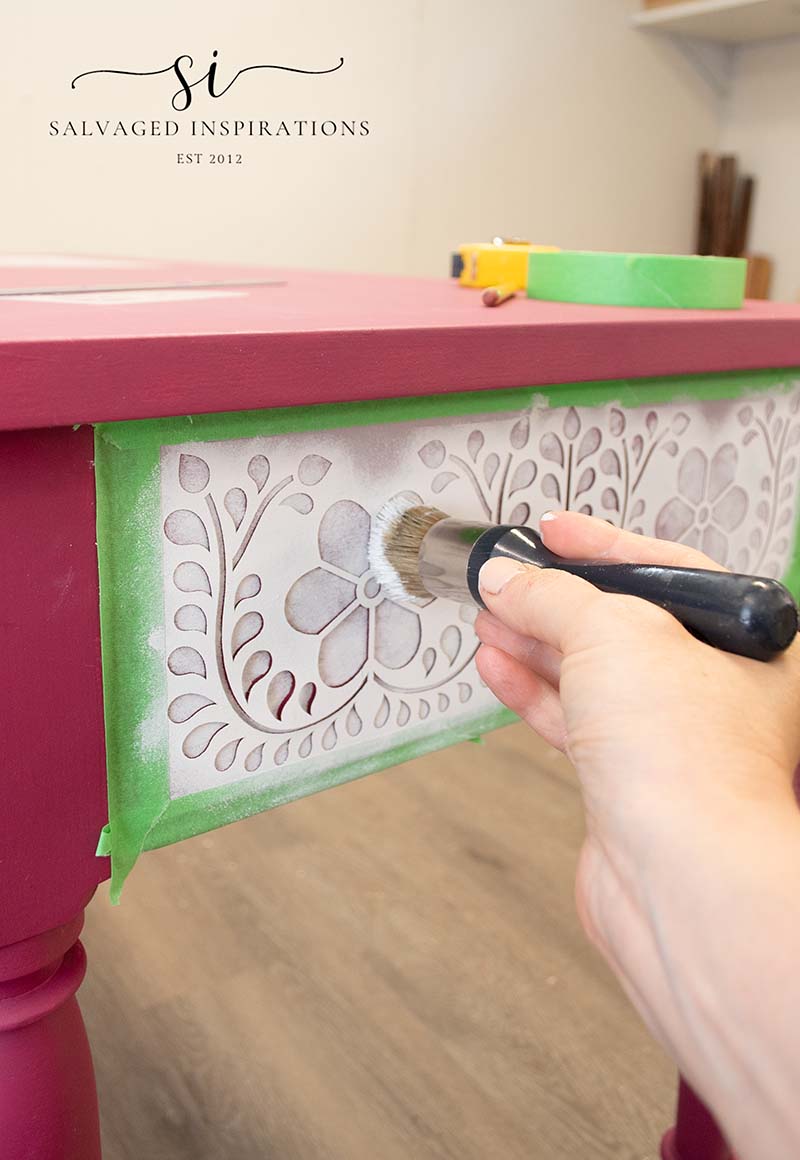
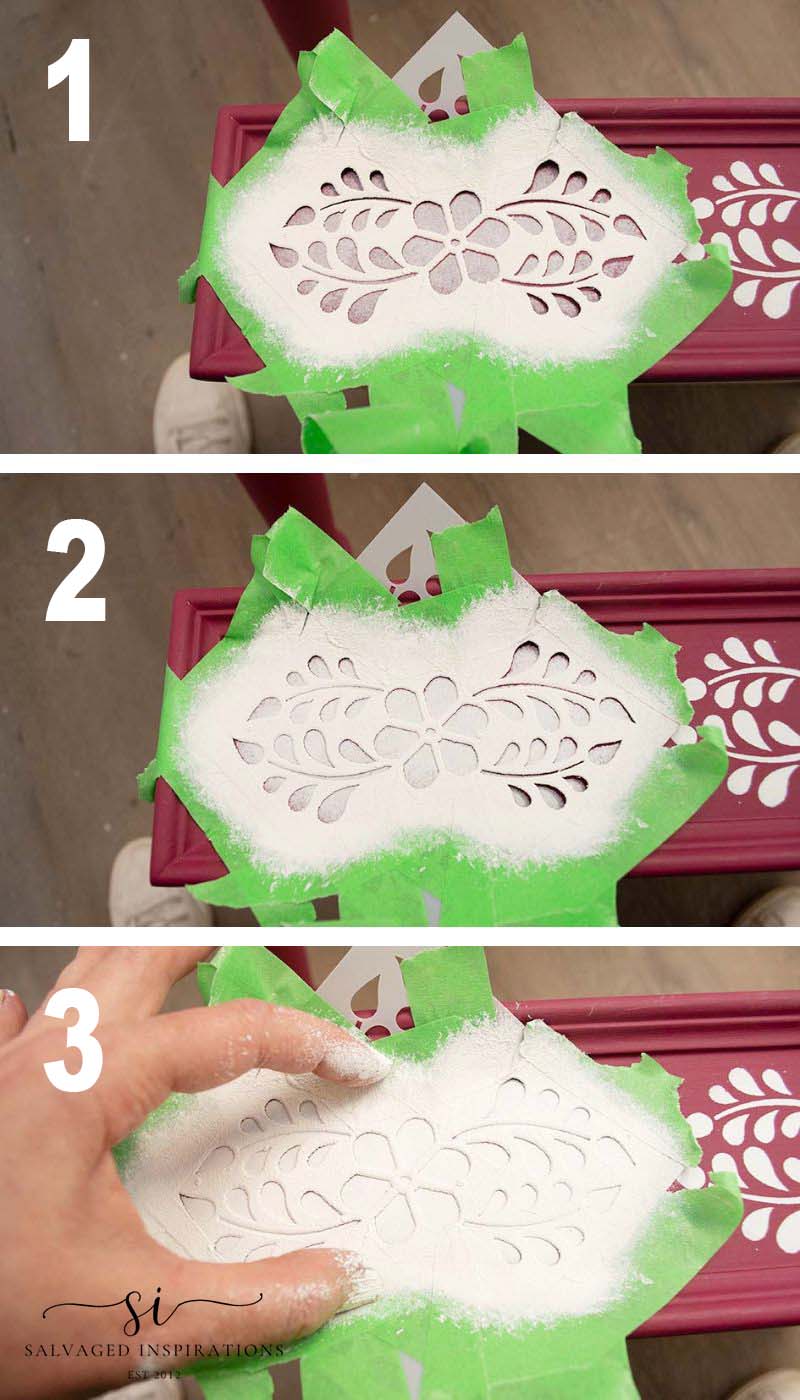
To prevent my paint from bleeding through (which is just another way of saying the paint seeps under the stencil design and looks messy) I stencil three THIN layers. I dip my stencil brush into a tiny bit of paint and then rub any excess off onto the paper plate. This keeps my brush fairly dry. Using a pouncing up and down motion, I add my first layer while holding the edges of the stencil down flat.
Pro Tip – To speed up the stenciling process I make sure to apply super thin layers of paint and then use my heat gun to dry the paint with each coat! Because there is so little paint being used, it takes under a minute to dry! I don’t need to remove or clean my stencil in-between coats which is also a time saver. Be sure to check out this Saturday’s video (which I’ll include in this post) to see how I *easily* clean my stencils.
Below is a pic of how the three light coats of paint build up to total coverage.
STEP-BY-STEP GUIDE
- Clean, prep, and paint the basecoat on your furniture
- Place and measure where you want your bone inlay design on your furniture
- Use painter’s tape to adhere the stencil flat
- Add a small amount of paint onto your stencil brush and then remove any excess onto a paper plate
- Dab and bounce your brush onto the stencil in a straight up-and-down motion
- Keeping the stencil on, dry your paint with a heat gun
- Repeat steps 4-5-6 another two times until your paint coverage is opaque
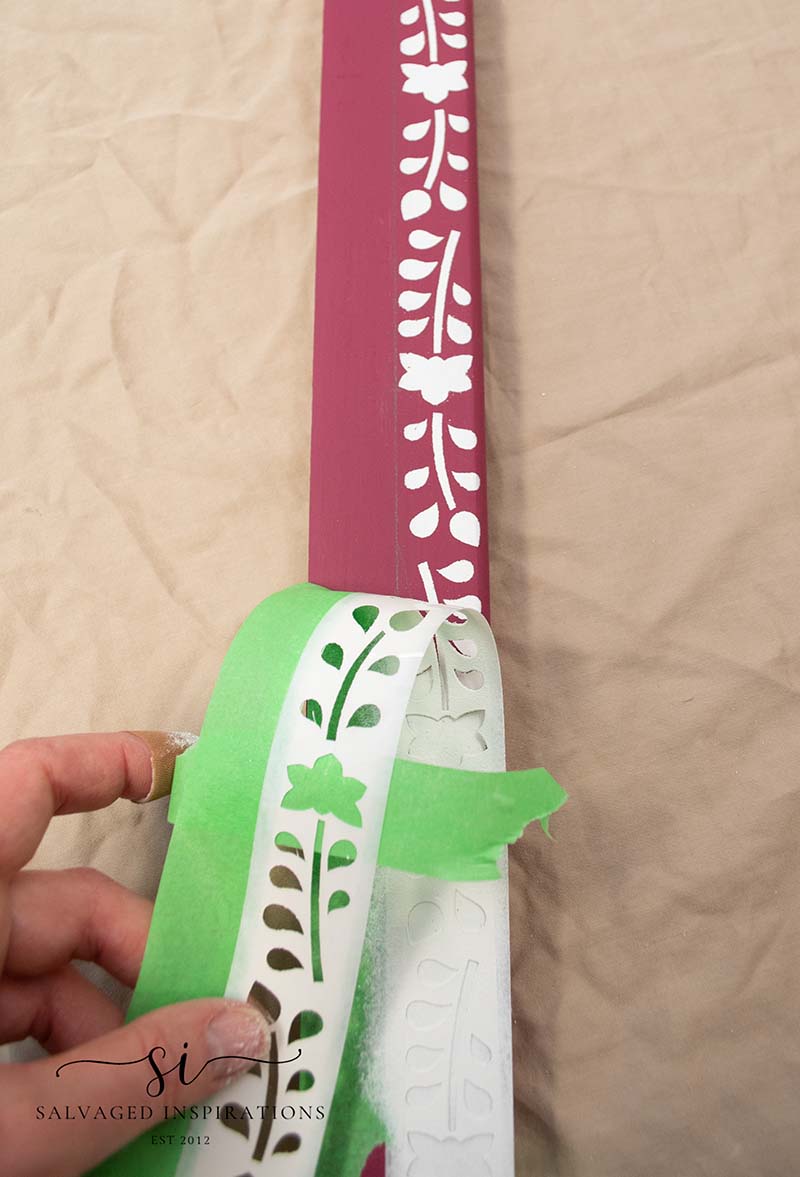
- Remove your stencil
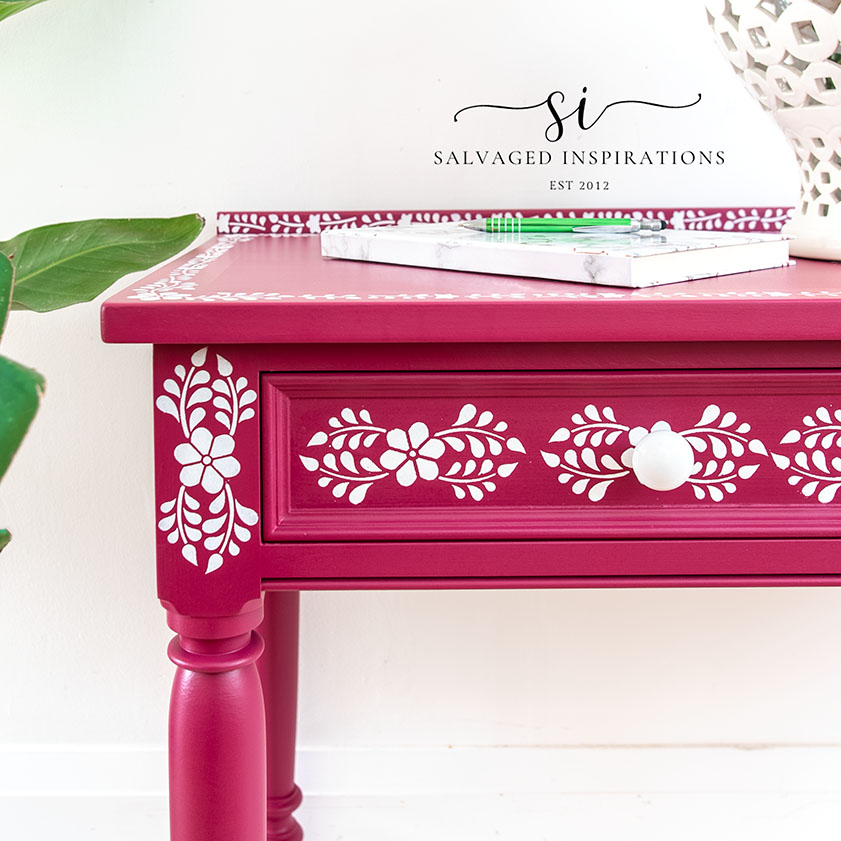
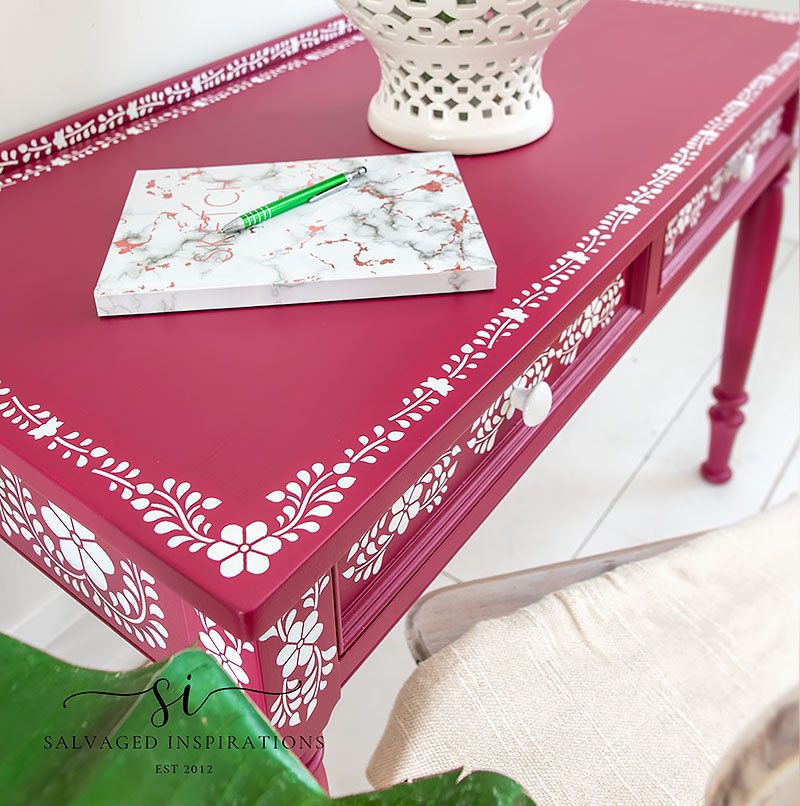
Here’s a close-up of how clean and precise the design looks when I used three super light coats leaving the stencil on the entire time.
TOUCH-UPS
To touch up any imperfections that happened while this desk was in storage, I used my 2″ short brush with the Plum Crazy paint and brushed it on making sure not to muck up my freshly painted stencil design.
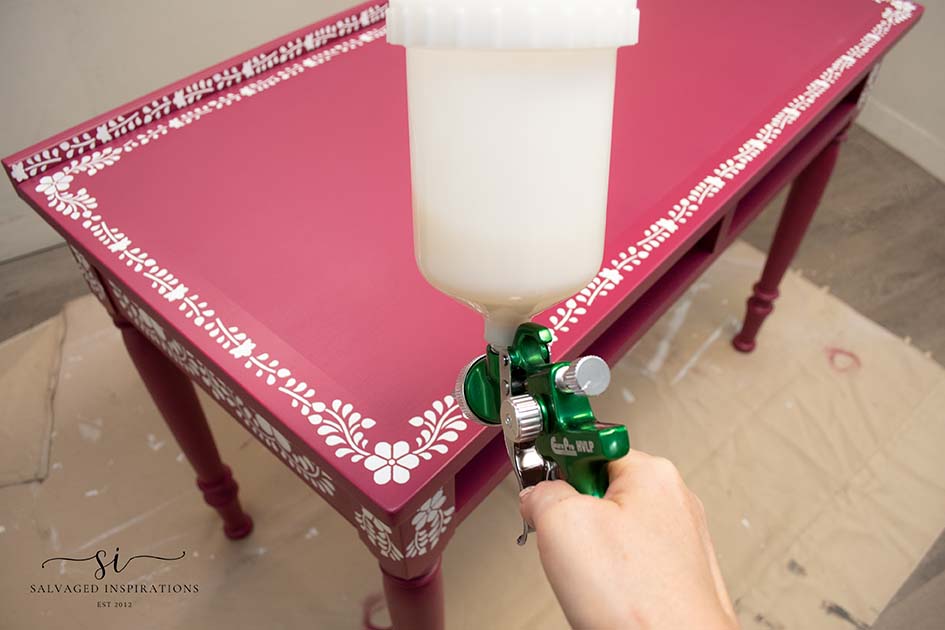
TOPCOAT + HARDWARE
To seal and protect this desk, I used this tough Gator Hide Topcoat. I love using Gator Hide for high-traffic items because I KNOW it works. It’s not only water resistant but water repellent which has saved the day many times on my kitchen table that I’ve been using daily for over 3 years now. Plus it cleans up beautifully.
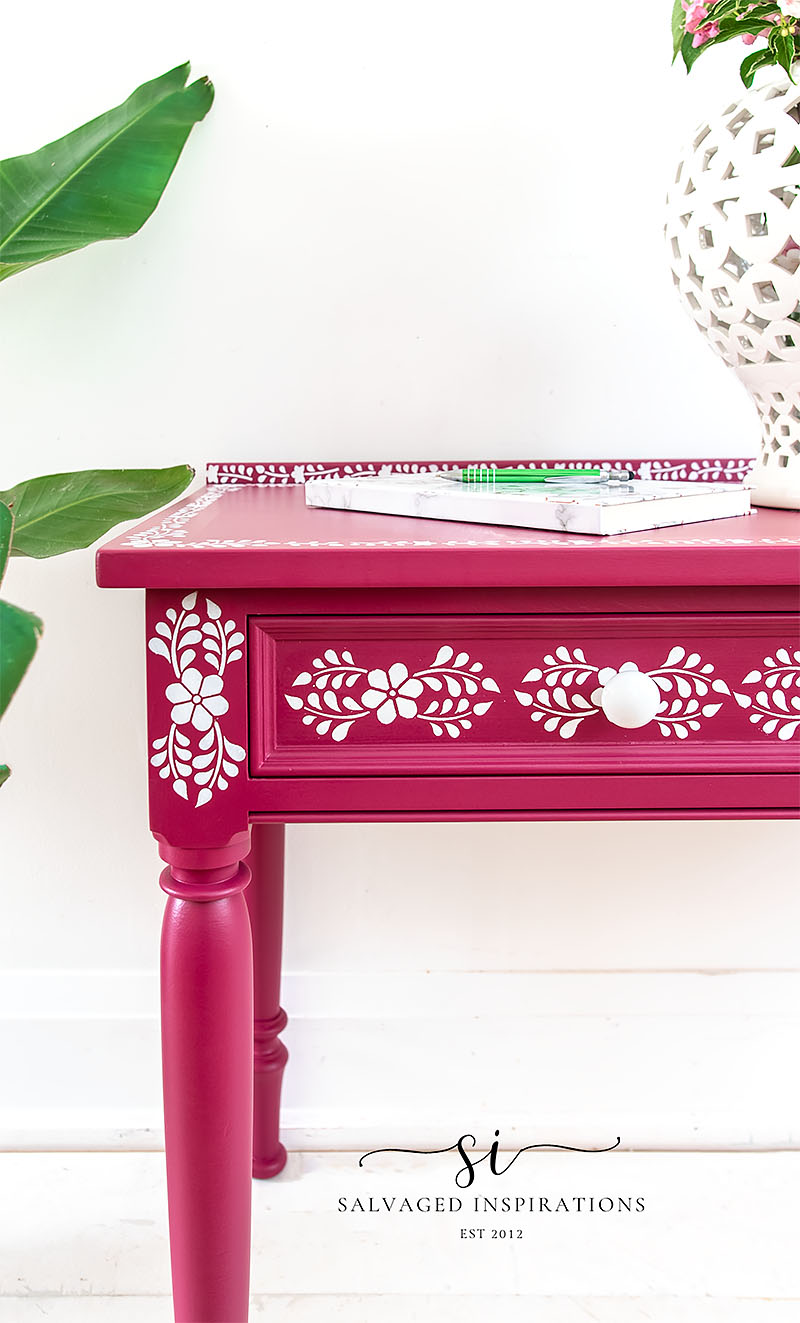
I also went ahead and added the original white knobs that were on these desk drawers. They are clean and simple and show off a little of the bone-inlay floral design.
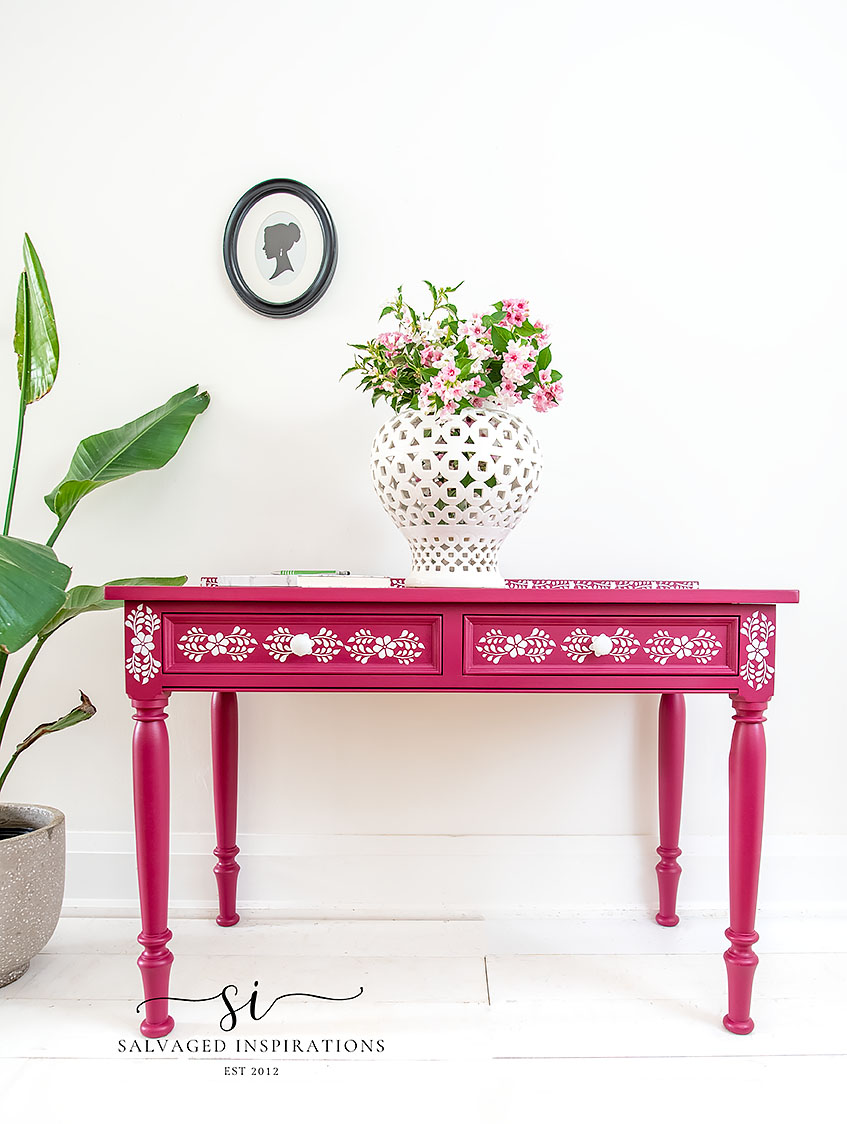
FINISHED LOOK
And here’s how this bone inlay desk makeover all came together.
 So pretty, right?! What do you think?
The Cotton White against the Plum Crazy looks amazing!
I’m really happy with how this all turned out. And hey, can you see the screw marks? It’s like they totally disappeared!
I just want to add that if you’re going to do this type of design on your furniture, put aside some time. Even with the quick drying of the heat gun (which REALLY helped speed up the process!) this bone inlay design took me five (5) hours to do. If I was to do the entire top and legs, I’m sure that would have more than doubled it.

YOUTUBE TUTORIAL
Here’s a step-by-step tutorial on Youtube. If you have any problems viewing it below, feel free to watch it on my Youtube Channel HERE. Our #siyoutubefamily is already a community of 38.8K so don’t forget to subscribe if you haven’t done so already! So exciting, thank YOU! 🙂
Here’s another look at this desks’ before and after. I hope this step-by-step tutorial has inspired you to try bone inlaying your furniture.
Let me know what you think of this makeover or if you have any questions. Or just leave a hello in the comments to let me know you were here… I always LOVE HEARING FROM YOU… it makes my day! 😃
Happy furniture painting my friends!
Denise x
RELATED POSTS::
HOW TO REVAMP YOUR OLD DESK
MCM CHOCOLATE-PAINTED DESK
RAISED STENCILS ON FURNITURE
PAINTED LACE SECRETARY DESK
STENCIL LIKE A BOSS | 7 PRO TIPS
PIN AND SHARE!

It’s so nice ! You’ve done an amazing job.
Thank you Helene!💜
Such a pretty desk Denise! I love the pretty plum color and bright white painted inlay detail Your heat gun tip is brilliant and one I’ll be using going forward. Thank you! xo
Aw thanks so much my friend! I was just thinking about you this morning so it’s so nice to see you here! Wishing you a fabulous weekend. XOXO
Thanks so much Nicki! So glad you like it and find the tips helpful! XOXO
I enjoyed reading this so much, Denise . The bone inlay designs are some of my faves! Thank you for sharing your tips and tricks to get the perfect finish. Beautiful makeover as always. 😘
There are some beautiful designs for sure and one of my all time faves is the bone inlay dresser YOU DID… so gorgeous!!! Thanks my friend. XOXO
A very pretty color and stencil, as usual your work is perfection! I recently sent you an email thru your comments regarding the antique mirror post but don’t know if you received it?
Hi Celia! Thank you! And I dont’ think I recieved anything. Can you try resending please?
Hi Denise. Fantastic job of doing a faux bone inlay. Your stencil technique is flawless. Can’t wait to see your video this Saturday.
Thanks so much! I can’t wait to share the video with you this Saturday. Thanks for all your support! XOXO
Oh Denise, this is gorgeous!!!!!! It was made for me. If we were closer, I would buy this beauty instantly!!!!!! You did a fantastic job. The bone stencil sets off that color perfectly. I would design my entire office around this table. Thank you for sharing your talent.
awww, I wish we did live closer. Not just so the desk would go to the ‘perfect’ home — but so we could get together and chit chat in person. 🤗😃💕
Hi Denise: Of course, I LOVE what you did to this already pretty desk. Now it has even more PIZAZZ! Why is it called, “bone inlay”?
Thanks so much Caye! The ‘real’ bone inlay furniture is made with REAL camel bones that are cut to specific shapes/sizes and inset into a piece of furniture. I’ve read that the bones are taken from animals who have died of natural causes but regardless, they real thing is not my thing. But because bone inlay furniture was, is and probably always will be popular, they’ve created numerous bone inlay stencil designs for the diy’er. Much better imo. 🙂
I love how it turned out,you are so talented.Thank you for sharing all of your ideas with us.
I’m so glad you love it Donna, thank YOU!!
Beautiful as always. I’ve learned so much from you.
Thank you so much Jane! XOXO
BEAUTIFUL! I wondered how Gator Hide works on white? Does it yellow? I’ve used it on black on a sink vanity and it is awesome!
Thanks Cheryl and ya, Gator Hide is awesome! And I’ve never had it yellow on whites or light colors. It’s water based so it should be okay. 🙂