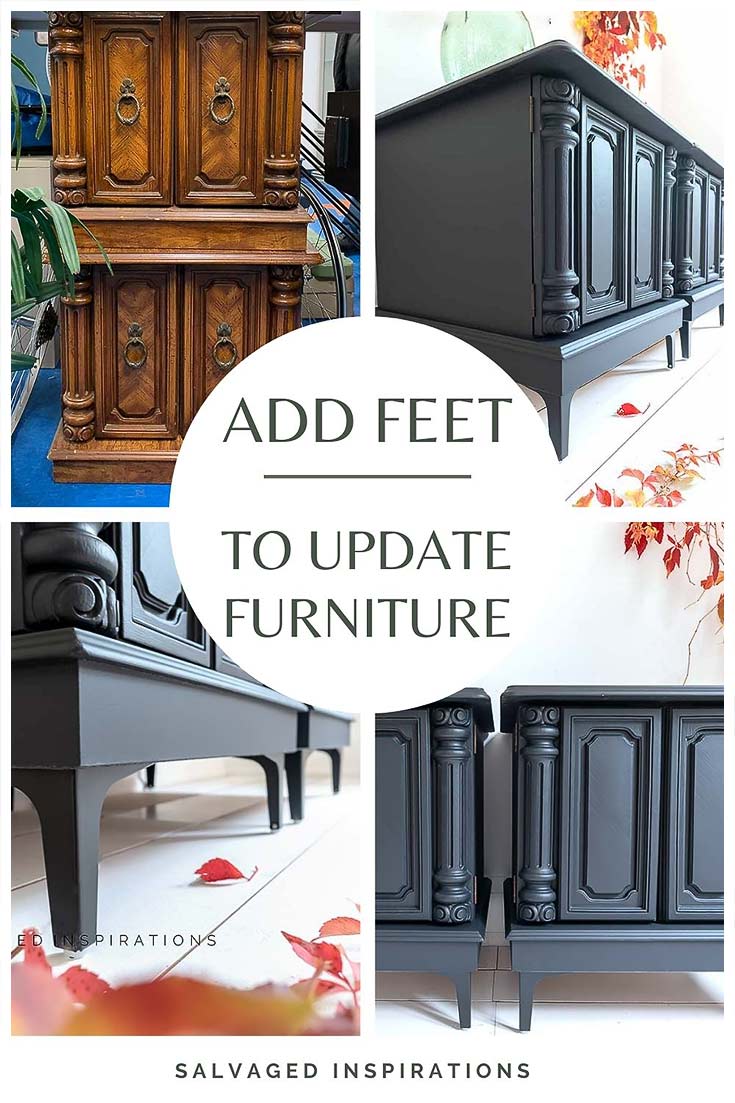
Update old furniture by adding easy to install metal feet! | 80’s Thrift Store Side Tables Before and After
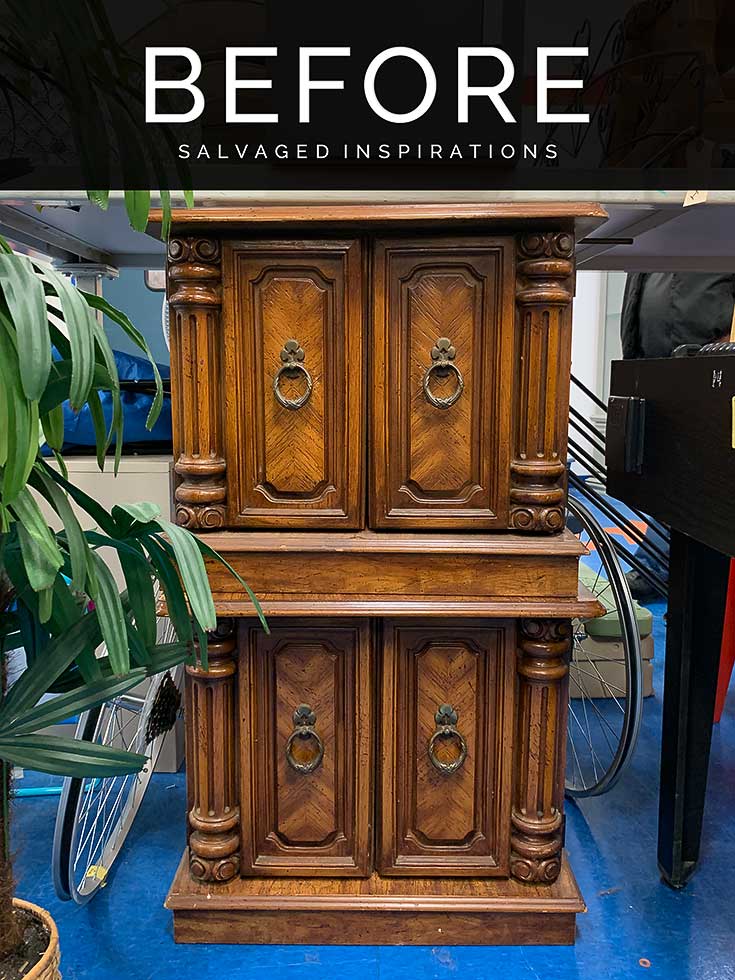
 Do you have a dated piece of furniture? Not sure how to make it look good again? Adding feet or legs to an old piece of furniture can totally transform a piece. Today I’m sharing these 80’s Thrift Store Side Tables that went from old and tired to sleek and elegant! I hope you love this before and after as much as I do!
It’s also one of my favorite days of the month. I’m joining my Trash To Treasure Crew!! Woohoo! I’ll be sharing links to their before and after tutorials at the bottom of today’s post.
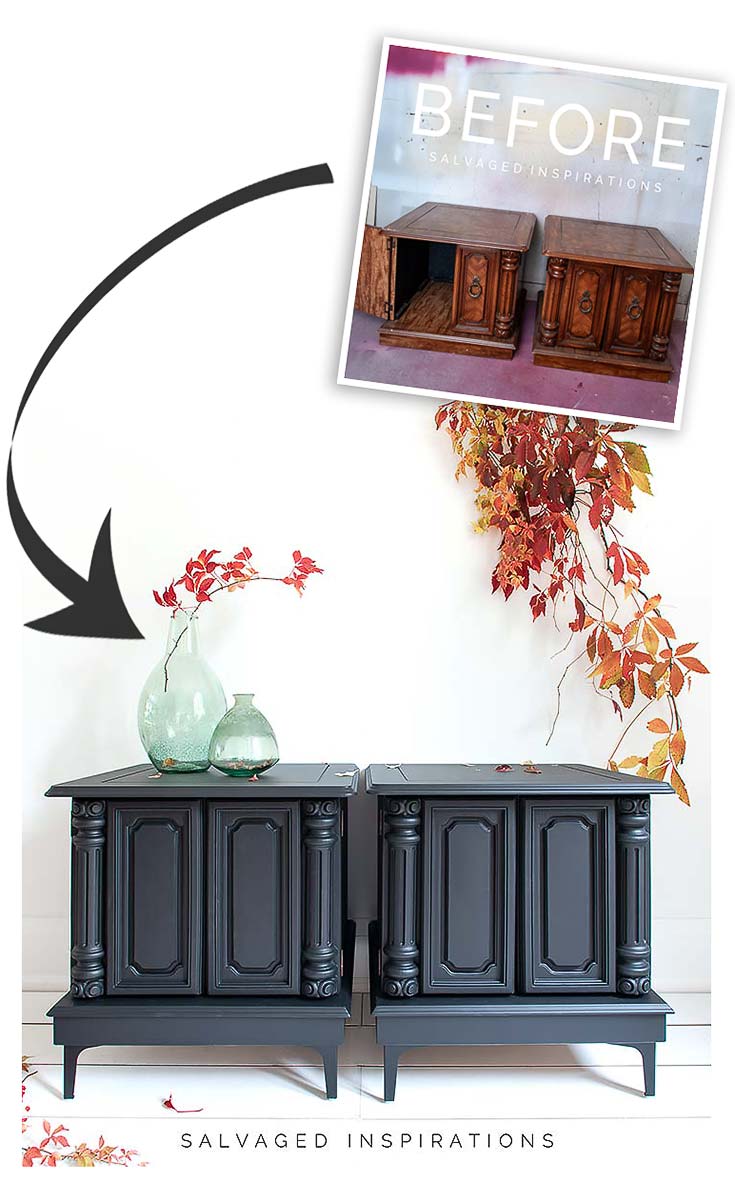
I found this set at a local Thrift Store selling for $12 each. They even ‘styled’ them by adding a fake plant beside the set. 😉
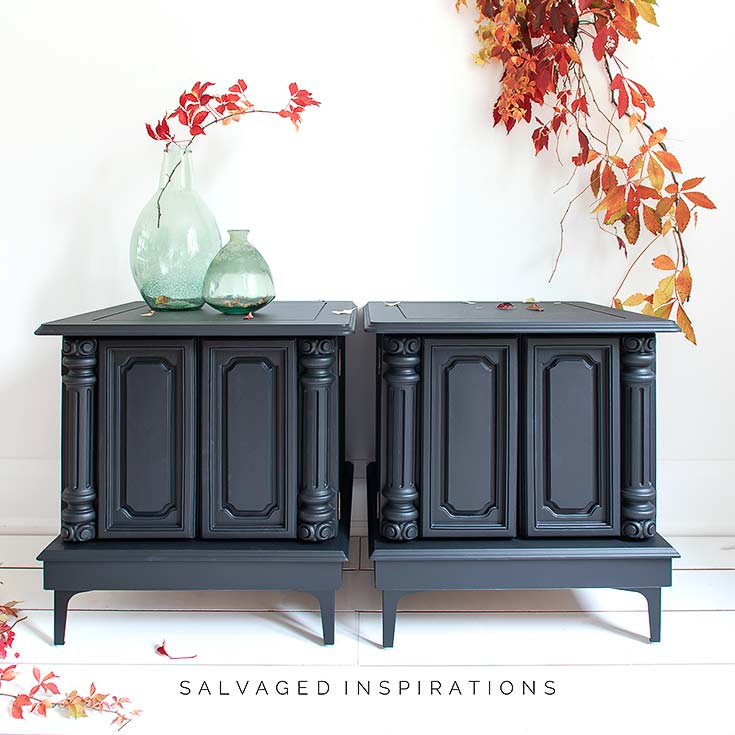
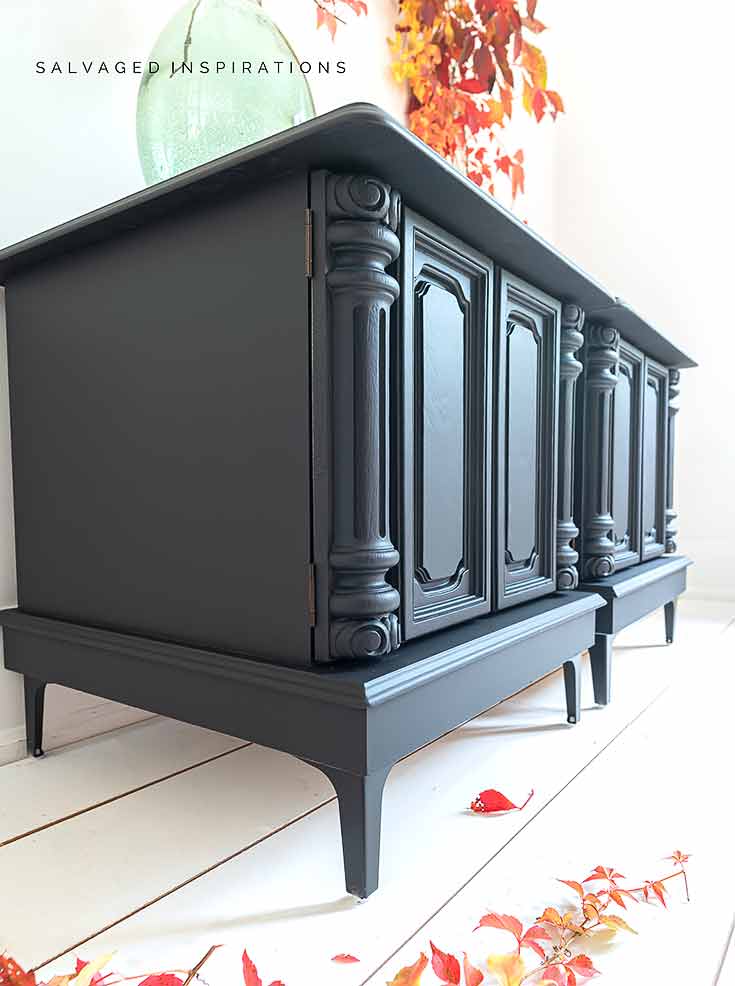
Here’s the updated makeover. Amazing how a little black paint and metal legs can change the entire vibe, don’t you think?

THIS POST IS SPONSORED/CONTAINS AFFILIATE LINKS TO PRODUCTS I USE. YOU CAN SEE MY FULL DISCLOSURE HERE.
SOURCE LIST
TOOL LIST
- DeWalt Orbital Sander
- Husky Spray Gun
- DeWalt Drill
- Rigid Brad Nailer
- DeWalt Drill and Driver Set
- Ryobi Miter Saw
- Tape Measure
ADDING FEET TO FURNITURE
To give these side tables a brand new look, I ordered these metal feet from Amazon. The funny thing is, I only ordered one (1) set for both night tables. Ugggh. Lucky for me (and everyone who has Amazon PRIME), I ordered another set at 10 pm that evening and the feet were delivered to my door by 11 am the next morning! What would we do without Amazon, right?!!!

![]()
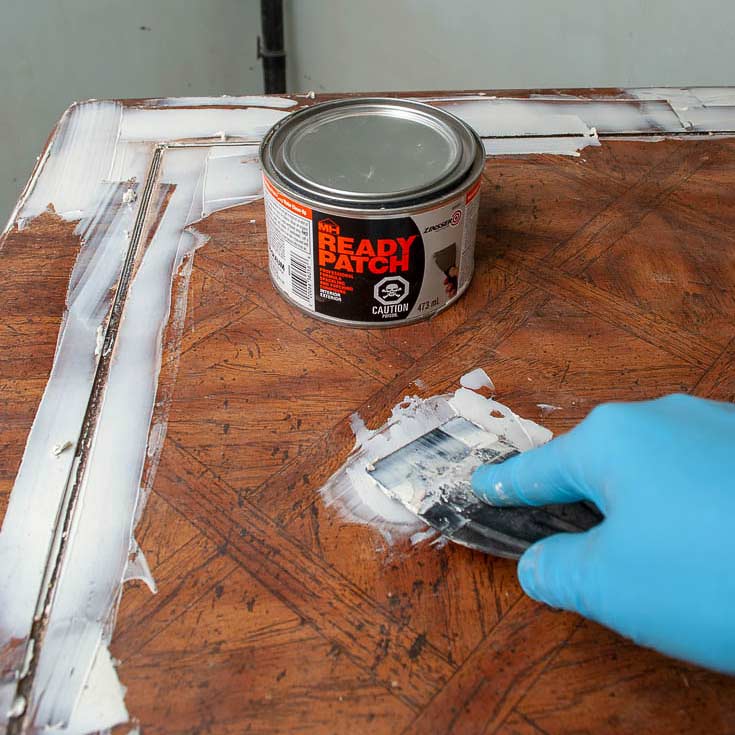
Before adding the feet to these tables, I had to deal with the scratched and blistered laminate.

I sanded to get rid of the blistering and used this fast-drying compound filler to smooth out all the scratches and blister scars.
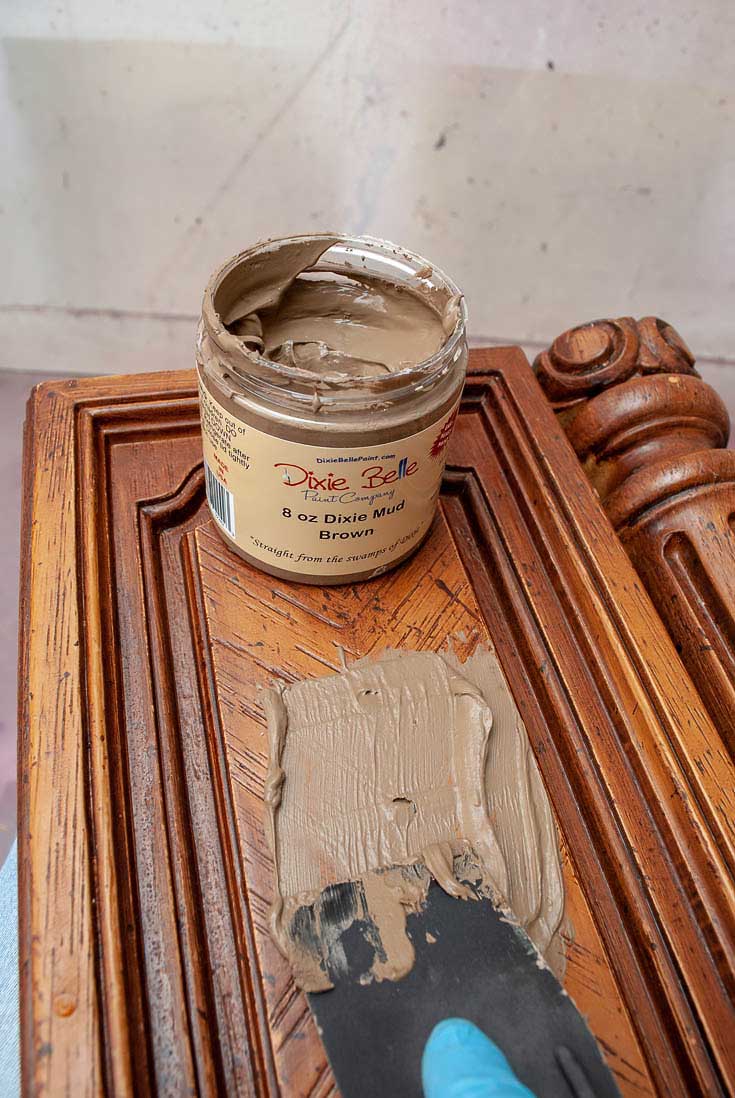
To fill in the faux wood grooves and hardware holes, I used DB Brown Mud Wood Fill.
After skimming and filling, I primed the tables with BIN Shellac Primer. If you don’t prime and seal after using wood putty or Bondo, the paint absorbs differently. This can lead to what looks like stains or discolored areas. If you missed the post on how to stop bleedthrough using this primer, you can view the BIN Shellac Primer post and video here.

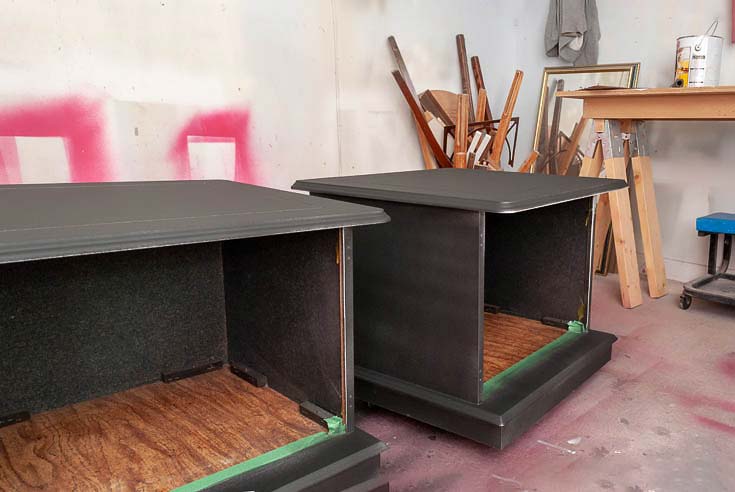
After the two coats of BIN primer was dry, I sprayed two coats of this Caviar Black. Below is what it looked like after the first coat of Caviar.
To add furniture legs to a piece of furniture, you first have to have something sturdy to attach them too. These tables had a skirt to hide any additional wood pieces so it was really easy to cut and attach a piece of wood to drill in the feet.
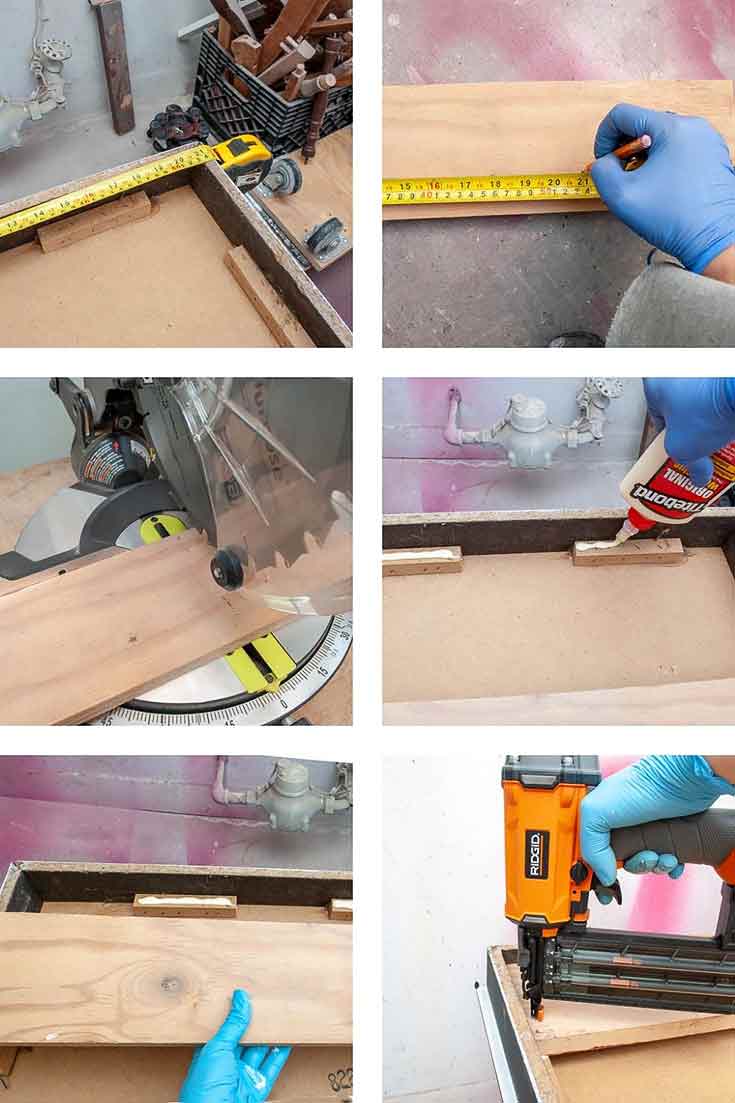
- I measured underneath the side table to see what size piece of wood I needed.
- I measured and marked my wood at 21″ to fit
- Using my Miter Saw I cut 4 pieces of wood (2 pieces for each side table)
- I added wood glue to all the areas it would be attaching
- Using a Trim Nailer, I nailed and secured the wood
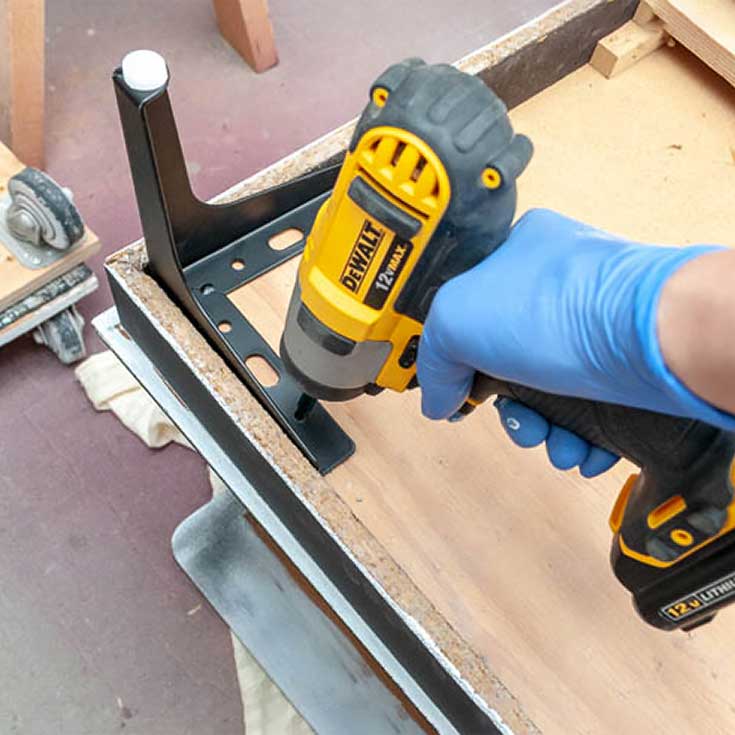
- The last step was to attach the metal legs in each corner with the screws provided
Here’s the finished look…

Don’t they make a HUGE difference?
To keep the front face of these nightstands (I think they’d make gorgeous night tables!) looking clean and modern, I opted for magnetic push latches instead of hardware on the doors.

They were top coated and sealed with two coats of this Satin Clear Coat. A satin finish you just want to run your hands over! 🙂

And now for some TRASH TO TREASURE FUN!
I know you’re going to LOVE what this talented team of ladies share. They never cease to surprise me with their creativity! Below are their BEFORE photos. Visit the links underneath to see the amazing AFTERS and to learn how they did it!
I’m heading over to take a peek right now myself! x
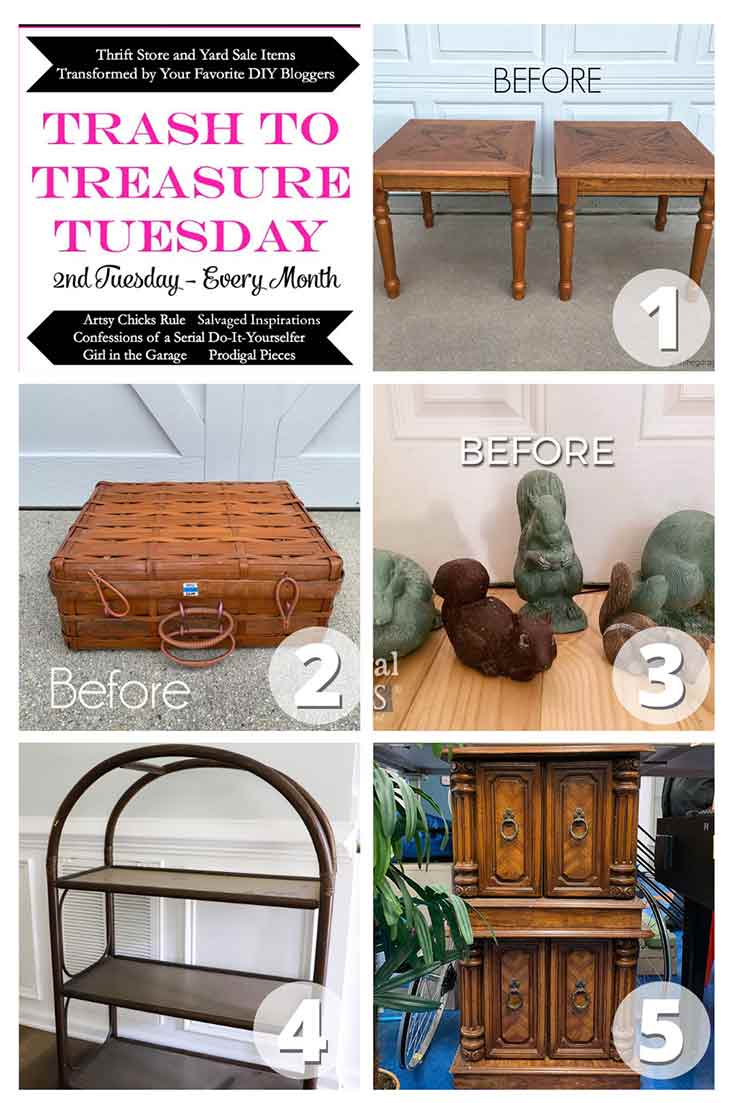
1. Girl In The Garage
2. Confessions Of A Serial DIYer
3. Prodigal Pieces
4. Artsy Chicks Rule
5. Salvaged Inspirations (I’m so happy you’re here!!)
Here’s another look at the before and after…
LET ME KNOW WHAT YOU THINK OF THIS THRIFT STORE NIGHTSTAND MAKEOVER AND THESE METAL LEGS. ALSO, IF YOU HAVE ANY QUESTIONS FEEL FREE TO CHIME IN… I ALWAYS LOVE HEARING FROM YOU.
Thanks for reading. 🙂
Wishing you a beautiful day filled with inspiration and Happy Painting friends!
Denise XO
RELATED POSTS::
Pin Legs Apothecary Cabinet Makeover
The Simplest Way To Add Furniture Legs
Turn Old Furniture Legs Into New Feet
Furniture Repair – Filling In Rounded Feet
Salvaged Trunk w DIY Angled Legs
PIN AND SHARE!


Hi Denise,
LOVE the look of these- adding the feet totally changed the look! I’m just starting to “dumpster dive”as my kids say (I prefer “Craigslist shopping” on the free listings) to turn other peoples trash into treasures. My question is do you always have to use chalk paint to paint wood or can you use regular latex paint? I LOVE to read your and the other “Trash to Treasure” ladies postings. Keep up the GREAT work!
Janice
Hi Janice! Craigslist and FBM have some fabulous FREE finds… brilliant! And yes, you can use regular latex so long as it’s prepped and topcoated properly. I really like Sherwin Williams All Surface Enamel. It is amazing. Very durable for furniture makeovers!
Hi, I love these tables and the legs are amazing! When I click the Amazon link it doesn’t go to a single set of legs, I’m having trouble knowing which exact set you used.
Thanks for the heads up Linda! I’ll go in and check on the link.
Thank you!!
Thankyou so much Denise for your excellent tutorial on B.I.N I’m going to give it a try. Your advice is so much appreciated 👍🏻🥰
I’d love to hear what you think! 🙂
Wow Denise, not only do these tables look so good painted black but the style of feet you added completely changed the look. Defeinitely a trash to elegant treasure makeover!
Thanks my friend! I really like the new look as well even though Andrea recommended I don’t get them…lol. 😉
Wow, great job, so much classier now. Thank you for posting.
Yaaay! Thanks Tracy! Hope you’re doing well and staying safe. XOXO
Are you ever going to do something I DON’T like…😂😂
Fantastic redesign Denise! I love the addition of the feet and the colour is spot on!
Awwww, thanks so much, Annie!!!! Hugs… and so glad you like it! XOXO
Please tell us where you bought those legs. Oh and change that blade in you miter saw to a 80 tooth blade for a MUCH better cut.
Thanks Richard! And you can find the metal legs here.
Hey Miss Denise!! Please tell me why you use Mud for holes and not use the Ready Patch to fill in holes since you already have it out? Can you use the Ready Patch to fill holes as well? Is Ready Patch the same as Bondo?? Thank you ma’am!!! Love your work!!!
Hey Miss Kristi! 😉 Ready Patch is FABULOUS when filling in scratches and gouges because it dries FAST and is SUPER easy to sand by hand, unlike BONDO that dries like a rock and takes a sander to smooth out. Because Ready Patch is so ‘soft’ it isn’t great for filling in holes. That said, I could have used it to fill in the grooves in the doors but I already had the DB Mud out for the hardware holes. And as I side note, if I were going to drill in new hardware, I definitely would have used the Bondo because it’s the strongest out of all 3 products. Hope this helps and great questions btw. 🙂
OH my goodness! These are gorgeous! The color, the legs, just fabulous!
Thanks so much Janet! 🙂
Love the new feet!! So good!
Thanks my friend! XOXO
Fabulous work, Denise! I’m so glad you ditched the chunky hardware, haha! 🙂
Thanks my friend! XOXO
Denise, they remind me of a little stove to warm a room on a cold winter night!!! I love how they turned out and the legs absolutely change the whole look for sure….another great re-do of something not too pretty at the thrift store that was walked past by many, except then YOU saw them….the lightbulb went on and Voila, a pair of beauties!!!
A little stove on a cold winters nights…love it! So glad you like the makeover, thank you! xo
Wow, great choice! Not only do the feet update the pieces…they make it way easier to move the pieces around.. Great save.
Way easier… thank you! 🙂
I just love all your work! When Covid is under control I want to volunteer myself to learn under you.
Do you not paint the insides of these?
Ah, thanks Darla!!! I didn’t paint the inside of this one because the inside top and sides were already black and the laminate on the bottom looks clean and nice. If a piece needs a clean look on the inside, then I’ll paint it. 🙂
Huge difference! ❤️Thanks for sharing. I’ve never seen these legs before and can’t wait to try them. Beautiful makeover. xo 😘
Aren’t they great?! And so easy to install! Have a great day my friend. XOXO
As always, another great redo of a piece I would have walked right by in the thrift store after thinking “yuck!” 😂
I am always amazed at your ability to see the potential in ugly pieces of furniture and make them beautiful. The addition of these particular feet are a game changer!
Thanks Patricia and my sister totally agreed with you lol. She was at the Thrift Store with me when I first saw them. Scrunched up her face shook her head and said I don’t think so.lol
What a lovely makeover! Those new feet make all the difference!
Thanks Becky! 🙂
I had no idea how you were going to save these, but they look amazing!! I shouldn’t have been surprised lol! XOXO
Thanks my friend! XOXO
Hi Denise. Oh. My. Gosh. It AMAZES me how you can turn such outdated furniture into something I wish I owned! These nightstands are simply gorgeous. They went from sad to fab:). The color, the legs, and using magnetic openers rather than handles…all brilliant. You really have a gift. Well done.
Sad to FAB…. love this! Thanks Monique and have a super week. XOXO
I love the color. Who would have thought these chunky pieces could look so delicate? I’m not a fan of metal legs but these add so much character to the pieces. Great job Denise! I’m checking out what the others are up to today. Have a good week.
Thanks Kathy and enjoy the other T2T makeovers… I’m always impressed by their creativeness! Have a super week as well. XOXO
I love the color. Who would have thought these chunky pieces could look so delicate? I’m not a fan of metal legs but these add so much character to the pieces. Great job Denise! I’m headed over too to take a quick look at what the other girls are up to.
Caviar is one of my favorite blacks… I love it too! Thanks so much Kathy and have a great day.XO
Yeah its does come out great… thanks for sharing…
Thanks, Edward! 🙂
They’re fantastic! Love the added height and your process shared to do it DIY style.
Thanks my friend! XOXO
These are BEAUTIFUL!
Thanks Jackie!