Hi, sweet #sifamily! Today my talented Furniture Fixer Upper friends and I are sharing our favorite makeovers, tips, and DIY projects from this past year. If you’re new here, on the third Thursday of every month, 6 talented ladies join together to share their furniture makeovers. I’m linking to my FFU Crew at the bottom of this post. I can’t wait to see what they’re featuring today!
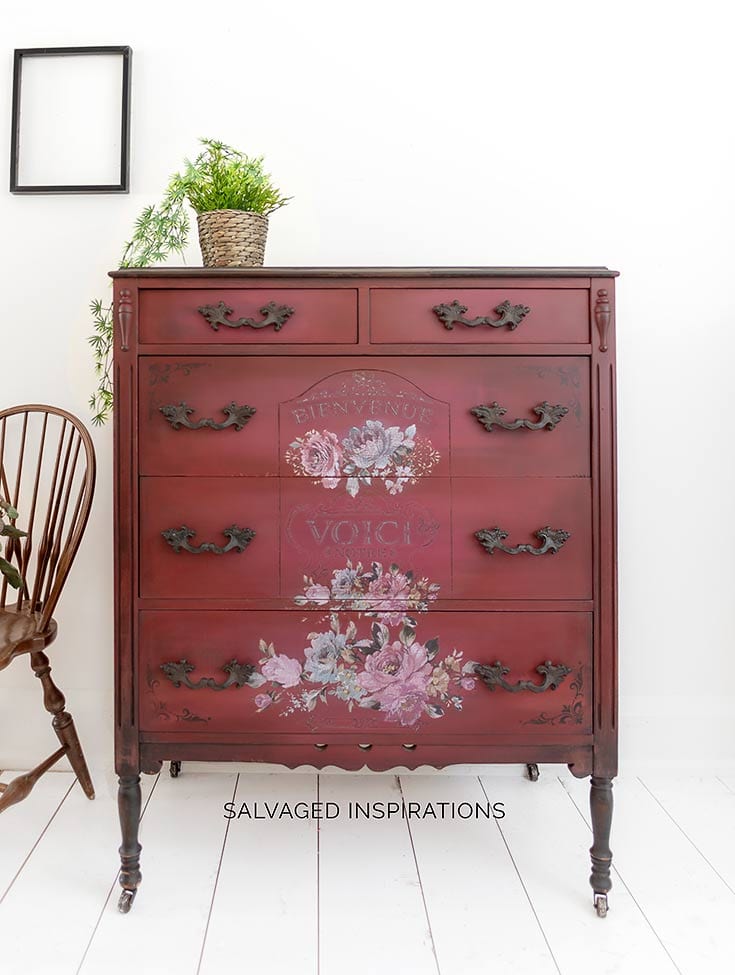
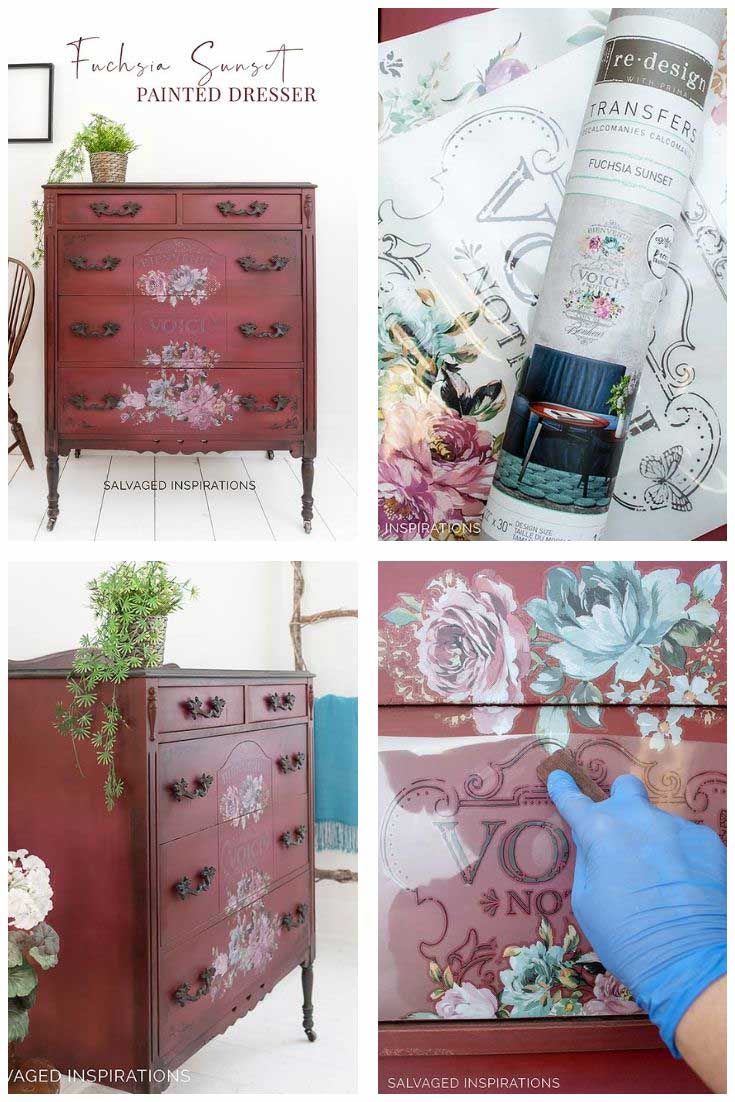
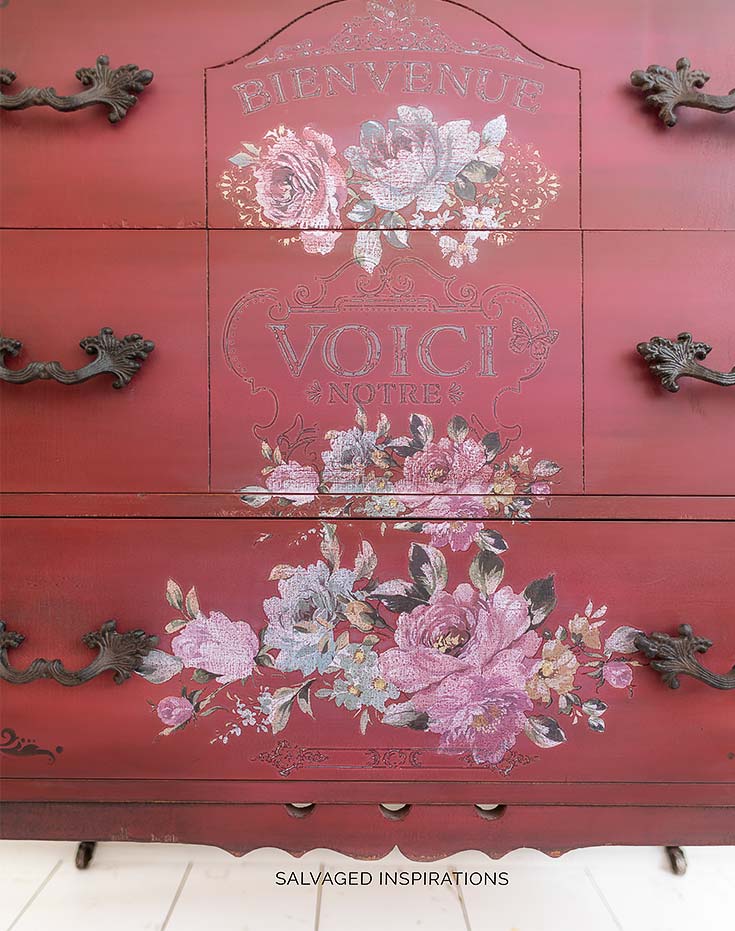
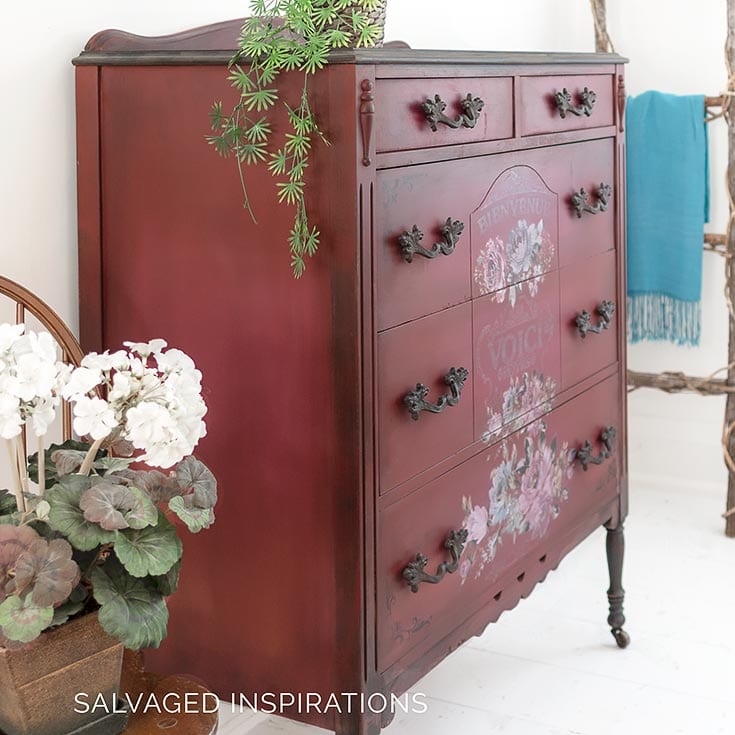
I’m highlighting my Fuchsia Sunset Painted Dresser and answering the 10 most frequently asked questions I get about furniture transfers.
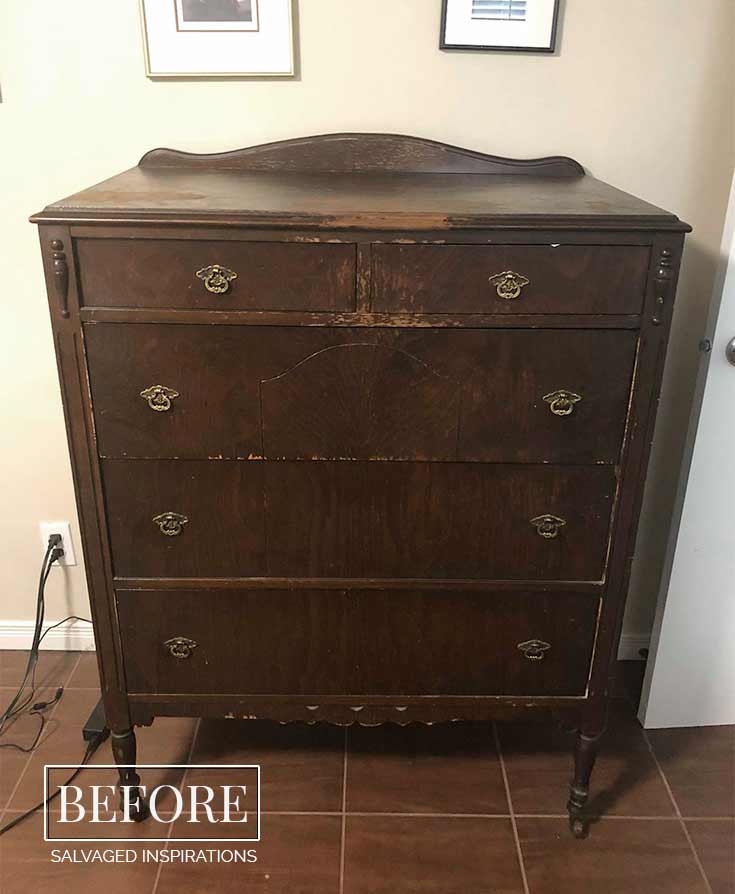
Here’s the vintage dresser I started with.
THIS POST IS SPONSORED/CONTAINS AFFILIATE LINKS TO PRODUCTS I USE. YOU CAN SEE MY FULL DISCLOSURE HERE.
SUPPLIES YOU’LL NEED
Furniture Transfers | 10 FAQ’s Answered
FAQ #1 – How Do Transfers Adhere?
Furniture transfers peel and stick and require some rubbing to adhere fully. The peel and stick part is as easy as pop sockets, peel and stick vinyl flooring, peel and stick labels, peel and stick contact paper… well you get the idea. You simply pull away from the white backing and then place your transfer on your furniture. Just be aware that once it is set down, it may not release I’m always mindful where I want it. These transfers adhere AMAZING and don’t budge.
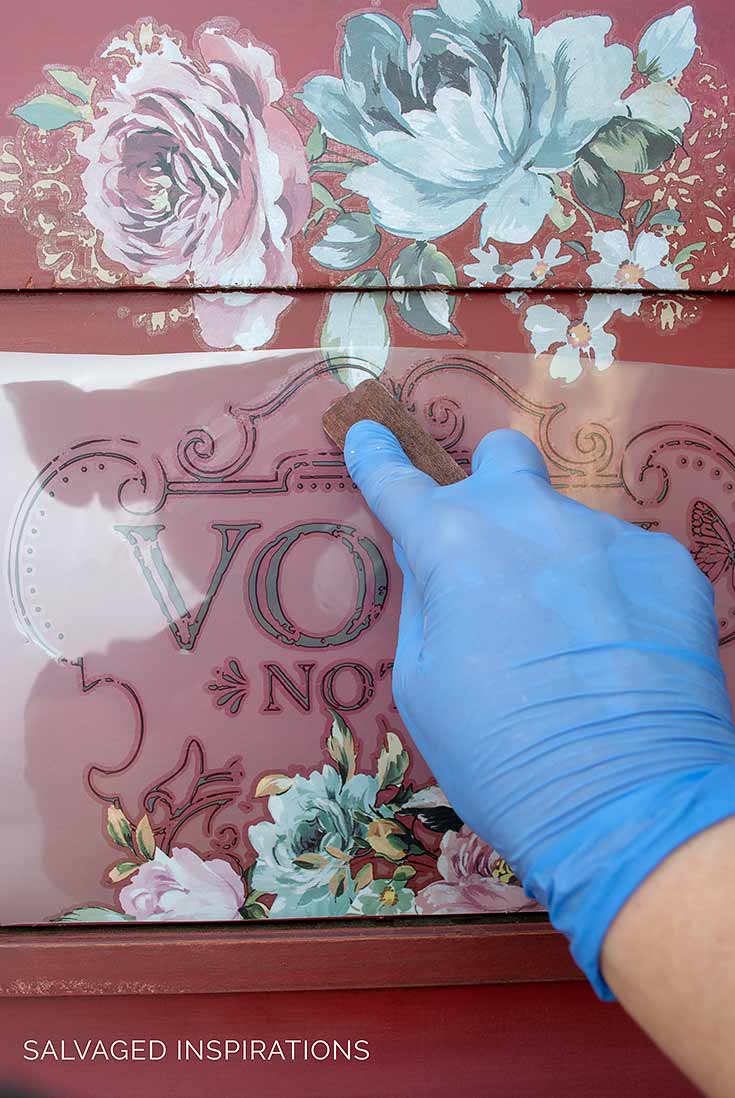
FAQ # 2 – What do I apply the transfer with?
Included in the tube is rub-on-stick specific for the application. Redesign with Prima also has this larger tool if you’re into doing a lot of large transfers and need something that covers more area than the stick provided. Elbow grease is also required. You need to RUB and I demonstrated my Rub-On-Method here. My sister broke a sweat the first time she tried one. 😉
FAQ #3 – How long should I wait before I apply a transfer to freshly painted furniture?
A twenty-four-hour dry time on freshly painted furniture is recommended before adhering your transfer. That said, I’m guilty of applying one sooner (the paint was 100% dry!) and have never had an issue.
FAQ #4 – Do I need to clean my piece before applying?
Yes! A perfectly clean surface is a must. If there is any debris, dust or dirt, the transfer will pick it up and not stick to the piece. This includes dust from sanding a freshly painted piece.
FAQ #5 – Can I apply a transfer over wax?
No. Wax can be used to seal your transfer but the transfer will not adhere properly to a freshly waxed surface. The only exception to the rule is if the wax is 100% cured, but I still wouldn’t recommend it. If it were my piece, I would remove the wax with mineral spirits. Clean. And then apply. If I’m spending my time and money on a gorgeous transfer, I want it to look fabulous and last.
FAQ #6 – Can I put a transfer on an old piece of furniture with an existing finish. (not painted)
Yes, you can! The key is having a good starting surface. No peeling paint or topcoat, scratches, wax, dirt, etc. If you have a smooth clean surface these transfers stick to anything. Glass, metal, wood, paint, plastic, ceramic, terracotta even skin! I’ve had bits and pieces of transfer stick to ME and I really had to scrub it off! hehe
FAQ #7 – What should I seal my furniture transfer with?
Any waterbased poly works really nicely. So does wax. Oil-based products don’t work well with furniture transfers.
FAQ #8 – Do I need to seal my furniture transfers?
For longevity and protection, I always seal my transfers on my furniture makeovers but I’ve left them au’ natural on mirrors and smaller low traffic projects like jewelry boxes, planters, for example.
FAQ #9 – Can I use furniture transfers on raw wood?
Yes! And they look great on raw wood signs and projects. The key is to clean and/or sand the wood really well so there are no particles or wood chips that will interfere and stick to the transfer. The raw wood also has to be 100% dry after cleaning. Any dampness will not allow the transfer to stick.
FAQ #10 – Will heating or cooling the transfer make it stick any better… or ruin them?
No and no. I store my furniture transfers at normal temps. Not too hot. Not too cold. Regular house temperature (whatever that may be for you) will work just fine. That said, I’ve had my transfers delivered via FedEx in the extreme heat and the extreme cold (Canadian winters and summers!) and I’ve never had any issues. Heat or cold is not necessary for better adhesion and I’ve never had it ruin a transfer either.
BONUS 🙂
FAQ #11 – Do I need to burnish my transfers?
No. Burnishing is when you polish/rub the transfer after it is applied. I have and I haven’t burnished my transfers. It just depends on what look you are after.
FAQ #12 – Can I sand my furniture transfers?
Yes. I love lightly (220+ grit) sanding my furniture transfers. It really makes them look like they have slightly aged and melded with a piece when you get hints of the paint color peeking through!
FAQ [Bakers Dozen] #12 – Do I have to use the entire furniture transfer?
No. As far as I know, furniture transfers have no expiration date if stored properly. I like to pick and choose what part of the transfer I need and like for a project. I even like to mix and match patterns and graphics. I have plenty of half-used transfers. I roll them up and keep them in the original container. Some have been stored for a couple of years and they still adhere perfectly.
Here are some gorgeous furniture transfer makeovers from my talented Furniture Fixer Upper friends. I hope you love it as much as I do. 🙂
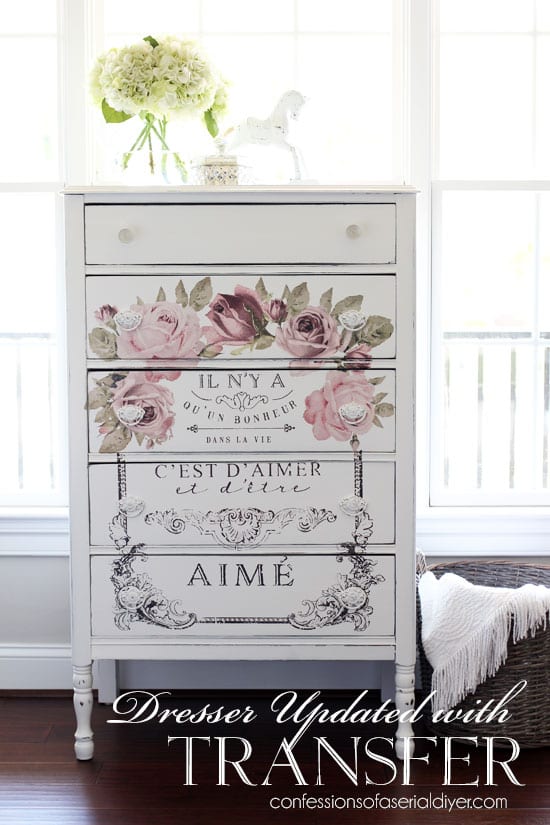
Antique Dresser Updated w Furniture Transfer – Christy @ Confessions Of a Serial DIY’er
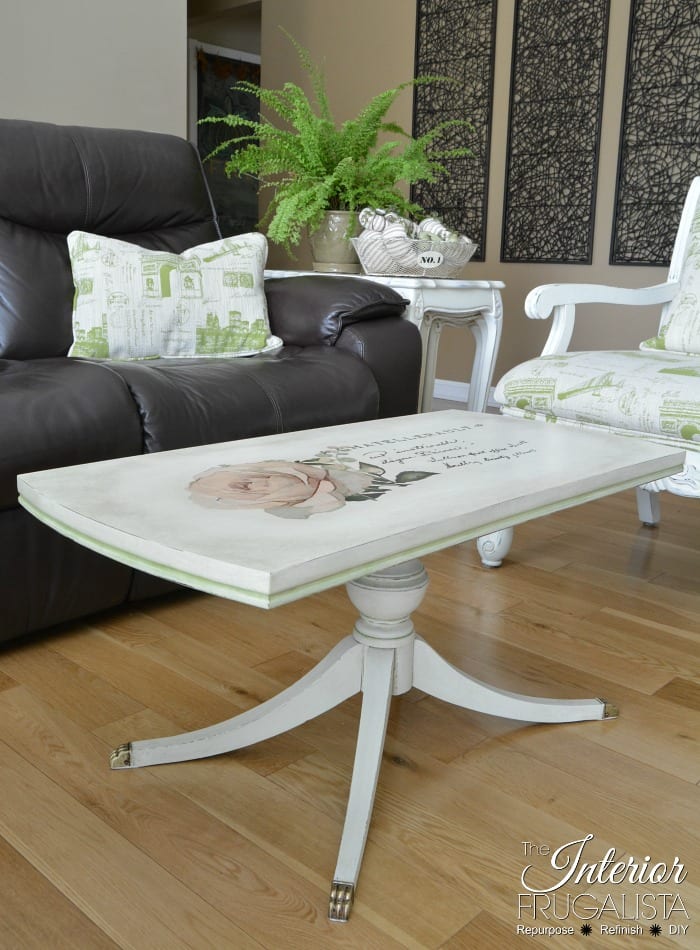
Transfer On Duncan Phyfe – Marie @ The Interior Frugalista
![]()
Chic Magnifique Dresser Makeover – Jen @ Girl In The Garage

Peel and Stick Rock Star Dresser – Kathy @ Petticoat Junktion

How To Refinish A Table in Florals | Kandice @ Just The Woods
And me! 🙂
Don’t forget my Furniture Fixer Upper friends are sharing their favorite furniture makeovers today too!
I know you’re going to LOVE what this creative team of girls do. It’s inspiration and techniques six-fold! 😉
![]()
Below are their BEFORE photos so feel free to visit the links underneath to see the amazing AFTERS and how they did it! I’ll meet you there. I’m heading over to take a peek myself! x
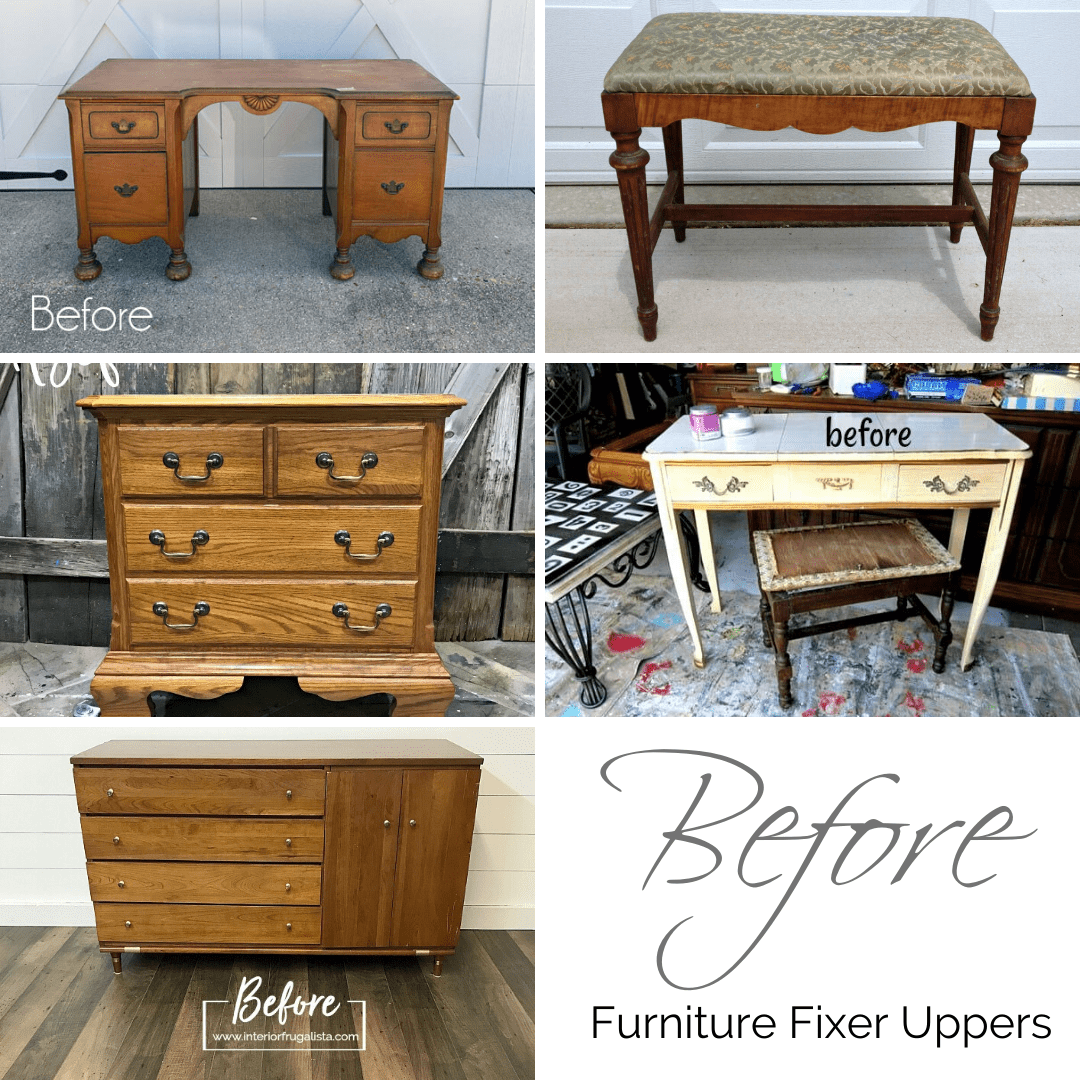
1. Confessions Of A Serial DIYer
I hope you enjoyed the round-up!
I’m signing off and unplugging for the holidays and will be back in January 2020 with more inspiring furniture makeovers! Two full weeks offline. No blogging, no social media. Wheeew… can I do it…lol. I truly believe unplugging for some ‘real face time’ will be good for my soul. 🙂 I’m so looking forward to relaxing with family and friends.
And that said, I know it’s only two weeks but I’m going to miss you all!
From the bottom of my heart, Happy Holidays to you!
LET ME KNOW WHAT YOU THINK OF THIS FUCHSIA SUNSET PAINTED DRESSER MAKEOVER… OR FEEL FREE TO ASK ANY QUESTIONS YOU MAY HAVE… I ALWAYS LOVE HEARING FROM YOU. IT MAKES MY DAY! 🙂
Happy furniture painting my friends!
Denise x
RELATED POSTS::
HOW TO APPLY FURNITURE TRANSFERS
ADDING GRAPHICS | VINTAGE TEACART MAKEOVER
POTTERY BARN KNOCK-OFF BUFFET MAKEOVER
STOP BLEED THROUGH WHEN PAINTING
5 IDEAS TO UPDATE AN OLD DESK
PIN AND SHARE!


Do I have to use mineral chalk paint? Will the transfer stick to BM Advance paint which is a waterborne alkyd paint?
Hi Mary! The transfer will stick to all types of paint – so no, you don’t have to use chalk/mineral paints. 🙂
This info has been so helpful but I do have one question. How long should I wait, after applying my furniture transfer, before sealing it.
Thanks, Sharlene
I usually wait until the next day to seal mine. Before sealing I make sure everything is adhered properly, no bubbles or lifting and that I’ve burnished it on 100%. Once these furniture transfers are adhered, they don’t go anywhere! Just be sure to use only water-based topcoats though. Oil based and even Gator Hide can lift the designs. Hope this helps. 🙂
Would i be able to put a transfer on a melamine cupboard. If so, is there any special prep needed. My first time to try this and would appreciate your input. It is a white melamine with semi-gloss finish to the melamine. Thank you for any advice.
Yes! A transfer will adhere nicely to melamine cupboards. As for prep, a good cleaning so there is no dirt, dust, or /grease/oils. Have fun!
I have stained a table with a minwax penetrating stain. I have a transfer I would like to use in the table top. Is this possible. Should I seal before putting the transfer on or put it right over the stain?
Hi Mari! If the Minwax Stain is oil based (not sure because they do sell both and you didn’t specify), it would need to cure 100% before applying a transfer – OR you can topcoat and then add your transfer. If your Minwax stain is water-based, wait until it is 100% dry, add the transfer, then topcoat. Hope this help! 🙂
Hi, I have a transfer that have a lot of bubbles and it also tore in places. I popped most of the bubbles, then I lightly sanded the transfer hoping I would take out the bubbles I didn’t get. Is it beat to apply wax to seal instead of polycyclic? I worried the polycyclic will lift the transfer. Will wax lift the transfer? Thank you.
A water based wax works beautifully with transfers however I wouldn’t recommend an oil based wax as it might lift the design. And same with poly. A waterbased poly works really well over transfers. 🙂
Can I OVERLAP different pieces to attain the look I want? Thank you! Lynne
Yes you can! 🙂
Hello Denise-I love the fuchsia sunset dresser. What a beauty! You used a stencil on the corners of two of the drawers. Could you tell me where you purchased that particular stencil? It looks perfect on the dresser:)
Thank you
Hi Lisa, thank you! I believe it was Americana Decor or Martha Stewart… I wish I had added it to my Source List! But you can find very similar corner stencils here.
I’m thinking of adding a furniture transfer to a project I’m working on right now. It’s pinewood and I was thinking of giving it a white wash effect with some diluted chalk paint… Just wondering if you’ve ever put a transfer on whitewashed wood and have a picture to share I can’t find one online and I’m worried it won’t look good!
Hi Maggie! You can definitely put a transfer over a whitewash paint finish. So long as the transfer is a pattern you like matched up with the whitewash, it will look fabulous. 🙂
Hello,
By any chance, can a furniture transfer be applied to manufacturer wood? If so, would I need to do any prep work in advance aside from cleaning the surface?
Thank you for any help you can provide. ;>
It sure can Amanda. And no advance prep required. Just be sure to clean off any oils or dirt. 🙂
Oh wonderful! Thank you kindly. ;>
What sealer do you use for over the top of the transfer?
Hi Carrie! Any waterbased poly works really nicely. So does wax. Oil-based products don’t work well with furniture transfers.
Can I paint the transfer itself? I love the design, but the color of the flower is pink and i need it to be red….can i go over it with reds?
You sure can! I did exactly that (with a paint wash) on this chest here.
I’ve tried an outdoor water based sealer over my transfers and it wants to bubble and lift off…. The transfer itself seems to be sure ok but can a transfer Not be used fir an outdoor sign??
this is gorgeous! I love seeing transfers on a color other than white 😉
Thanks so much, Kandice! XO
Hello Denise !
Thank you for your good wishes . May you and your Family have a wonderful Christmas ,many Blessings .to you ,it is always with a smile and giggles inside that I open your page ,thank you for all your beautiful work you so happily share . With Love . Catherine
You always bring me smiles when you drop by Catherine! Happy Holidays to you and yours. I hope you had a wonderful Christmas my friend! Hugs! x
Great information and beautiful pieces! A Merry Christmas to you. I can’t wait to see what you inspire us with next year! ~ Nicki
Thanks Nicki and Merry Christmas to you too! XO
Truly an all time favorite! Just absolutely beautiful. When you come back in 2020, can you mention somewhere if you have ever found a wood stain that would cover a wood filler/bondo patch? I don’t think it is possible to stain over a patch. Hope you can prove me wrong! Keep up the good work and can’t wai to see what happens next year, truly enjoy your posts.
Hi Mary! Thank you and Happy Holidays to you! And no. Unfortunately, I haven’t found a stain that covers wood fill or Bondo. There is a stainable wood fill. In my experience, it doesn’t work that well. I’m still on the hunt too. 🙂
Oh my, this one is my most favorite color of ever…lifetime. The coloring is simply beautiful. Love, Love it! It is the perfect shade for my hutch I have that I want to repaint. I bought it a while back. It is a pale blue right now but it needs some woodwork done on it before I paint.
Did you mix all those different colors of paint listed?
How much of each to mix to get this color?
How can I determine how much paint I need?
I am about as green as green can be when it comes to mixing paint. If Lowes can’t mix it…I surely don’t buy. That is why I’ve not done things before or settled. I want this color. I want to replicate it. But I am fearful I won’t be able too.
Any help or advice for a really green painter who has just come upon this type of painting?
Thank you so much for your help.
Merry Christmas to you and your family.
Angel Blessings,
Kimberly Thomas
Hi Kimberly! Here’s the original HOW-TO post for this Fucshia Sunset Dresser. 🙂 https://salvagedinspirations.com/fuchsia-sunset-painted-dresser/ A very Merry Christmas to YOU! x
This is a beautiful piece! Your post is so informative and I’m pumped to start with my Butterfly transfers. I wish you could come to Atlanta to the Dixie Belle symposium.; I’m so excited to be going and meet the talented artists and designers who will be presenting. Enjoy your holiday s! I am excited to see what all you and your blog buddies have planned for the new year!
Thanks, Cecilia and WOW, you’re going to have SO MUCH FUN in Atlanta! Dixie Belle really goes all out to make sure everyone walks away with a ton of know-how and a fun memorable weekend. Be sure to give everyone a BIG “hello” from me!! Happy Holidays to you Cecilia! XOXO
Such a gorgeous dresser makeover, and great tips for using transfers! Hope you have a fabulous Christmas and enjoy your time off Denise! xo
Thank you, Jen! Looking forward to another great year of Furniture Fixer Upper FUN! 😉 Merry Christmas to you and yours!
Hi Denise. Great information on transfers. I laughed when I read how your sister broke a sweat the first time she rubbed on a transfer, because that’s exactly what happened to me!!! It takes some real “elbow grease” (as you called it) to properly rub a transfer on. I admire all of your hard work:). Have a wonderful holiday.
Hi Monique! If you take a close look at the picture where I’m applying the furniture transfer, you’ll notice MY hand is all sweaty in there!🤣 Thanks so much and I’m wishing you the best holiday season ever my friend! XOXO
Omg that’s like a replica of the one I am working on right now Denise! Matching colors except I am doing the new Native transfer with the skulls and florals by Prima. Yours is amazing as always.
I love the new Native Transfer. I’ll keep my eyes peeled for your finished piece! 🙂
You know this is one of my favorite dresser makeovers of yours this year! The color, the shading, the transfer – all so beautiful! Wow, you answered some great questions about furniture transfers and I picked up a few tips here. Thank you so much for including one of mine in the mix, Denise! Wishing you and yours a beautiful Christmas! xo
Aw, thanks Marie! And I’m wishing you a Very Merry Christmas too my friend.💕Hugs!
BEAUTIFUL! I absolutely love everything about this piece. I do so look forward to your wonderful posts. and seeing the wonderful creations you do!
That makes my day Linda, thank you! I’ve said it a thousand times, but none of this would be any fun without you! Happy Holidays to you!
Wow Denise, That is a really stunning transformation, What a beautiful result!
Thanks so much for sharing that. It’s a real inspiration.
Thanks so much Allison! Happy Holidays! x
This is so helpful – thanks, Denise! And that dresser – wow. Just beautiful. Enjoy your offline time! Can’t wait to see what you bring us in the New Year. Thanks for all you do, and for sharing your gift with us!
Thanks so much Marcia! I hope you enjoy your Holiday Season as well! Hugs
Gorgeous!! I really loved this one! And what a great, informative post! Enjoy your well-deserved break, my friend!! Merry Christmas! XOXO
Thanks Christy! I hope you and yours have a super Merry Christmas as well! XOXO
Fuchsia Sunset….beautiful. Can’t wait to do a project with a transfer. Your tips will help make it a success, I know. Love your blog..
Hi Shirley! I’ll bet you’re going to love using transfers. They can really add to a piece. And if you ever have any questions feel free to reach out. Happy Holidays! 🙂
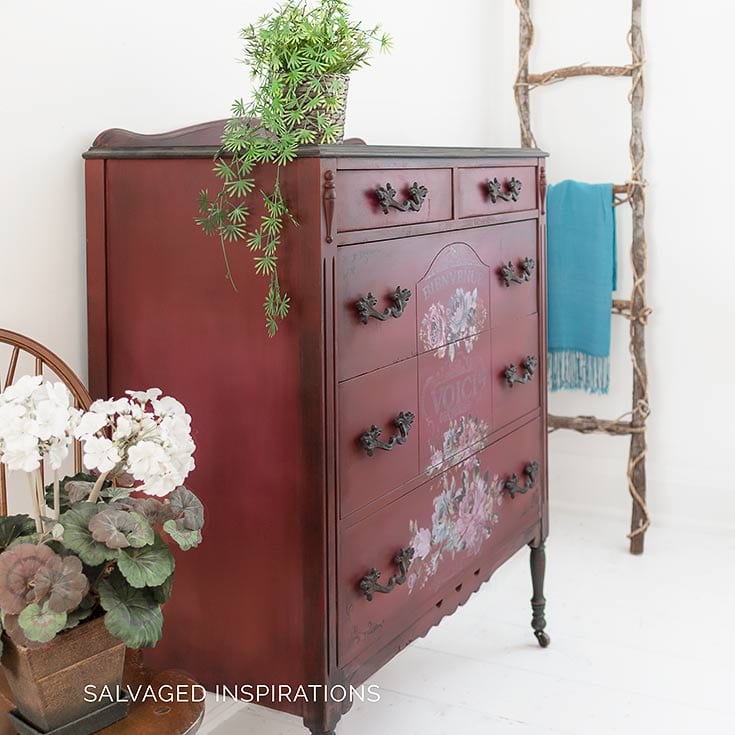
I just love this dresser. It is so pretty, and I love the drawer pulls you switched out. I love your projects so much. I have done 3 pieces of furniture. It is so much fun. I am quite a bit older than you, and it takes me a bit longer to finish a piece. You have inspired me too. I . start refinishing and upcycling furniture.
Taking your time with pieces is a blessing Margaret! I kind of miss the days I was more leisurely with my makeovers. Happy Holidays to you! 🙂
Love the way the fuchsia dresser turned out. Do you recall the painting sequence of colors you used?
Thanks and for sure Cynthia. The details are all here in the original post. 🙂
Love this…. the color !!, Reds always seem to be favorites of mine. what finish did you use on your handles? They really go well with the color of this piece.
Thanks, Ginger and the handles are from Hobby Lobby and didn’t need to be finished. That’s exactly the way they looked from the store. They are super heavy duty too. When I make another trip cross border I’ll be picking up some more of these! 🙂