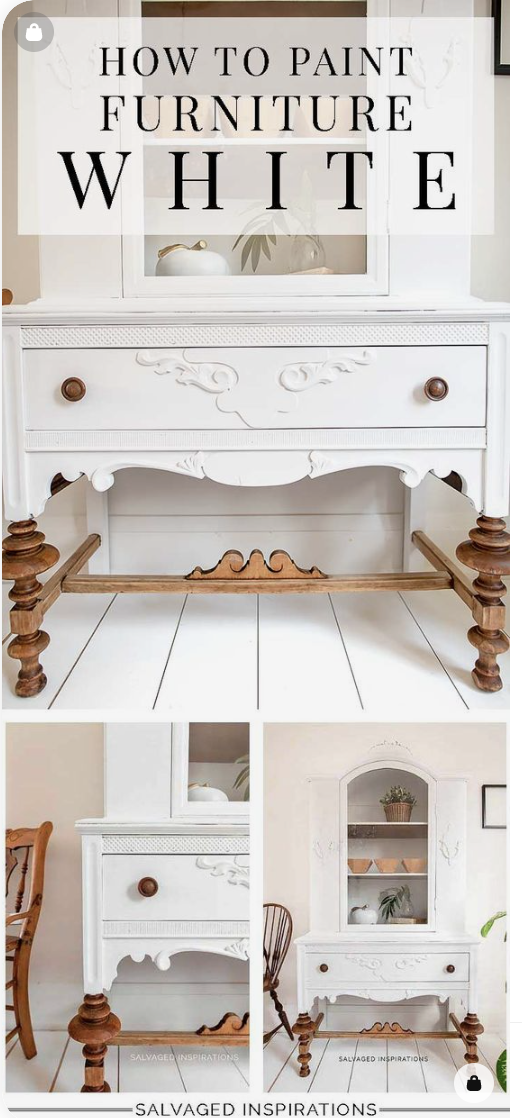
HERE ARE 5 FAIL-PROOF TIPS TO GET A PERFECTLY PAINTED WHITE FINISH ON YOUR FURNITURE EVERY TIME! | YOUTUBE VIDEO INCLUDED

Hi #sifamily, thanks for joining me today! This is the first furniture makeover and tutorial of the year so we are going back to basics. Clean. Classic. How To Paint Furniture White!
When I first started painting furniture, most of my pieces were white or off-white. Mostly, because I was afraid of color, but also because I was under the impression that white was the easiest finish to do. Not so. Unfortunately, I ran into the same problems over and over again.
3 MOST COMMON PROBLEMS AND ISSUES
- Bleedthrough showing through the white paint.
- Bleedthrough hiding under the white paint and rearing its ugly head only AFTER I top coated.
- Bad or Uneven Coverage
At the time, I had no idea these are VERY common problems when painting wood furniture white.
It’s years later and I’ve painted I don’t know how many white pieces and tried I don’t know how many products. Now I have a fail-proof technique down pat… which I hope will help you too. 🙂
If you’re looking to update your furniture in a perfect white finish, I promise these tips will save you time, money, and a ton of frustration!
![]()
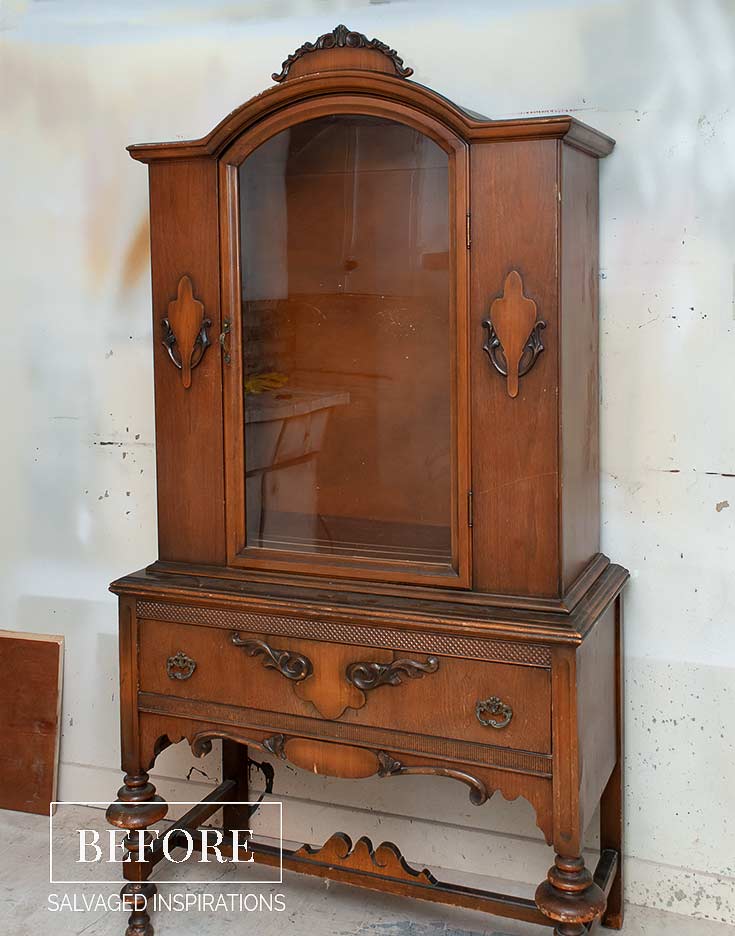
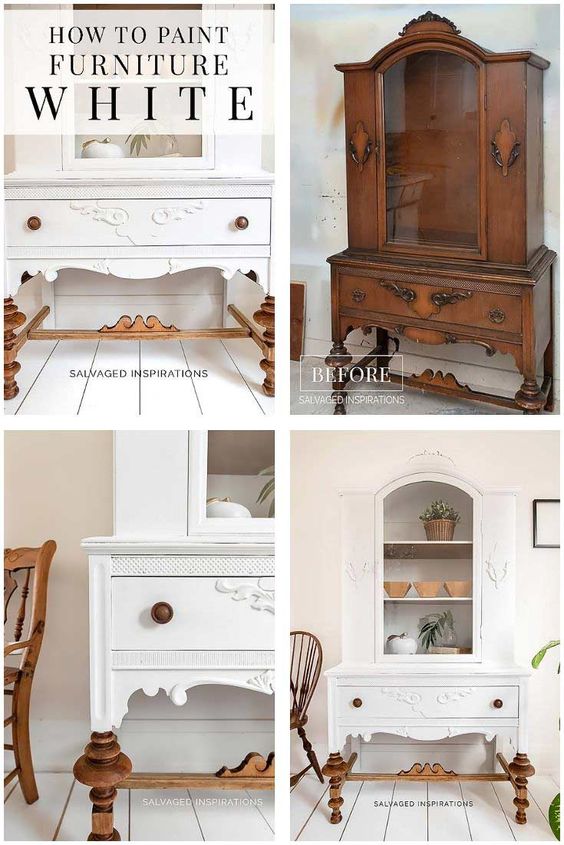
I started with this vintage china cabinet I found at the Restore which is notorious for bleddthrough. Even so, I absolutely love working on these. (I’ll link to some others I painted in the Related Posts below). Painting the inside can be a little extra work but the style of these cabinets is always a pleasure to work on.
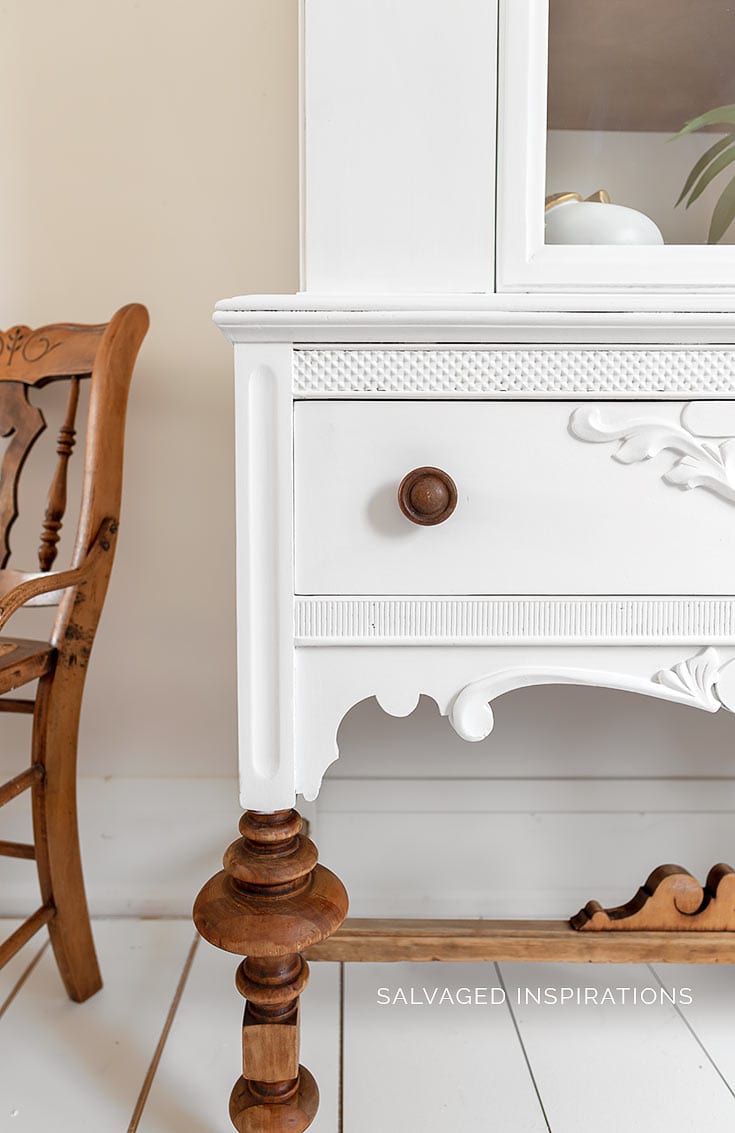
Check out the updated version!j Perfect white with shapely bare wood legs. I’m loving it.


THIS POST IS SPONSORED AND/OR CONTAINS AFFILIATE LINKS TO PRODUCTS I LOVE AND USE. YOU CAN SEE MY FULL DISCLOSURE HERE.
SOURCE LIST
Restore China Cabinet – SALVAGED
Mini Angle Paint Brush
Sandpaper | Shop Towels
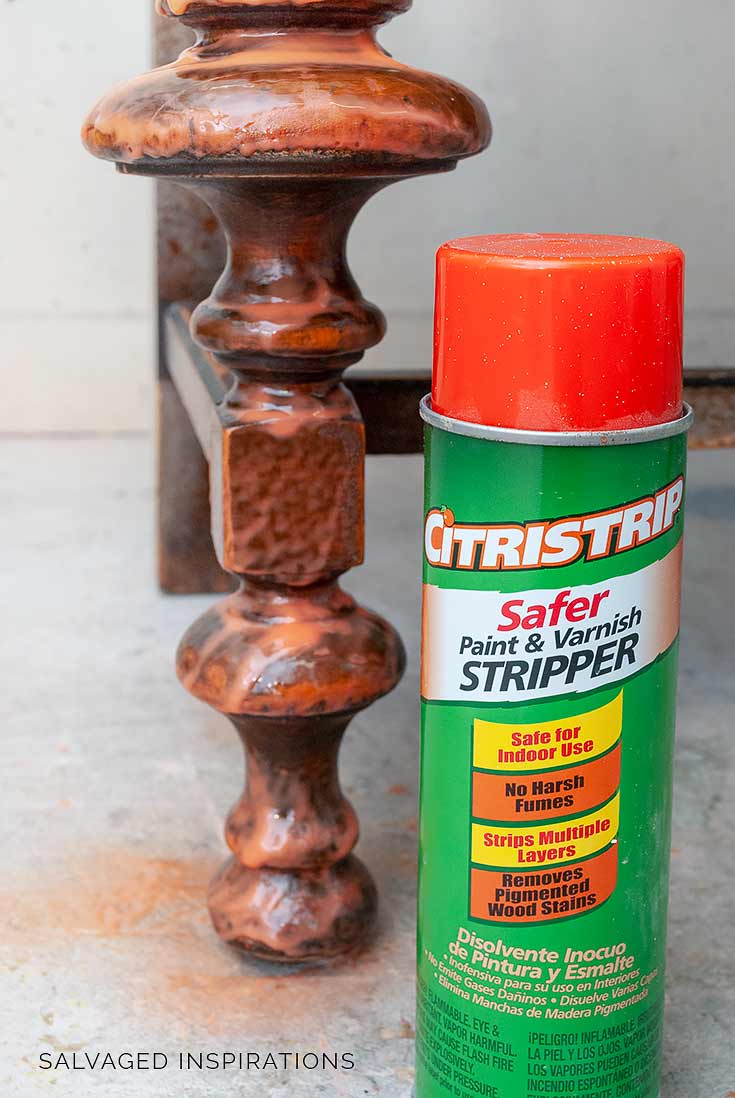
CitriStrip Stripping Gel
BIN Shellac Primer
Water Misting Spray Bottle
Cotton Chalk Mineral Paint
White Wax
HERE’S A TIME-LAPSE VIDEO OF THE ENTIRE MAKEOVER
If you have any issues viewing it – you can check it out here on my Youtube Channel.
HOW TO PAINT FURNITURE WHITE
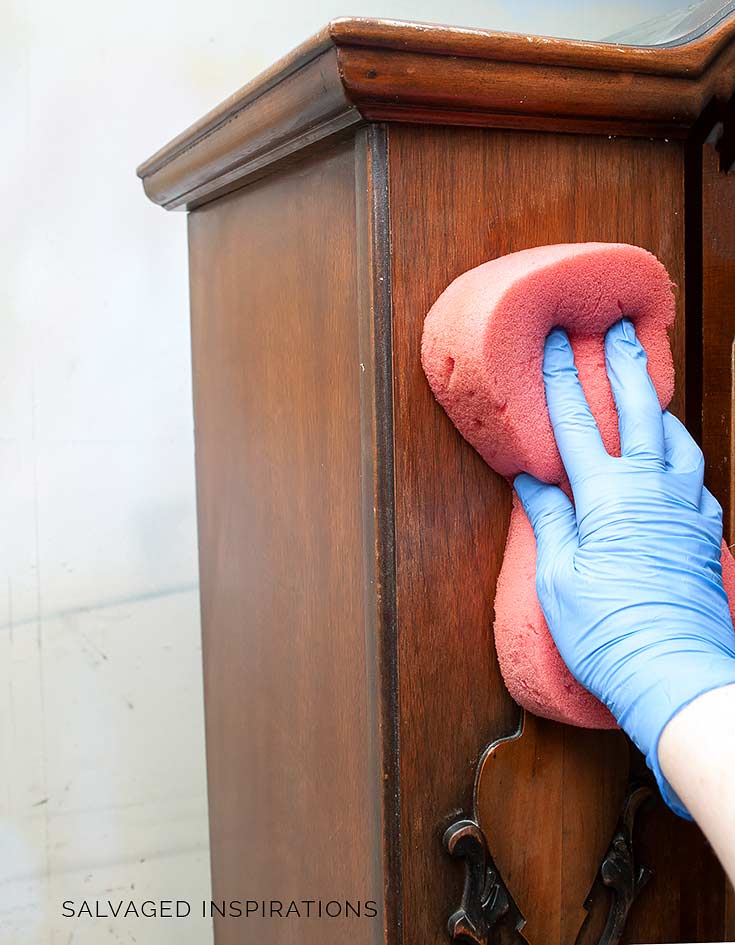
STEP 1 – CLEAN
The very first step to painting a perfectly white piece of furniture is clean and prep. This is the most important step… especially when using WHITE! Seriously, you don’t want to put a crisp clean white on top of a surface that has any dirt, grime, or grease on it. Cleaning with TSP, White Lightning, Krud Kutter or any other great cutter product is a must.
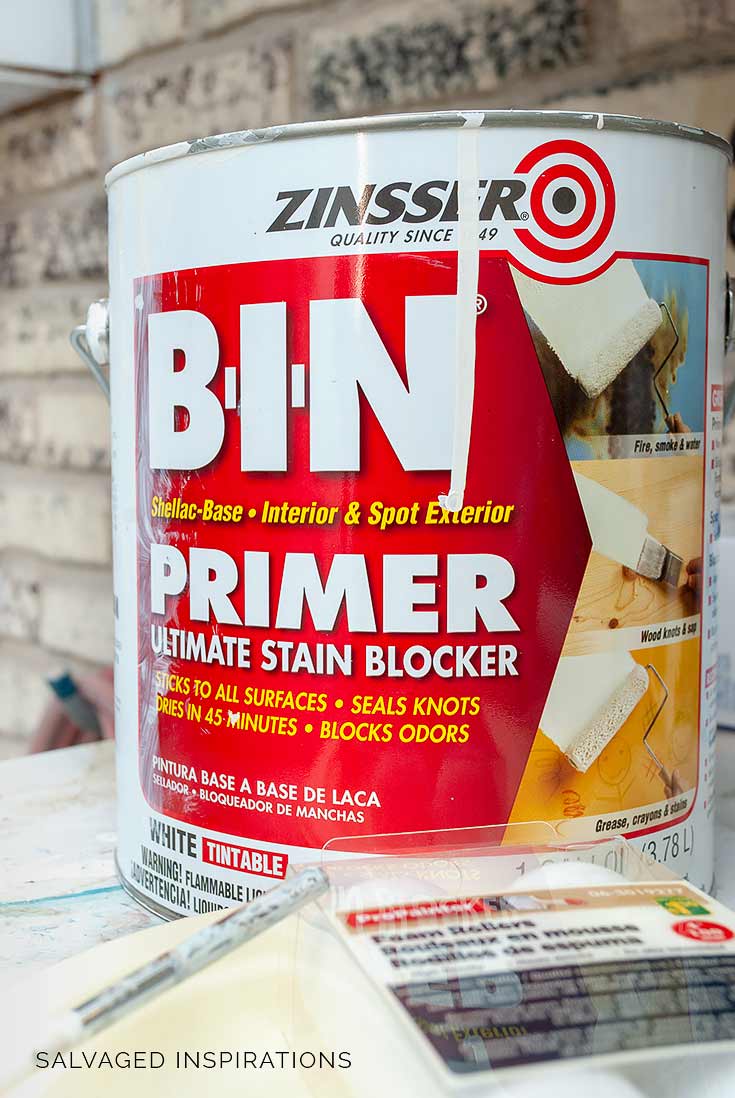
STEP 2 – PRIME
I started by giving this cabinet a super good cleaning and then a light sanding followed up by BIN Shellac Primer to kill the bleed through. In my experience (and I’ve used and tested a TON of stain-blocking primers!!!) BIN Shellac Primer is the ONLY primer that I can ACTUALLY SEE when all the bleedthrough is covered.
Below is a perfect example. The inside has been rolled with one coat of BIN Shellac Primer and you can visibly see the areas bleed through (discoloration) is showing through. This indicates a second coat is required.
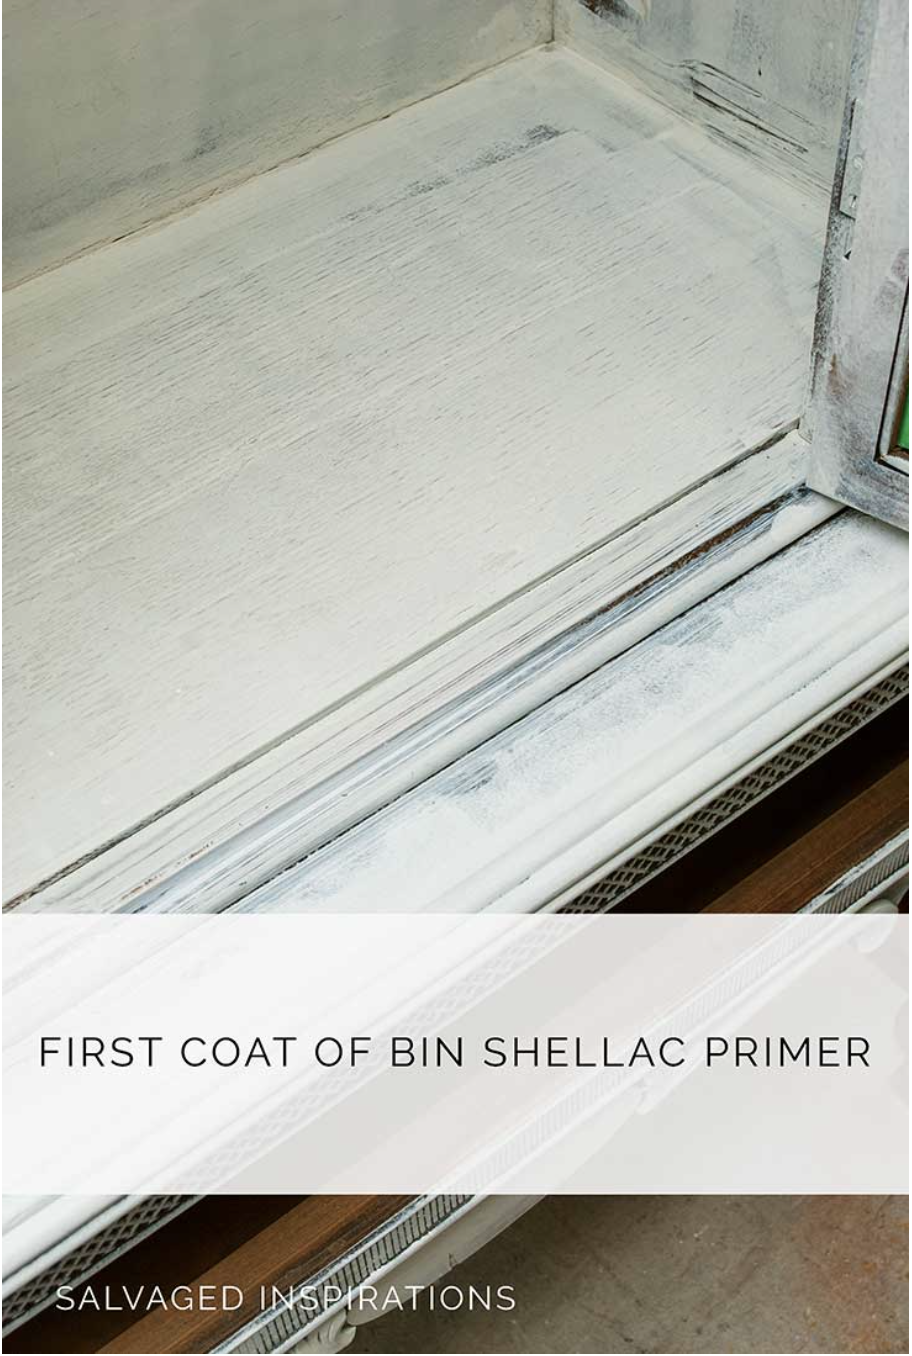
Once the second coat is applied and no more ‘stain’ is showing through, I know it’s safe to paint white. When the BIN Shellac Primer is totally white, I can paint and topcoat and be 100% confident no bleedthrough or stain is going to creep through my finish.
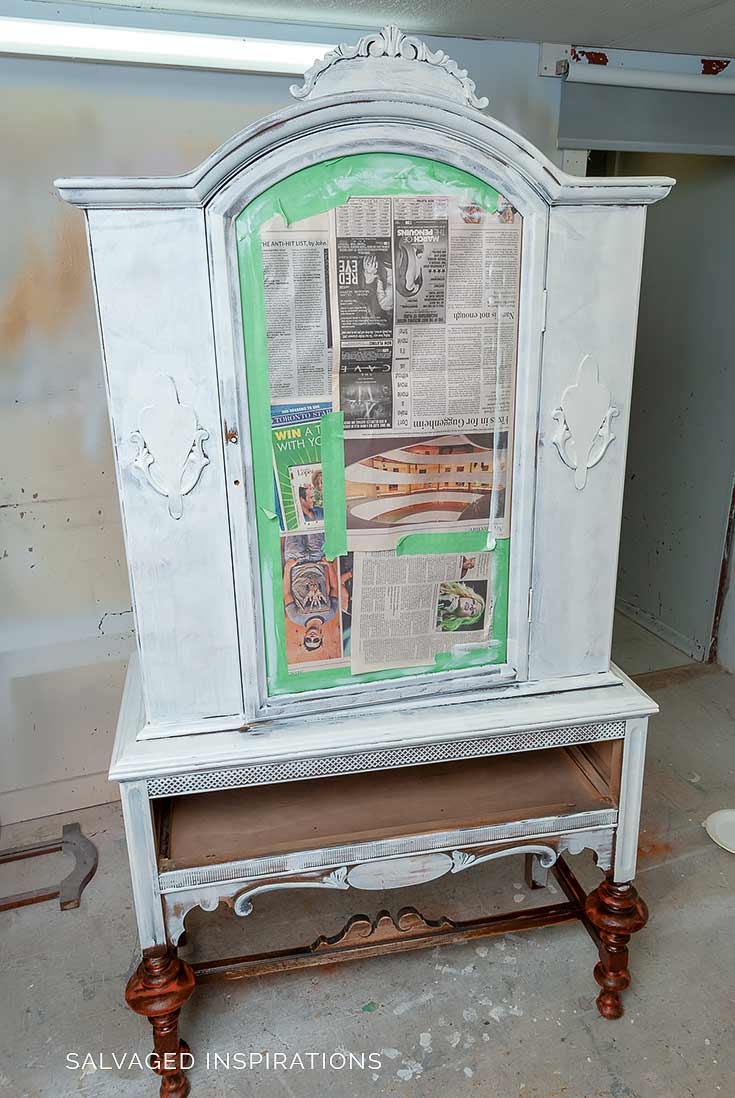
Here’s what the outside of this china cabinet looked like after the first coat. Don’t worry. It always looks horrible before it starts looking good. 😉
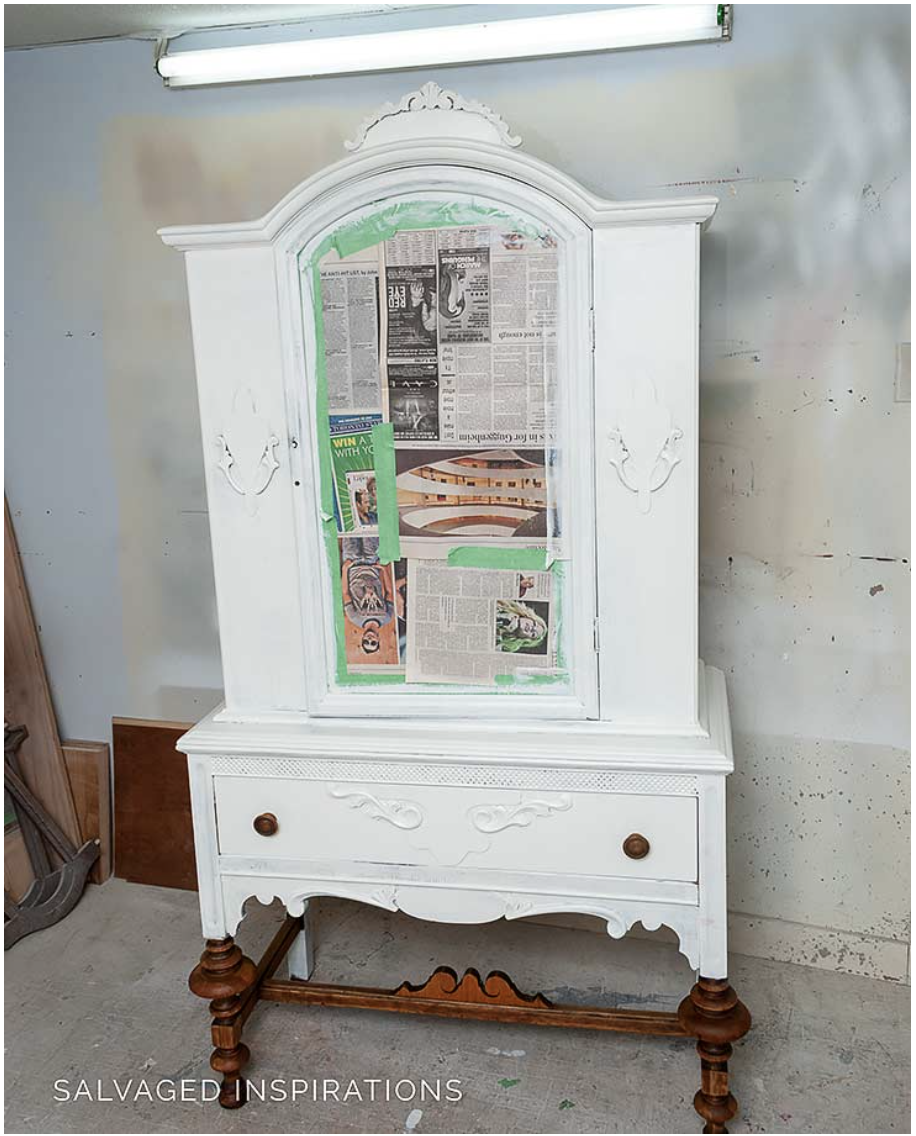
The second coat (below) is ready for paint other than a few tiny tiny spots. You may be able to see a stain on the bottom part of the right leg. When I have these persistent bleed-through areas, I spot prime with a third coat rather than apply another full coat onto the entire cabinet. This saves product and time.
A bonus when using BIN is it dries fast and I can recoat (or paint) in less than an hour. Often I’ll finish priming an entire piece and by the time I’ve finished, the area I first started on is ready for a second coat.
MY GO-TO WATER-BASED PRIMER [ALTERNATIVE]
When I don’t want to use a smelly shellac-based product or I have more time to get my project done, this is my go-to…
BOSS WATERBASED PRIMER – BLOCKS ODORS, AND STAINS, AND STOPS BLEEDTHROUGH
The Benefits of BOSS –
- It comes in white AND CLEAR which is amazing when I want some original wood showing through
- It costs much less than BIN Shellac Primer
- It doesn’t have fume odors because it’s waterbased
The trade-off is time. You can apply a second coat of BOSS within 2-3 hours however it requires a 24-hour set time before applying your paint. If you’re a professional furniture painter, this may not always be convenient however if you’re painting a piece for your home, it’s the perfect alternative.
STEP 3 – SAND & REMOVE DUST BETWEEN EACH COAT
For a smooth professional finish, I sand between every coat. This included primer and paint. Nothing crazy. But a light once over (like wiping down a kitchen counter) with a 220 grit makes a world of difference!
STEP 4 – PAINT A MINIMUM OF TWO COATS
Whenever I use white or off-white paint, I always paint at least two coats. Three coats are often required to get that perfect white finish.
STEP 5 – TOP COAT AND PROTECT
I can’t tell you how many times I used to paint in white, it looked magnificent UNTIL I applied a topcoat. Only then, would the bleedthrough rear its ugly head. SO FRUSTRATING after I put in all that work!
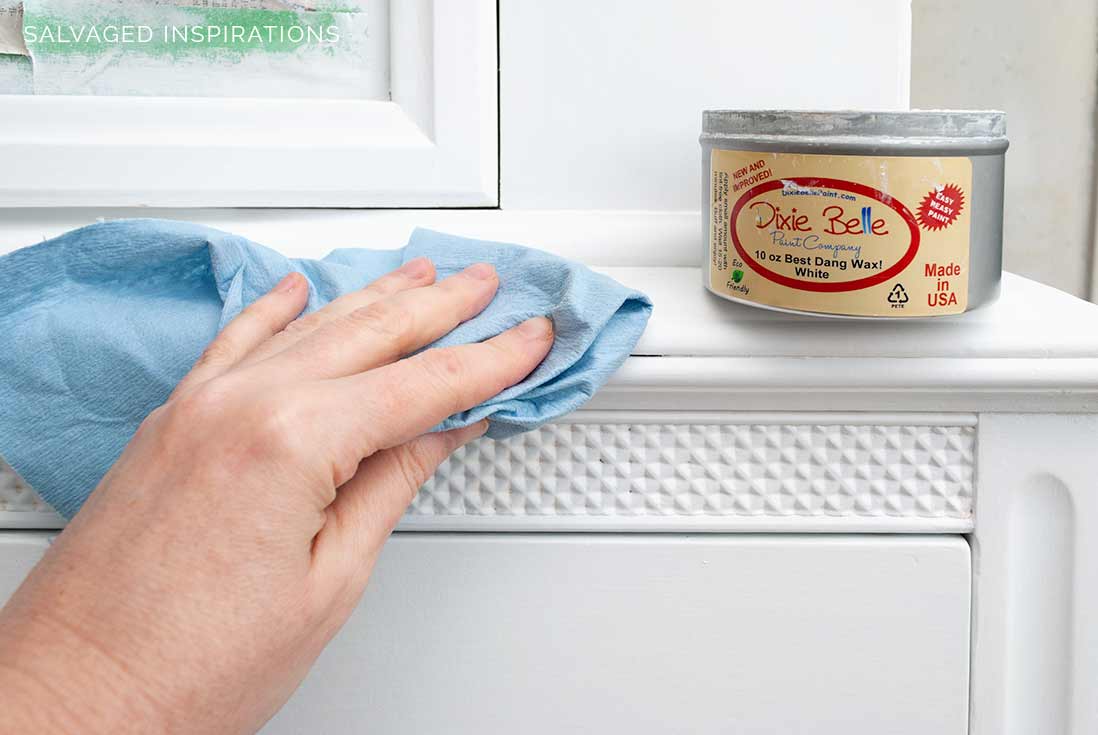
With all the above steps in place, ANY topcoat can be used without worry. To protect this china cabinet, I could have sprayed or brushed poly or used clear wax, but I opted for this white wax for a beautiful satin finish.
What do you think?
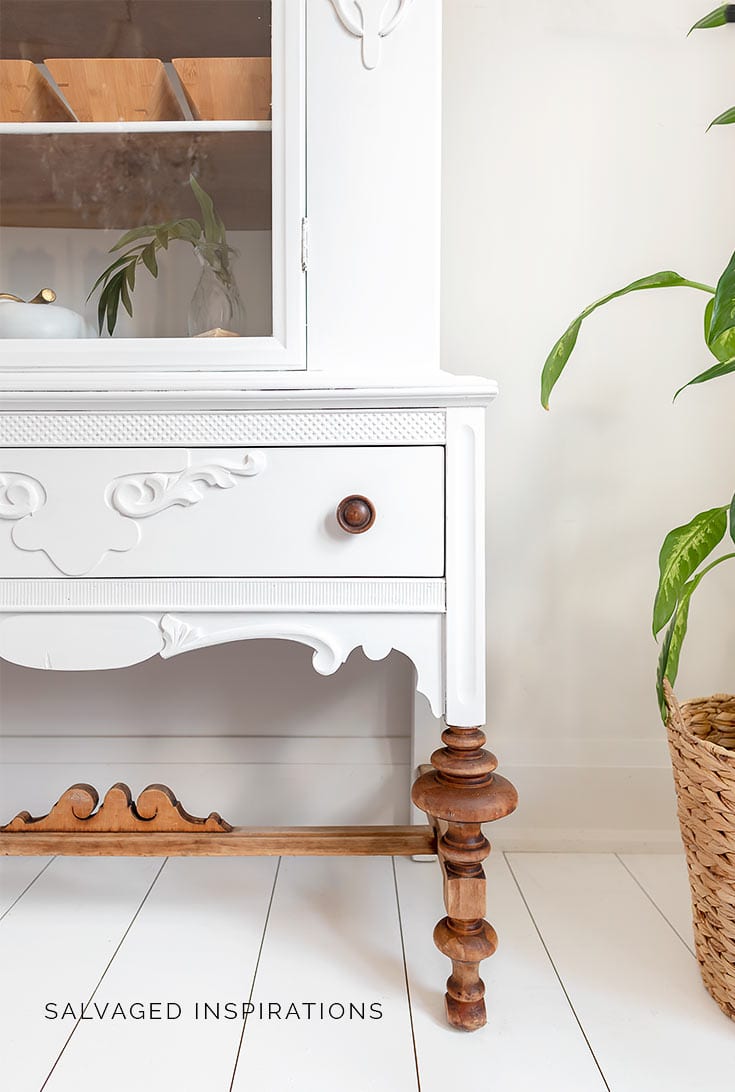

And I know the focus of this post is how to get a perfect white-painted finish, but check out these legs! I stripped off the old finish and added matching wood knobs to tie the entire look together. The contrast between the classic clean white and the bare wood has me swooning. What do you think of this combo?
I’m looking forward to sharing another year of painted furniture makeovers sprinkled with some smalls for staging and styling your furniture. I also love it when YOU share here on the #siblog so you have an open invitation to join me every Tuesday and chime in on whatever may be on your mind.
LET ME KNOW WHAT YOU THINK OF THIS WHITE-FINISHED CHINA CABINET… OR FEEL FREE TO ASK ANY QUESTIONS YOU MAY HAVE. I ALWAYS LOVE HEARING FROM YOU!
Thanks for reading.
Wishing you a beautiful day filled with inspiration and Happy Painting friends!
Denise XO
RELATED POSTS::
HOW TO REMOVE FRETWORK ON CHINA CABINETS
GOODWILL CHINA CABINET BEFORE & AFTER
CHALK-PAINTED CHINA CABINET
STOP BLEED THROUGH WHEN PAINTING
HOW TO USE B-I-N SHELLAC PRIMER
PIN AND SHARE!


Lovely piece, and I appreciate the detailed steps! I do have a question regarding the BIN primer. Your photo shows shellac based primer, but the link takes me to a BIN water-based low odor primer. I know you said sometimes you prefer to use Boss because it’s water based. What about the water based BIN, do you ever use it?
Hi Vicki! I just recently tried the BIN2 Alkyd Primer on this desk and didn’t have the greatest time with it. I’ve included a video in that post as well with my review. BOSS is an amazing water based choice if you have the time to wait overnight for it to work on the stain and odor blocking. Hope this helps. 🙂
Thank you! Question: I don’t understand the recommendation to always. Deep clean a piece first, even it it will be stripped or sanded.
Yes. I like cleaning all my pieces before sanding, stripping etc. The cleaner the piece is while I’m working on it, the better. Also, I prefer not to clean/wet the wood after it’s been sanded (other than using a tack cloth to get ALL the dust off) because it raises the grain of the wood right before painting.
`That cabinet is just lovely, Denise!
Thank you Caye!😘
Beautiful!!!!!!! I love this piece…
Thank u for sharing
Deborah
Thank you Deborah!
Great post! Do u need to use some type of sealant after u bare the wood?
I was gifted a dining set with lots of round details on the base and chair spindles. What is the best way to primer and paint these areas? Thanks!