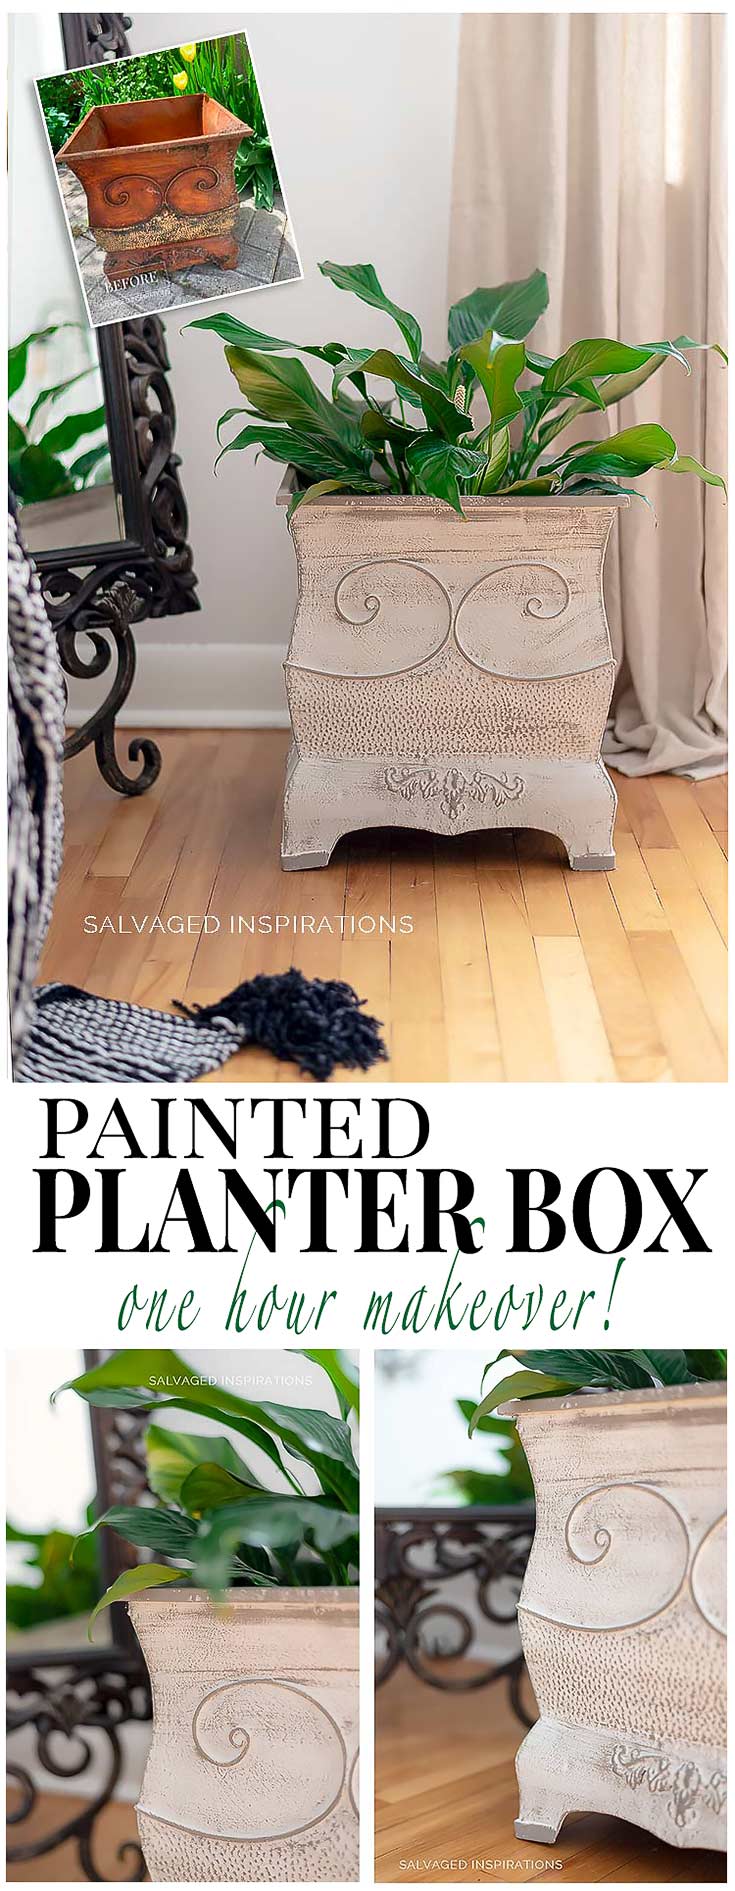
HOW TO CREATE TEXTURE IN UNDER AN HOUR USING VERY LITTLE PAINT | METAL PLANTER MAKEOVER

Hi sweet SI family! Today’s metal planter is a stunning example of how a little paint can go a loooooong way to create a gorgeous textured finish! It’s also one of the fastest projects I’ve ever done. From start to finish – a one-hour makeover!
Bonus, it’s one of my favorite days of the month. I’m joining my Trash To Treasure Crew!! If you’re new to the #siblog, I join four other creative bloggers on the second Tuesday of each month. I’ll be sharing links to their before and after tutorials at the bottom of today’s post.
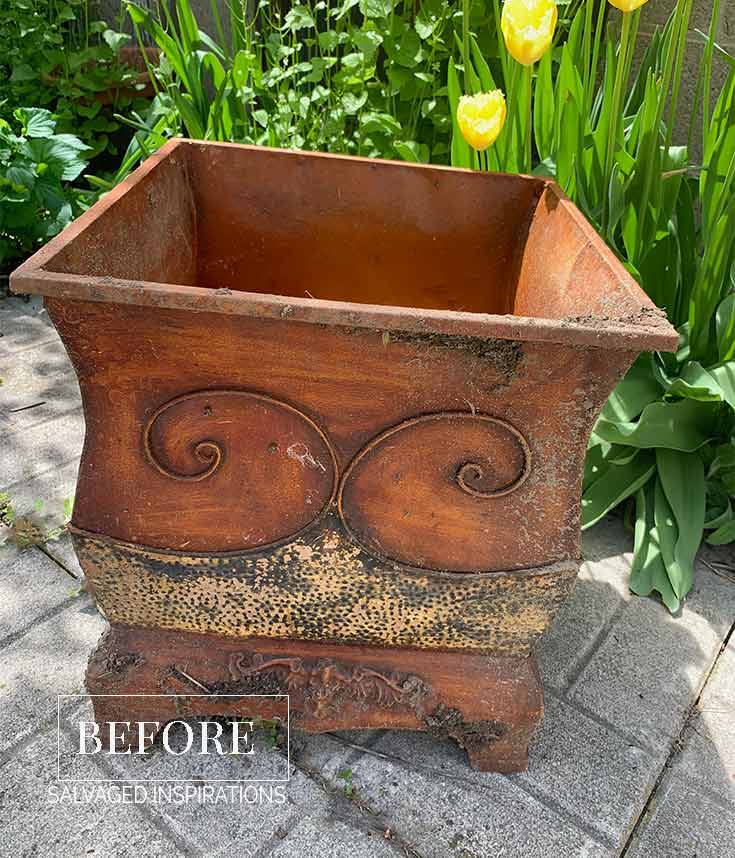
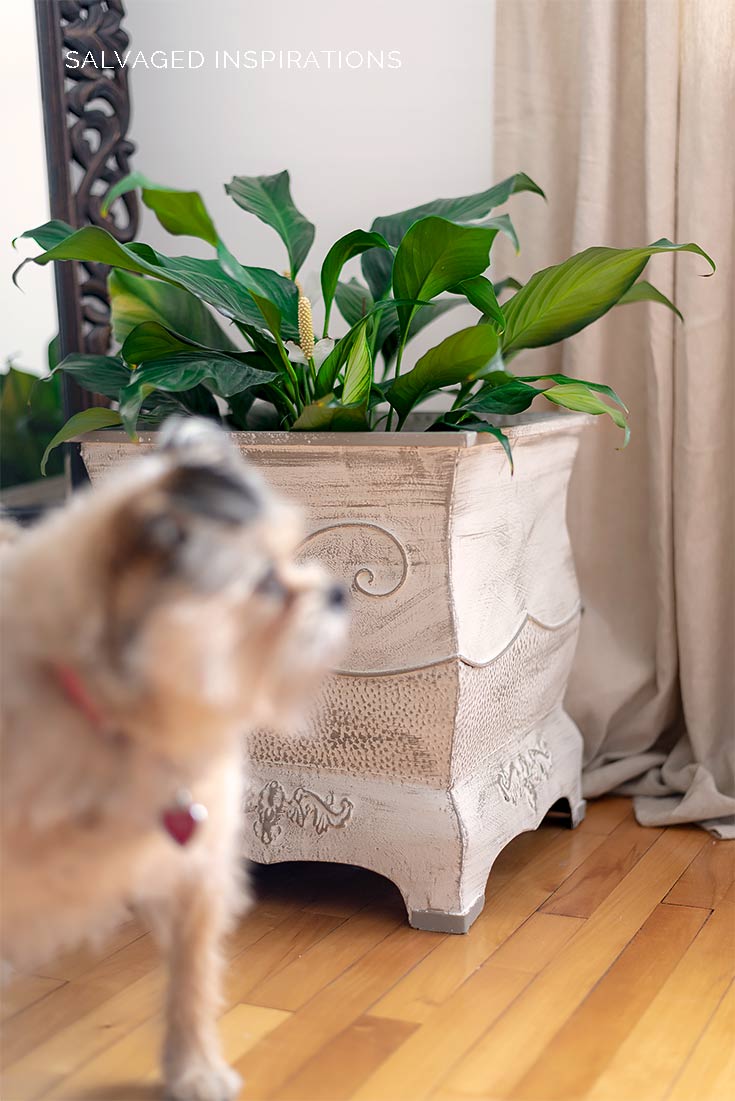
Here’s my T2T piece. I’ve owned this metal planter for years. It was used as a storage box for pillows and blankets at my last home. I used it as a plant holder when I first bought this house. I ended up getting bored and placed it outside where it started to rust.
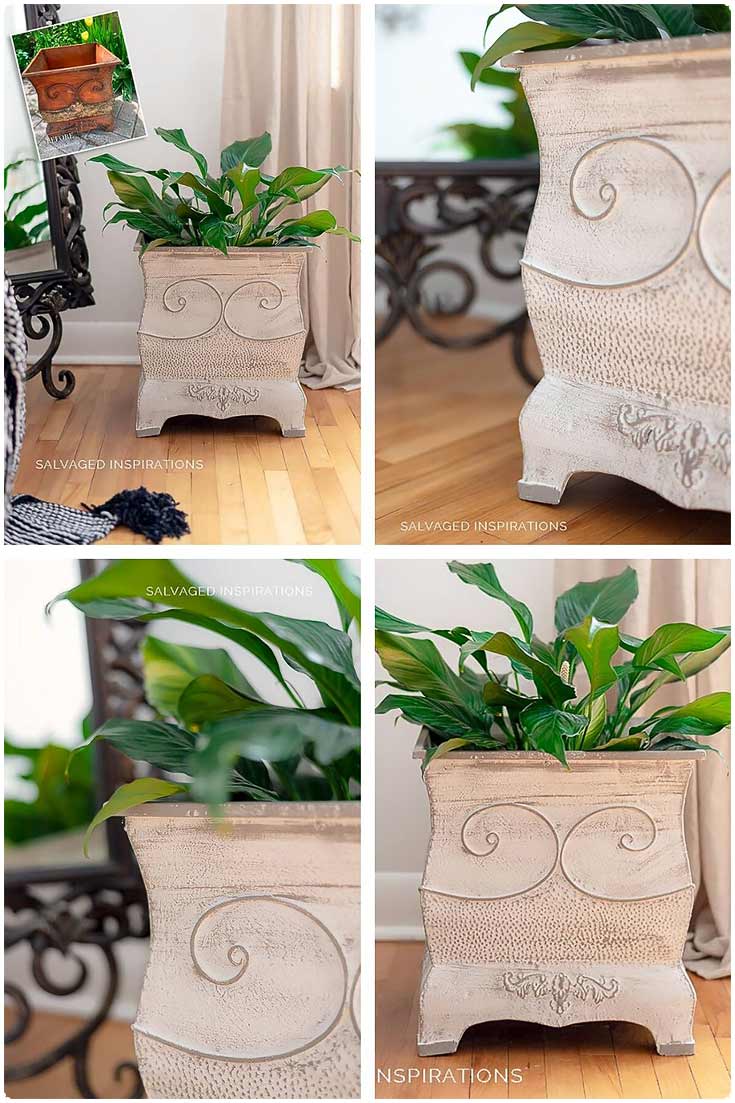
Here’s the fresh new look. What do you think? Much better, right?

THIS POST IS SPONSORED/CONTAINS AFFILIATE LINKS TO PRODUCTS I USE. YOU CAN SEE MY FULL DISCLOSURE HERE.
SOURCE LIST
-
-
- Metal Planter – SALVAGED
- Mini Angle Paint Brush
- Cheap Chip Brush
- BIN Shellac Primer
- Water Misting Spray Bottle
- Cotton White
- French Linen
-
CREATING TEXTURE
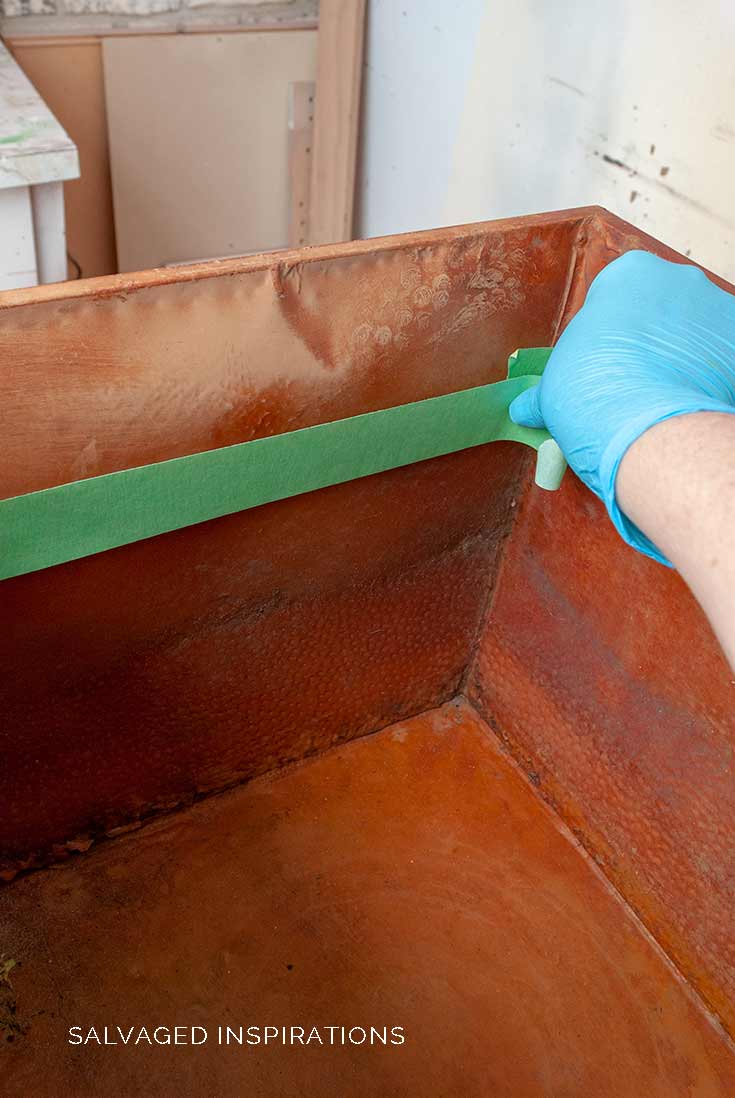
To give this metal planter a brand new clean look, I started by removing the dirt and rust. I used my garden hose and an old rag to clean it all down. Once dry, I taped off the inside rim for a clean paint line.
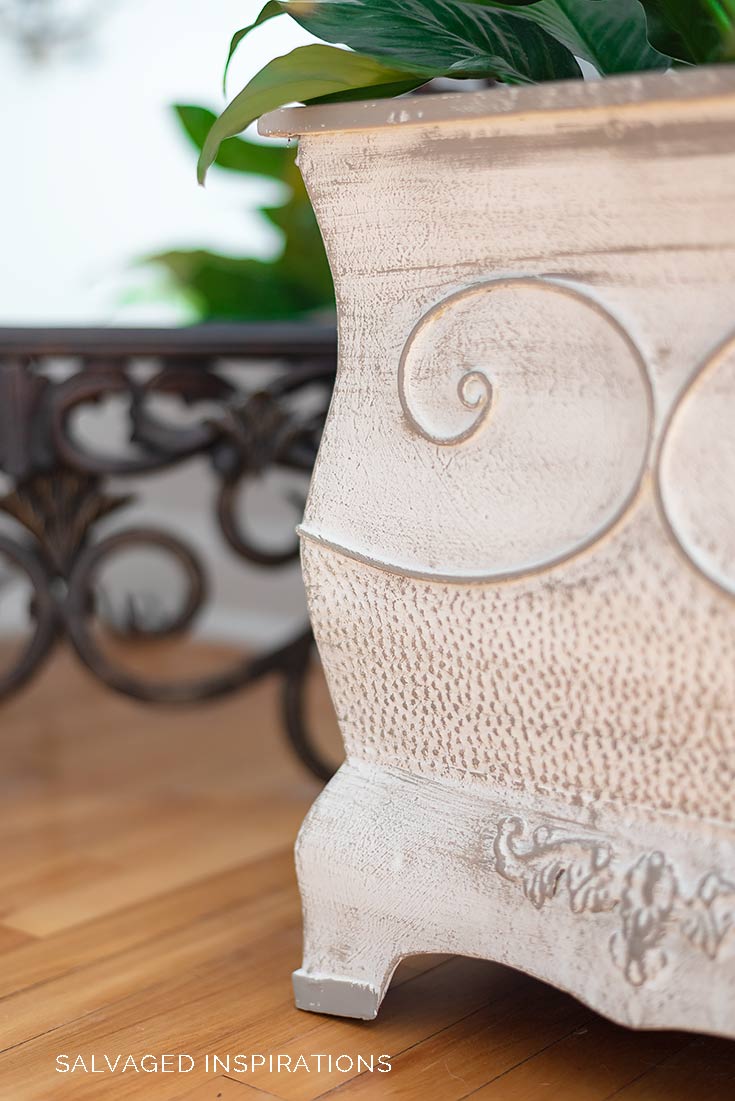
Due to the rust, it took two generous coats of BIN Shellac Primer. I used my brush to add texture by pouncing it up and down and creating brush strokes in different directions.
TIP ~ If you want a smooth look, BIN Shellac Primer Spray or Rustoleum Metal Primer works great.
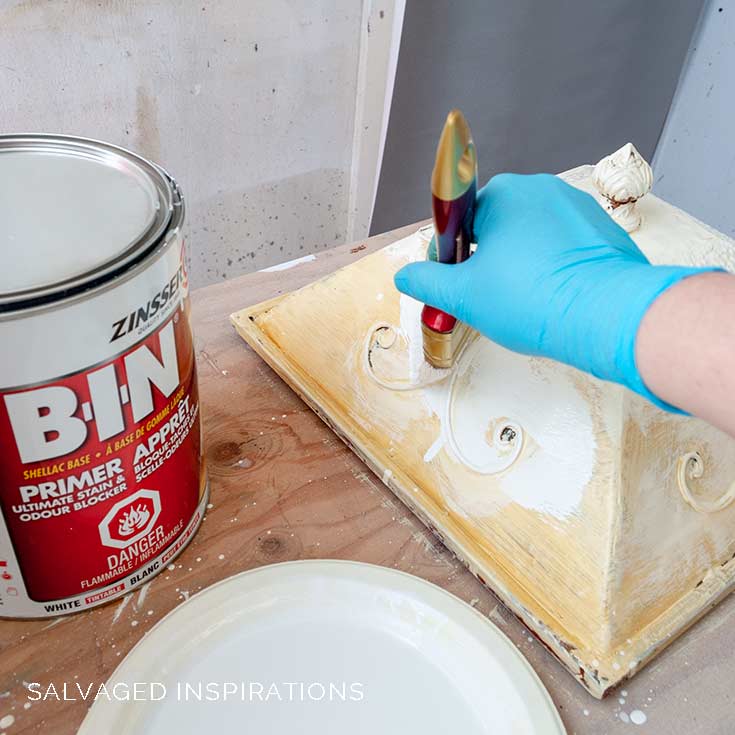
I applied the 2 coats of primer and then the painting fun started.
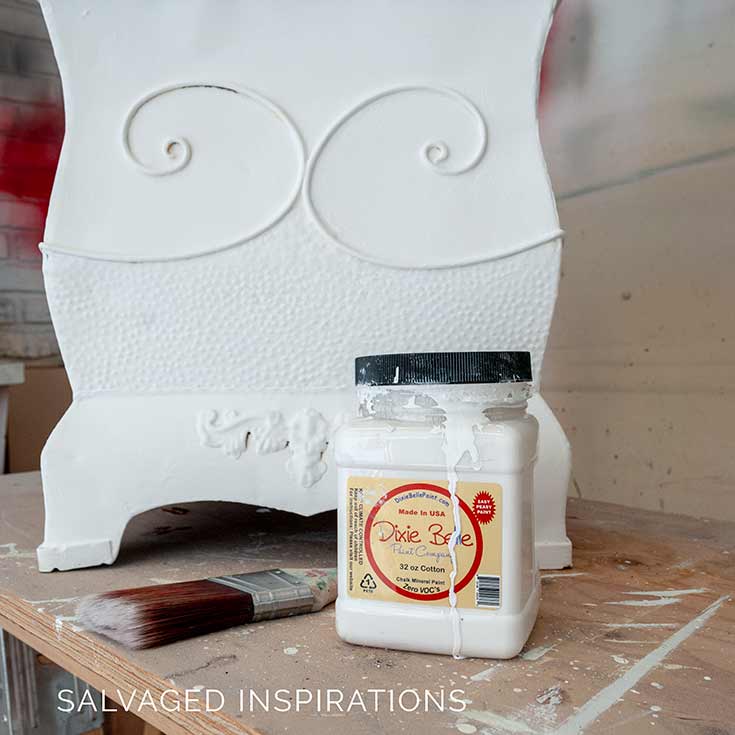
For the base, I used Dixie Belles Cotton. I applied the paint using the same technique as the primer adding texture with the brush.
You can probably tell by my messy jar I get a lot of use out of this crisp white. It’s a MUST in my paint arsenal because it allows me to create a variety of colors using the paints I already have. It’s the perfect white to lighten up colors without changing their hue.
To make all those textured brush marks stand out, I dry brushed on a little French Linen with this cheap chip brush.
I barely used any paint at all. I dapped the tips of the brush into the paint on the paint lid, removed all excess paint on the lip of the lid, and lightly ran the tips of the brush over the basecoat.
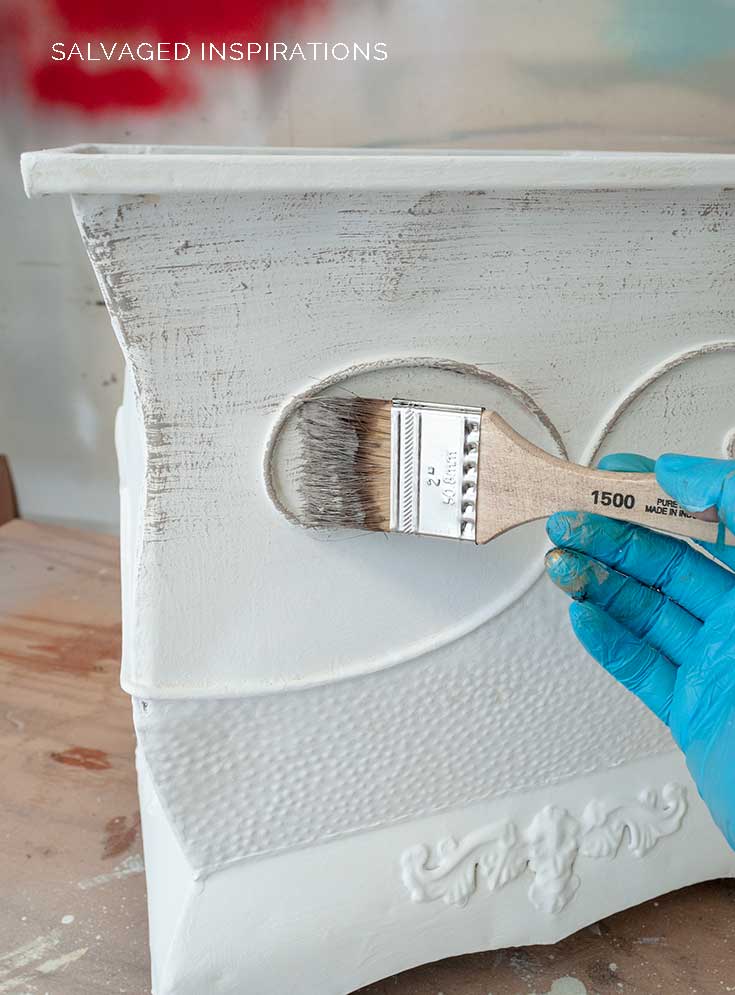
I dry brushed in straight lines and then added interest by going in a few different directions.
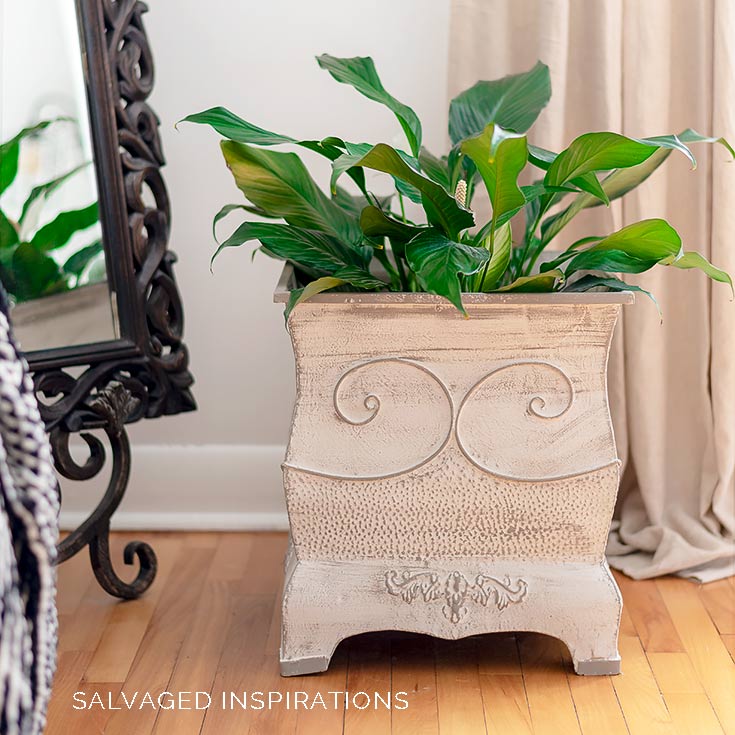
Here’s the finished look. Excluding dry time, this paint finish took less than an hour from start to finish!
My Gidget photobombed this next pic… maybe to show off her new spring-do! She was a little ragamuffin with her winter coat so it was time to pull out the clippers and pretend I’m a groomer. I did a pretty good job I think!
And now for some TRASH TO TREASURE FUN!
I know you’re going to LOVE what this talented team of ladies share. They never cease to surprise me with their creativity! Below are their BEFORE photos.
Visit the links underneath to see the amazing AFTERS and to learn how they did it!
I’m heading over to take a peek right now myself! x
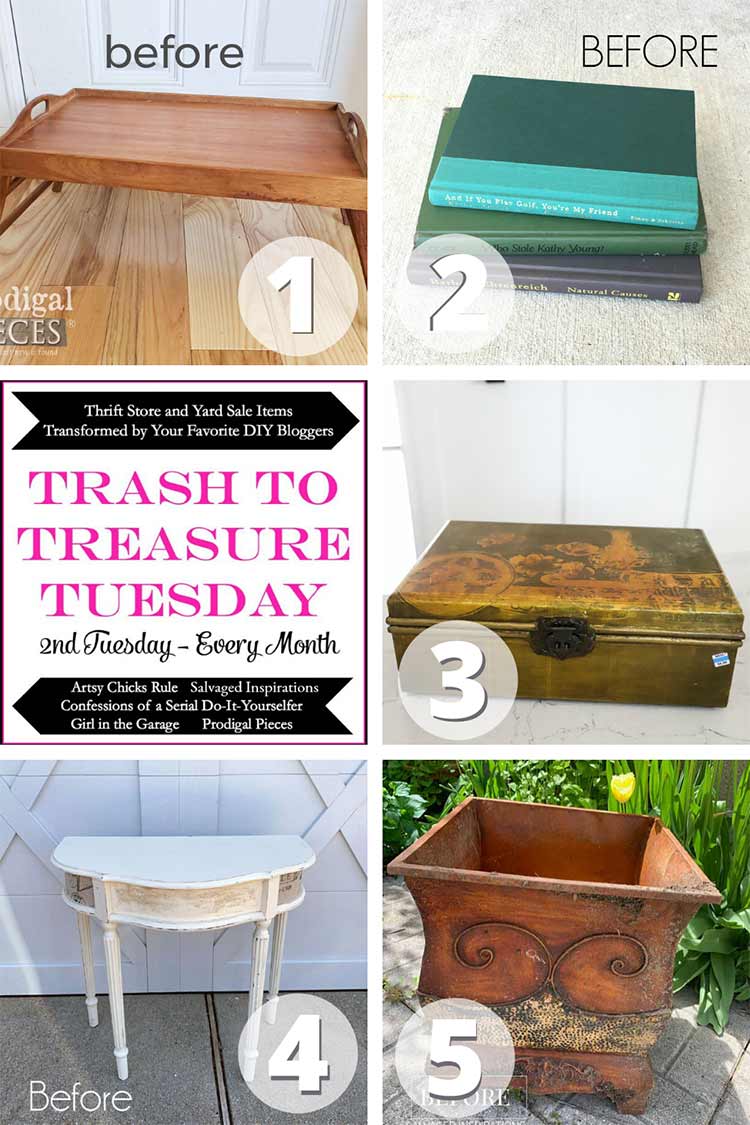
1. Prodigal Pieces
2. Girl In The Garage
3. Artsy Chicks Rule
4. Confessions Of A Serial DIYer
5. Salvaged Inspirations (I’m so happy you’re here!!)

I HOPE THIS PLANTER MAKEOVER HAS INSPIRED YOU TO TAKE A LOOK AT WHAT YOU HAVE LYING AROUND YOUR HOME. FEEL FREE TO CHIME IN … I ALWAYS LOVE HEARING FROM YOU!
Thanks for reading. 🙂
Wishing you a beautiful day filled with inspiration and Happy Painting friends!
Denise XO
RELATED POSTS::
DIY Resin Furniture Appliques & Onlays
DIY Furniture Appliques | Iron Orchid Molds
Mini Luggage Box Makeover
How To Use WoodUBend on Painted Furniture
How To Apply Bendable Wood Appliques – Video
Vintage Duck Egg Paint Finish – Video
PIN AND SHARE!

Very pretty upcycle, Denise, love the neutral color! You know, this would look so good beside a chair draped with that lovely tufted throw 😉 Your little photobomber is so adorable!
Ha, great minds! I originally staged it with the beige blanket with black tassels and then went back to the plant! And thanks re my photobomber… she’s a sweetheart on the inside and out. 🙂
Hi Denise – I love the difference between the before and after on your planter – its quite the transformation. I was wondering if the shellac primer is latex or oil based? The reason for my question is if the planter is exposed to water or the elements and the primer was water based I would worry that the rust will quickly start to penetrate your new paint job. The reason I ask is due to the fact I painted metal garden items I use outside with latex paint and primer and the items looked great for a short period but unfortunately rust started to show through the white paint in short order. I ended up removing the fresh paint and starting over with oil based paint products and after several summers outside in the elements the rust has not reappeared.
Hi there! I’m not certain BIN Shellac Primer is considered “oil-based” but it can be used with either oil-based paint OR water-based paints. And it’s durable enough to be used for outdoor projects. Hope this helps. 🙂
So much better! It looks brand new! XOXO
Thanks my friend! XOXO
I love the new French Country look they have – so charming, Denise! xo
Thanks Jen! I’m liking the new look too! XOXO
I love the new look! I’m going to try this on a set of planters I have. Your Gidget looks so cute! ~ Nicki
Thanks Nicki! And if you give it a try, I’d love to hear how your planters turn out for you. 🙂
Wow! What a beautiful transformation! I love T2T Tuesdays! I know this will find a special place back inside your home. Have a great week!
Thanks, Cecilia and I love T2T Tuesdays too! Also, another BIG thanks for sharing your mirror. Just gorgeous! XOXO
So pretty, Denise!! I love how it turned out! xo
Thanks Nancy! And great minds… I like your dry brushing too!🤗 XOXO
Hi Denise. Beautiful planter makeover. Love how you incorporated texture into the finish. It creates such interest and depth. Your photography is always stunning, but I have to say my favorite photo this week is the photobomb:). Gidget is adorable!
Awwww, thanks! We LOVE her!💕She’s my little shadow. XOXO
Simple – but well done 😉 A perfect re-do !!
Such a pretty planter – Now !
A question : Is this paint ok for outside use ? If not – what paint would be weatherproof ?
p
Thanks P! Chalky/mineral paints do work well outside but I’m guessing would need a re-do eventually. A more weatherproof option would be a paint designated for outdoor use – maybe something like an Outdoor Rustoleum. 🙂
Great idea! I have 2 planters that are going to get this treatment. Thanks for the inspiration! Oh, and your Gidget… adorable. 😘 xo, Do
Thanks Do… we LOVE her! I have a few more outdoor planters that need a facelift too. This makeover is so fast it has inspired me too. XOXO
Now you’ve got meet looking around for something to paint like this now! Great job on this planter
Thanks Carole! Sometimes we all need a ‘quick-pick-me-up-project’, right? It’s nice to get speedy results sometimes. XOXO
Denise, I just lovevthe softer, muted tone you gave this. So beautiful now!
Thanks my friend! XOXO