HOW TO CREATE YOUR OWN DIY RESIN FURNITURE APPLIQUES AND ONLAYS. [VIDEO]
Hi, sweet #sifamily, and welcome back! I’m kicking off the upcoming holiday season with the simplest DIY ever… but I promise once you try this, it’s going to transform ALL your projects from ho-hum, to AMAZING! Today I’m sharing how to make your own easy Resin Furniture Appliques and Onlays.
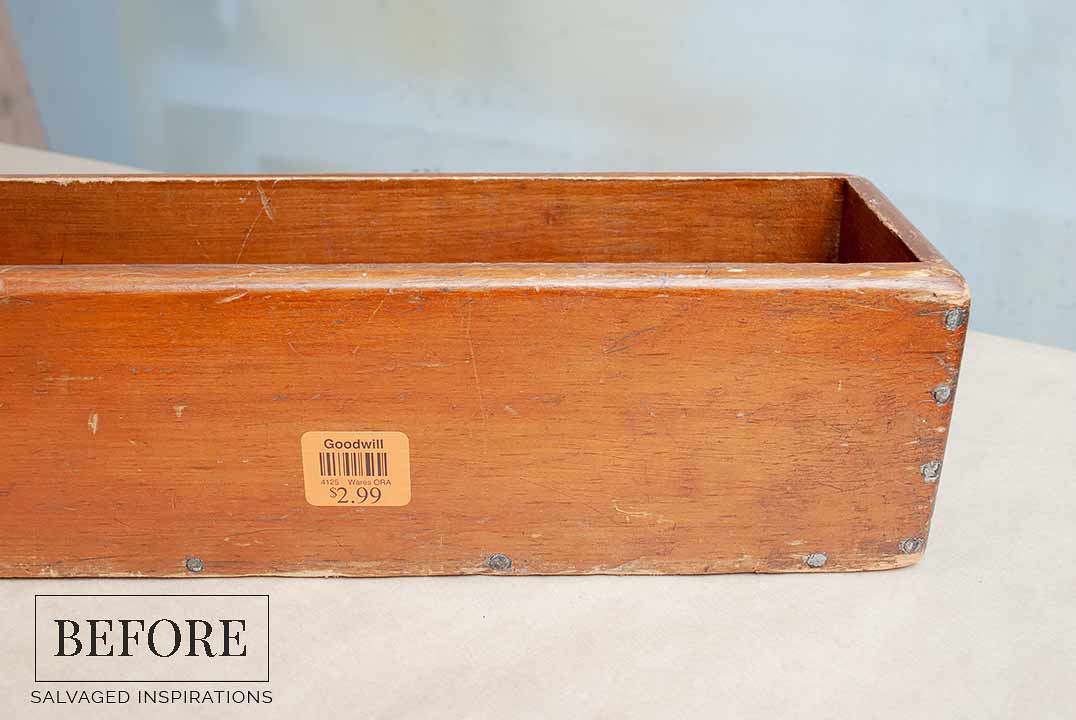
Casting is really fun and easy but I’m giving you fair warning — it’s kind of addictive! I’ve used these onlays and appliques on my furniture makeovers, but they’re also incredible for craft projects and home decor. This plain $2.99 Goodwill box is a perfect example!
Here’s what I started with…
And I can’t wait to share what a difference a little paint, gilding wax, and a faux wood applique can make!

THIS POST IS SPONSORED/CONTAINS AFFILIATE LINKS TO PRODUCTS I USE. YOU CAN SEE MY FULL DISCLOSURE HERE.
SOURCE LIST
$2.99 Goodwill Box – SALVAGED
Mini Angle Paint Brush
Sandpaper | Shop Towels
Dixie Cups
Glue Adhesive
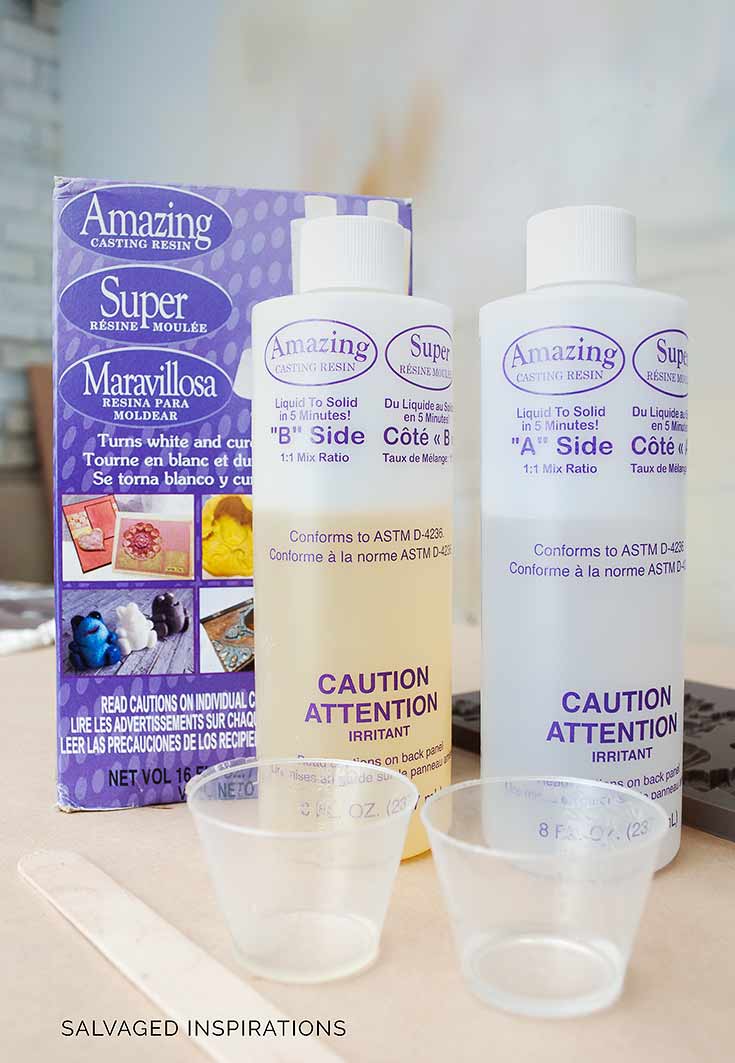
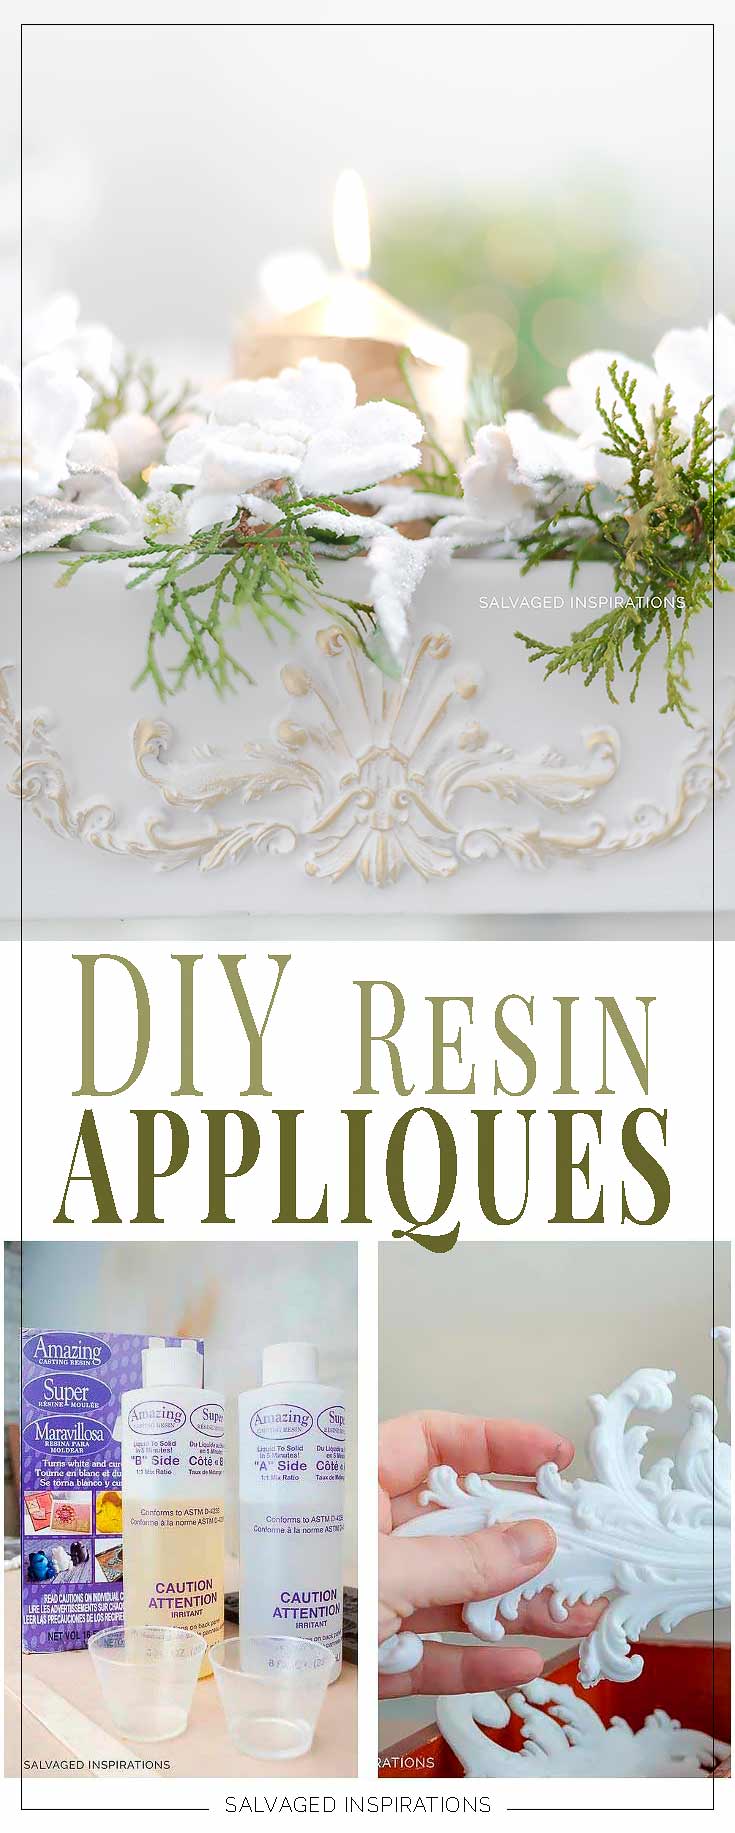
Amazing Casting Resin
Prima Silicone Molds
BOSS Stain Blocker
Fluff Chalk Mineral Paint
Prima Decor Wax
HOW TO MAKE RESIN APPLIQUES [VIDEO]
I created a YouTube video so you can see this resin casting in action. I’ve also included what NOT to do. This casting resin turns into a globby mess if you don’t work fast enough… lol.
If you have any issues with the playback, feel free to watch it on my Youtube Channel here.
HOW TO – DIY RESIN APPLIQUES
- Pour Amazing Casting Resin A-B in a 1:1 ratio into the measuring cups provided. A measured 1:1 ratio is half and half or 50/50 – equal parts of each.
- Take the A fluid and the B fluid and pour them both into a paper cup.
- Mix thoroughly until the milky color turns translucent.
- Pour into the silicone molds to cast the appliques.
- Use a craft stick or toothpick to maneuver the liquid resin into all the nooks and crannies of the silicone mold.
- Work quickly, as this resin starts to set within 2 minutes. (example of working too slow on video!)
- Let resin sit for 10-15 minutes.
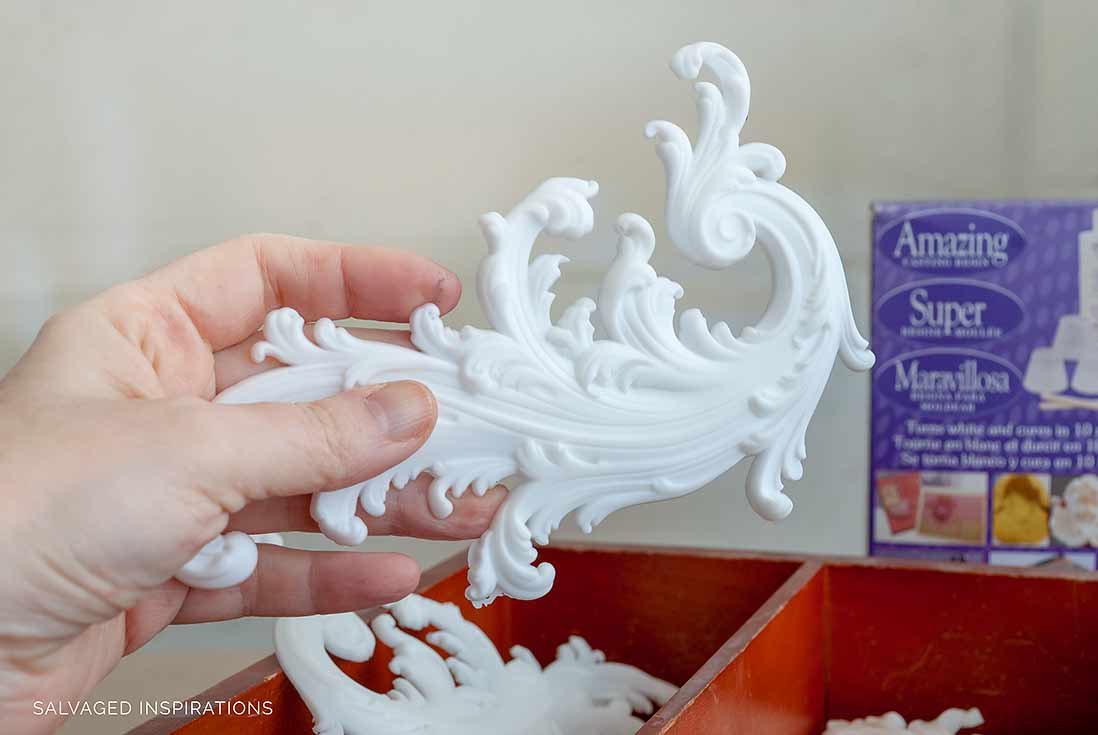
- Once cured, remove from the silicone mold by pulling the silicone away from the applique.
The resin is a liquid so it self-levels but I use these toothpicks or craft sticks to remove any bubbles and coax it into the little corners of the mold.
Casting resin sets in 10-15 minutes and will turn white once dry.
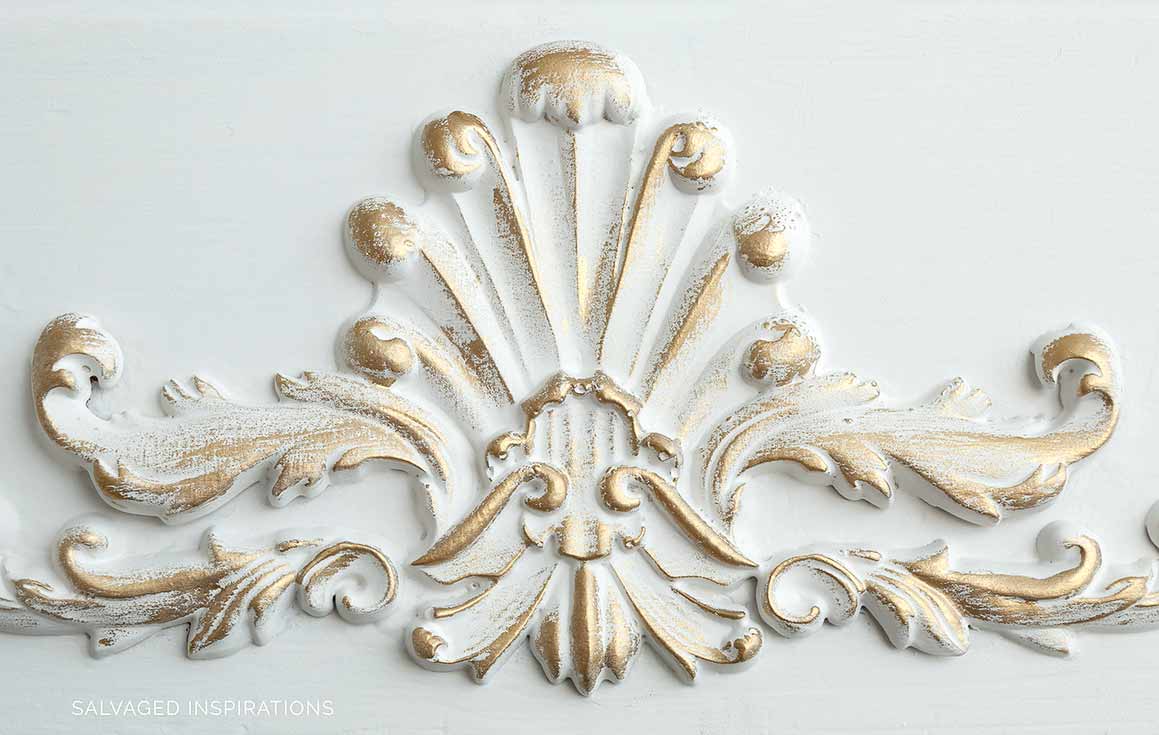
I really like this resin for detailed molds. Because it’s a liquid, it takes ALL the shape and details beautifully. Take a look!
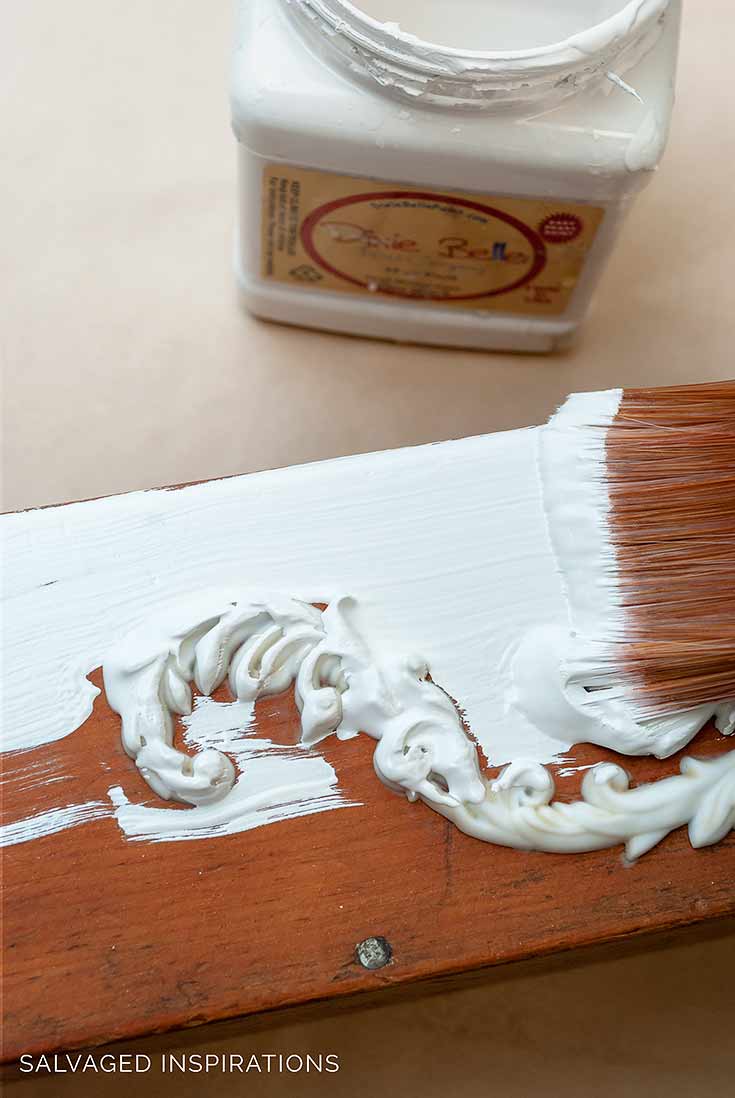
Once the resin appliqué is set, it can be glued onto your project. I used Bondweld but Liquid Nails or E6000 works really well too. Once it’s glued on and secured, that’s when the painting fun starts.
I used DB Fluff after I applied BOSS to stop any bleedthrough.
HOW TO HIGHLIGHT DECOR MOULDS
To make these appliques really POP and stand out, here are a few tips.
Gilding Wax – apply a small amount of this gilding wax to highlight the raised area or go crazy and gild the entire applique.
Dry Brushing – Run your brush over the applique with a tiny amount of paint in the color or your choice.
Dark or Light Wax – Apply a dark or light wax over the applique and then rub off the access. The wax will stay in all the nooks and crannies to give it an antiqued look.
Metallic Paint – Paint the entire applique or use a dry brush technique to hit the highlights.

THE REVEAL!
So fun, festive, and pretty! And the best part is the molds can be used over and over again to create unlimited projects!
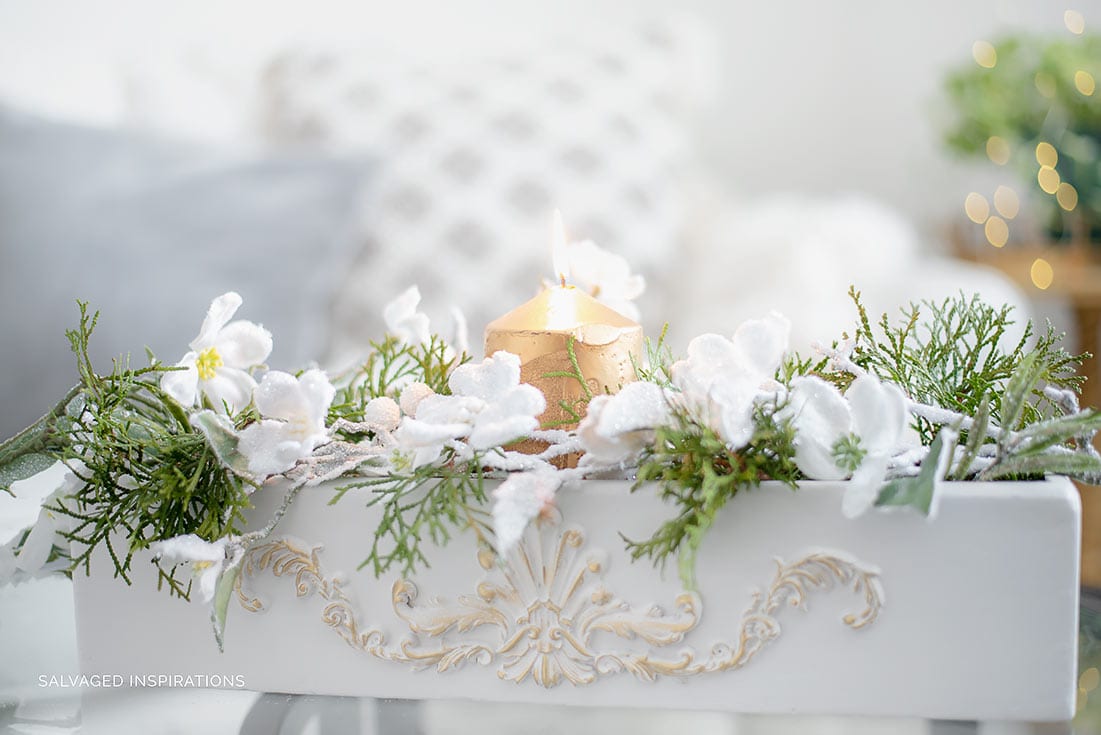

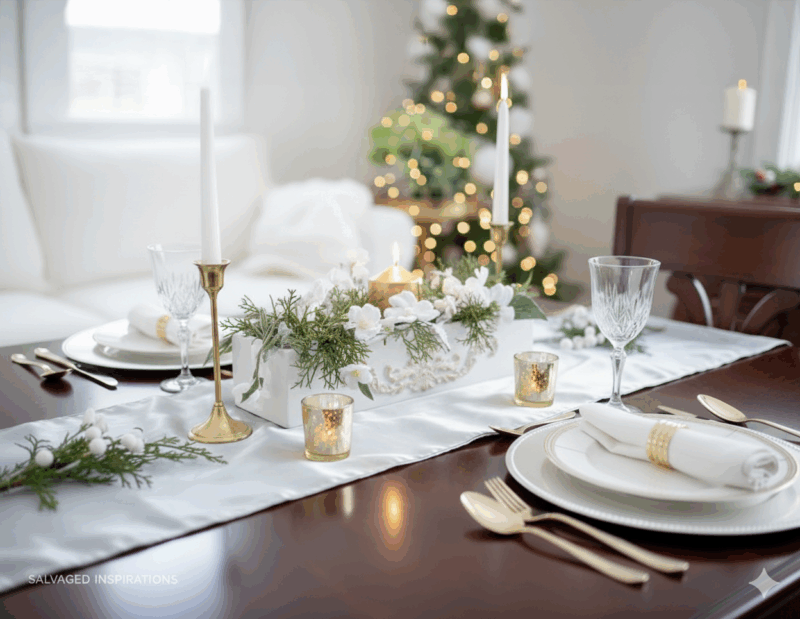
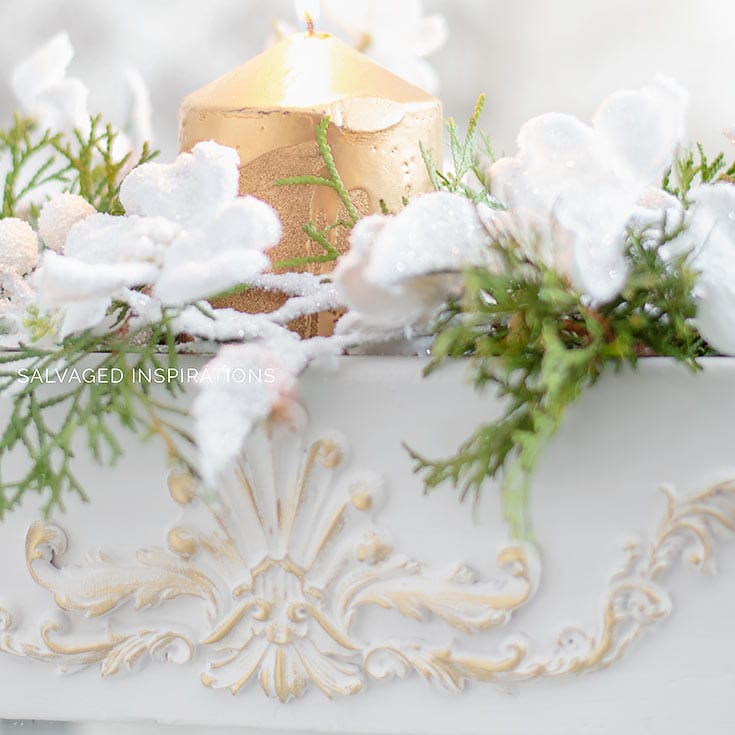
This makes a really pretty holiday centerpiece for a living room table or dining table.
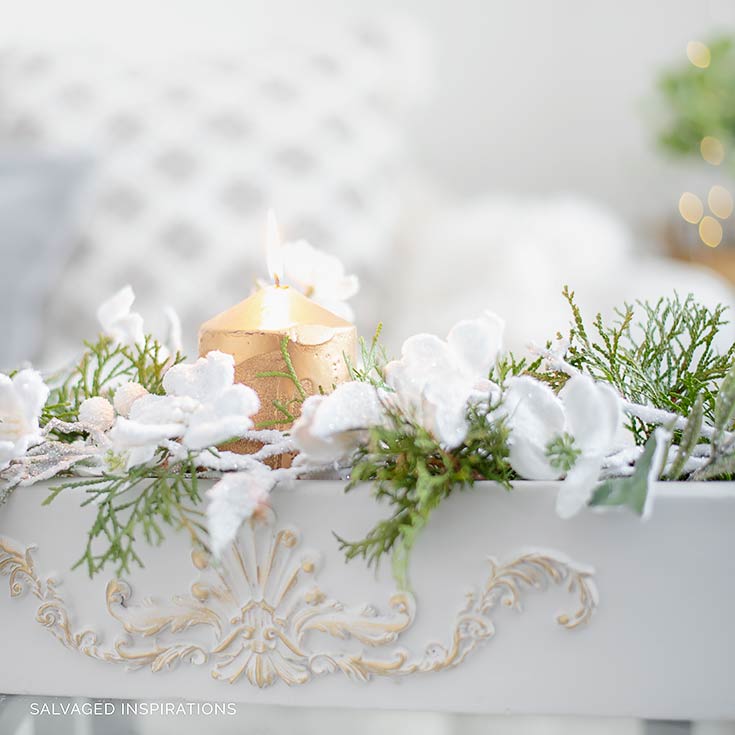
It looks like it was original to this box, don’t you think?
LET ME KNOW WHAT YOU THINK OF THESE RESIN FURNITURE APPLIQUES AND ONLAYS … OR FEEL FREE TO ASK ANY QUESTIONS YOU MAY HAVE… I ALWAYS LOVE HEARING FROM YOU.
Thanks for reading. 🙂
Wishing you a beautiful day filled with inspiration and Happy Painting friends!
Denise XO
RELATED POSTS::
DIY PAINTED NIGHTSTANDS FROM REPURPOSED DESK
CHRISTMAS EVERGREEN WASHSTAND TAKE 2
WHITEWASHED WOOD PLANT STAND MAKEOVER
DIRTY POUR CHRISTMAS ORNAMENTS
LAST-MINUTE GIFT IDEA | SALVAGED STYLE
PIN AND SHARE!

Oh my goodness, I had forgotten about resin appliqués. It’s the perfect way to add a little wow factor. Dressed that plain box right up. Love the gold highlights too. ❤️👏🏻 Pinned!
Thanks my friend and ya, this box was nothing to look at first.😆 Thanks for the PIN! XOXO
Simply lovely…just one more crafty idea for me to do. Just love the different ways you can create uniqueness in your decor.
Your box is elegant and would look beautiful in any spot you put it in.. 😍
Thanks so much Lorri! XO
Love this tutorial. I’m wondering if you have ever used ready made resin appliques/furniture onlays? And If so, do you have any comments on whether the flexible resin appliques vs non flexible appliques are any easier to work with?
Thank you, Alston
I’ve only used the flexible store-bought resin appliques and that was years ago but they were very easy to use. And so long as my DIY Resin ones pour and set properly, I’ve never had any issues using them either. Super easy. 🙂
Wow! What a beautiful and easy makeover! I’m drooling to think about all the things I could do with this technique. I think the biggest gain is that You can make very blah, modern furniture look a bit more traditional or even vintage with these appliques and some paint! That is huge, I’m looking forward to trying it on a very ugly, (but very useful) entrance unit to my home! Thanks!
Thanks Gabi! If you give it a go on your entrance unit, I’d LOVE to see how it all works out for you. 🙂
I’m a stickler for good details and I have to say that your project certainly and easily passed the “test”. What a great job, Denise! Simple, quiet and elegant. Just lovely!!
I have never worked with molds and resin, but you made it look easy so I am greatly encouraged. Thank you! Do they break easily once you take them from the molds?
Not being French I could be saying this incorrectly but here goes: Joyeux Noel, Denise.
BTW, This was the first time I’ve listened to your video, and I understand your speaking perfectly. It can take just a bit of mental maneuvering to understand and comprehend someone of another country, but there’s usually no reason to make them speak in our language. You are very gracious!
Thanks so much, Caye! The resin molds are super hard to break and release from the molds really easy! That’s one of the reasons I prefer them over products like paper clay. Much more durable and it dries much faster as well. Joyeux Noel and Happy Holidays to you as well! XOXO
Hi Denise! Thank you for the tutorial! I have a couple of molds but I bought paper clay. I have not used them yet. Once you glue the (App Le kay) to your piece, do you clamp it on and let it dry first? That’s how we say Applique .
Thank you again.
I’ve used the paper clay and it works well. I let mine dry first and then glue it on. You can use a clamp or I know a lot of painters that hold it in place with painter’s tape. 🙂
Love!!!! This post! So inspired that I immediately ordered some casting moulds & resin. Can’t wait to try it. The results you achieved with this are stunning! It’s a fabulous idea to improve a million things!. Is it possible to be addicted without even trying it 😂? Thank you once again for inspiring me!
It is,🤣!! You’re going to have so much fun and YES, it can be applied to almost anything that you’d like to ‘fancy-up’! I’d love to hear how your project(s) turn out if you have the time Neetu! x
Thanks for reposting this! I am a box lover and always looking for ideas to refurbish them. I love the French pronunciation of appliqué so don’t change how you pronounce it! Joyeuses fêtes!!
LOL, thanks, Cecilia! I did get quite the reaction from you guys south of the border! Makes sense. I probably sound so foreign!😉 Joyeuses fêtes to you my friend. XOXO
Simply stunning! I love the addition of the resin pieces. Thanks, too, for sharing the details of how to make these molds. Very inspirational! Have a great day!
Thanks Sue, so glad you like it, and wishing you a fabulous day as well! XOXO
These are fun to do and always turn out so pretty. I have also used hot glue to fill the molds & it works great as they are flexible & can be glued down on rounded surfaces.
That is brilliant Tracy. You always give the BEST tips! I have one post left before I take off for the year and spend some quiet time with family and friends but if I don’t see you on Thursday, I’m wishing you and your family all the best. Joyeuses fêtes to you my friend. XOXO Hugs
I might give this a try for my silverware box re-do! Every time I need help, I find answers on your site. Thank you!!
I’m so glad… and have fun with your silverware box re-do Erin! 🙂
Hi! If I want to put an onlay on my wall, should I caulk it around the edges? I want them to really feel as though they are part of the wall. What do you think?
Yes, great idea Jordan!
You are pronouncing applique incorrectly. It is app li kay. Just thought would might want to know.😁😉
Hi Kelly, thanks for this! A few people have mentioned this on the Youtube comments and it wasn’t until it was pointed out that I realized I was using the French pronunciation. Here in Canada (where English and French are spoken) I always heard “Ap-lique” as the correct way. So long as you all know what I’m referring too, we’re good.😉
So simple, yet beautiful. I’m giving it my first to at trying one of IOD’s Trimmings Moulds on an old pain wood frame and them using the decor stamps on the glass to try to make it look like a shabby and a
antiques mirror. Thank you, as always for sharing such awesome techniques!
Hi Lindsay! IOD has gorgeous trimming moulds and what a brilliant idea adding the decor stamps on the glass! x
That looks like a whole lot of fun, Denise! Your thrift store box looks beautiful and so festive!
Thanks, my friend! XOXO
Hi Denise. I love how you changed this dated wooden box into a beautiful centerpiece. Amazing results. The resin stick on really makes a statement! Can’t wait to try it on one of my future projects.
They’re a lot of fun and make a HUGE difference. If you get the opportunity, I know you’ll love them. 🙂
So clever you are, Ms. Denise!!! Can those silicone molds be purchased at places like Michaels or Hobby Lobby, or are they specialty items that must be secured online or from particular vendors? The only type of silicone molds I’ve ever used were in the kitchen to freeze homemade basil pesto lol! — so I can’t say I’d know where to begin looking for such elegant mold shapes. Thanks for your lovely creative ideas and for being so gracious to share them with you DIY sistas everywhere!!
Hi Ms. Suzy! 🙂 I’ve used those square molds to freeze herbs too…lol!!! I know Hobby Lobby and Michaels sells silcone molds for cake/baking and they also sell the Amazing Casting Putty and Silcone but I’ve never seen these decor moulds there. I had Redesign send me some to try and then I know they sell on Amazon and on redesignwithprima.com and also at selected retailers. ps LOVE sharing with my DIY sistas! XO
You’re a doll, thanks so much 😀
thank YOU!🤗
Love how the appliqué turned out on the box. It looks effortless. I need to figure out how to make a mold of an embellishment on a antique church pew so I can replace the missing piece. If I can make the mold then I can use the Amazing resign to make the piece to match. Do you have any ideas on making a mold? Thanks
Hi Cecilia! Amazing also has this Mold Putty which works extremely well on missing decor so long as you have a matching piece you can actually apply the putty on. Then you can pour in the silcone solution and have an exact match. I believe they even sell the casting kit and silicone kit in a set on Amazon. It may be a little cheaper if you buy them together. 🙂 PS – I know I emailed you but thanks again. Lovely mail that made my day. 🙂
I found this video for you Cecilia. It describes the casting putty in the first 2-3 minutes so you can see if it will work and/or be appropriate for the missing piece on your antique church pew. 🙂
I wasn’t sure you could make that box look better but it’s simply elegant Denise. Beautiful work as always! ~ Nicki
Yes, it looked rough. 😉 Thanks, Nicki!
Well! I have to admit that I’m a bit of a “picky puss” in most things, but this is a WOW! So simple, elegant, pretty, . . . Great job! Thank you for the demos because I’m going to give this a try on a piece of furniture that’s just blah! and I couldn’t decide what to do with it. Now I know, thanks to you.
Wishing you a lovely Christmas and a great new year!
These resin appliques look AMAZING on furniture and really do fancy up a boring piece so I think you’re going to love them. Wishing you a happy holiday and Merry Christmas too Cate! x
Wowser! What a huge difference…..
…lol..ya, it was pretty ugly to start with! 😉
Looks gorgeous Denise .what are the names of the two molds that you used as I would like to order some?
Hi Yanina! The silicone mold I used was Redesign by Prima’s Greco Crest. 🙂
Not that I not only love what you did here, your pictures are just plain stellar!!
Aw, thanks my friend! XO
Turned out beautiful!! Thank you for the video, list of products, and pics. I am going to be doing some of these myself. They are amazing!
Merry Christmas!
My pleasure… so happy you find it helpful. Have fun making your appliques and Merry Christmas to you Ashley! xo
Wow! that’s beautiful!
Thanks Norma! Fun little project. 🙂
Just beautiful and it looks like it would also fit rolls of toilet paper for the back of the toilet tank?? Just a thought. I do love the arrangement you have in it.
Jane, that’s too funny! I was thinking I could use it for the back of my toilet after the holiday season… NO JOKE! Not for toilet paper — but for hairspray bottle, perfume, lotion etc!
Very pretty, perfect for Christmas. I’ve also made the molds with hot glue.
Thanks my friend. I tried hot glue but mine turned out pretty shabby… and not shabby chic… just shabby. 🙁 Maybe I need to try a few more times to get it right. 🙂
Hi Denise
I love your creations looks extremely expensive I live in a small town where do you shop to buy all the things for this project
Hi Judy! I love that you think it ‘looks extremely expensive’ but honestly, I such a Thriftista I usually get my supplies at Thrift Stores and Dollar Stores. I treated myself to those white snow flowers from Homesense but the greenery is fresh of a tree at the front of my house and the gold candle is dollar store. 🙂
Soooo pretty!!
Thanks Dottie! x
Always the BEST! Ideas, tutorials, pics, and styling!!!!
Thank you Diane! 🙂 And LOVE your stockings/decor btw! Simply gorgeous!
I love this Denise. ❤️
Thanks Betty! xo