HOW TO TURN A CURB-SHOPPED SETTEE BENCH INTO A GLAM FRENCH SETTE | YOUTUBE VIDEO COMING THIS SATURDAY!
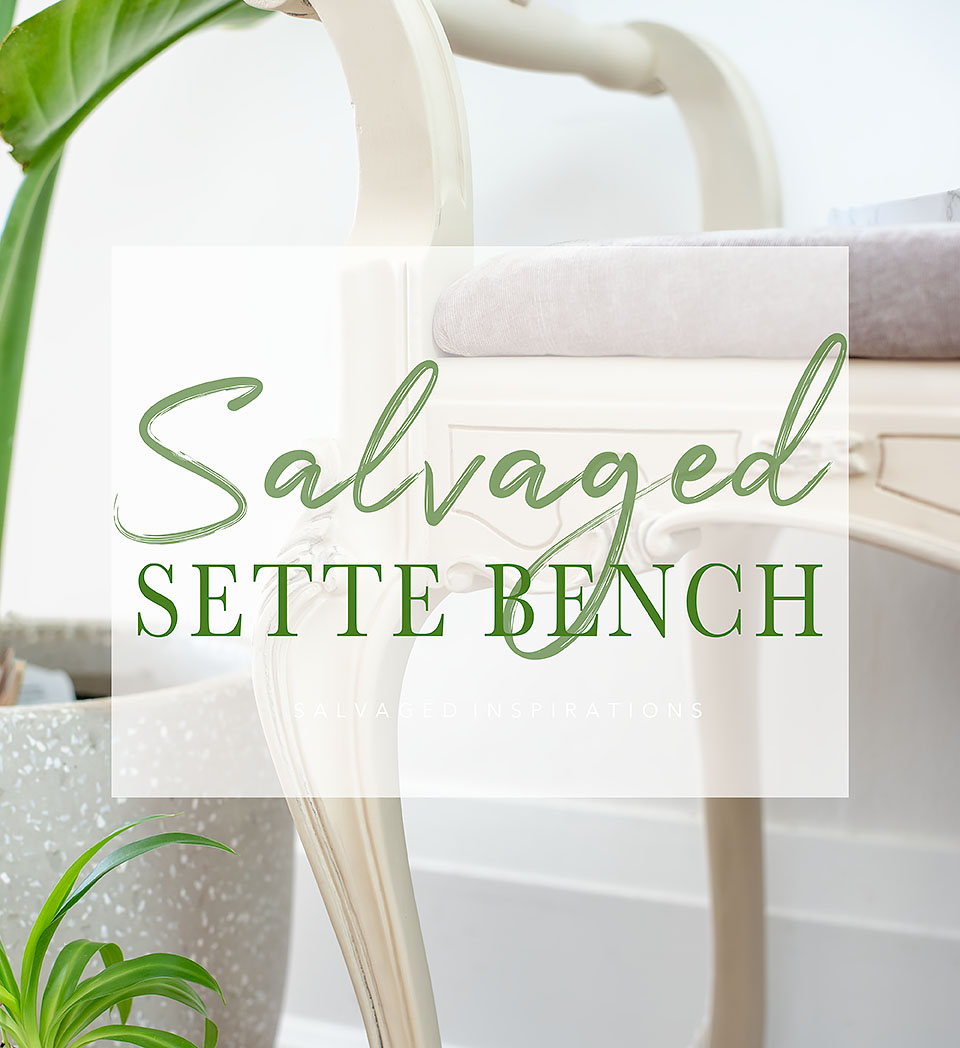 Hi, sweet creative friends! Today I have a curb-shopped Settee Bench Makeover for you! I have to admit when my sister first brought it to me I was like meh, but now that we painted and reupholstered it, she’s adorable… and I can’t wait for you to see what we did using old chair spindles!
I’m also sharing
- How to color match paint
- An AMAZING product to hide furniture imperfections
- How to highlight details with wax
- How to repurpose old chair spindles
- The cheapest place to buy foam for upholstery
And bonus, it’s also the fourth Thursday of the month. This means I have the honor of joining my super talented Furniture Fixer Upper Crew with their makeovers as well. Be sure to check out their pieces at the bottom of this post and then click the link to see the after!
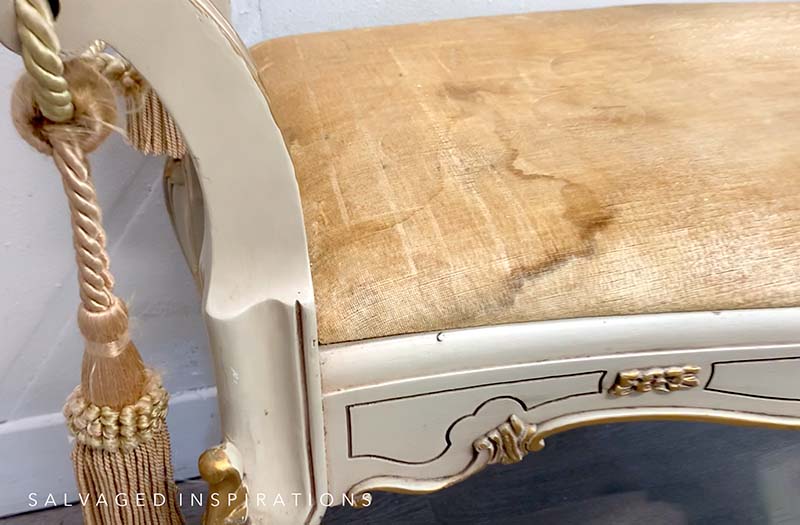
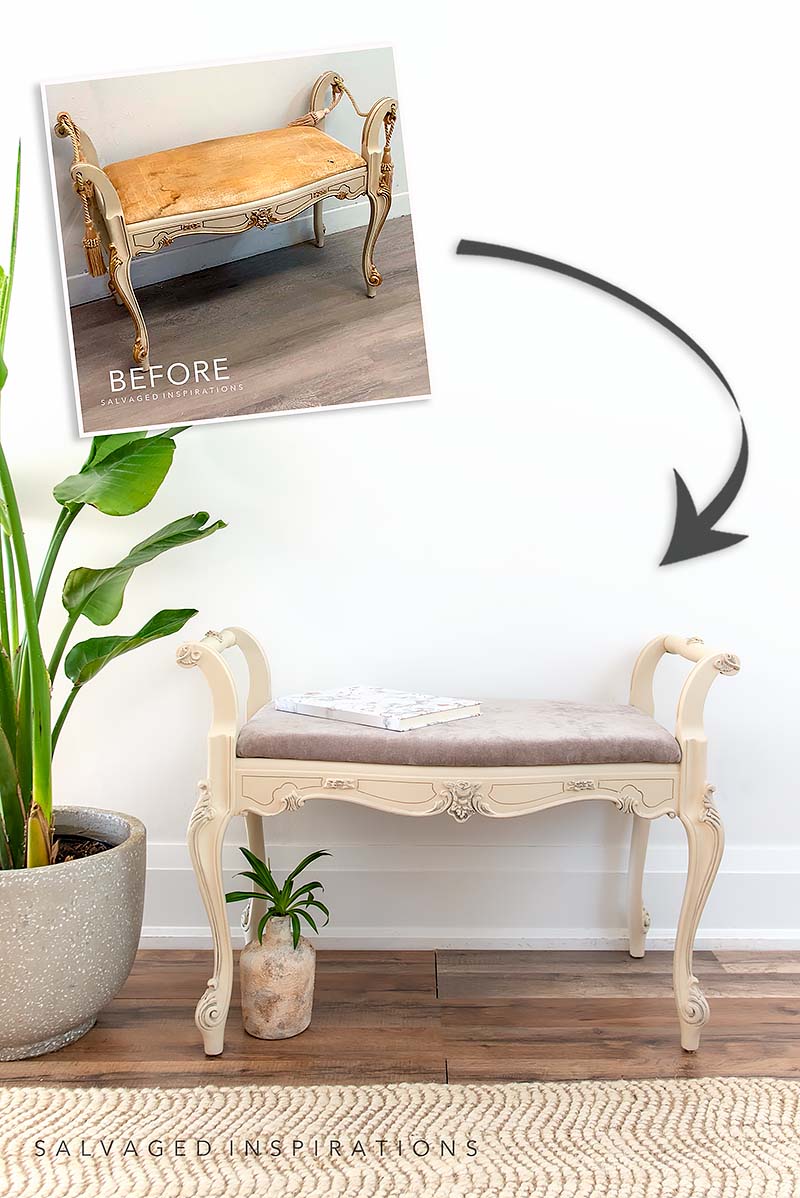
Here’s the curb-shopped settee bench we started with. It was structurally sound but needed a really good cleaning and reupholstering.
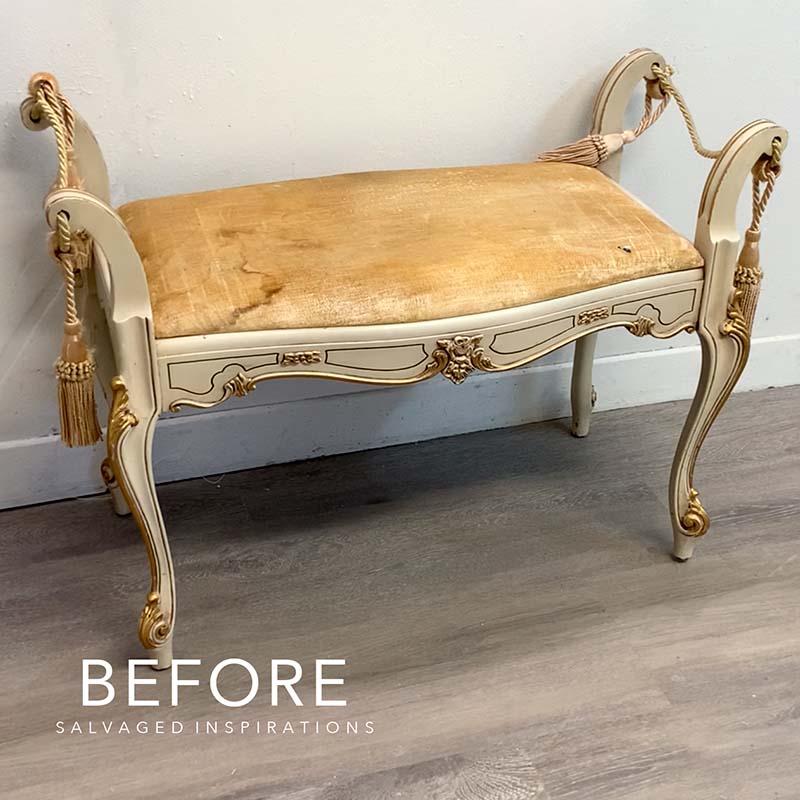
The fabric smelled like smoke.
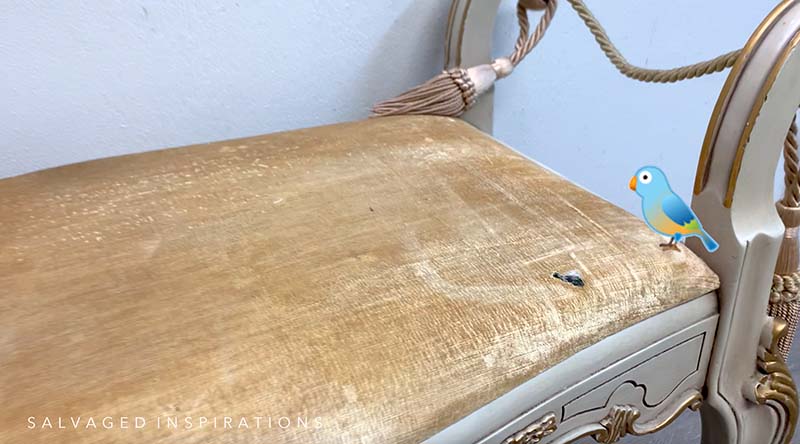
And the bird droppings didn’t help either. 😂
THIS POST IS SPONSORED/CONTAINS AFFILIATE LINKS TO PRODUCTS I USE. YOU CAN SEE MY FULL DISCLOSURE HERE.
SOURCE LIST
Settee Bench – SALVAGED
White Lightning
Sanding Sponge
Woodubend Appliques
Wood Glue
Paint Brush
Sand Castle Silk Paint
Endless Shore Silk Paint
Clear Wax | Gray Wax
TOOL LIST
Scissors
Measuring Tape
Dewalt Drill Set
Ryobi Miter Saw
Pneumatic Staple Gun
Heat Gun
PAINTED SETTEE BENCH
Here’s how it all came together. A big thanks to my sister Andrea. She was kind enough to give me a hand with this project as I’m still not up to speed with my broken foot. She also asked me to say thank you to all of you who gave her a shout-out in the comments over the last few weeks. She really appreciates it! I better be careful – she could be planning a blog takeover! 😉
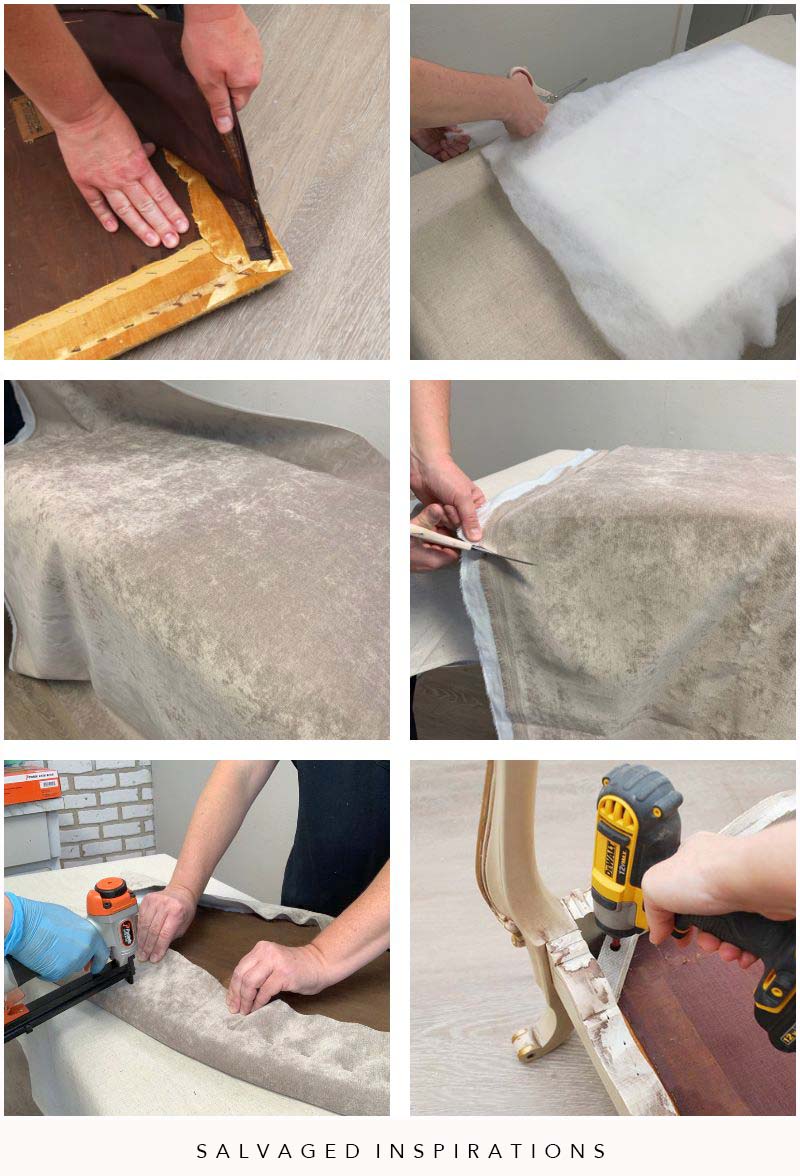
PREP | CLEAN
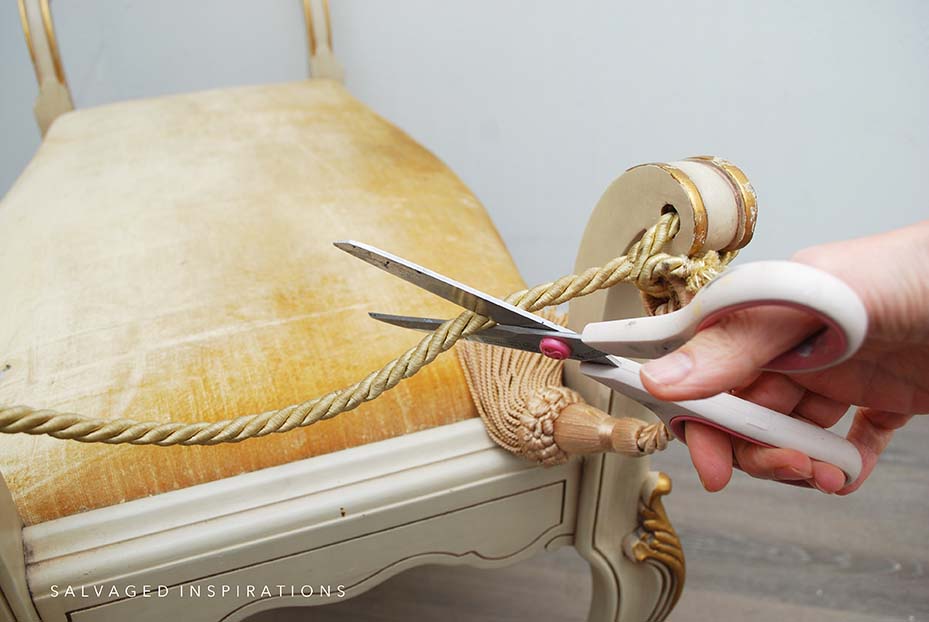
I started by cutting off the old dirty tassels.
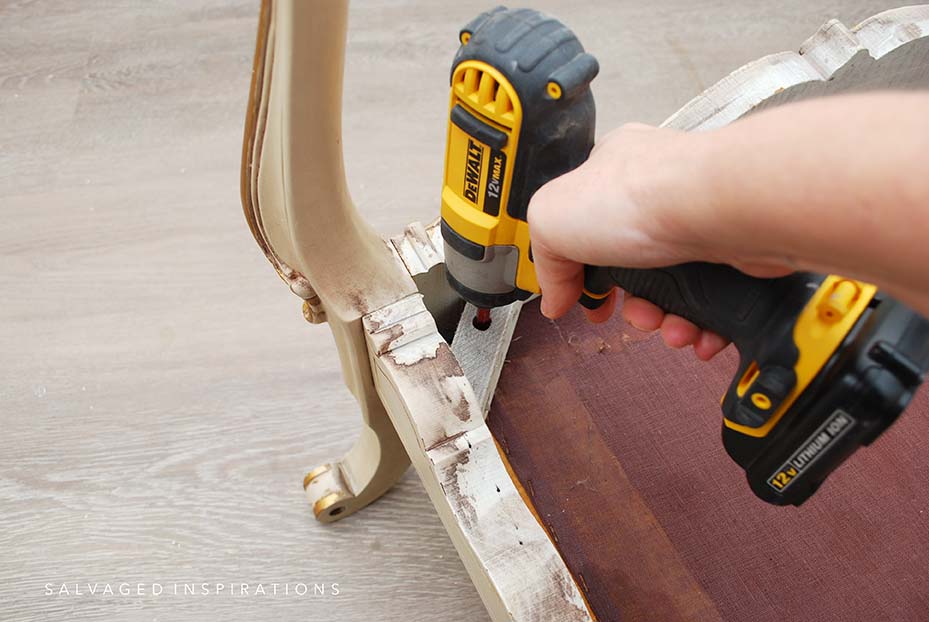
Then we removed the old seat using this Dewalt impact driver.
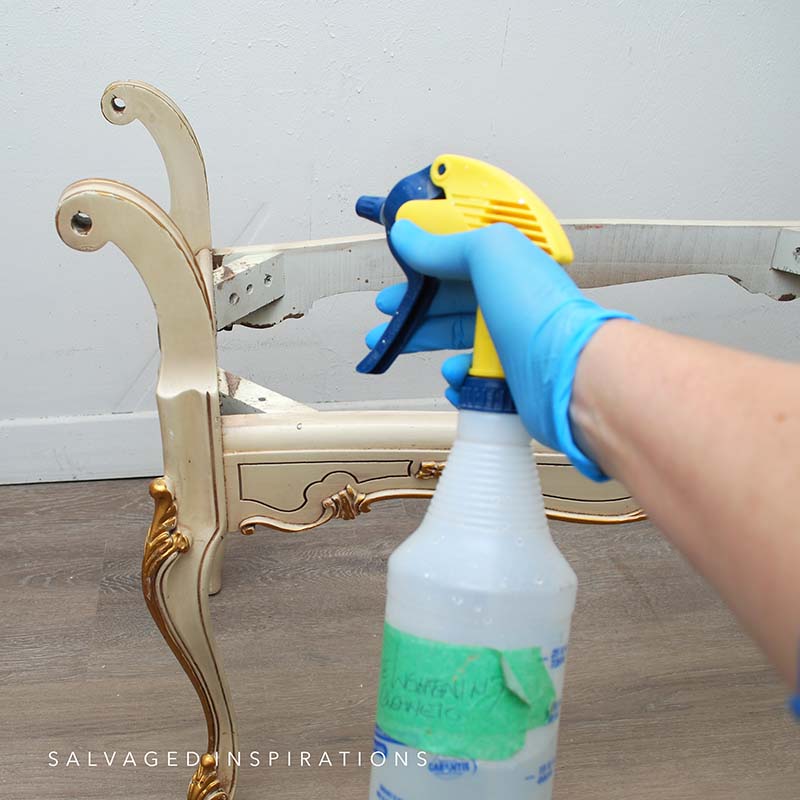
After we removed the seat from the base, I gave it a really good cleaning with this White Lightning and scuff sanding with this sanding sponge.
PAINT
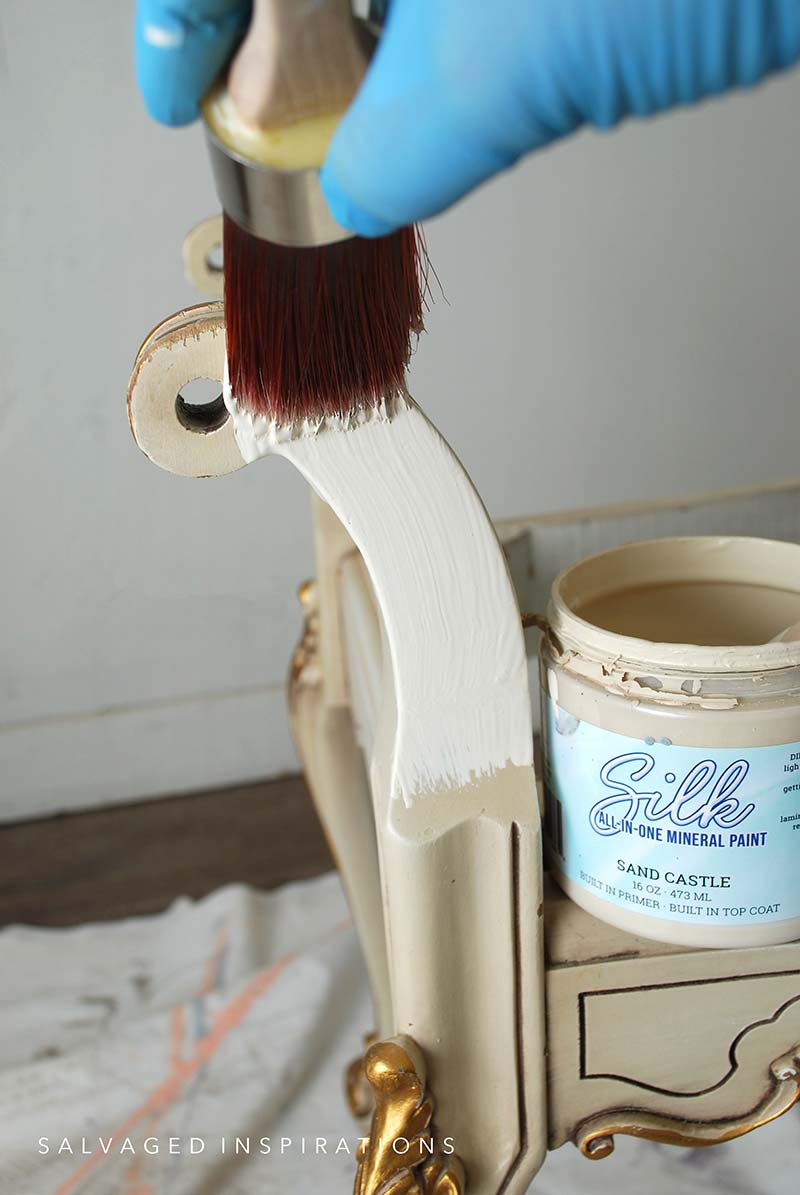
I had a small amount of this Sand Castle Silk Paint. I added a small amount of Endless Shore to the Sand Castle to give me enough to paint 2 coats on the settee. Andrea wanted the color to be similar but “cleaner and more updated” so I think we matched it really nicely. When paint-matching, I like to use a paper plate to mix my colors. Tip – Let them dry before deciding which is a close match! You can also use a color match app like this one here. Most brands of paint companies have them online and the accuracy is impressive!
REPURPOSING CHAIR SPINDLES
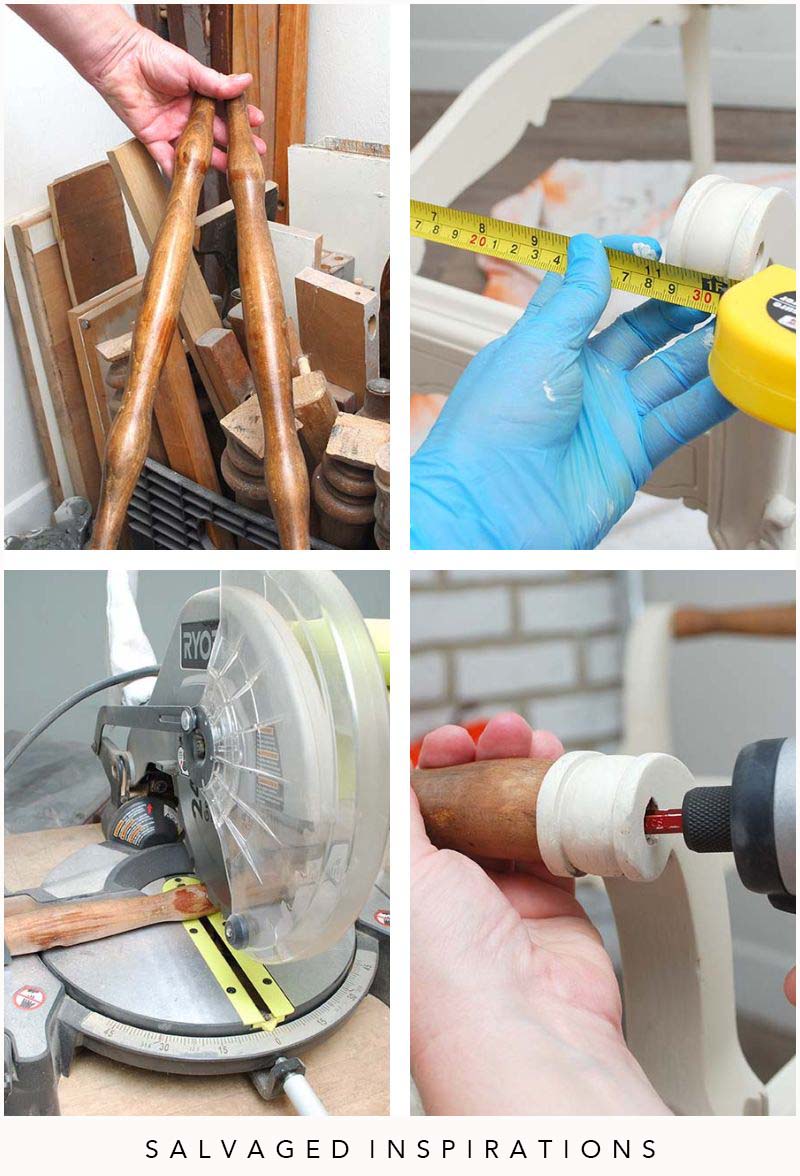
To make new ‘arms’ for this settee we used repurposed chair spindles. Each spindle had a hole in it (which I’ll share how I covered that up easy peasy in this Saturday’s video and below!) and was slightly too long which was easy to fix.
- I started by picking chair spindles that had a nice shape
- I measured each side 11 1/4 inches long
- I cut the chair spindle to size using my miter saw
- And installed the arms using a large screw
HIDING IMPERFECTIONS
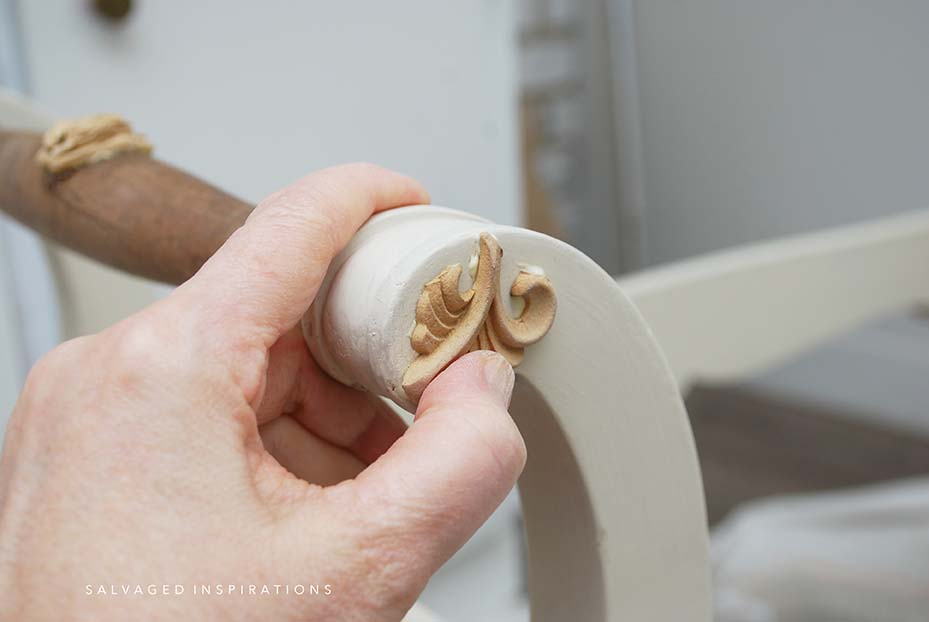
To hide the holes on the chair spindles and the holes on the frame, it was Woodubend to the rescue! I keep all my little bits and pieces of Woodubend because they not only hide imperfections but make everything look beautiful as well!
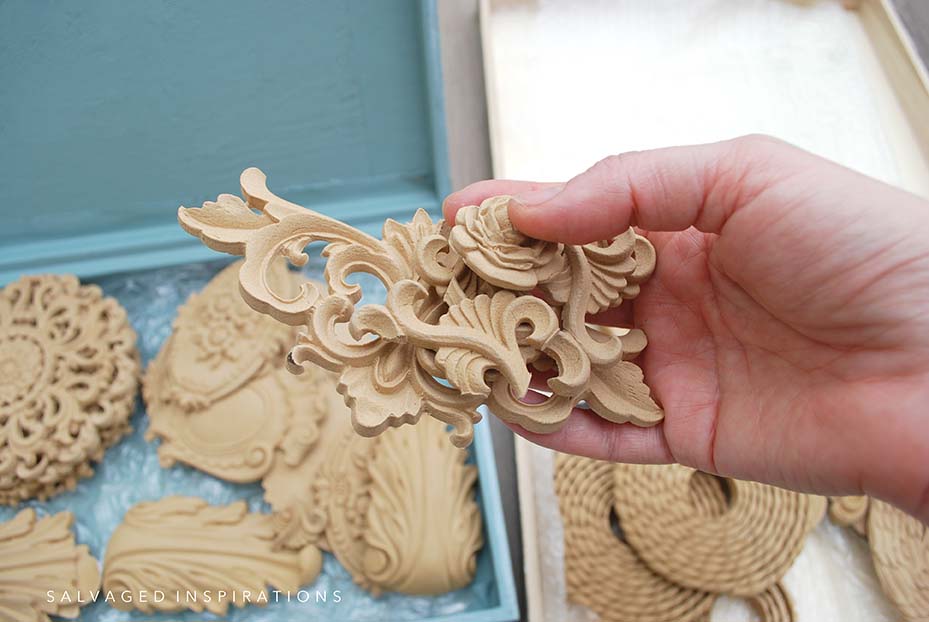
I used these sweet floral roses to hide the hole in the spindles.
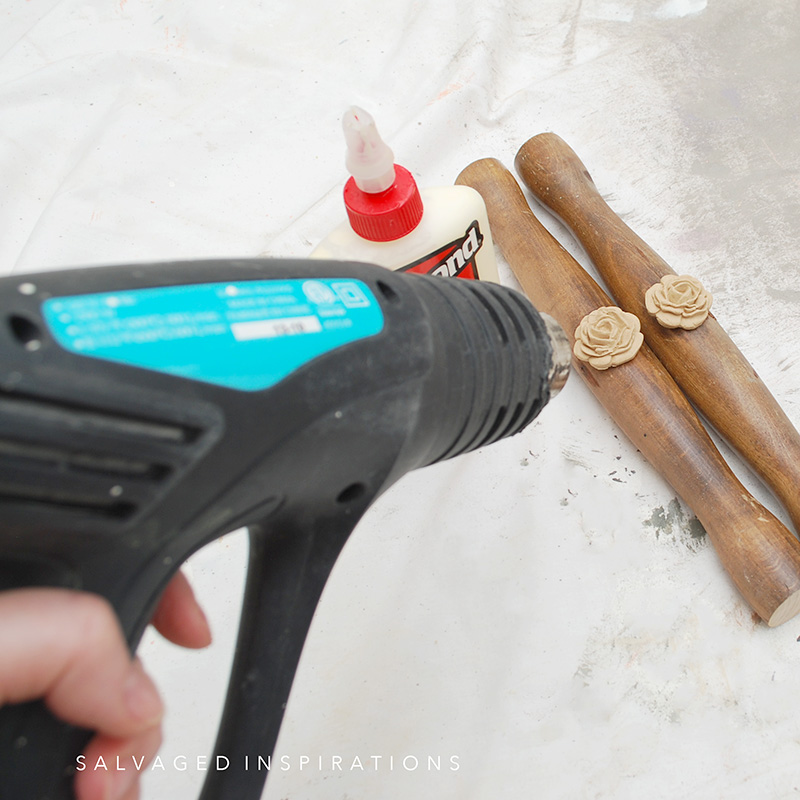
Woodubend is wood that actually bends when heated. This makes it super easy to bend into the shape of whatever you’re gluing it onto. I have a full tutorial on How To Use Woodubend here.
TOPCOAT | PROTECTION
I used clear wax over the entire piece not so much for protection (it already has the topcoat included in the paint) but to provide a base coat for some darker wax. Then to add a little extra dimension to the Woodubend and existing details, I added gray wax to the details and then wiped the excess off. When we think of dark waxing, we usually think of black or brown wax. But using a softer gray or even mixing a custom color of wax can really highlight details without looking too harsh!

REUPHOLSTER
Andrea removed the old seat fabric and foam and had the new foam cut to size at The Foam Centre here in Burlington. Tip – If you have a local foam center in your area, be sure to check it out when doing these types of projects. For $11, we had a 1″ piece of foam cut to the shape of our board and glued on for us!
To recover the new seat, Andrea cut the batting to the size of the seat leaving an extra 6″ all around the edges. And then we cut some leftover velvet fabric oversized as well. Then using one of my favorite tools, my pneumatic staple gun, we stapled the batting and fabric to the underside of the bench. To finish it off, the seat was reattached with screws from the underside.
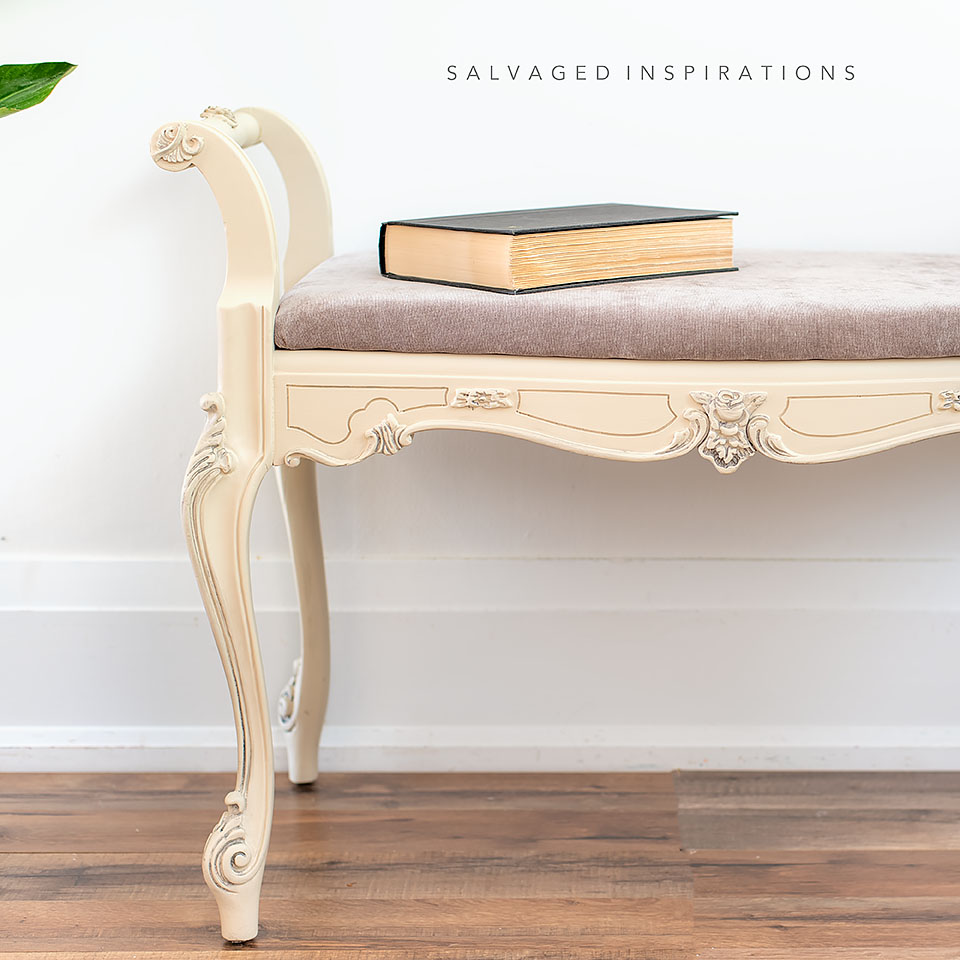
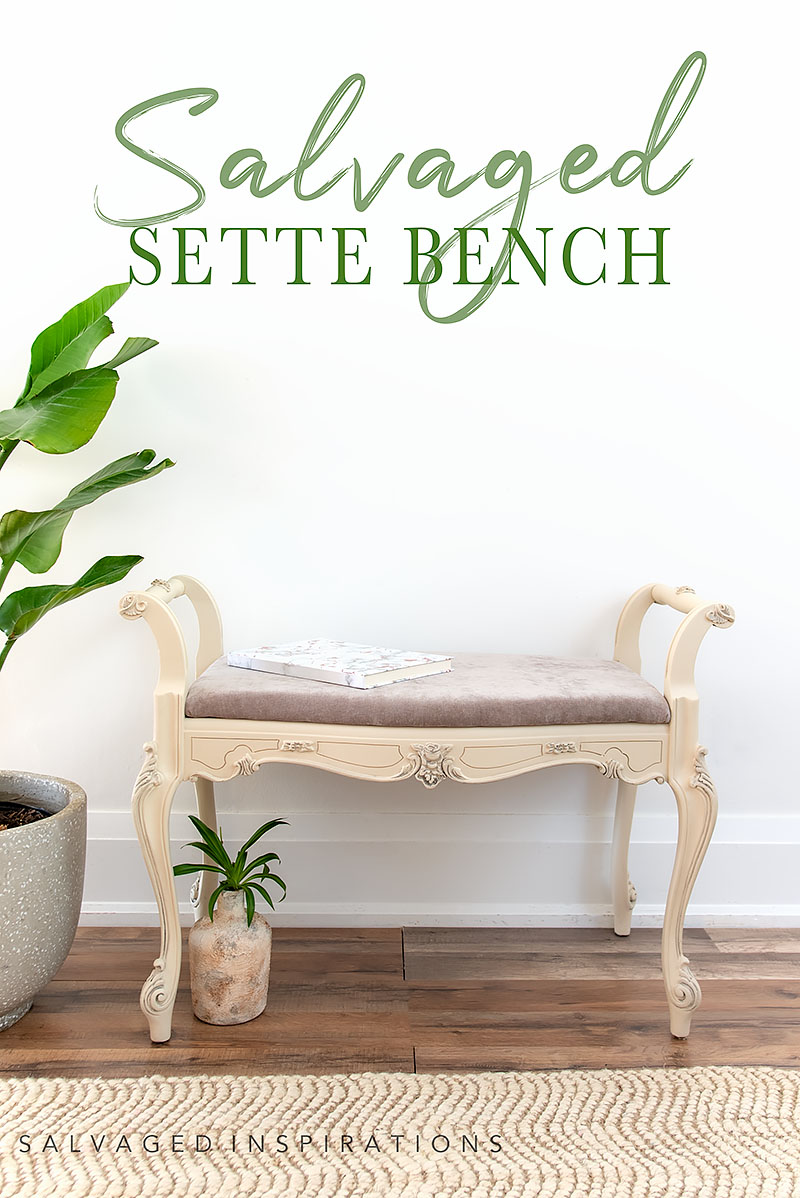
FINISHED LOOK!
What do you think? Isn’t she sweet?!

It looks (and smells!) so much cleaner!
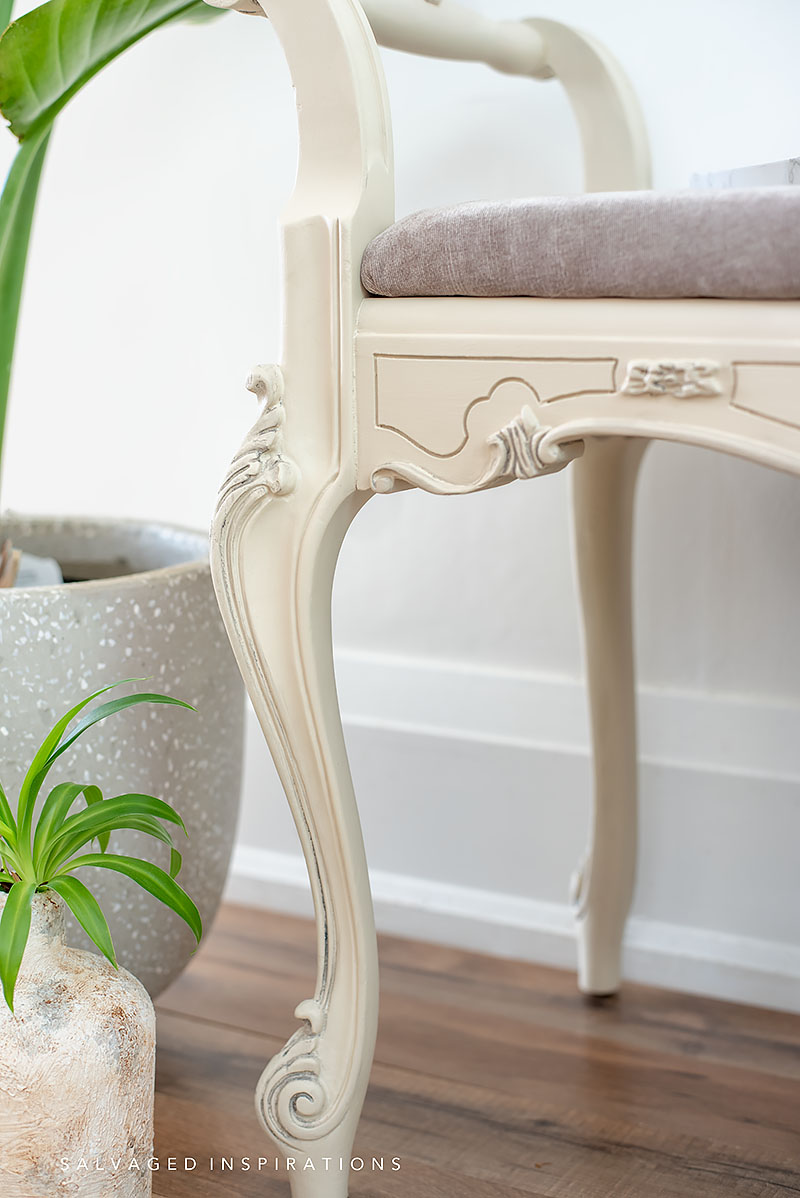
Another piece road-rescued from our landfill!
YOUTUBE TUTORIAL
Here’s a step-by-step tutorial on Youtube. If you have any problems viewing below, feel free to watch it on my Youtube Channel HERE. Our #siyoutubefamily is already a community of 15.5K so don’t forget to subscribe if you haven’t done so already! So exciting, thank YOU! 🙂
AND NOW FOR SOME FURNITURE FIXER-UPPER FUN!
You’re going to LOVE what my creative team of Furniture Fixer Upper ladies do! Below are their BEFORE photos. Visit the links below to see the amazing AFTERS and learn how they did it! I’m heading over to take a peek as well! x
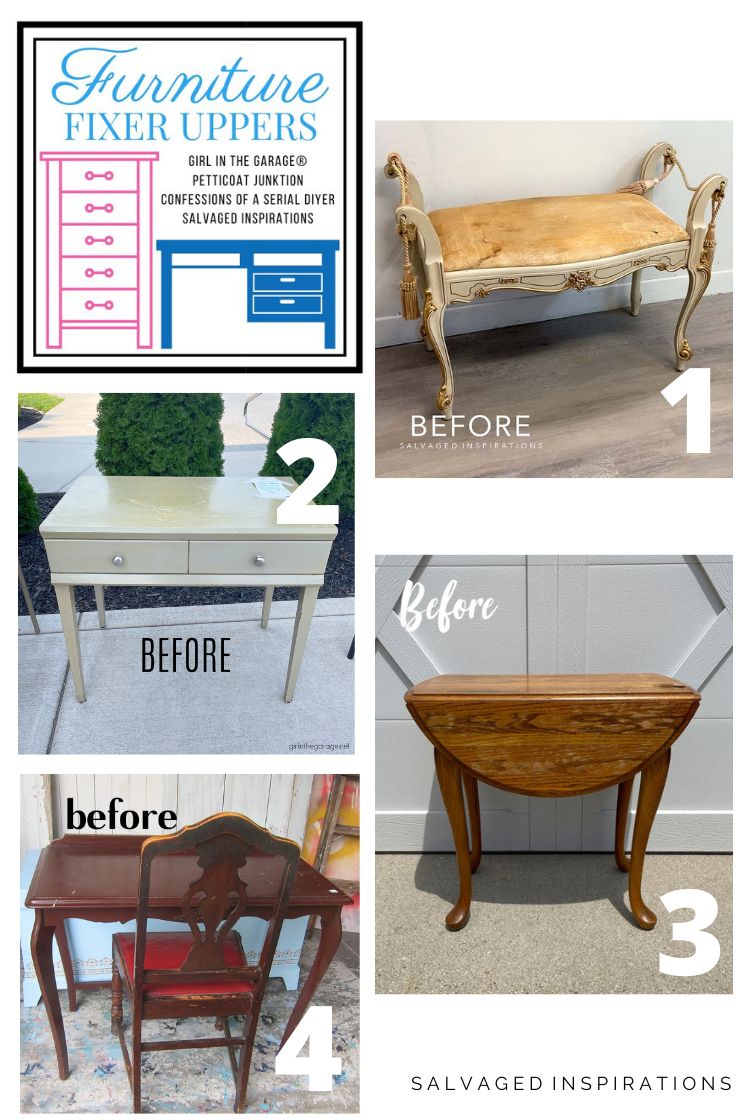
1. SALVAGED INSPIRATIONS (HAPPY YOU’RE HERE!)
2. GIRL IN THE GARAGE
3. CONFESSIONS OF A SERIAL DIYER
4. PETTICOAT JUNKTION
Here’s another look at this small settee bench before and after. I hope it’s inspired you and given you some new ideas for your projects!
LET ME KNOW WHAT YOU THINK OF THIS CURBSIDE SETTEE BENCH MAKEOVER. FEEL FREE TO ASK ANY QUESTIONS YOU MAY HAVE… I ALWAYS LOVE HEARING FROM YOU. IT MAKES MY DAY! 🙂
Happy furniture painting friends!
Denise x
RELATED POSTS::
PAINTING FABRIC WITH CHALK PAINT
HOW TO REUPHOLSTER A SEAT
GOLD AND VELVET CHAIR MAKEOVER
DIY TUFTED FOOTSTOOL
HOW TO UPHOLSTER A BENCH
PIN AND SHARE!


First off, I love this bench, the Wood U Bend is perfect on it. Secondly…I had no idea we lived in the same city! lol I always assume the bloggers I like are far away from me, but here we are in Burlington, Ontario. 🙂
Whaaaat!… yes…a Burlingtonian for over 45 years now! Love this city! And so glad you like the bench neighbour!😉
Denise, just a thought for your confirmation (because I may be totally confused in how I’m looking at this 😂)
Could you have installed those chair spindles upside down (i.e. with the holes facing down) and have just filled them with Bondo as you so often do, before painting? If yes, why did you decide to install them “holes up”? Just curious 😉 Loved the color combination of your finished product. Mixing those 2 paint colors was genius, and I like the gray wax. Much softer for sure 👍🏼
Hi Suzy!🤗 YES, I was thinking of filling them with Bondo but my sister is ‘scent-sensitive’ and HATES the smell!😂 Woodubend to the rescue! hehe
Oh how cute is that! Great makeover !
Thanks Deanna! 🙂
What a find! We don’t see those around my neck of the wood. I love all the little additions you added to make this old gal amazing again. Another beautifully orchestrated makeover. 😘 xo
I love all the little ‘additions’ that covered those big holes as well!… so easy! Thanks my friend. XOXO
It’s beautiful now! Well done!!
Thanks, Michele! 🙂
Denise,
I am soimpressed with everytingyou restore, I wish someone in this area of Nevada carried some of the products like benduwood, dixiebelleaint and such. I bet your home is fixed up cute. Do any of the HGTV or Magnolia people know about you?
Aw, thanks so much Wendy, such a sweet compliment! And if you don’t have local retailers in your area, it’s super easy to order online and have them delivered right to your door!
That is just gorgeous! Love all your tips too!
Thanks my friend! Wishing you a super day! XOXO
I would have snatched up the settee, too. I like how you toned down the old-fashioned feeling of it and made it current. Great job!
Thanks Lizzy! XOXO
You did the perfect justice for this dated settee. Wow! So much better!!
Smells better too hehe… thanks Larissa! XOXO
Hi Denise. I can only say “WOW”! That setee was rather grubby looking and I really disliked the fabric cording. You totally transformed it into a beautiful piece of furniture. Using spindles for the arms and Woodubend to cover the holes was genius. Beautiful.
It was a little grubby, wasn’t it?! lol. Thanks my friend! XOXO
What a find, but it did make you work lol! The result is beautiful as always! Funny that we both used gray wax this week ha ha! XOXO
I thought the SAME thing when I visited your table makeover today. We are like two peas in a pod hehe. XOXO
You always find the best curb rescues! This bench looks a million times better, Denise! xo
Thanks so much Jen! XOXO
Denise, you sure named your blog perfectly! Salvaged is your game and you are the champ! This bench is wonderful and you included some great makeover tips. Andrea is a jewel to bring you rescues!
Aw, thanks!!! And yes, my Andrea is a JEWEL! I don’t know what I would do without her. XOXO
Beautiful! And you gave lots of good info too. TY!
So happy you like it and thanks Cyndi!
She’s absolutely beautiful! Can’t imagine someone tossing that out! Great rescue!
Thanks, Susan! And I know, right? I’m sometimes a little shocked and amazed at what people throw away!
You and your sister cleaned this bench up and made it look brand new! Thanks for all you share Denise, I always look forward to your emails!
Thanks so much Nicki! XOXO
Absolutely beautiful transformation. Looks terrific now.
Thanks Cathy! XOXO
Hi Denise! It looks so much better. Thank you for sharing all of your knowledge. I don’t know what I would do without all of the tips and tricks.
Awwww, thanks my friend. This means a lot!
This is not at all my style of furniture, but goodness gracious is that pretty!! All the choices for colors, Woodubend pieces , fabric and wax blend perfectly. So good Denise and Andrea 😉!
Yaaaay, huge compliment Niki! Much appreciated!