HOW TO CREATE TUFTED FABRIC ON A SALVAGED FOOTSTOOL | EASY BEGINNERS DIY | YOUTUBE VIDEO TUTORIAL
Hi, sweet creative friends! Have you ever wondered how to get that gorgeous tufted upholstered look? I’ve always wanted to try tufting but as I’ve mentioned in a few of my other fabric-related posts, working with fabric intimidates me. This was my sister’s footstool project and she reallllly wanted to tuft so we thought we’d give it a try together. It was our first time trying it and I have to admit it turned out pretty darn cute! So believe me, if we can do it, YOU can do it!
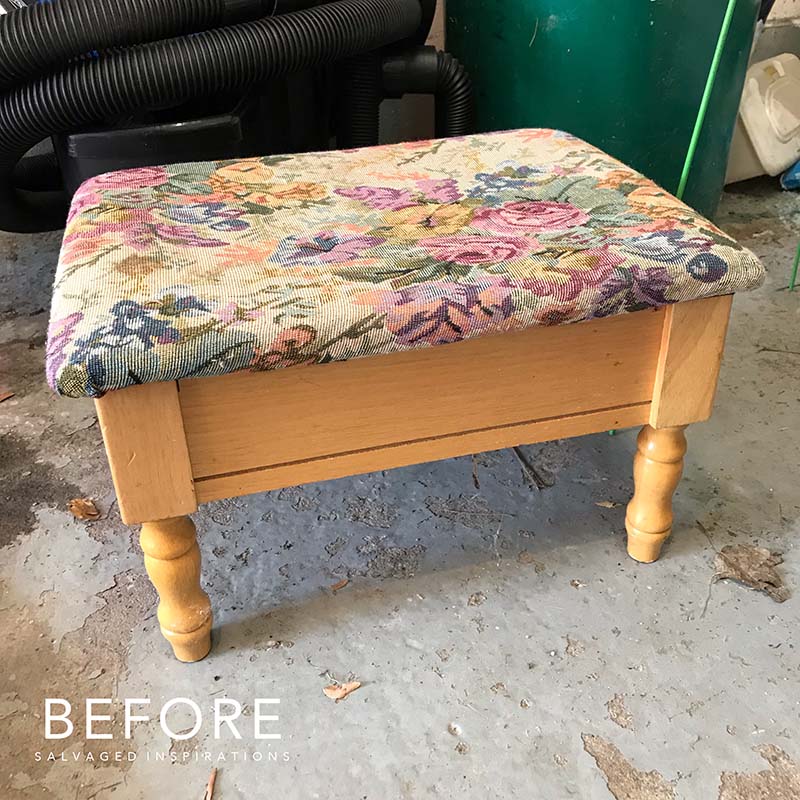
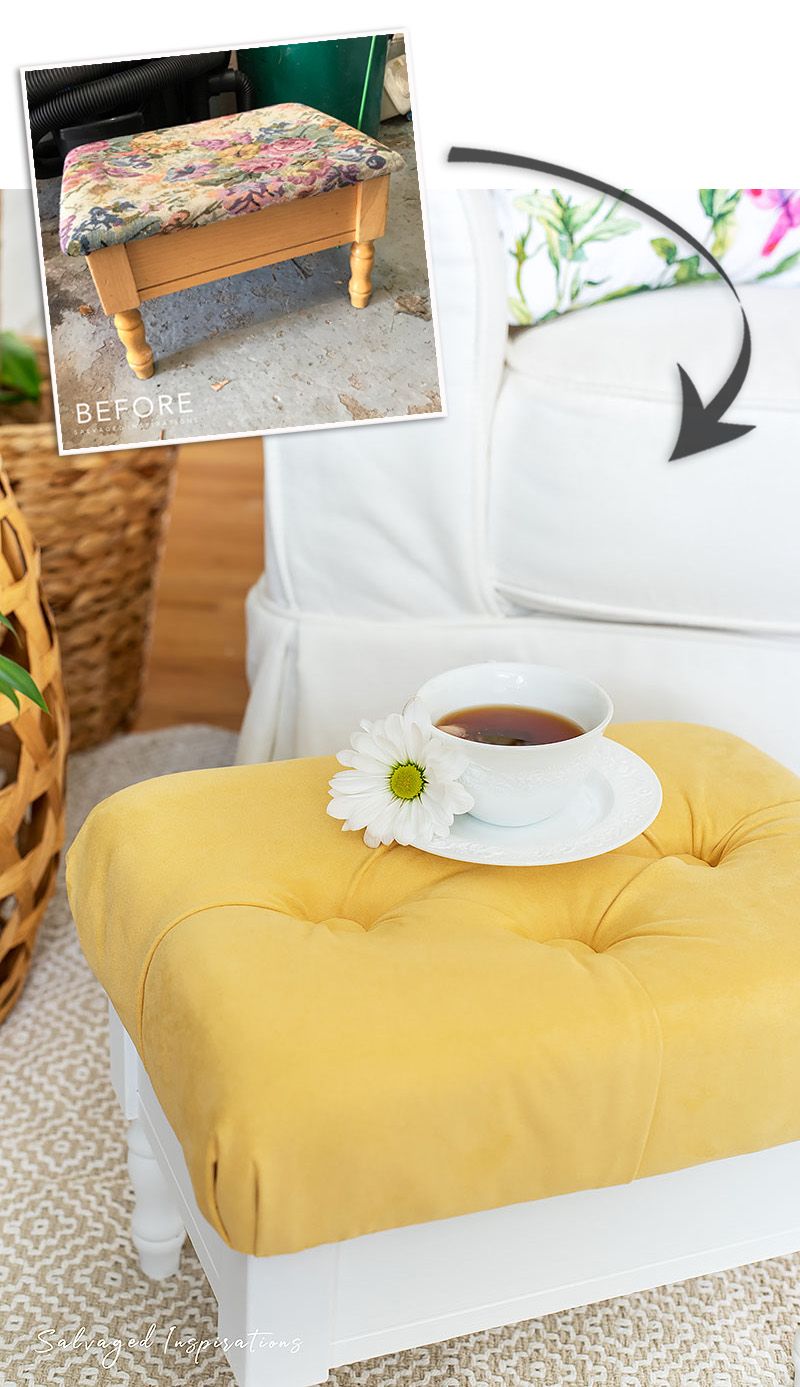
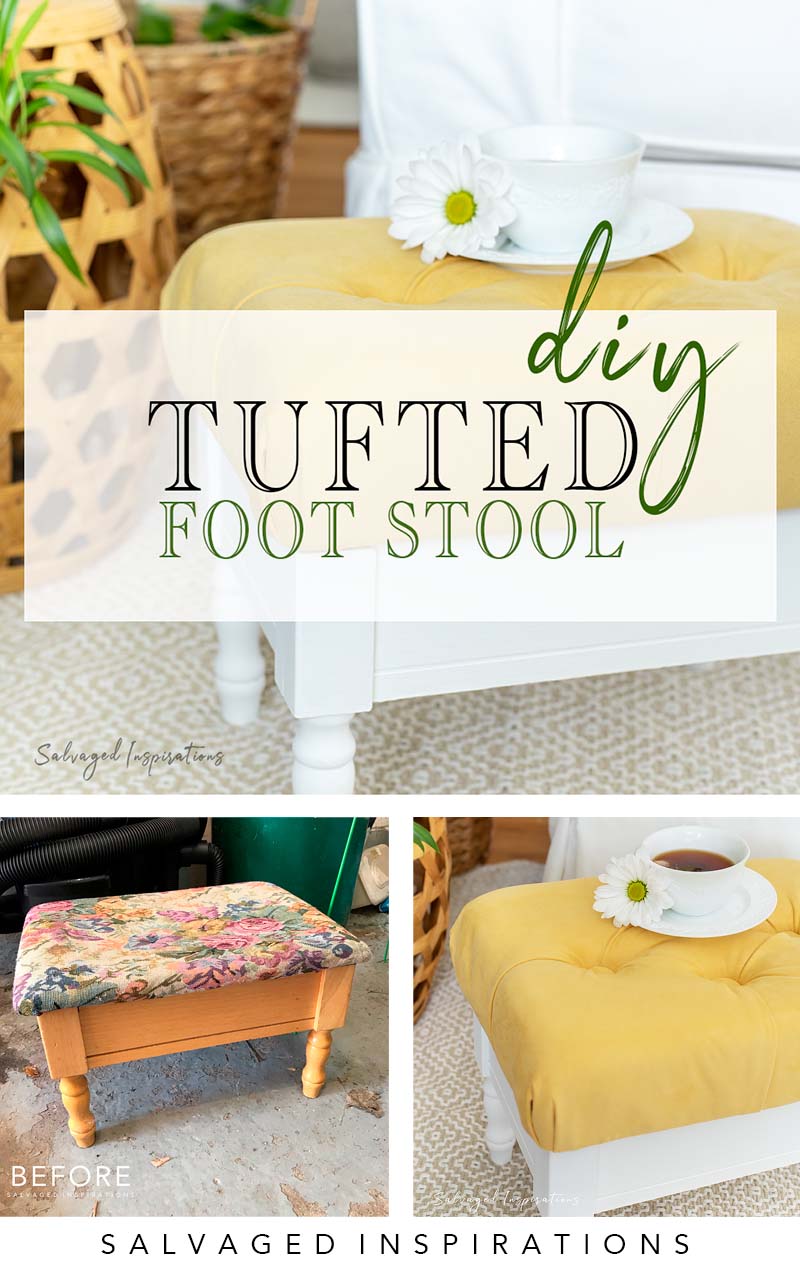
Here’s the salvaged foot stool we started with. Andrea picked it up for $3.99 at our local Restore. It looks a little dated but the wood base was in great condition.
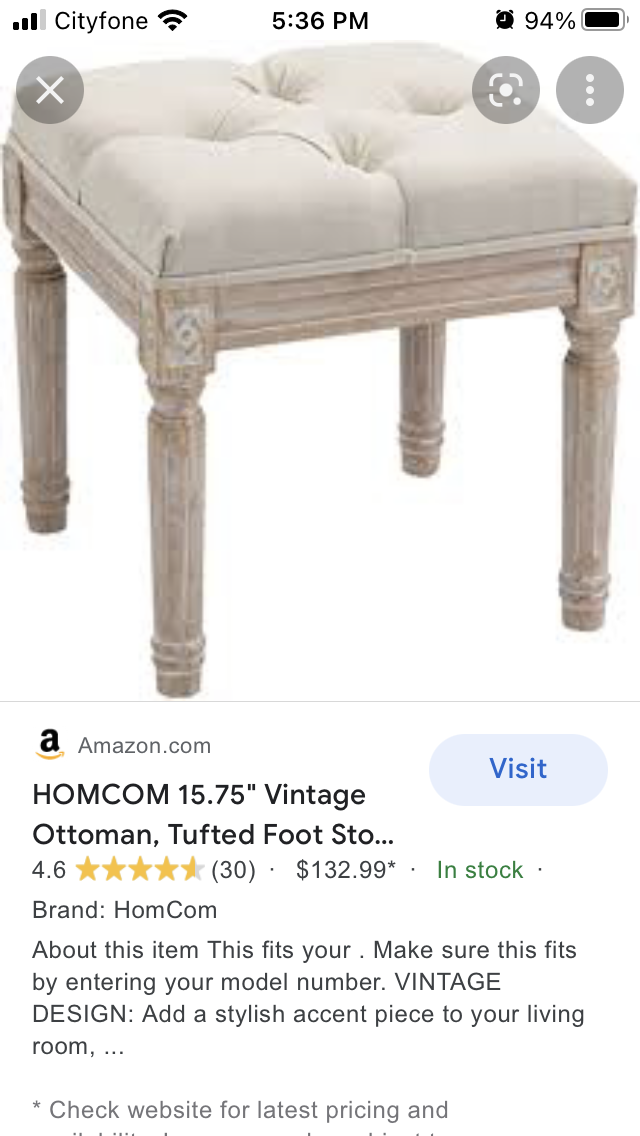
Before I get into the how-to details here are the two inspiration pics Andrea sent me. She wanted the base to be white, but the top to be yellow velvet and tufted.
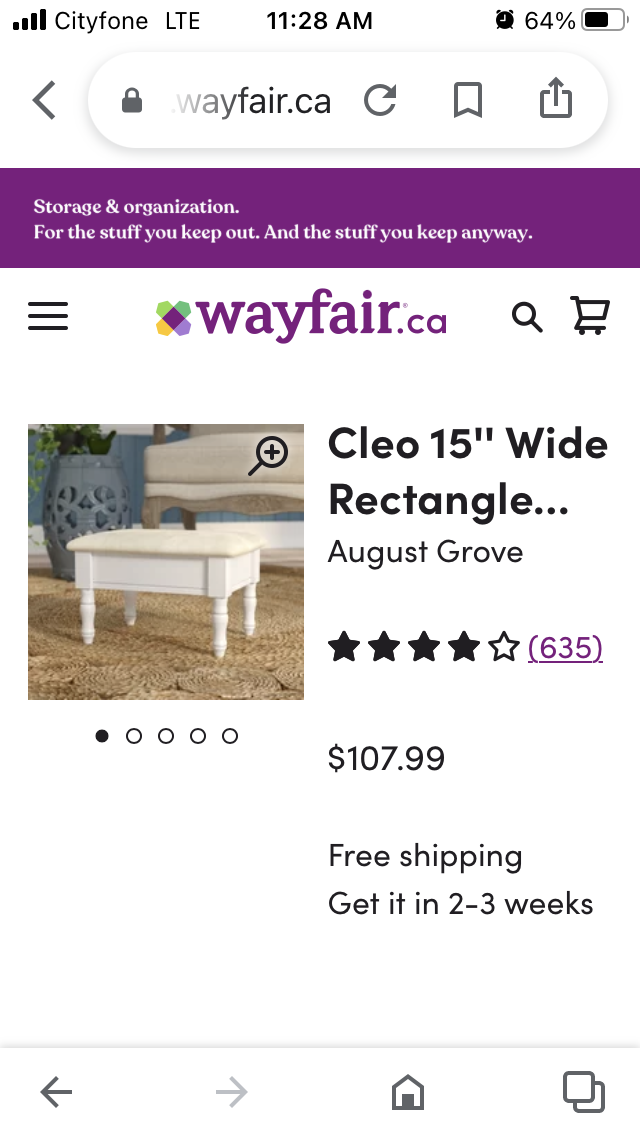
Ya gotta love a girl who knows EXACTLY what she wants!
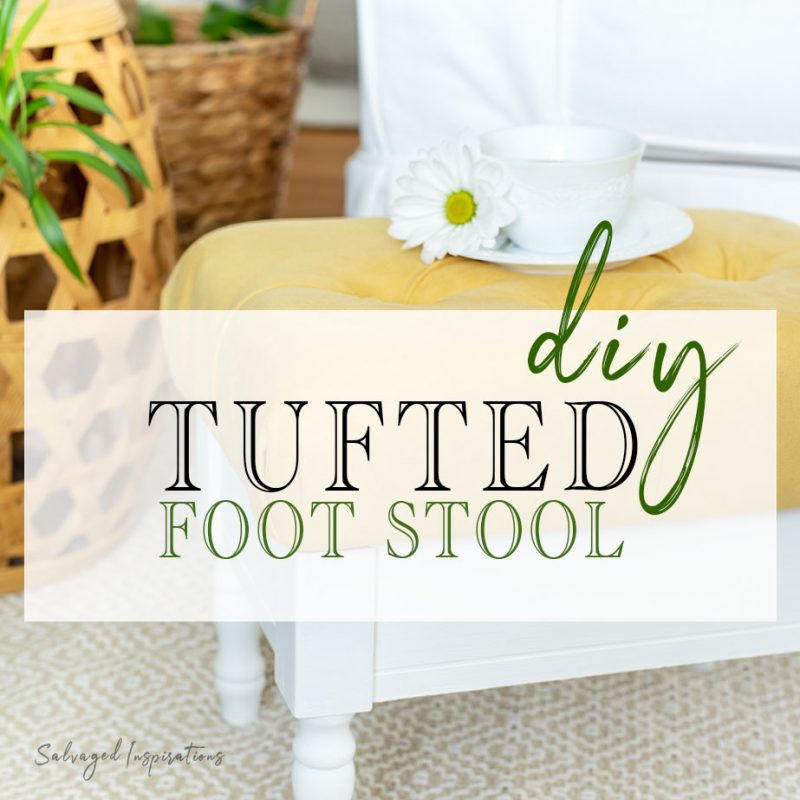
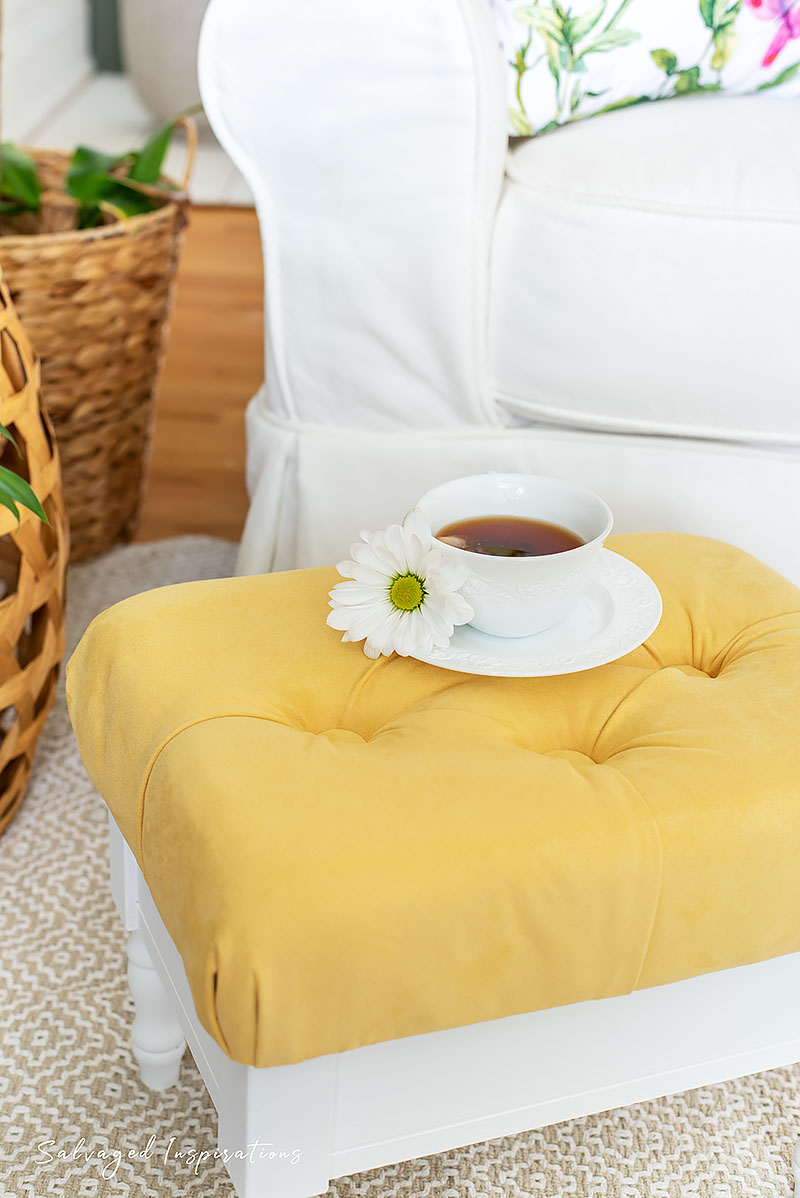
And here’s a sneak peek at the NEW look! I’ll share the close-up tufting details below. What do you think? Worth $3.99?

THIS POST IS SPONSORED/CONTAINS AFFILIATE LINKS TO PRODUCTS I USE. YOU CAN SEE MY FULL DISCLOSURE HERE.
SOURCE LIST
$3.99 Foot Stool – SALVAGED
Measuring Tape | Ruler
Fabric of Choice | Batting
Buttons of Choice
Upholstery Needles
Knife or Foam Cutter
Upholstery Thread
Scissors
Spray Adhesive Glue
Upholstery Foam
Pneumatic Staple Gun
Screwdriver | Pliers
Knitting Needle
Cotton Chalk Mineral Paint
HOW TO CREATE AN UPHOLSTERED TUFTED FOOTSTOOL
Here’s how it all came together. I know some of my #sifamily are “REAL UPHOLSTERS” so if you have any tips you’d like to add feel free to chime in below. I’m all ears because I love to learn! 🙂
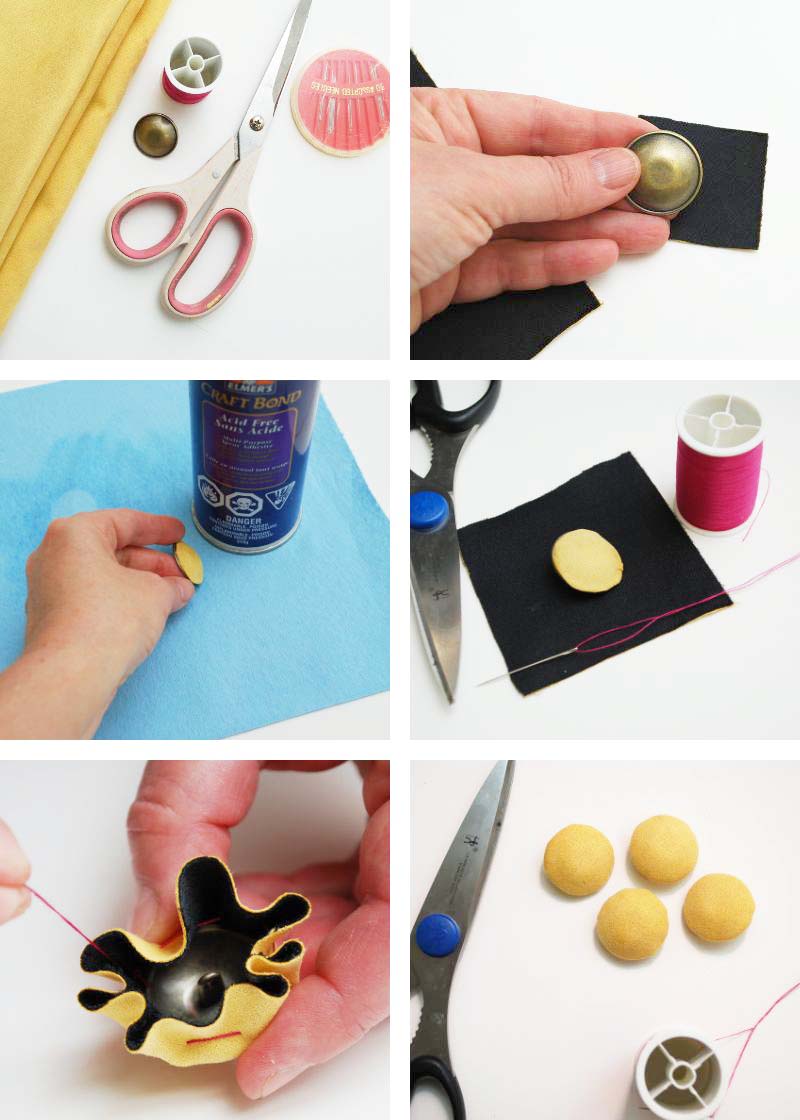
COVER BUTTONS W FABRIC
Andrea found these buttons on sale for 50% off and bought two packs. We didn’t use a button cover kit because covering buttons with fabric is really easy to do.
Cut a piece of fabric the size of the button top and glue it onto the top. This will add a little cushion and keep the top fabric from sliding around.
Cut a larger circle and slip stitch it about 1/4 of an inch around the button. Then pull the thread to create a small parachute pouch to enclose the button in. Once the button is fully covered in fabric, straight stitch it closed and double knot.
Cut off the excess fabric so the button eyelet is accessible. Now you have matching fabric-covered buttons!
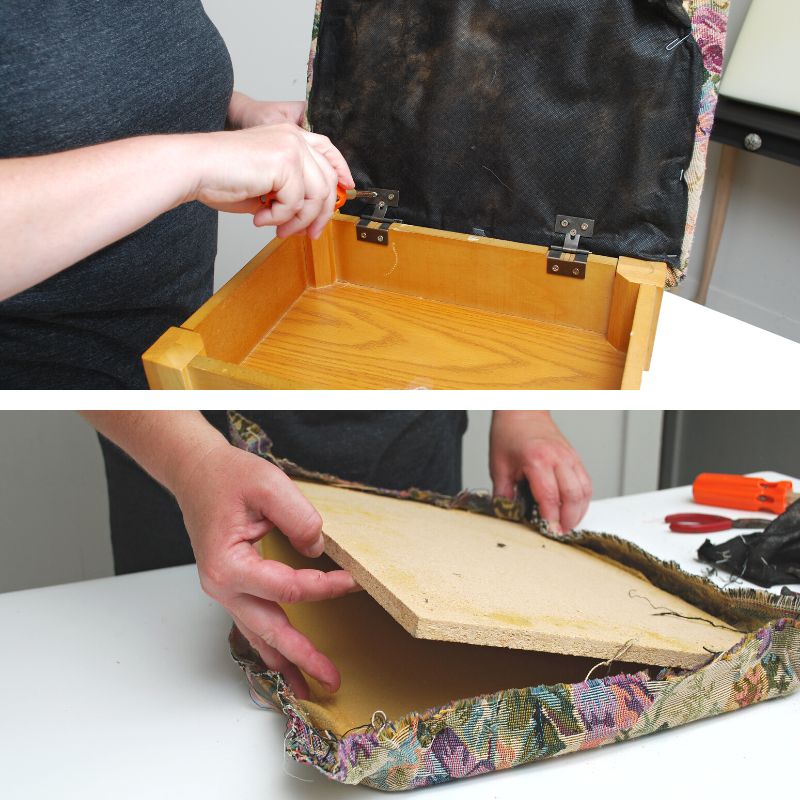
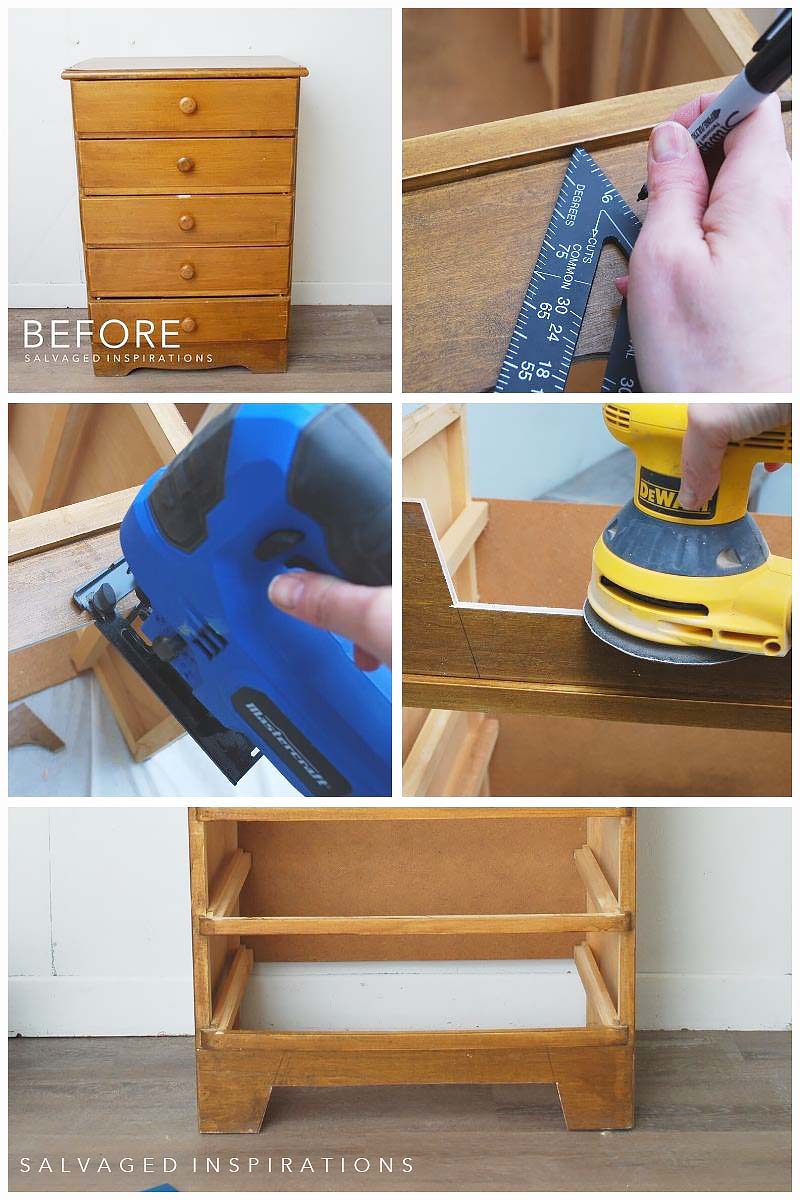
DISASSEMBLE
We removed the top of the footstool from the base by unscrewing the hinges and removing the old fabric and foam.
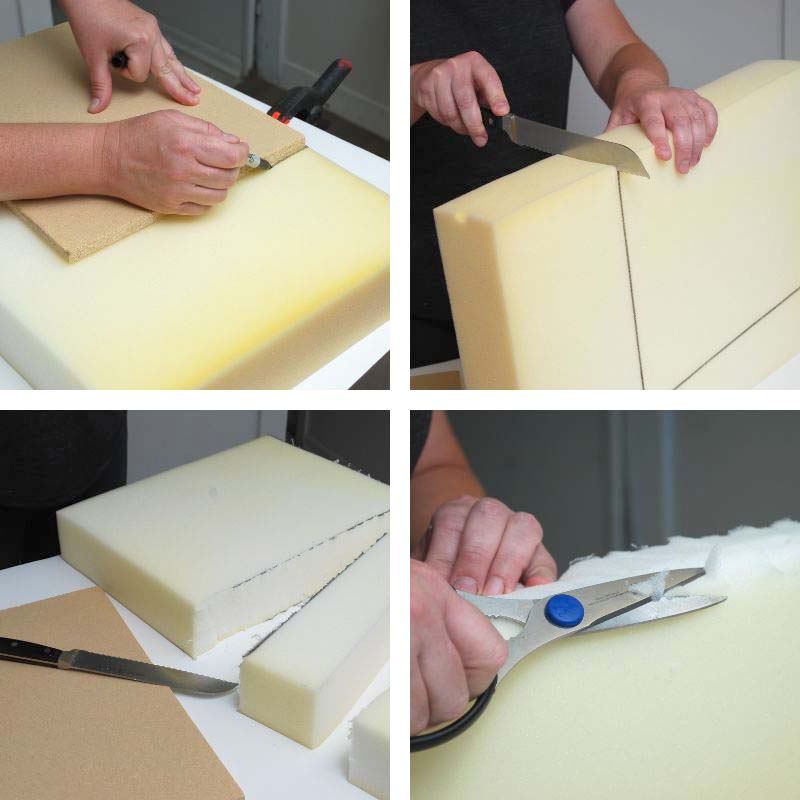
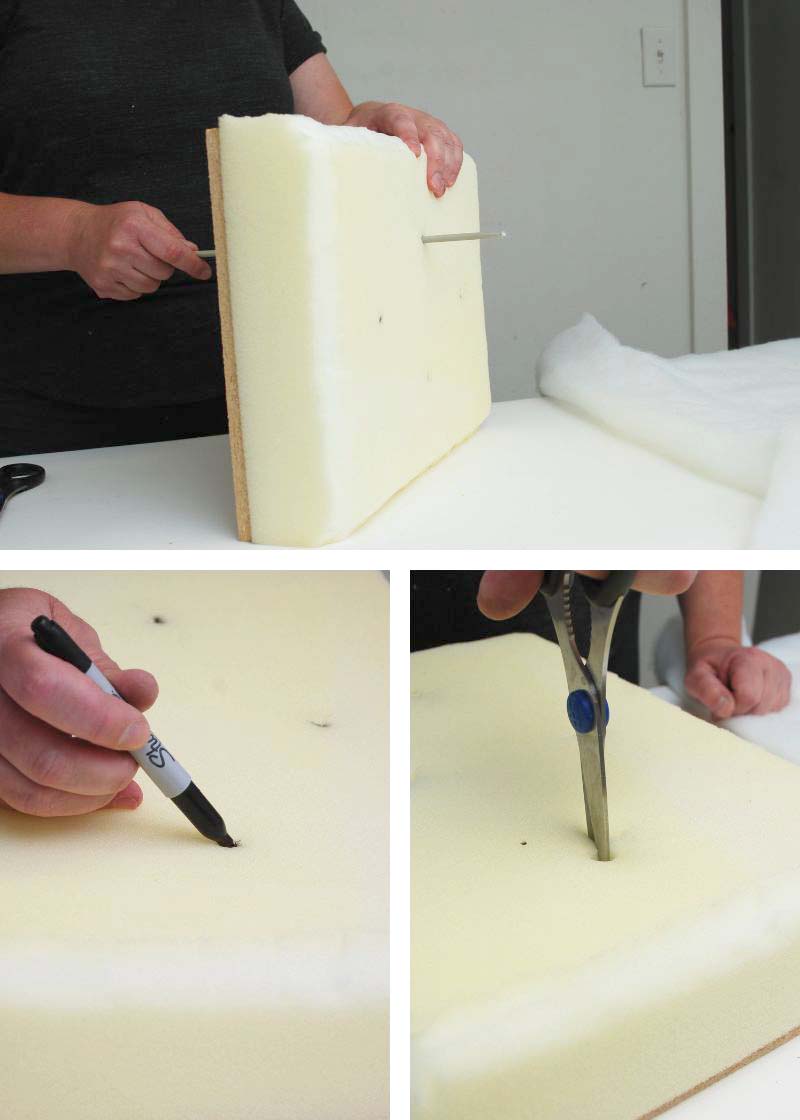
CUT FOAM TO SIZE
Andrea laid the top of the stool on the foam and traced a line with a sharpie. Then using a bread knife (probably not the right knife for this application lol) she cut the foam to size. To ‘round’ the edges she used scissors to cut off the sharp edge and create a 45 angle.
TIP – If you have a specialty FOAM store in your area, it’s way cheaper to buy from them rather than a fabric store. Andrea picked up a package of foam from Fabricland and it was $18. She ended up returning it because we found these scrap pieces at our local foam store for ONE DOLLAR!
TIP – If you cut these foam pieces in squares, they are also amazing for applying streak-free stain!
MARK OUT TUFTED BUTTONS PLACEMENT
Using the sharpie we marked out where we wanted the button holes to be and drilled a hole into the MDF. Then we attached the foam to the MDF using this spray adhesive.
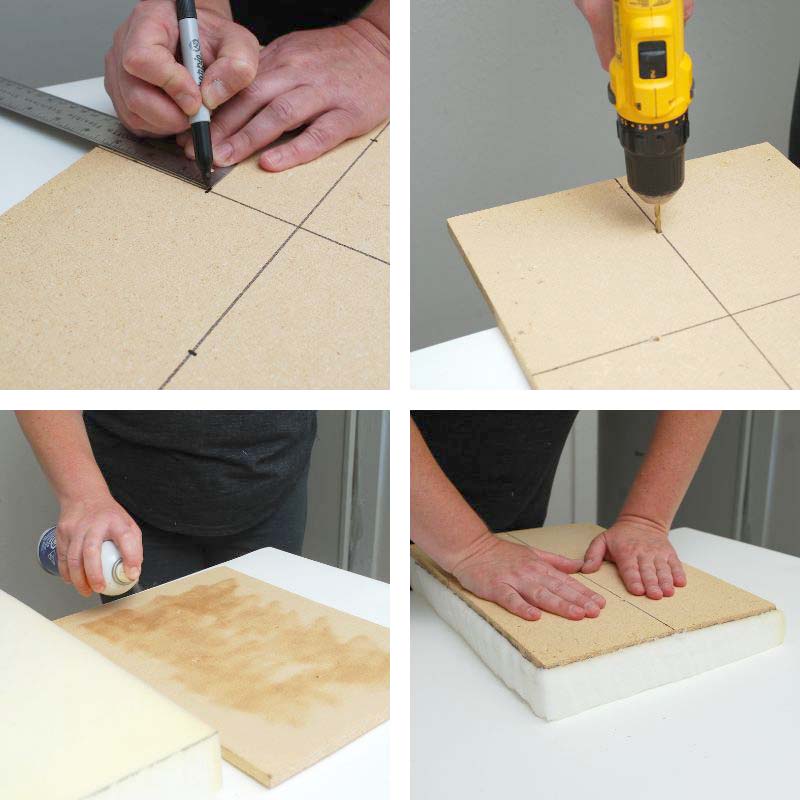
To add the tufted button holes to the foam, Andrea used a knitting needle. It was long enough to push through the drilled hole in the back of the MDF right through the foam. Then marking the hole with a sharpie we then took a pair of scissors and cut an X through the sharpie mark.
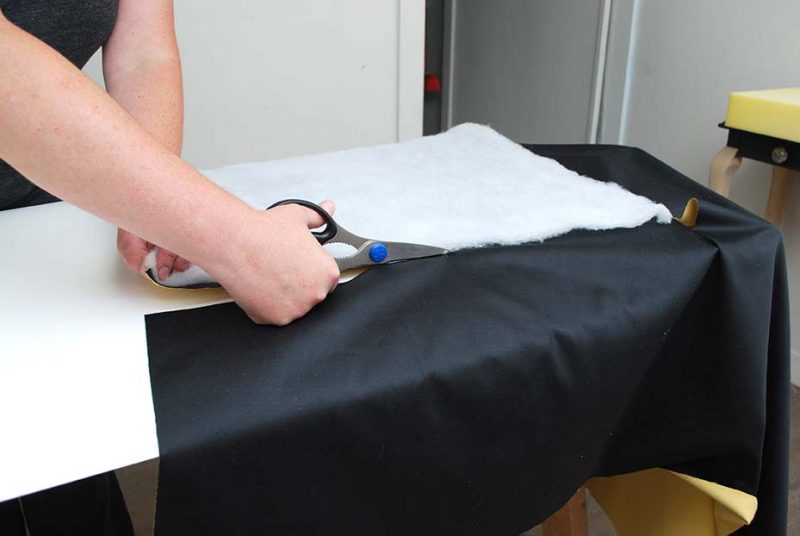
CUT OUT BATTING AND FABRIC
Cut out the batting and fabric. Center the foam in the middle and make sure there is excess fabric. You will need enough to cover the front, and sides, and extra to attach to the back. As a safety measure, we cut out 6 inches overlaying the back in case we made a mistake. Probably overkill but it made us feel better.
ATTACH THE BUTTON TO CREATE THE ‘TUFT’
This took us two tries! The first time we used a regular needle instead of an upholstery needle and it didn’t turn out at all. So I would strongly recommend investing a few dollars in a long upholstery needle. It makes things so much easier.
- Thread the upholstery needle with heavy-duty string/thread
- Run the needle and string through the eyelet of your button
- Tie a double knot onto the back of the button
- Find the center of the tufting hole on the right side of your fabric
- Insert the needle dead center of the hole through the fabric
- Bring the needle and thread right through to the MDF drilled hole on the other side
- Pull tight and using a staple gun staple the string in place 3x using a zigzag pattern for strength
- Cut off any excess string/thread

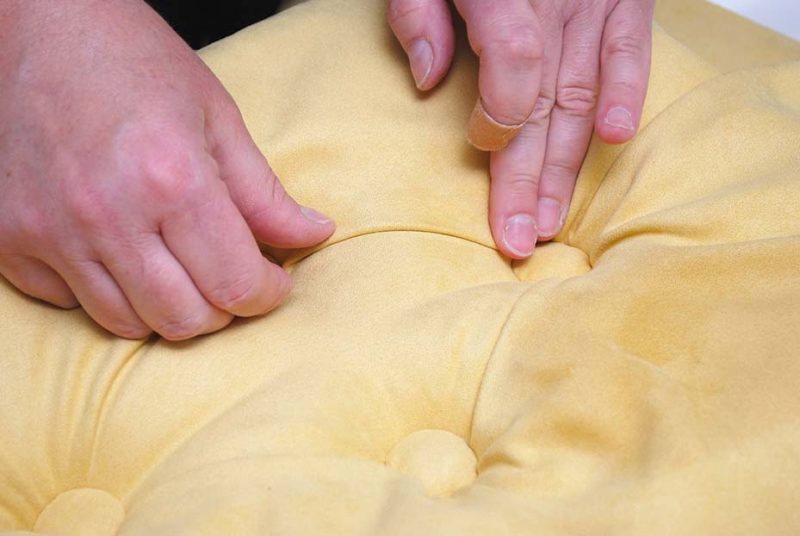
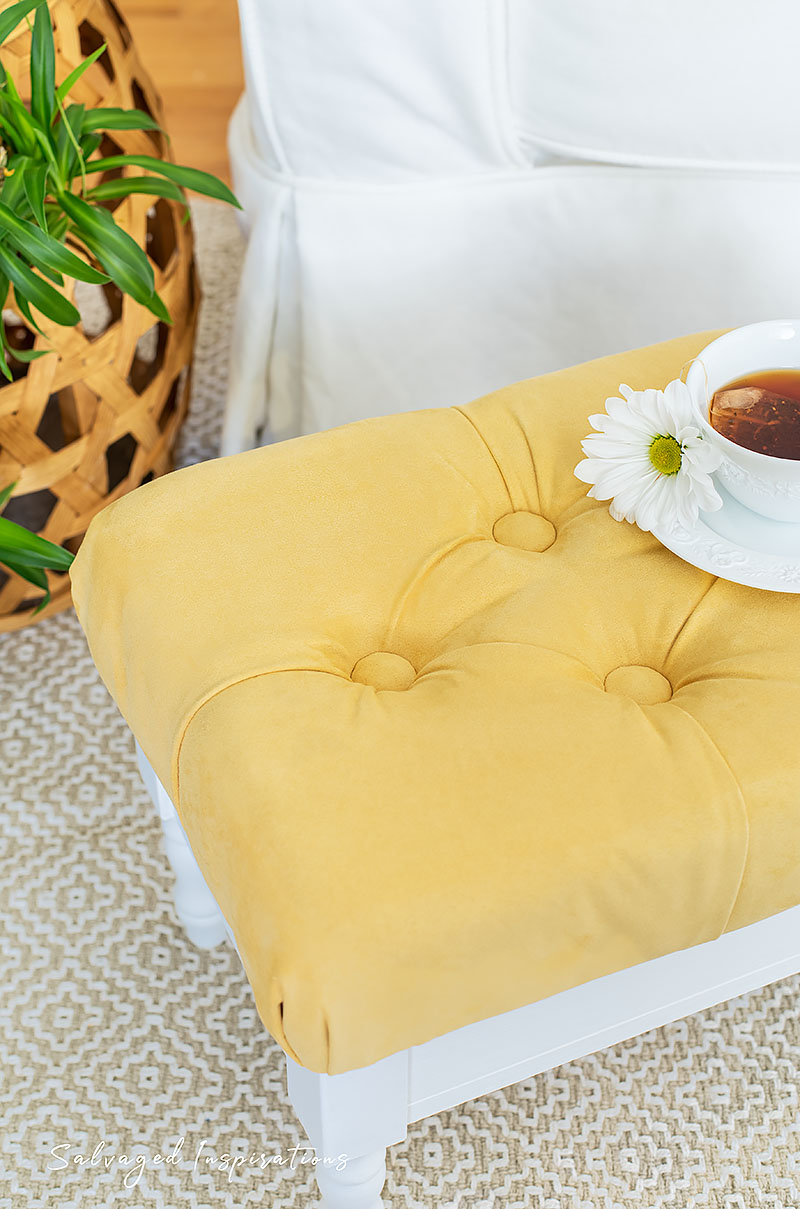
ARRANGING YOUR TUFTED PLEATS
Before we attached the fabric to the back we made sure we like the looks of the tufted pleating. We arranged the folds so they looked visually pleasing for Andrea. As a rule of thumb, we read online that it looks best when all the folds are facing the same direction.
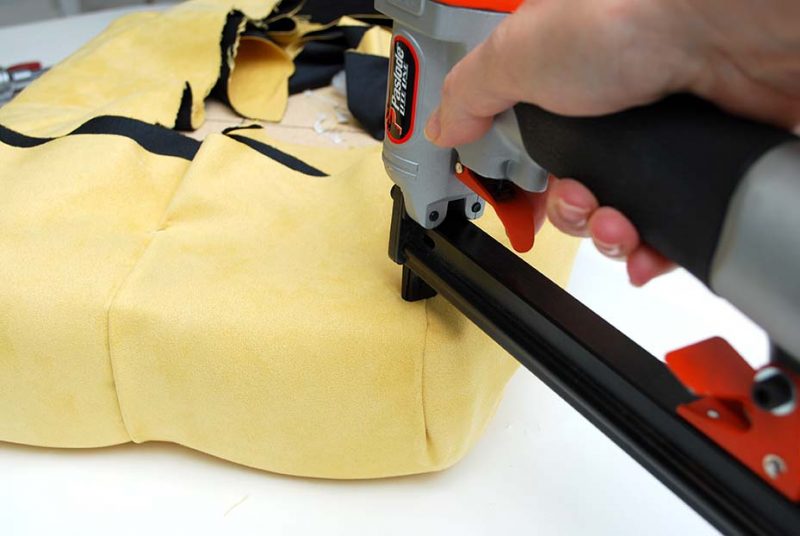
ATTACHING THE FABRIC
Once our tufts were perfect we attached the fabric. As I mentioned this project took us two tries. The second time around we figured out attaching the fabric at the button tufts first was much easier than starting at the corners — which is what we did on the first try. Also, the first time around we pulled the fabric way too tight. The second time around we pulled it just enough to remove any wrinkles and keep it taunt.
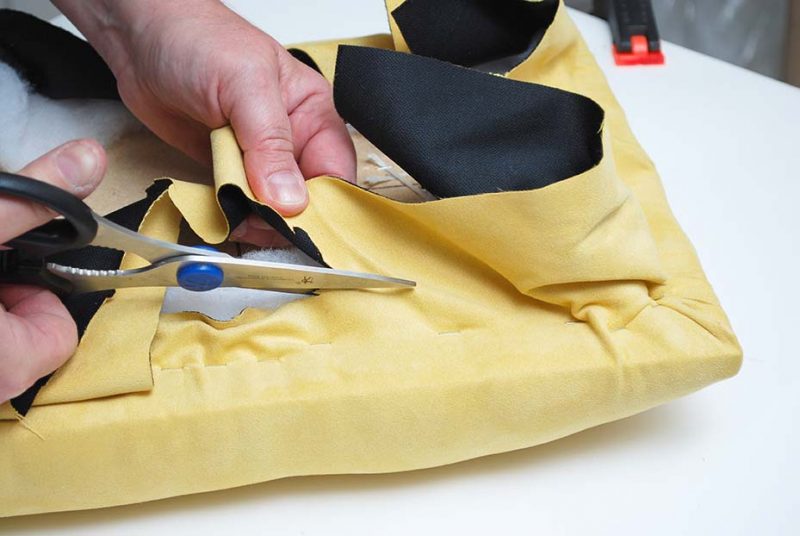
CUT OFF EXTRA BATTING AND FABRIC
To finish the piece off, Andrea cut off all the extra batting and fabric from the back of the bench seat.
PAINT THE BASE
The last thing we did was to paint the base in this crisp white Cotton paint. It looks so good against the yellow tufted top!
WHAT WE LEARNED DOING THIS TUFTING PROJECT
- Don’t buy foam that is too thick or too high density as it makes it harder to get a tufted look.
- Definitely buy a long tufting needle. It’s worth the $10 and will save a ton of time trying to McIver it!
- Make a deep button hole for the buttons to sit in. Not just a little X. This will ensure you don’t have to pull the fabric too tight to create the tufting look.
- Don’t overwork a certain area by pulling it too tight when attaching it to the backside.
- Have patience and don’t rush the process – especially if it’s your first time!
- When attaching the fabric to the back, start with the pleats, then the corners, then the rest of the project.
I’m really happy Andrea encouraged me to step out of my comfort zone and try this!

Including the cost of the salvaged stool and all the supplies, this entire project came to $15 plus about 2 hours of our time.
YOUTUBE TUTORIAL
Here’s a step-by-step tutorial on Youtube. If you have any problems viewing below, feel free to watch it on my Youtube Channel HERE. Our #siyoutubefamily has hit 14.8K so don’t forget to subscribe if you haven’t done so already! So exciting, thank YOU! 🙂
Here’s another look at this salvaged footstools’ before and after. I hope it’s inspired you and given you some new ideas for your projects!
LET ME KNOW WHAT YOU THINK OF THIS DIY TUFTED FOOTSTOOL MAKEOVER. FEEL FREE TO ASK ANY QUESTIONS YOU MAY HAVE OR ADD ANY TIPS! I ALWAYS LOVE HEARING FROM YOU. IT MAKES MY DAY! 🙂
Happy furniture painting friends!
Denise x
RELATED POSTS::
MAKE FABRIC LOOK LIKE LEATHER
HOW TO REUPHOLSTER A CHAIR SEAT
DIY TRANSFERS ON FABRIC FOR DESIGN
DO’S & DONT’S – DYING FABRIC W CHALK PAINT
HOW TO PAINT A FAUX LINEN DRESSER
PIN AND SHARE!


Great job. Great step by step tutorial. Beautiful yellow stool!! I am going to try to make one also. Great inspiration!!
Oh I’m so happy the tutorial inspired! Have fun Mona!
It’s a true beauty! Would never be able to tell it was a first for you. Plus the colors are like a breath of spring and a daisy on the teacup is the perfect touch to set it off ! Though I’ve never attempted tufting I now feel much better about trying. Great job ladies!
Thanks Cindy! I’m really happy I gave it a try! Even happier it turned out…lol 😉
You guys, the stool makeover looks so good and you’d never know it was your first try at tufting. I love the colors too! I’ve been wanting to recover our ottoman with tufted fabric but have been procrastinating because I’m too chicken. Thanks to your great tips, I’m feeling more confident. I’ll definitely be revisiting this post when I finally get around to reupholstering my ottoman. Thank you!
You’d do an amazing job Marie! I’m really glad Andrea encouraged me to give it a try. Wish we lived closer so I could join in on your ottoman project…we’d have a blaste! hehe
Beautiful transformation! I’ve always wanted to try tufting. You two did a terrific job. That yellow color is delicious, and so fresh and cheerful with the white. What a sweet stool! Congratulations, you two!
Thanks Marcia! I know Andrea has been checking the comments so she’s going to be so happy you liked her fabric and paint choice!
Hi, wondering how you would repair a button that came lose and the padding was attached to the base?
Hi Claire! Hmmm well I Googled this for you and it sounds like you might need something called a German Needle for Tufting. I found this Tufting Youtube Video on how to use it. I hope this helps.😊 If anyone reading this comment has any suggestions, I’d love to hear!
Turned out SO LOVELY!!! Good job, sisters!!!
Thanks so much Susan! XOXO
Hi Denise,
Another winner!!!!!!! You and your sister did a fabulous job. That little stool is sooooo cute! I can see that in a sun room taking center stage. The instructions make it seem like even I could be successful. Thank you so much.
Hi Marian and thank YOUUUU!💕 I have to admit it turned out a lot cuter than I thought it would!😂😉
You two have inspired me. I own a 30 inch round ottoman with a skirt and several buttons that I’d love to reupholster. Just wondering how to know how much extra fabric I need to cinch down because of the buttons. I’m sure it increases the fabric width needed. Any ideas?
Honesty, no idea Kim…sorry…lol. When it comes to any fabric-type projects, I’m always nervous and just end up buying more than I need and winging it. If it’s your first time doing this I would ask the associate at your fabric store. Every time I’ve shopped at Joannes or Fabricland, they are always SO HELPFUL!
Beautiful job but it makes me nervous to see that cup of coffee on it in the reveal pictures!
lol… funny that you say this because while I was taking the after pics, my dogs tail near bumped it over and I thought… if this spills Andrea’s going to KILL ME! 😂
Great step by step to follow. I will keep this in ind when I find a stool to recover. Thanks again!
Oh I’m so glad. I tried to be thorough with each step because everything was new to me and I was learning as I go. In this Saturday’s Youtube video I’ll also share where we went wrong so hopefully it will save beginners from making the same mistakes we did!
Denise, are there any videos you recommend for the tufting? It looks difficult to get it to look right.
I’ll be putting out the Youtube video this Saturday but YESSSS, if you put in the keyword ‘tufting’ in Youtube there are a good few vids that pop up!
So cute! I’ve done a few stools but always avoided the tufts cos of the work involved. Where does one buy an upholsterer’s needle? You & your sis make a great team!
I know you’d knock it out of the ballpark if you gave it a try Tracy. Everything you do is gorgeous! And ya, we’re a comedy act sometimes but it’s always super fun!👯♀️😊 Andrea bought hers at Fabricland. It was a 3 pack but they also sell a 4pack on Amazon.
Thanx for that tip, and you’re too kind!
Looks fab! Tip: To cut foam, you can use an electric carving knife.
Thanks x2! An electric carving knife would be so much easier! XOXO
This is absolutely beautiful. What a fantastic job you did!!
Thanks Lori! Took us two tries but I’m really happy with the way it turned too!🤗
It’s fabulous, but….. After the fabric was trimmed and the bottom half painted white, then what? Was the top glued to the bottom or somehow nailed or brackets?
Hi Jeanie! Great question and then the answer is still up in the air so I haven’t included it in the tutorial. My sister’s not sure if she wants to permanently close it up or re-attach the original brackets (which will take a little altering because of the fabric) again.
looks wonderful Denise. Beautiful job…
Thanks so much Cathy! We had a lot of fun!💕
That looks so cute! I’ve done many stools but have only tufted two of them. It is not easy.
Thanks Julie! And ya, it was a lot more steps than we thought it was going to be!
Cute makeover! The addition of the tufts are a great choice. You are always inspiring. Thanks for sharing, my friend. xo 😘
Thanks Do! We had a lot of fun even tho it took us two tries!🤗
This footstool looks totally different! What a fun project to do with your sister! Thanks for sharing Denise!
Aw, thank Nicki! We had a lot of fun and I’m really pleased I gave it a try!
Hi Denise. What a sweet little project for you and your sister to do together. I love the crisp white paint paired with the sunny yellow fabric. Very pretty.
Thanks Monique! And ya, Andrea was very specific about what type of fabric and color. I think her choices look really good as well!