MY BATHROOM CORNER CABINET GETS UPDATED BY REMOVING THE TRIM AND ADDING A NEW PAINT COLOR!
Hello beautiful SI family! It’s Furniture Fixer Upper Day so I decided to fix up a piece of furniture for ME because my bathroom cabinet was in need of a makeover. I’m sharing how I removed the scalloped trim and painted this corner cabinet into a dark beauty… and I can’t wait to share and hear what you think of the NEW LOOK!
I’m also sharing ~
- The tool to help EASILY remove wood trim
- How to PEEL Painters Tape Off that’s been stuck on for days
- And more!
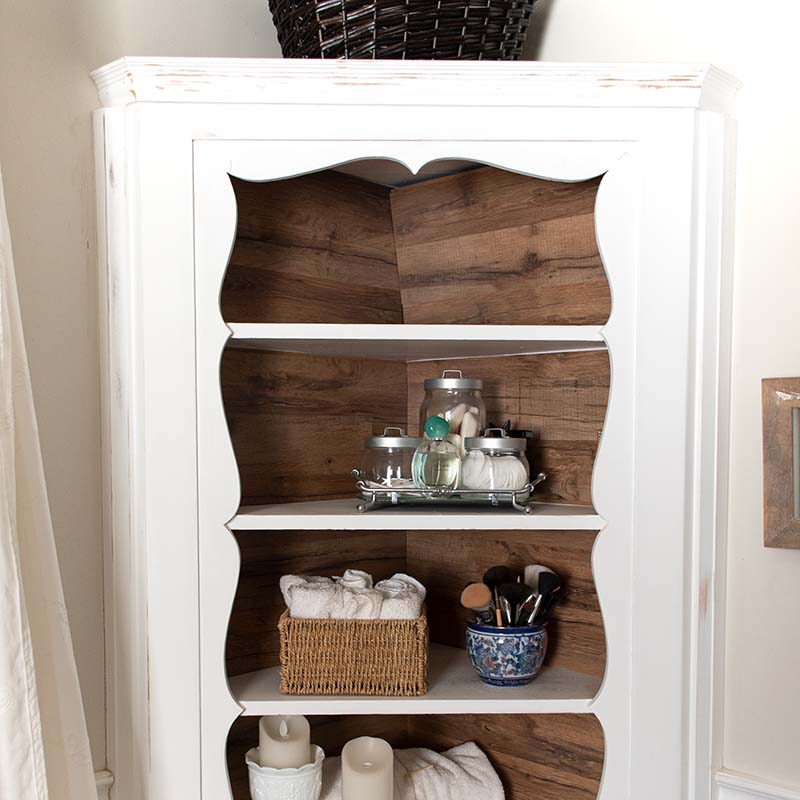
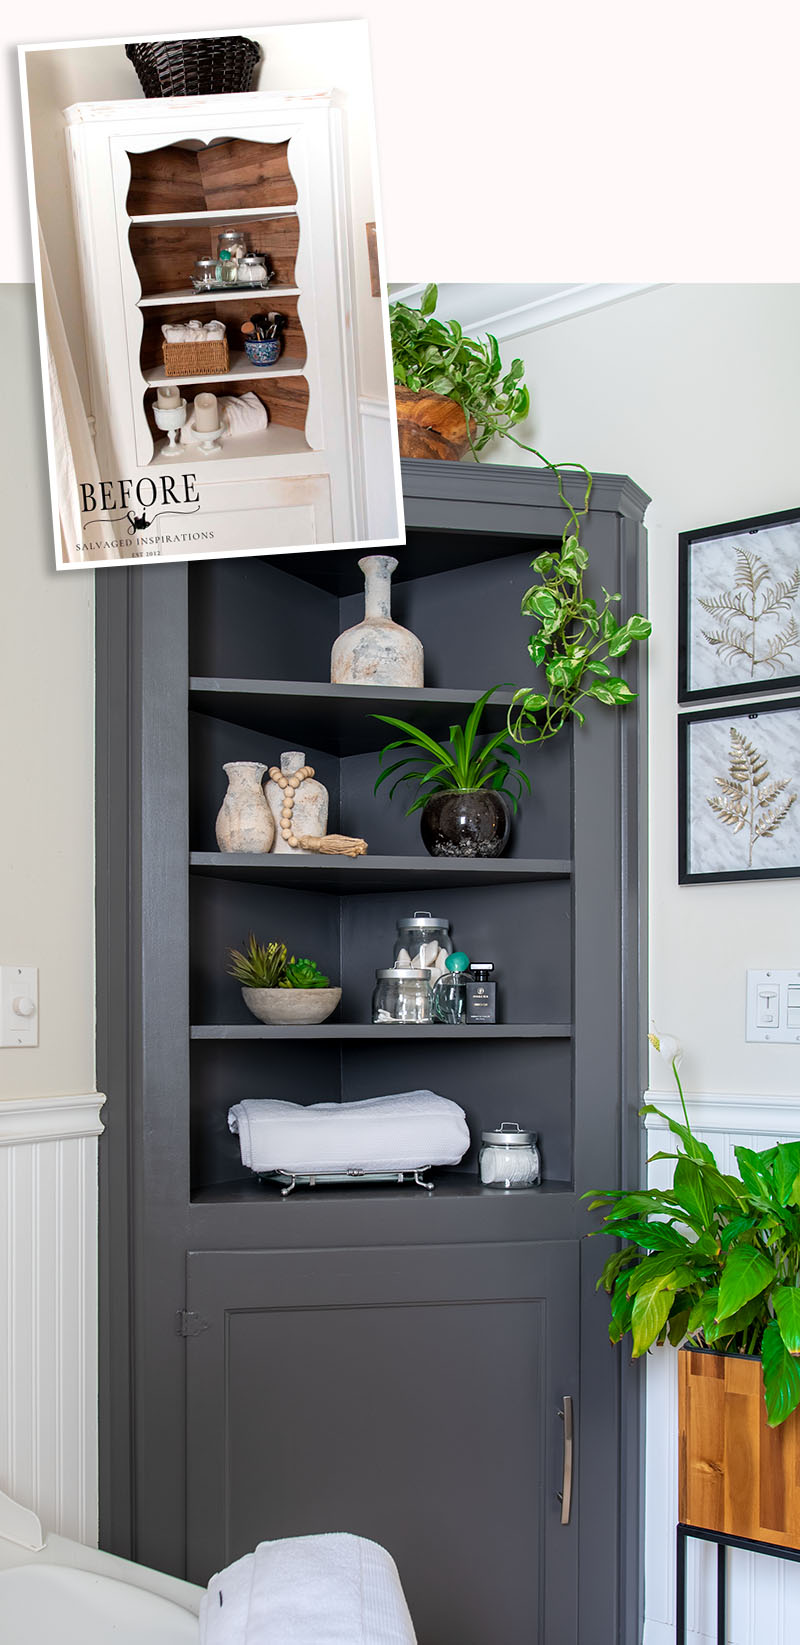
Here’s the cute corner cabinet I started with. You may remember me adding the barn wood boards to the back of the cabinet back in 2018.
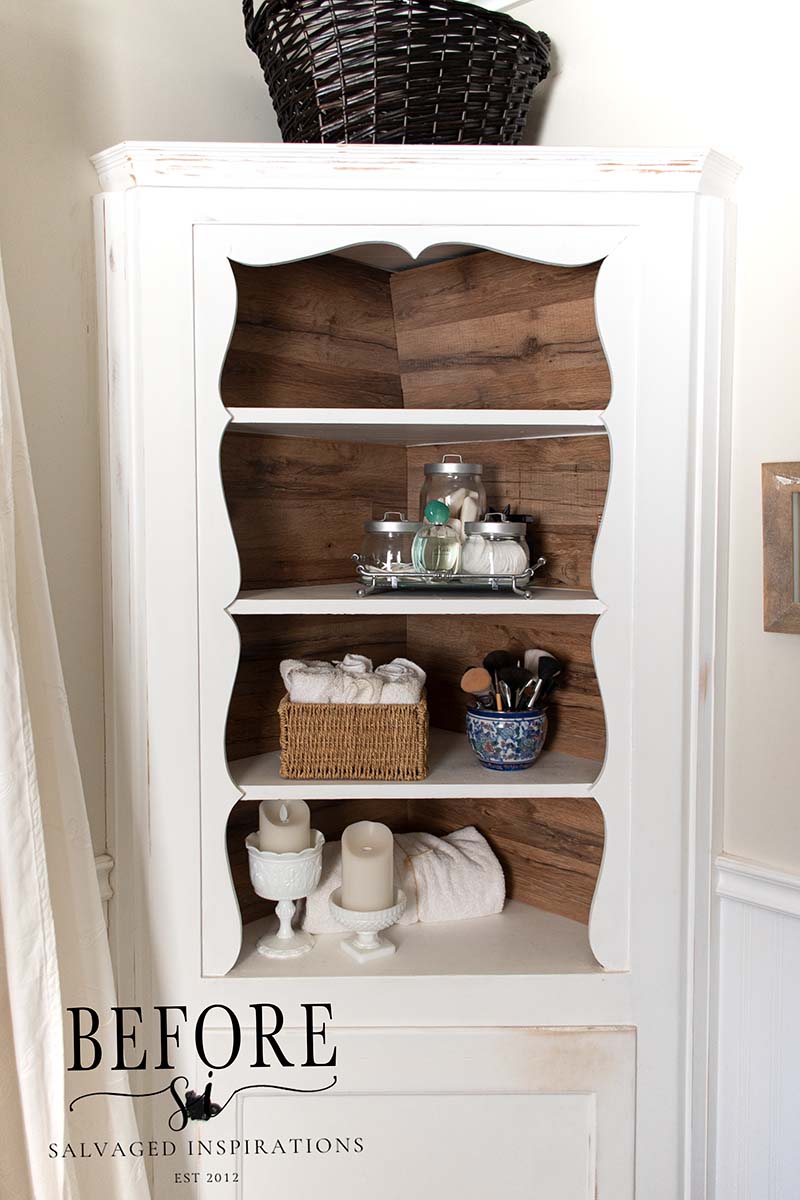
The ‘barnwood’ was not meant to be a permanent backing. I didn’t nail or glue these boards so all in all they held up really well. A few of the boards have not been behaving in the last few months and it’s been driving me crazy. I’ve been looking at it every time I’m in the bathroom thinking it’s time for a new look.
THIS POST IS SPONSORED AND/OR CONTAINS AFFILIATE LINKS TO PRODUCTS I LOVE AND USE. YOU CAN SEE MY FULL DISCLOSURE HERE.
SOURCE LIST
Corner Cabinet– SALVAGED
White Lightning Cleaner
Valspar Semi-Sweet Paint
DB Mud Filler
2″ Mini Brush
Painters Tape
TOOL LIST
I’ve searched and found some deals for you! These discounts are in effect as of the writing of this post.
Rubber Mallet (28% OFF!)
Pry Bar Scraper (44% OFF)
4″ Paint Roller
Heat Gun
Shop Vac (16% OFF)
Orbital Sander
Sand Paper | Tack Cloth
Shop Towels
BATHROOM CABINET MAKEOVER
Here’s how I salvaged and updated this corner cabinet…
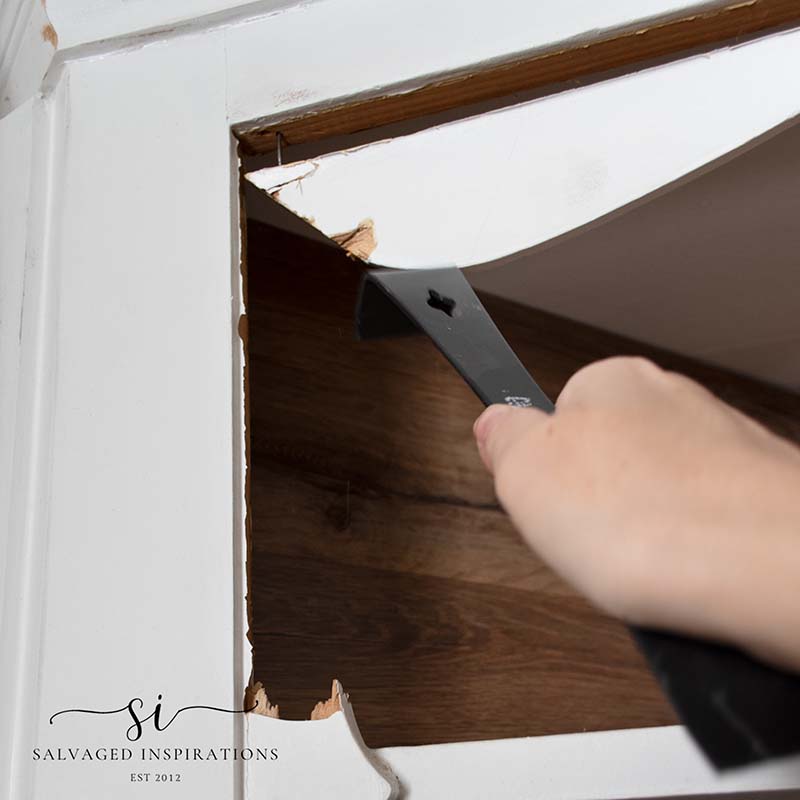
REMOVING SCALLOP TRIM
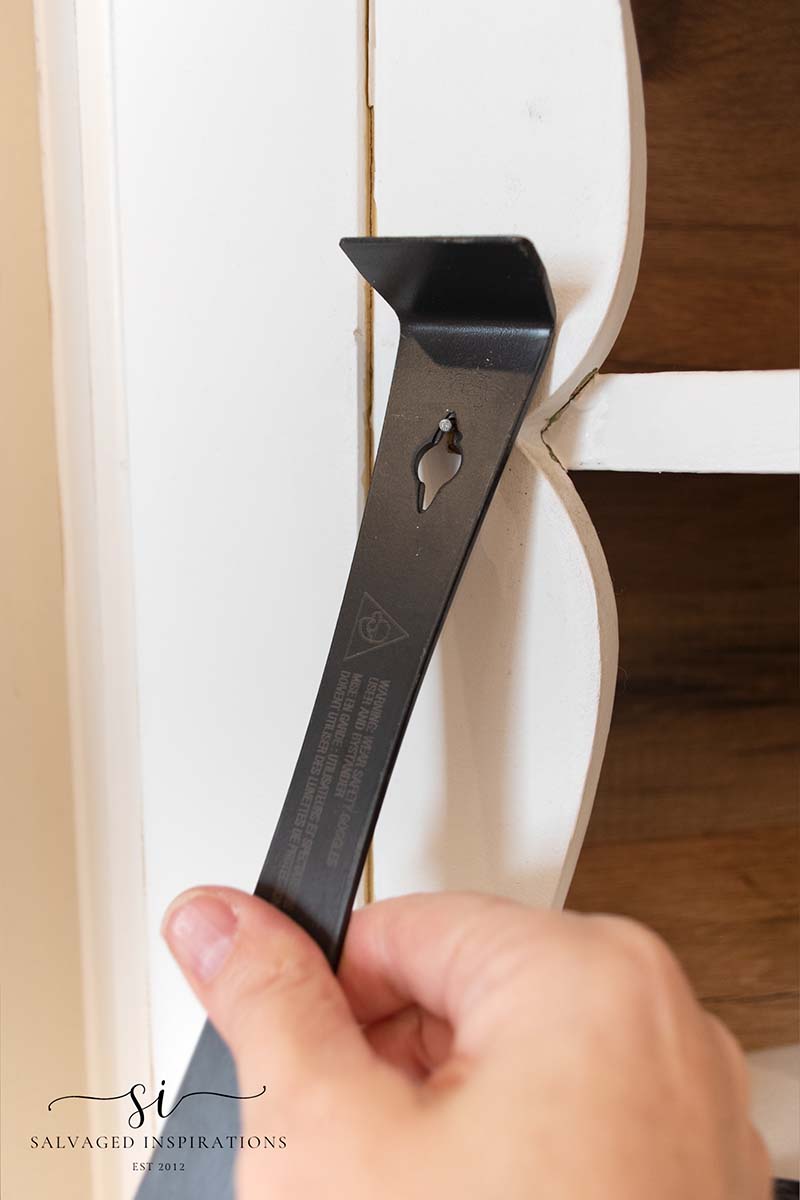
After clearing my things off the shelves I started removing the scalloped trim. I used a rubber mallet and started bashing away. Be sure to wear protective eyewear when doing this demo.
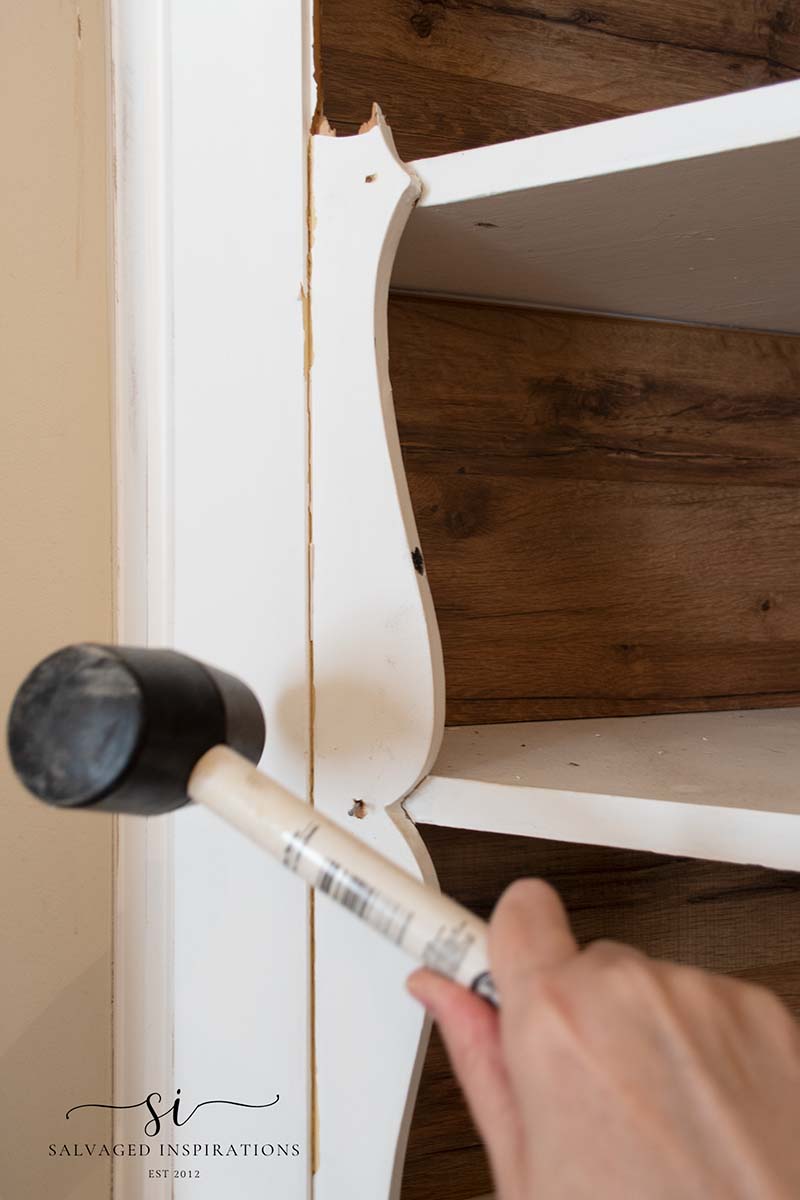
Hitting the trim with some good wacks on the front and from behind started prying the scalloped trim from the frame. Then using this pry bar (an awesome tool for so many furniture fixes!) I pried the nails from the scallop trim which removed it from the unit.
This mini-demo was a lot of fun!
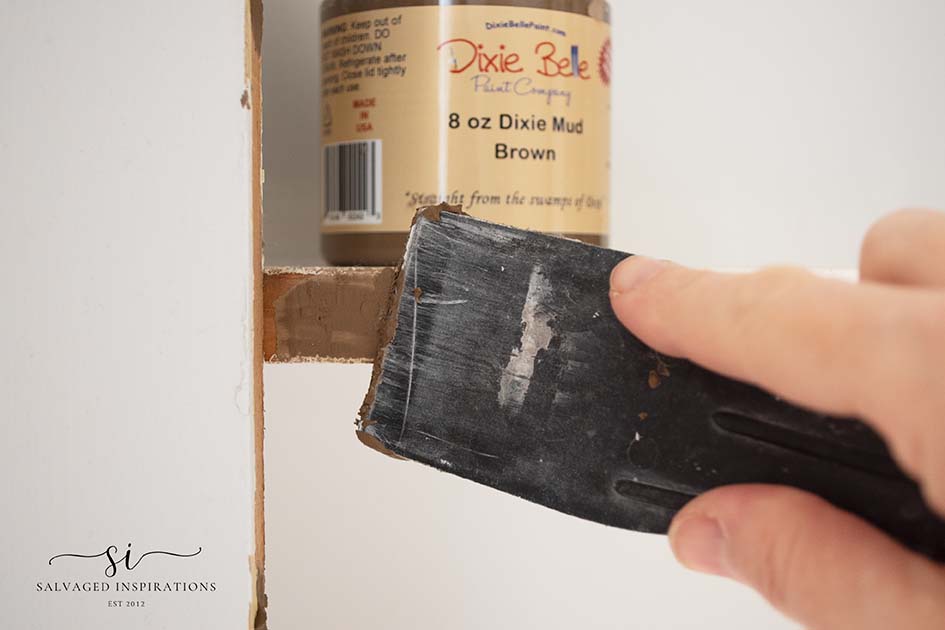
FILLING NAIL HOLES
I filled all the nail holes and imperfections on this using this easy-to-sand Dixie Belle Mud. I also removed the old hardware and filled those holes as well.
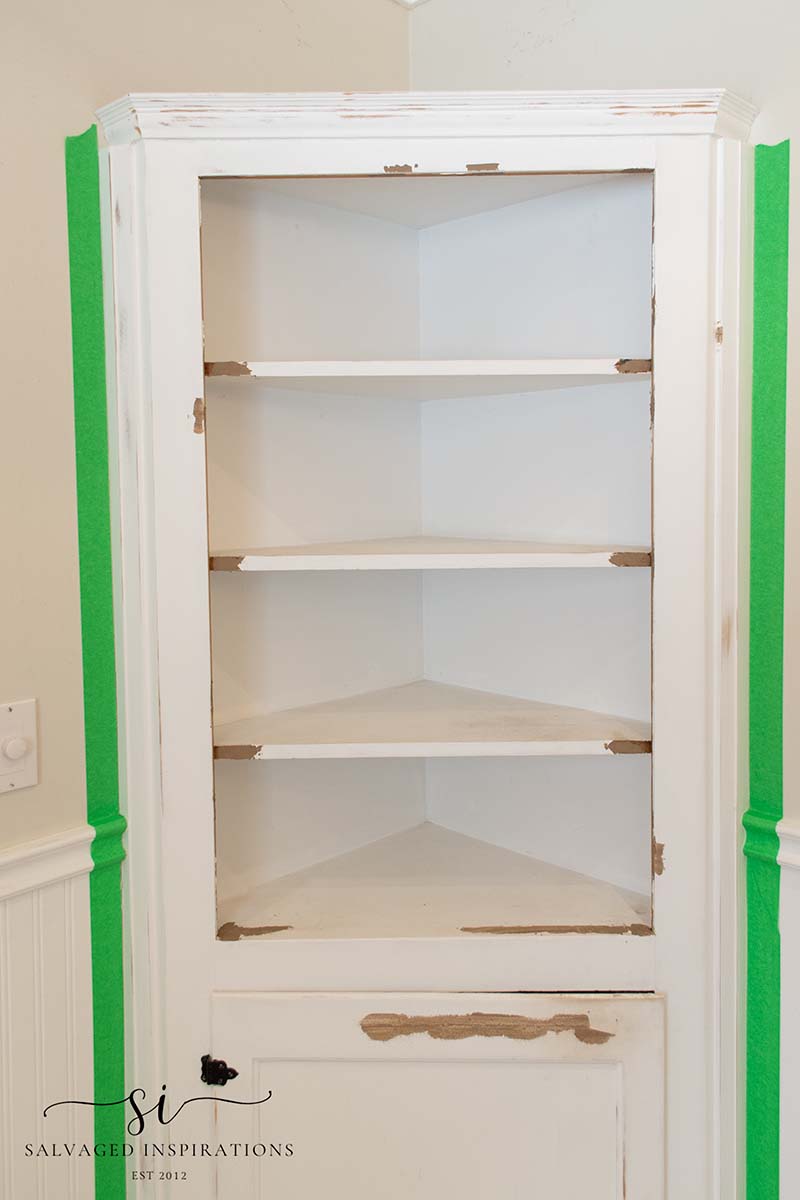
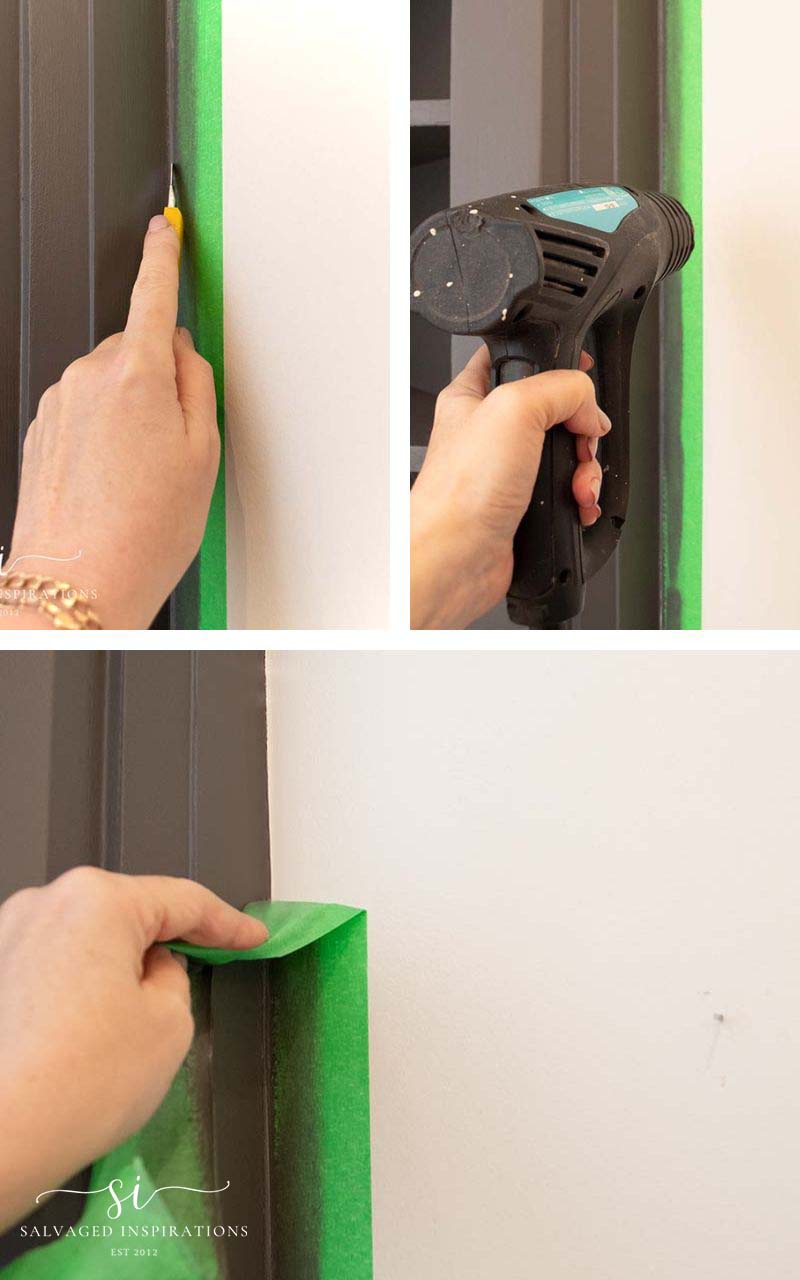
This is what the corner cabinet looked like with the trim off, filled with wood filler, and taped off with painter’s tape.
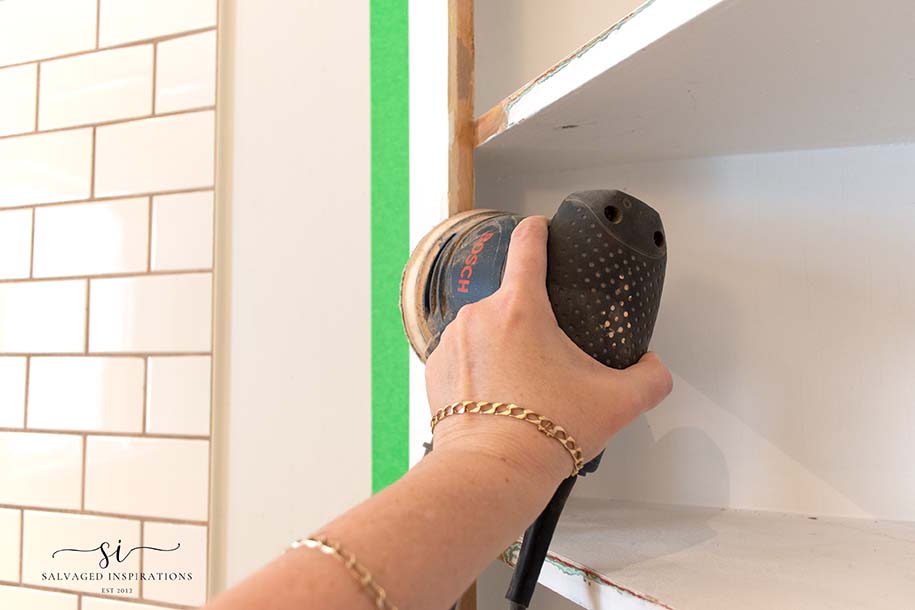
SANDING
Once the wood filler was 100% dry, I sanded everything smooth with a 220 grit sandpaper and my orbital sander.
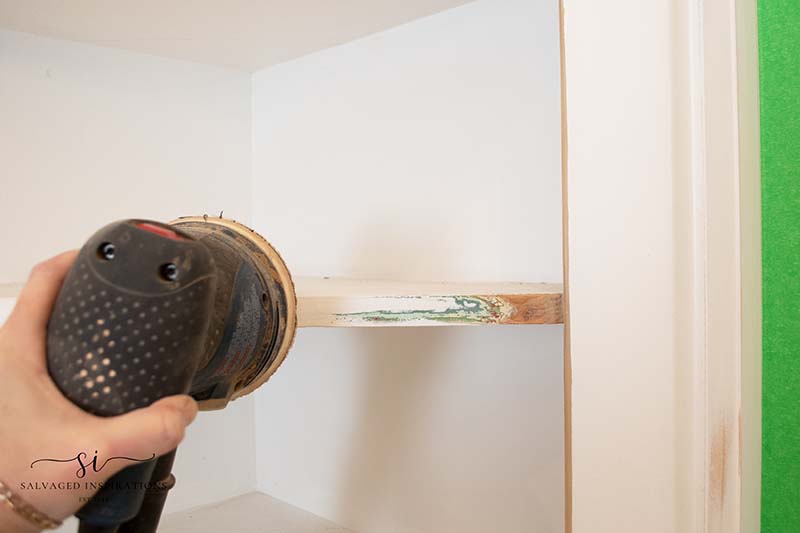
If you don’t have a sander, this step can also be done by hand.
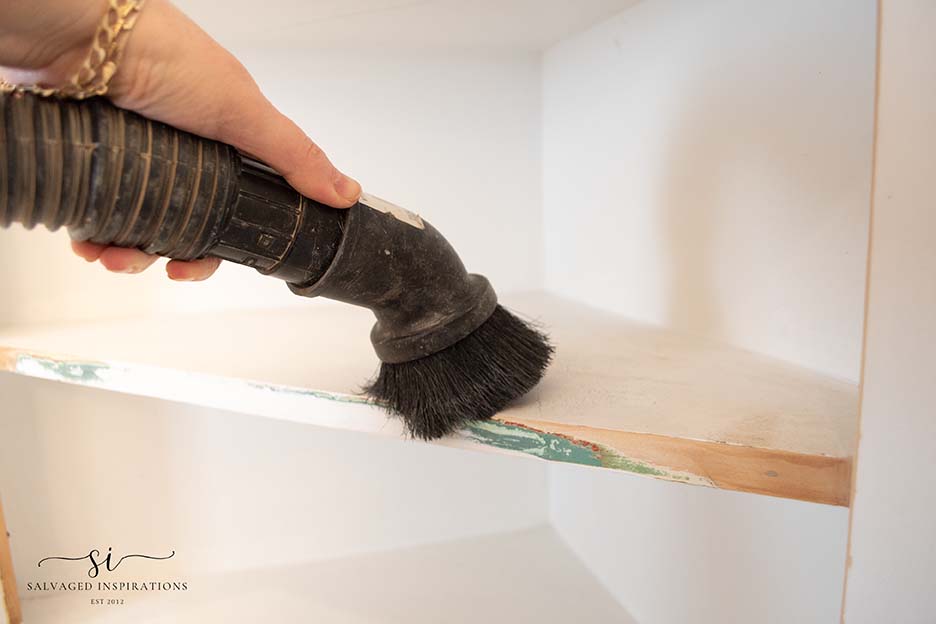
Then using my shop-vac, I sanded up all the dust and debris.
PAINT
Now for the fun part – painting! I used the same color as I used on my back picket fence AND my Painted French Doors. The color is Valspar from Lowes and it’s called Semi-Sweet. I would describe it as dark gray with brown chocolate undertones.
I went into the corners with my 2″DB Brush and then used a 4″roller to finish the panels.
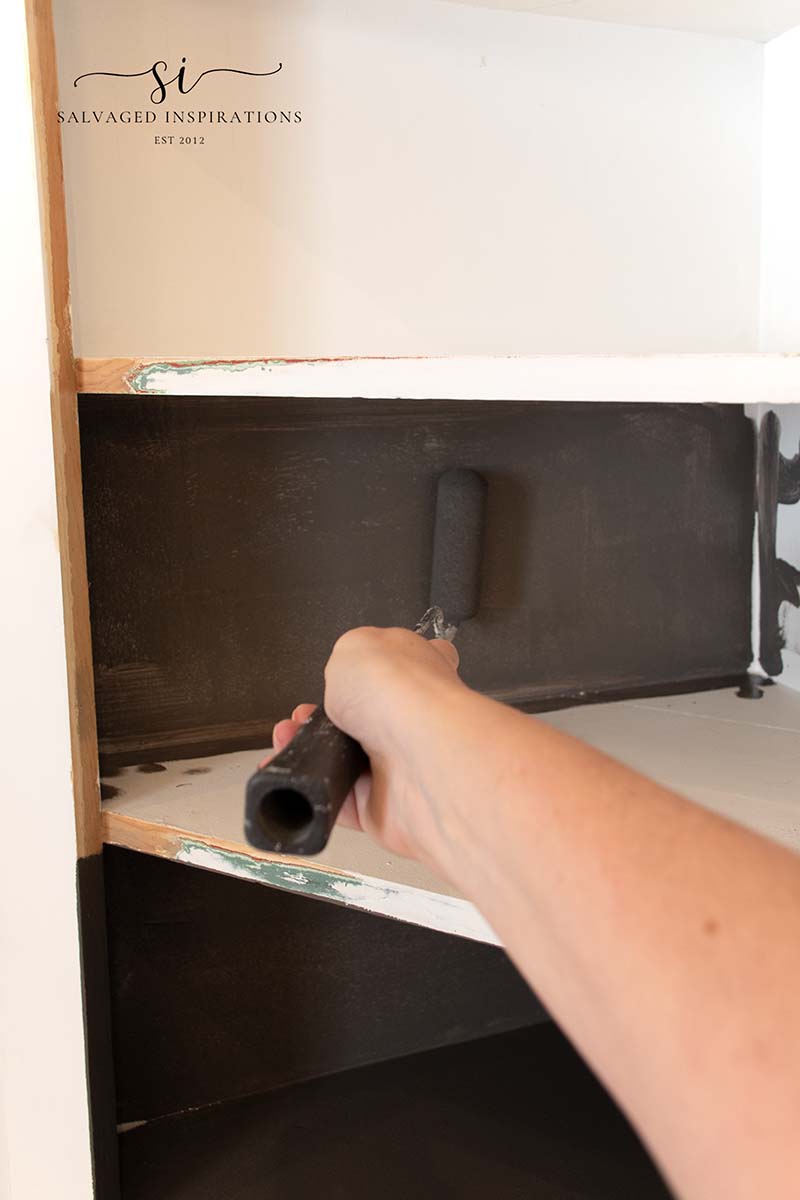
This bathroom corner cabinet took two coats for complete coverage. Below is what it looked like after the first coat.
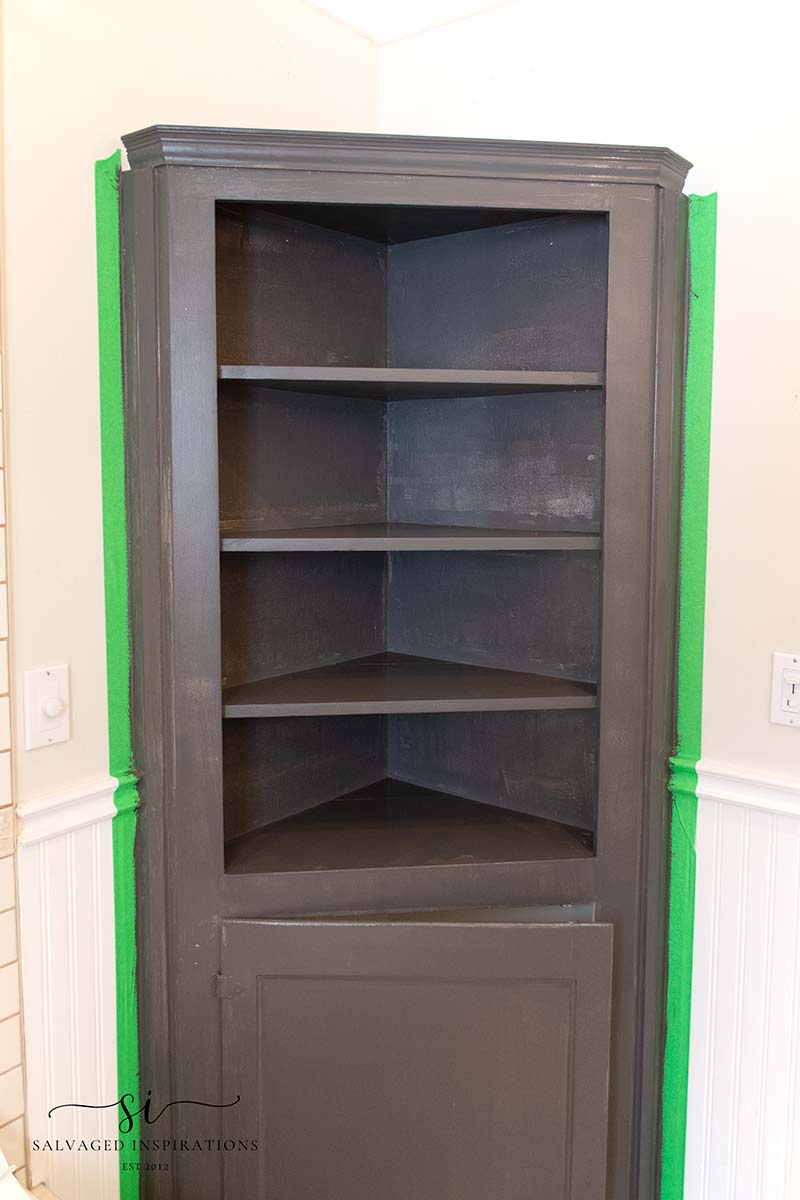
After I added the second coat, I let it sit for a few days — this included the painter’s tape. When I went back to remove the tape it was stuck on there good. No worries. Heat gun to the rescue! If you ever have any adhesive tape or contact paper that doesn’t want to come off, score the edges with a craft knife and then add a little heat. This will loosen the adhesive and it will peel off effortlessly.
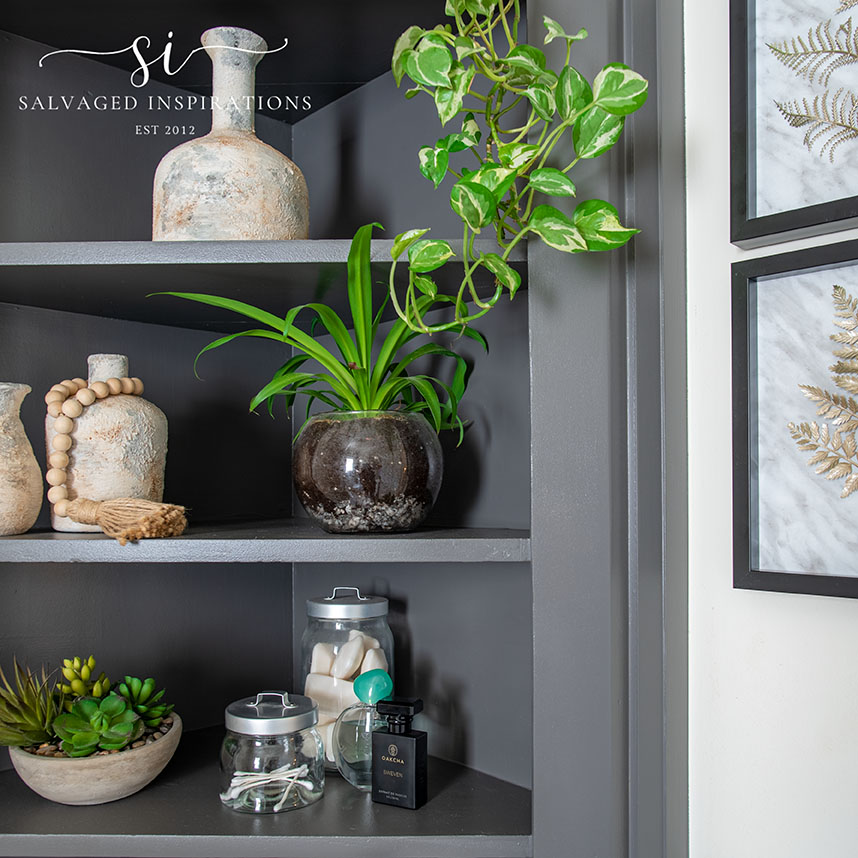
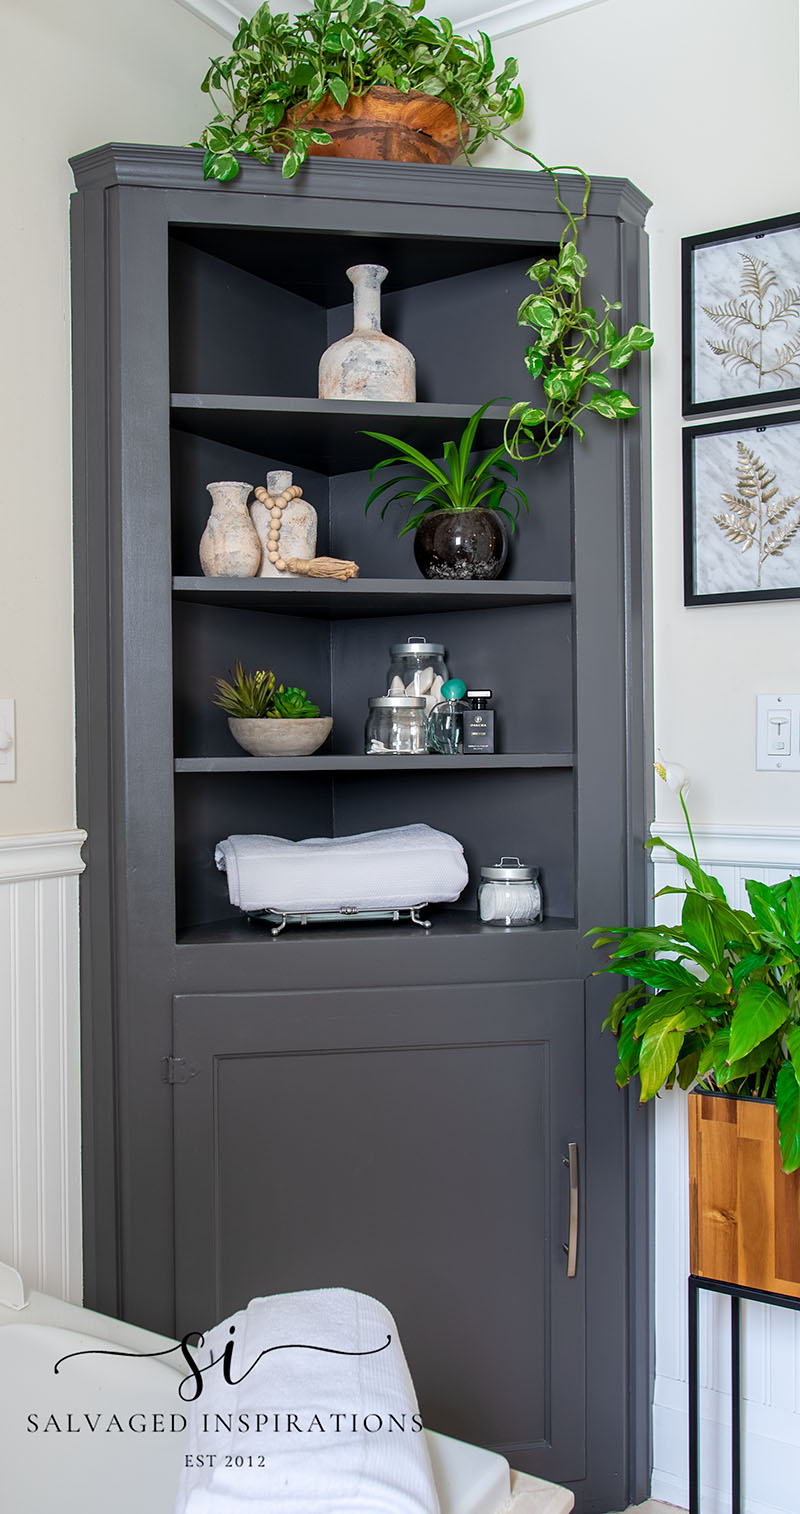
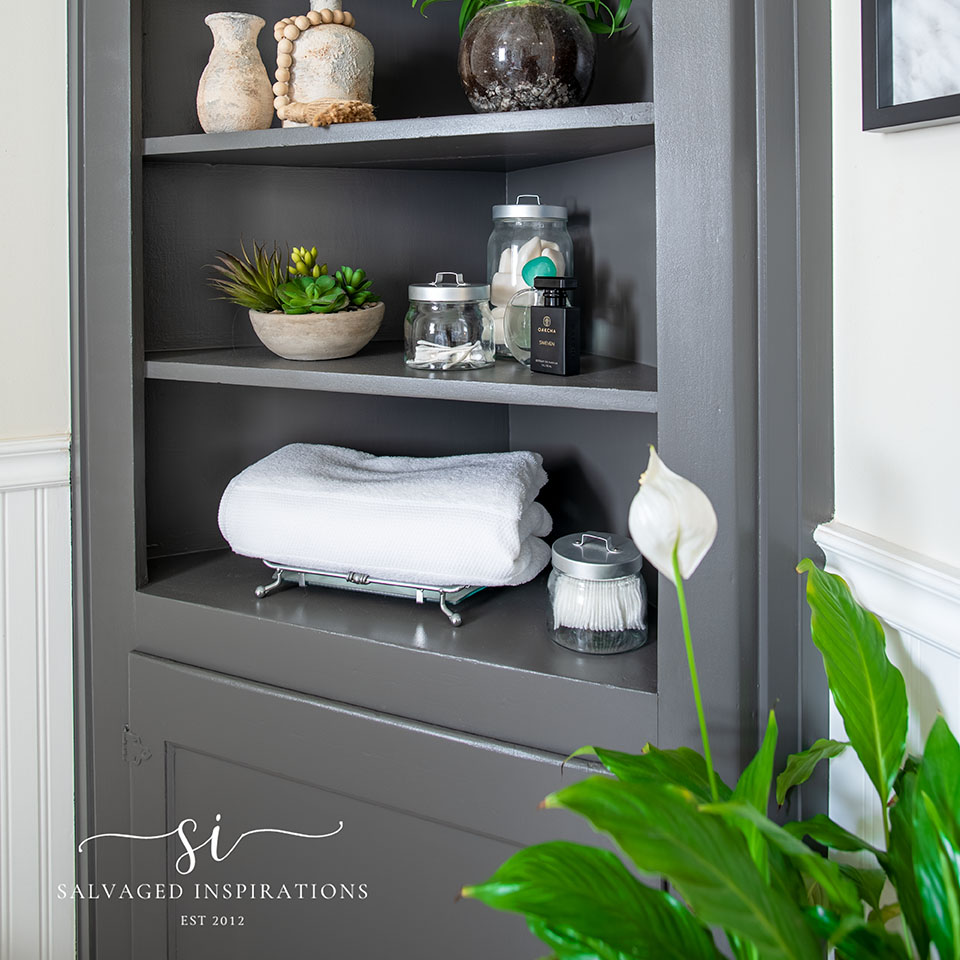
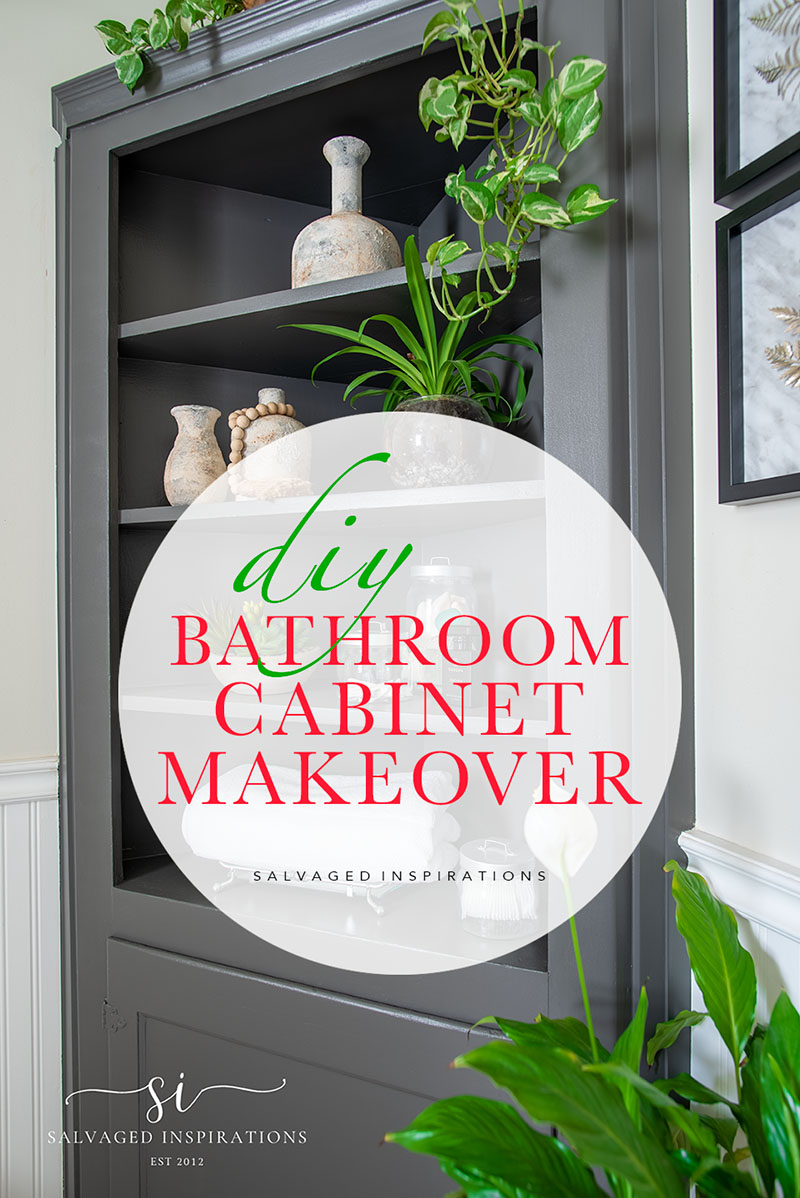
FINISHED LOOK
And here’s how this bathroom corner cabinet all came together.
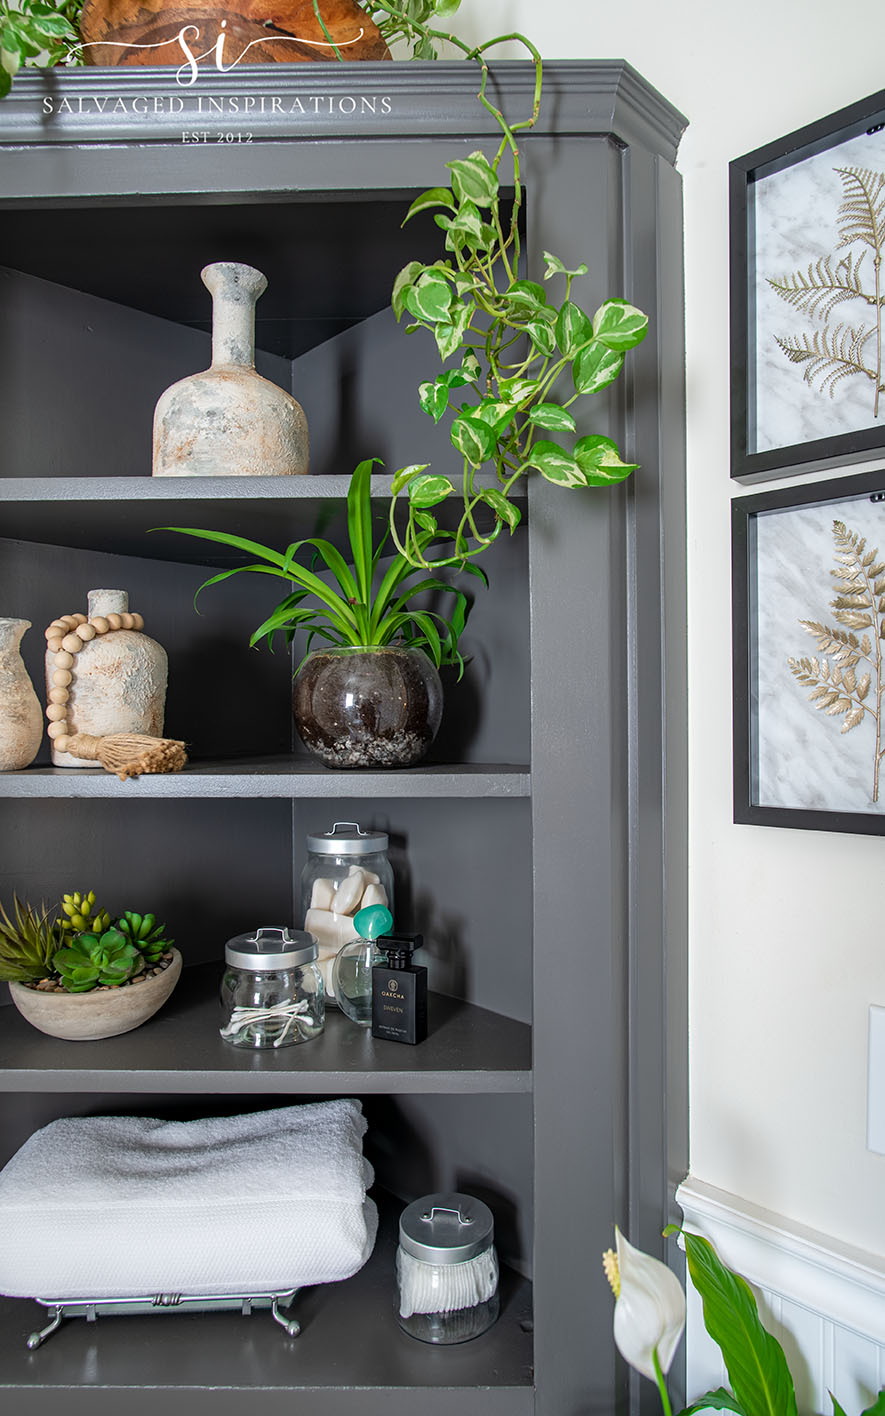
What do you think? It looks so much more updated without the scalloped trim, right?!
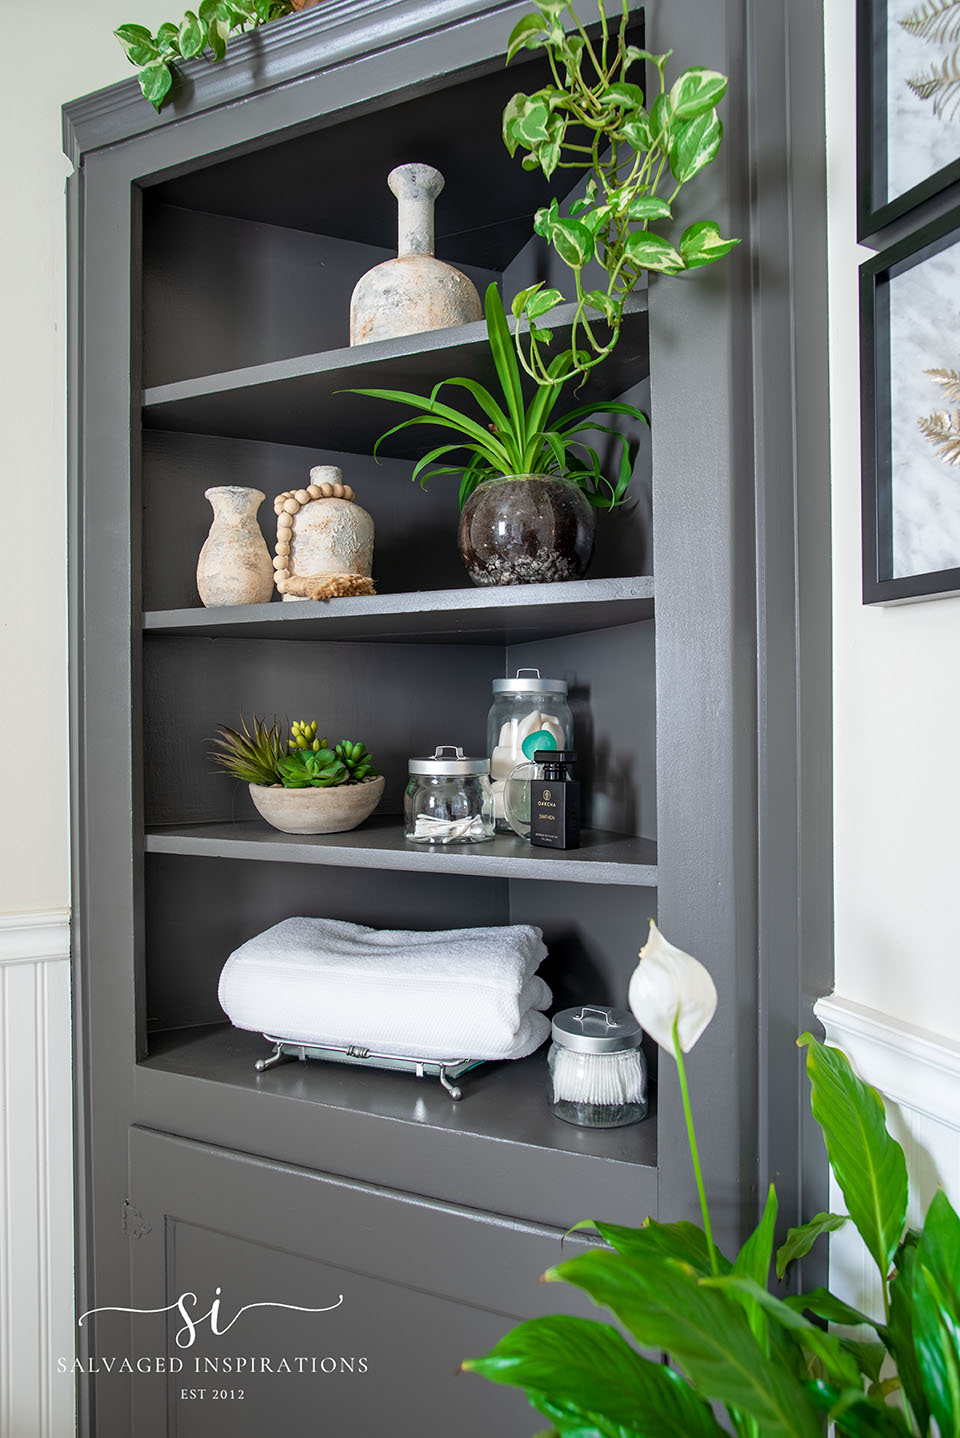
This dark paint is such a contrast to what I had so I’m still getting used to it… but I think I love it!
The only problem is, now that I’ve updated the cabinet, I’d like to repaint the walls and maybe my update my floor and vanity as well…lol.
Feel free to chime in with your decor thoughts. I always appreciate your styling opinions! xo
AND NOW FOR SOME FURNITURE FIXER-UPPER FUN!
You’re going to LOVE what my creative team of Furniture Fixer Upper ladies do. Below are the BEFORE photos. Visit the links underneath to see the amazing AFTERS and learn how they did it! I’m heading over to take a peek as well! x
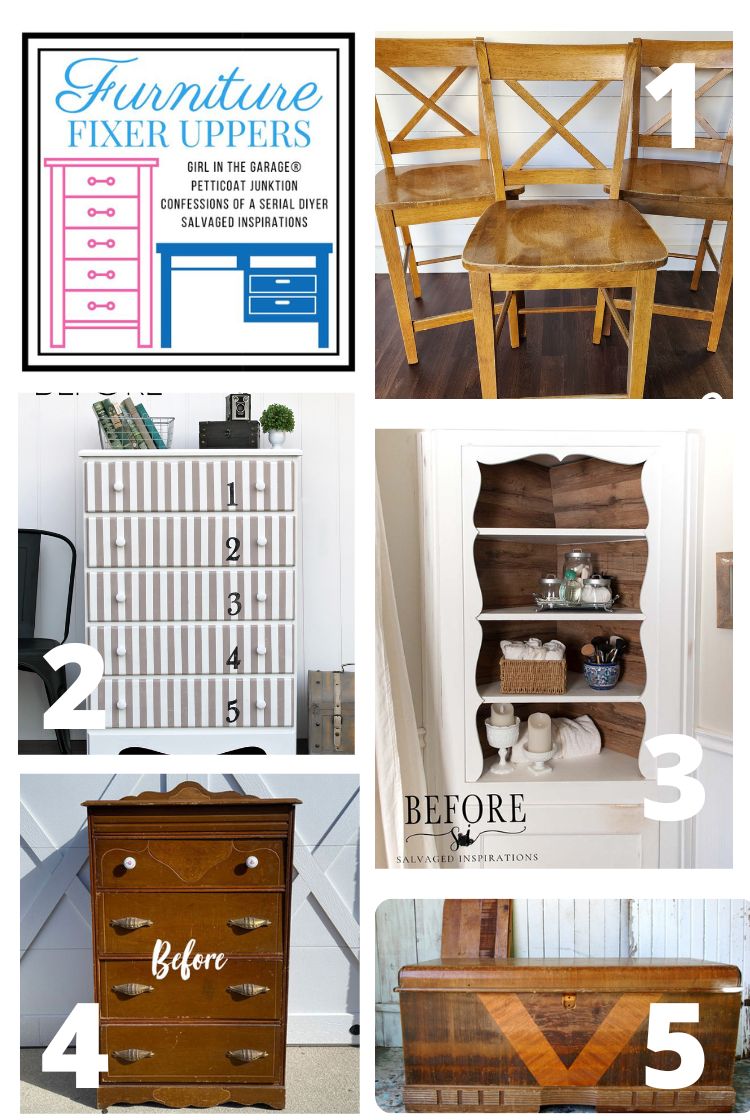
1. MY REPURPOSED LIFE
2. GIRL IN THE GARAGE
3. SALVAGED INSPIRATIONS (HAPPY YOU’RE HERE!)
4. CONFESSIONS OF A SERIAL DIYER
5. PETTICOAT JUNKTION
Here’s another look at my bathroom cabinet before and after. I hope this simple makeover has inspired you and given you some new ideas on how to update your furniture.
LET ME KNOW WHAT YOU THINK OF THIS DARK CORNER CABINET MAKEOVER AND FEEL FREE TO CHIME IN WITH DECOR IDEAS! ASK ANY QUESTIONS YOU MAY HAVE… I ALWAYS LOVE HEARING FROM YOU. IT MAKES MY DAY! 🙂
Happy furniture painting my friends!
Denise x
RELATED POSTS::
SALVAGED BATHROOM REVEAL
CORNER CABINET WITH BARNWOOD BACKING
PAINTING FRENCH DOORS IN BLACK
PAINTED LACE SECRETARY DESK
SALVAGED SEWING DESK MAKEOVER
PIN AND SHARE!

Haha, I’m a sucker for scallops on the right piece, but your bathroom cabinet looks just perfect for the space now! Great update, my friend! xo
I think scallops are adorable as well but I’m also super happy with the update! Thanks my friend! XOXO
What a shame! You removed the part that showed real craftsmanship and created a piece you could find at any Pottery Barn or on Wayfair. Sometimes, over-renovating drives the life out of a piece (or even out of a whole old house).
I understand what you’re saying about craftmanship Marybeth – and I appreciate it just as much…if not more because I work with so much furniture! But that said, it was time for a change. I’m a firm believer in repurposing what you already have in your home rather than buying new. I also believe your home should reflect a style that YOU enjoy, and this changes over the years. This was a much better look and choice for me right now. 🙂
This cabinet looks great! Thanks for the tip about the tape too. I am sure I will use it in the future.
Thanks, Debby and ya, the tape tip works great! 🙂
That’s super cute and so much better! Perfect color, too.
Yay! I’m liking it better as well… now I just have to match up the rest of the bathroom…lol. Thanks Lizzy! XOXO
Wow! that cabinet had its Cinderella moment. It looks very modern now. But you know, it’s kinda like getting a new dress/outfit–ya gotta get new shoes, purse/tote and maybe even new lipstick…..it doesn’t stop. But, you’re cool. You’ll figure it out.
Exactly!😂 Thanks Caye! XOXO
Hi Denise. You always amaze me with your talent. You never fail to show how some paint and a few small changes
(like removing scalloping and new hardware) can COMPLETELY transform a piece of fur.niture. Your cabinet is beautiful.
Aw, thank you Monique! I’m really glad I did it. I’ve been looking at it for the last couple of months and not liking it so I’m super happy with the change!
Denise,
Removing that trim made all the difference! I love the new color. It looks so perfect now.
pinned!
gail
Thanks so much Gail! And thanks for the PIN!
Wow – what a difference! That looks really sharp. Nice to do something for yourself! But yes, now you’ll have to replace the flooring, lighting, etc. (-;
Exactly, right?!😆 Now I need to ‘tweak’ the rest of the bathroom so she fits in…lol.
A simple re-do, but a stunner, Denise! I love you’re not afraid to take a chance, and do something “drastic” when your creative juices get flowing! I have found, when we listen to our inner artist, the results are usually amazing! I have one question: did you topcoat or wax any of the surfaces on this piece since it’s in a bathroom and will likely be exposed to humidity? Thanks again for another awesome redesign 😉
Hi Suzy! Thanks so much! I did not topcoat or wax. The Valspar Duramax is an Exterior Paint + Primer. An all-weather adhesion with maximum resistance to mould, mildew and algae (as stated on the paint can) so it’s the perfect choice for a bathroom project without having to topcoat.😊
Taking off the scalloped trim really made it look different. Love the new color too! Great job!
Right!? It looks totally different without that trim! Thanks Marty!
I noticed in the ‘after’ photos that the shelves look glossy. Did you line the shelves with glass or lucite? Or a gloss clear finish? The cabinet looks terrific! Many thanks, friend.
Hi Elle and thank you! This Valspar Duramax is an exterior paint + primer in Satin… so when the light hits it just right there is a bit of a sheen.
Love, love, love it!
Removing the scallops completely changed it and the fabulous colour is just as beautiful here as it is on your French door.
Thank you for the heat tip. I’ve had the problem trying to remove painters tape that’s been on way too long. It can take be a long time to finish a project.
Side question; with old pieces that are solid but a have a bit of an age odour, do you use blocking primer or shellac on the inside and under sides too?
Thanks Denise!
The heat gun (or hairdryer if you don’t have a heat gun) works AMAZING! It’s a great hack for me because then I don’t feel rushed…lol. As for odours, BIN Shellac-Based Primer is my go-to for smells, inside and out. My water-based alternative is BOSS from Dixie Belle. Have a super day Val! XOXO
Thanks, Denise!
I think I’ll try shellac. I’m hoping this small table is a good project to try it for the first time. It’s finally warm enough here in Calgary that I can do the shellac outside.
I’m going to try your slap in method for the spindle in this table too 😊
I can wait to see what you do next!
You’re going to LOVE the slap-on method for the spindles Val! Just be sure to be sparing with the paint on your brush otherwise its ‘slaps’ all over the place.😂
You’re so good! I wouldn’t have thought to hammer off the trim!!
Thanks Nicki! Ya, the pry bar makes it easy! 🙂
I love it! The contrast is really updated and modern! XOXO
Thanks my friend! XOXO
I absolutely LOVE the change! You always do such artistic makeovers but this one is my favorite. I appreciate it so much when a piece goes from nice to stunning! It makes such a huge difference in your bath and I can’t wait to see what you do with the rest of the room!
Debbie
Aw, thank you, Deborah! And ya, that’s the only problem… not I want to change everything in my bathroom.😂
It’s much more modern and a bit dramatic. A great contrast. Love it!
Thanks Jamie! 🤗💙
Love it, it looks gorgeous and really fresh again.x
Thanks Janette! 🤗 Amazing what a different color paint can do!