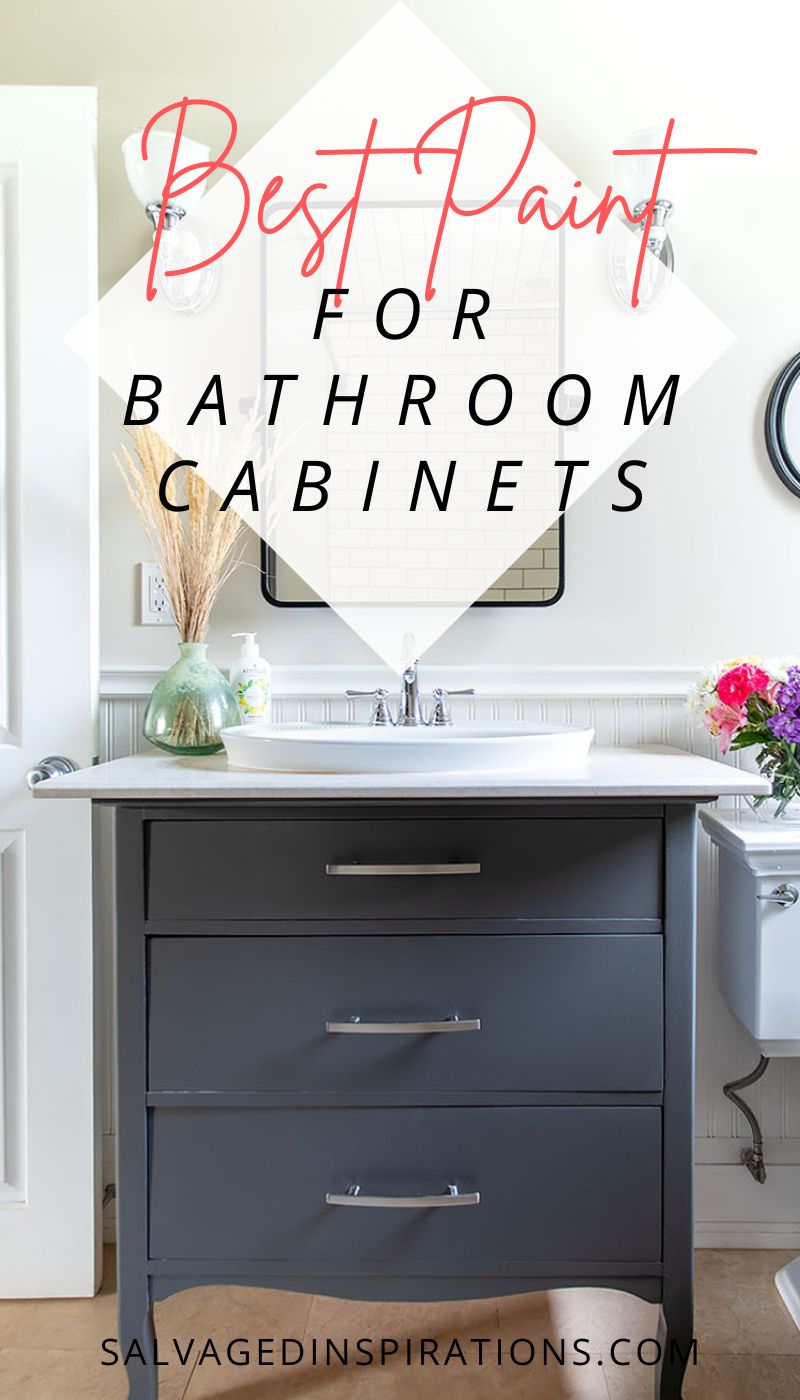
MY BATHROOM VANITY GETS UPDATED WITH A NEW PAINT COLOR & I’M SHARING THE BEST PAINTS FOR BATHROOM CABINETS!
Hi creative SI family! Thanks for all your lovely comments on last week’s bathroom corner cabinet makeover. I had a few questions in the comments and a ton of emails asking what is the best paint for bathroom cabinets. When it comes to painting your bathroom cabinets, it’s important to choose a paint that can hold up to moisture, steam, and frequent use and cleaning. I’ve listed my top choices below. I’m also answering the common question – should you prime or topcoat your painted bathroom furniture?
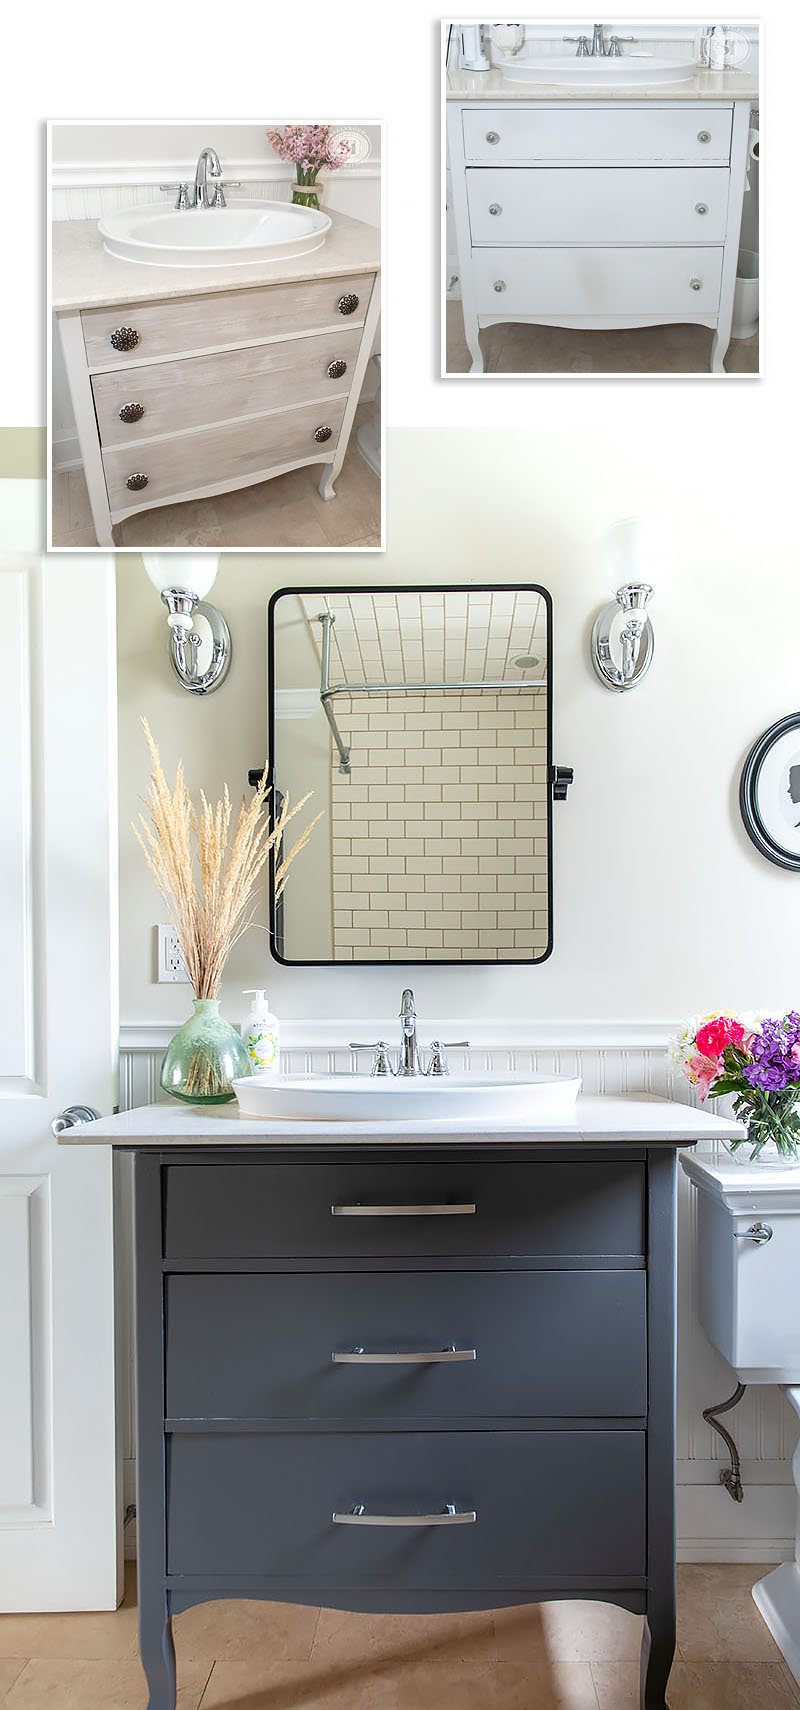
Painting your bathroom vanity is such an easy and inexpensive way to change the look of your bathroom. I’m sharing 3 versions of my bathroom vanity below. They all have VERY different looks!
Here’s the bathroom vanity I started with. I purchased a small dresser from the Restore for $40. Nick had the marble counter custom cut and we dropped in a sink. Look #1.

You may remember me refinishing this old dresser-turned-vanity back in 2016. Look #2.
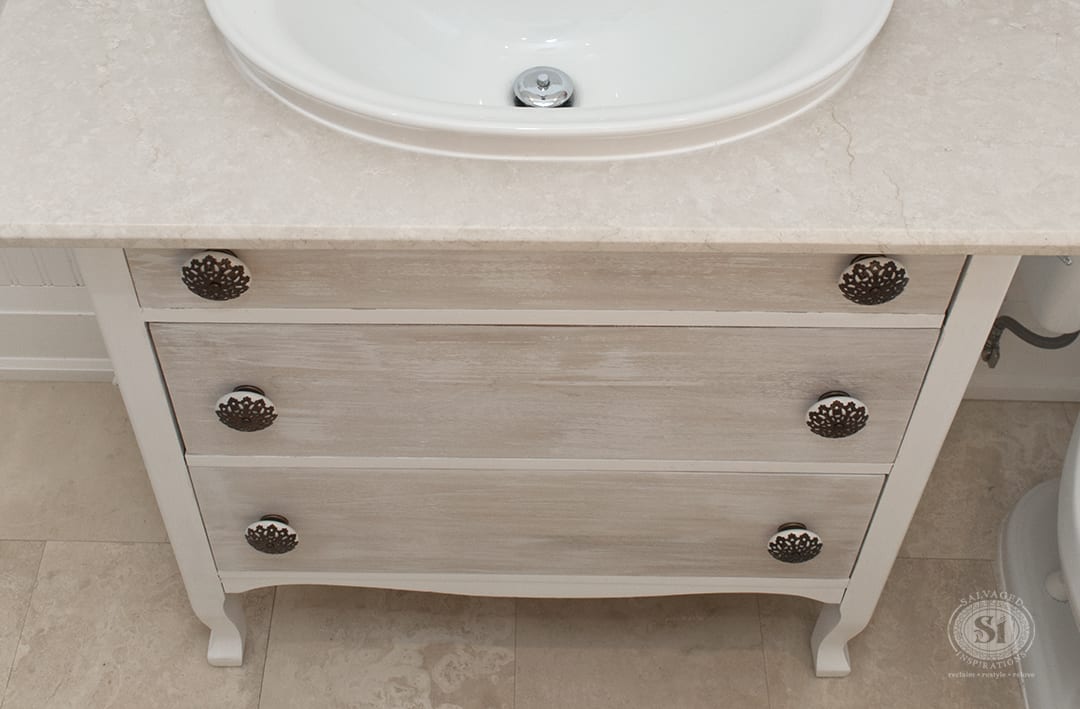
I can’t wait to hear what you think of look #3 below!
THIS POST IS SPONSORED AND/OR CONTAINS AFFILIATE LINKS TO PRODUCTS I LOVE AND USE. YOU CAN SEE MY FULL DISCLOSURE HERE.
SOURCE LIST
Bathroom Cabinet– SALVAGED
White Lightning Cleaner
Valspar Semi-Sweet Paint
DB Mud Filler
2″ Mini Brush
Painters Tape
TOOL LIST
4″ Paint Roller
Heat Gun
Shop Vac (16% OFF)
Orbital Sander
Sand Paper | Tack Cloth
Shop Towels
SHOULD I PRIME BEFORE PAINTING
The short answer is YES. It guarantees your paint will adhere properly and covers up any stains or imperfections you have on your existing cabinet. Here are a few steps to do BEFORE painting a bathroom cabinet…
- Remove Old Hardware
- Clean Well
- Scuff Sand
- Remove Dust
- Tape Off Walls etc with Painters Tape
- Prime
BEST PAINT FOR BATHROOM CABINET
Before I share my vanity makeover, I’m including a list of the BEST paint to use in your bathroom. As I mentioned above, you want a paint that will repel water, resist mold and mildew and hold up to a ton of use and cleaning! There are SO MANY fabulous paints on the market that will do the job and do it well, but here are a few of my favorites in no particular order…
- Benjamin Moore Advance: This waterborne alkyd paint offers a smooth, durable finish that resists moisture, stains, and mildew.
- Sherwin-Williams Emerald Urethane Trim Enamel: This water-based enamel paint provides excellent durability and adhesion in high-traffic areas and it’s easy to clean, making it a great choice for bathroom cabinets.
- Behr Premium Cabinet and Trim: This indoor and outdoor paint is designed to resist moisture, mildew, dirt, and grime making it a great choice for bathroom cabinets.
- Valspar Cabinet Enamel: This self-leveling paint provides a smooth, durable finish that resists scratches, scuffs, and moisture.
- General Finishes Milk Paint: This water-based paint provides a durable, long-lasting finish that resists moisture and stains.
- Dixie Belle or Annie Sloan Chalk Paint: These versatile chalk paints can be used on almost any surface and provides a durable, matte finish. Topcoating is required because the surface is porous.
- Farrow & Ball Modern Eggshell: This water-based paint provides a durable, washable finish that resists moisture and stains, making it a great choice for bathroom cabinets.
BEST TOPCOAT FOR BATHROOM CABINET
Some of the above paints have a topcoat included so be sure to read the instructions or ask your paint associate. That said, if you are using chalk or mineral paint (any brand) a topcoat is required for protection and a long-lasting finish.
- General Finishes High-Performance Water-Based Topcoat: This topcoat is a water-based polyurethane that provides excellent durability and protection for painted bathroom cabinets.
- Minwax Polycrylic Protective Finish: This water-based topcoat provides a clear protective layer that is easy to apply and dries quickly.
- Benjamin Moore Stays Clear Acrylic Polyurethane: This water-based topcoat provides a clear protective layer that is easy to apply and dries quickly.
- Sherwin-Williams ProClassic Interior Water-based Acrylic-Alkyd: This topcoat is a water-based acrylic-alkyd hybrid that provides excellent durability and protection for painted bathroom cabinets.
- Behr Premium Plus Interior/Exterior Multi-Surface Primer and Sealer: This water-based sealer provides excellent adhesion and protection for painted bathroom cabinets.
- Varathane Ultimate Polyurethane Water-Based Interior: This topcoat is a clear water-based polyurethane that provides excellent durability and protection for painted bathroom cabinets.
- Gator Hide: Gator Hide is NON-yellowing and has a superior toughness that is perfect for your high-traffic areas. Add Gator Hide to your chalk-painted kitchen or bathroom cabinets for long-lasting durability. Gator Hide is Water Repellant and the rock-hard finish will leave your bathroom cabinets easy to clean and looking beautiful for years.
BATHROOM VANITY MAKEOVER
Here’s how I salvaged and updated my bathroom vanity…
REMOVING HARDWARE
After I cleaned my vanity I removed the old hardware and filled in the existing hardware holes with this Dixie Belle Mud.
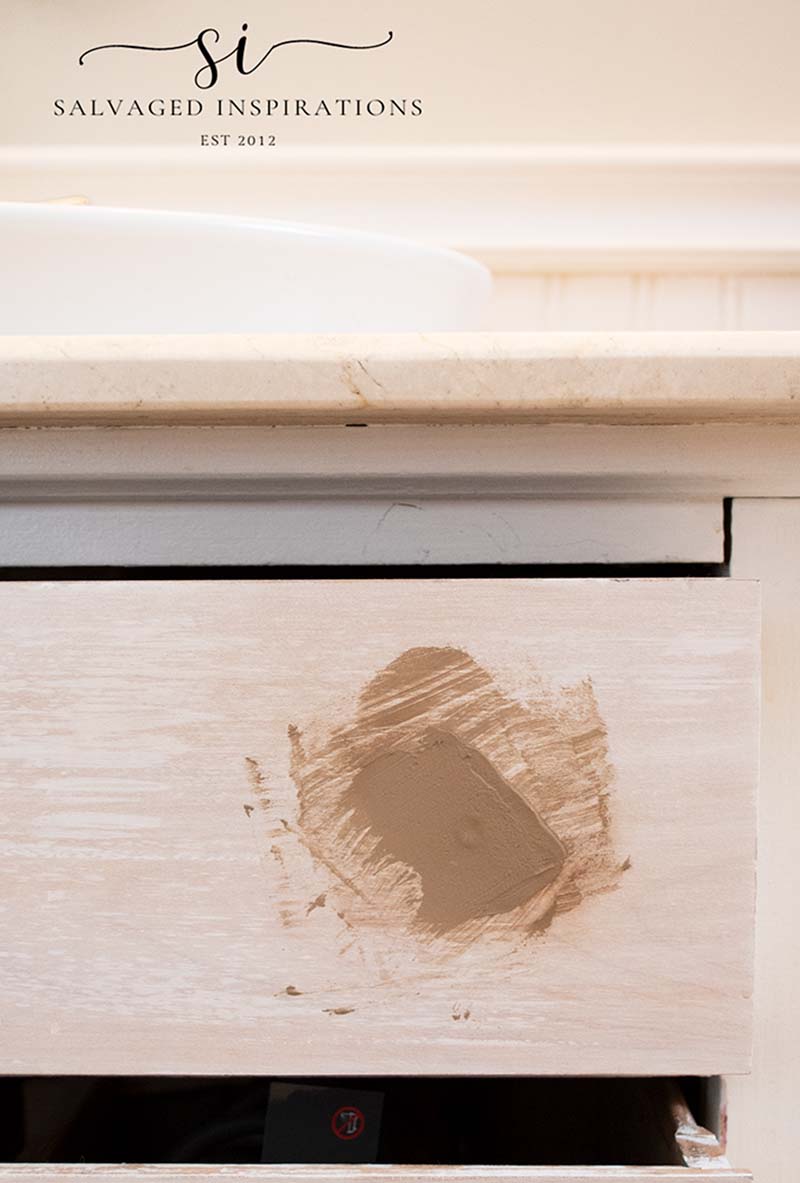
This filler is super easy to use and sands nicely. Just be sure to give it a second coat if you notice the first coat ‘sinking’ into the hardware hole.
Pro Tip ~ Use a piece of cardboard under your drawers to catch the sanding dust. Makes the clean up soooo much easier!
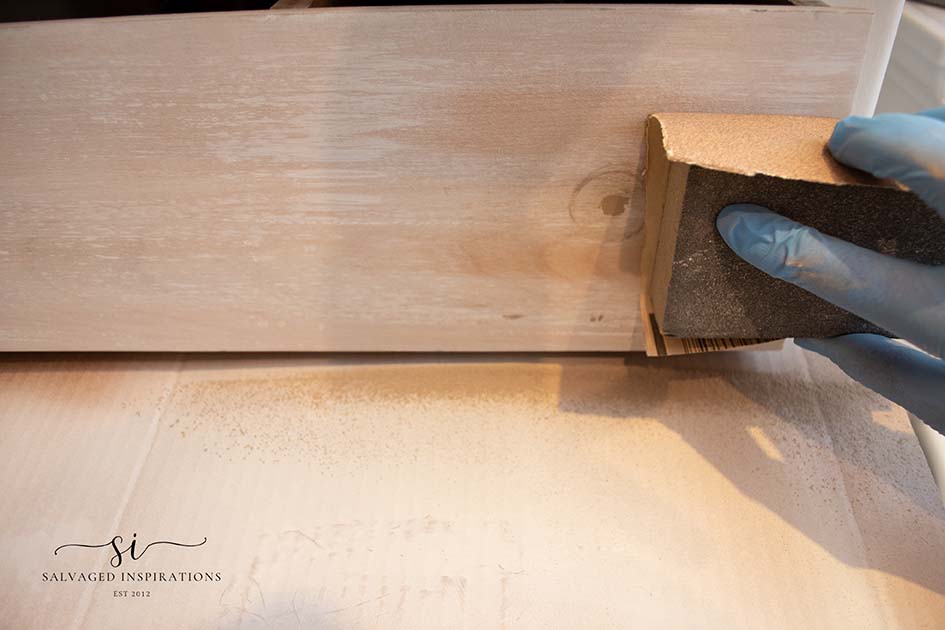
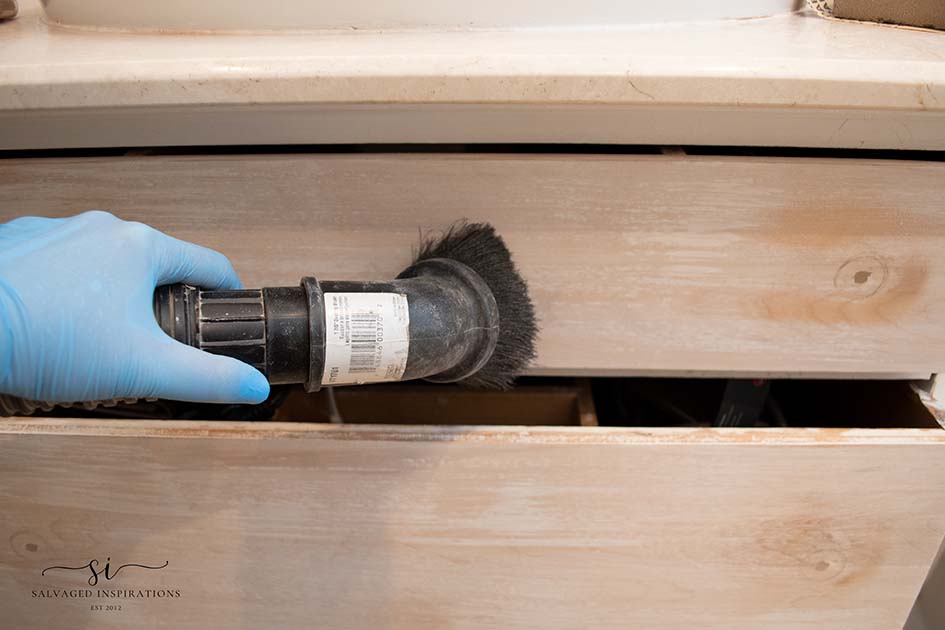
Once the filler was sanded smooth, I gave the rest of my vanity a quick scuff sand (I used a 120 grit sandpaper and gave it a quick once over as if I was wiping down my kitchen cupboard) then using my shop-vac, I sanded up all the dust.
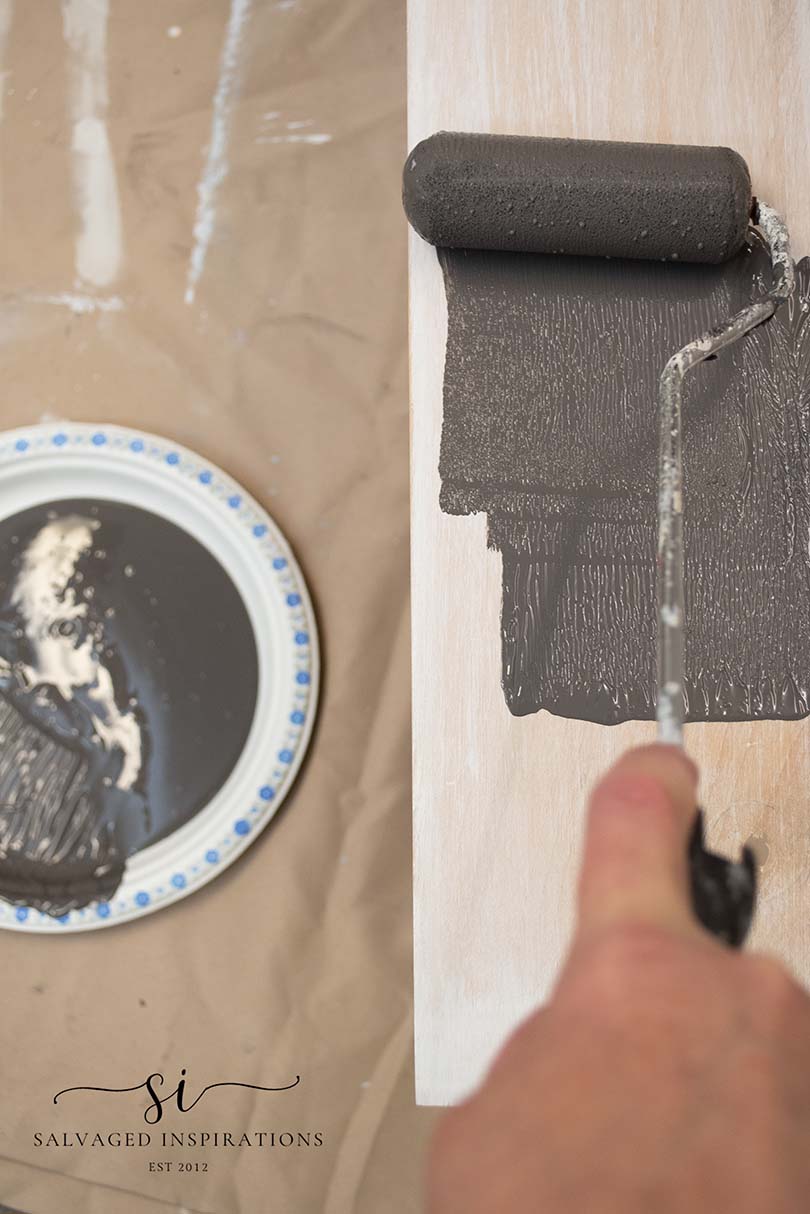
PAINT
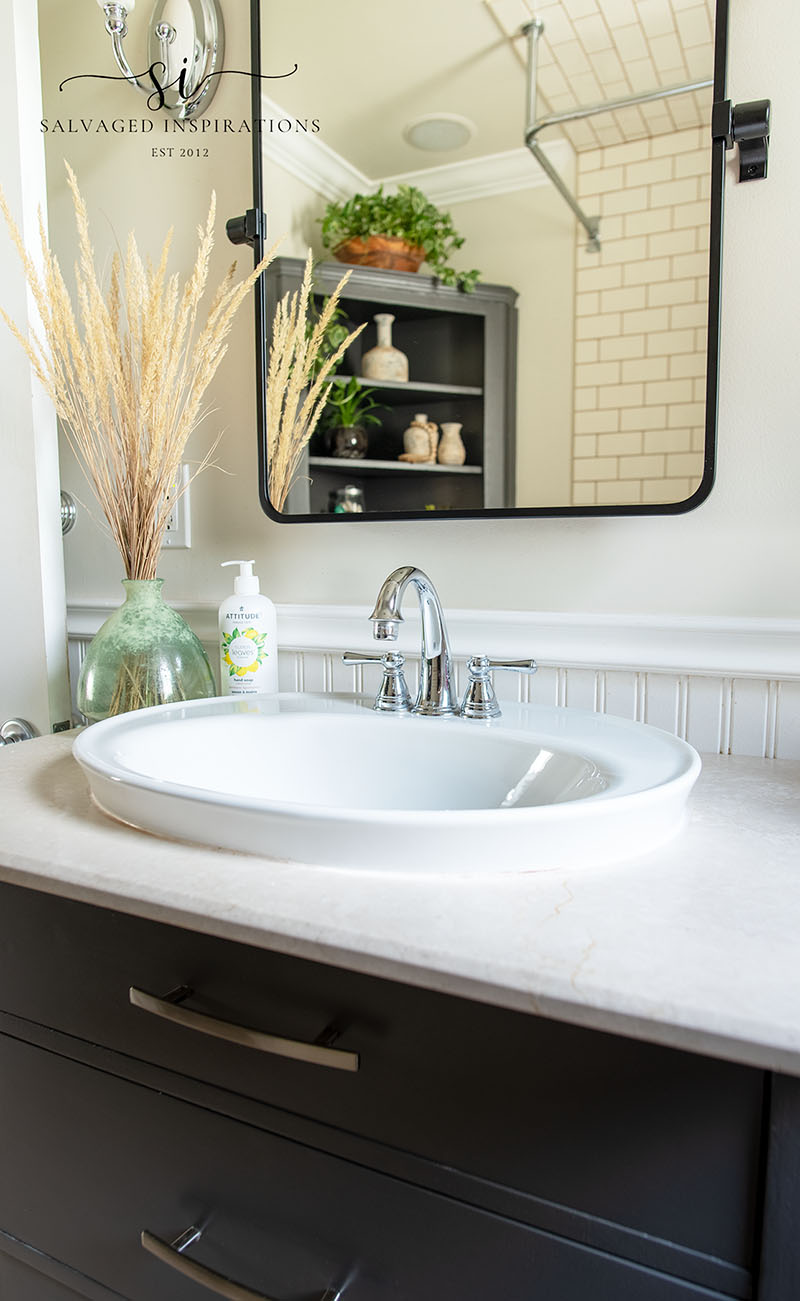
Now for the fun part – painting! I used the same color as I used on my back picket fence AND my Painted French Doors AND last week’s Bathroom Corner Cabinet makeover. This gallon of paint getting good use! The color is Valspar from Lowes and it’s called Semi-Sweet.
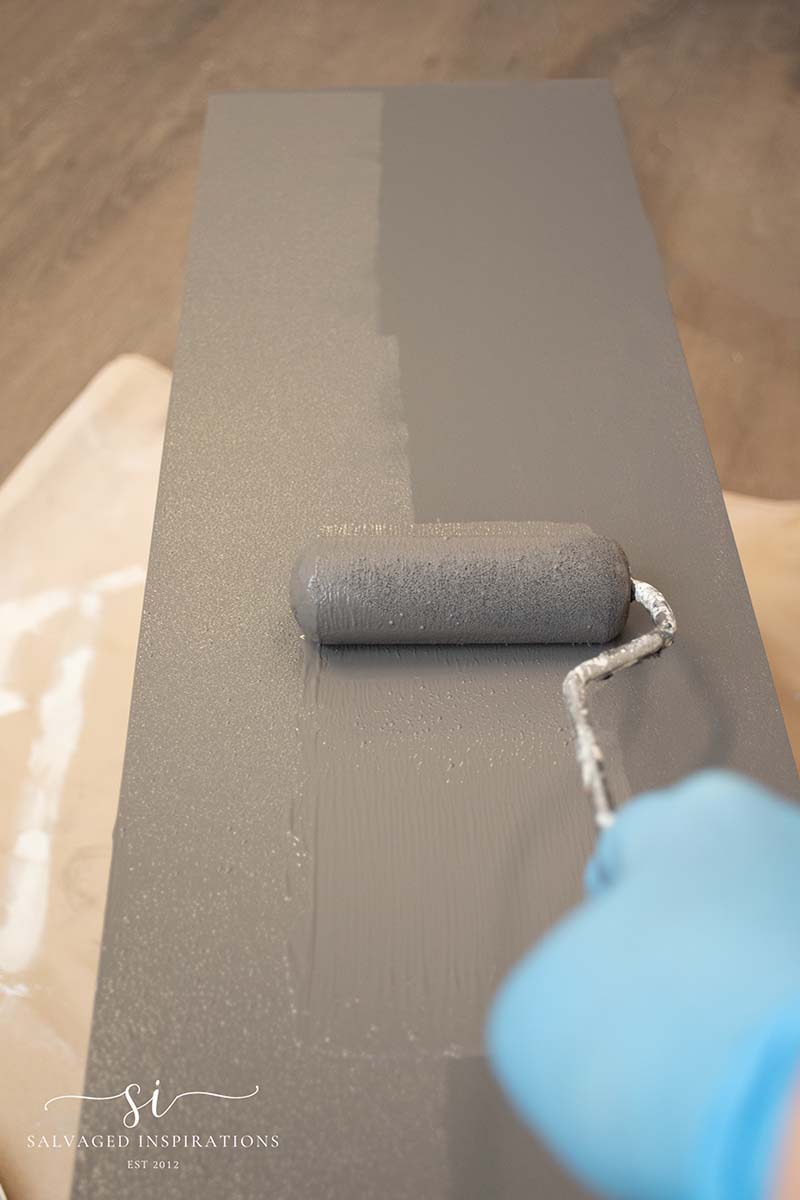
This bathroom cabinet took two coats for complete coverage. I went into the corners with my 2″DB Brush and then used a 4″roller to finish the panels and drawer fronts.
Here is the drawer on the second coat.
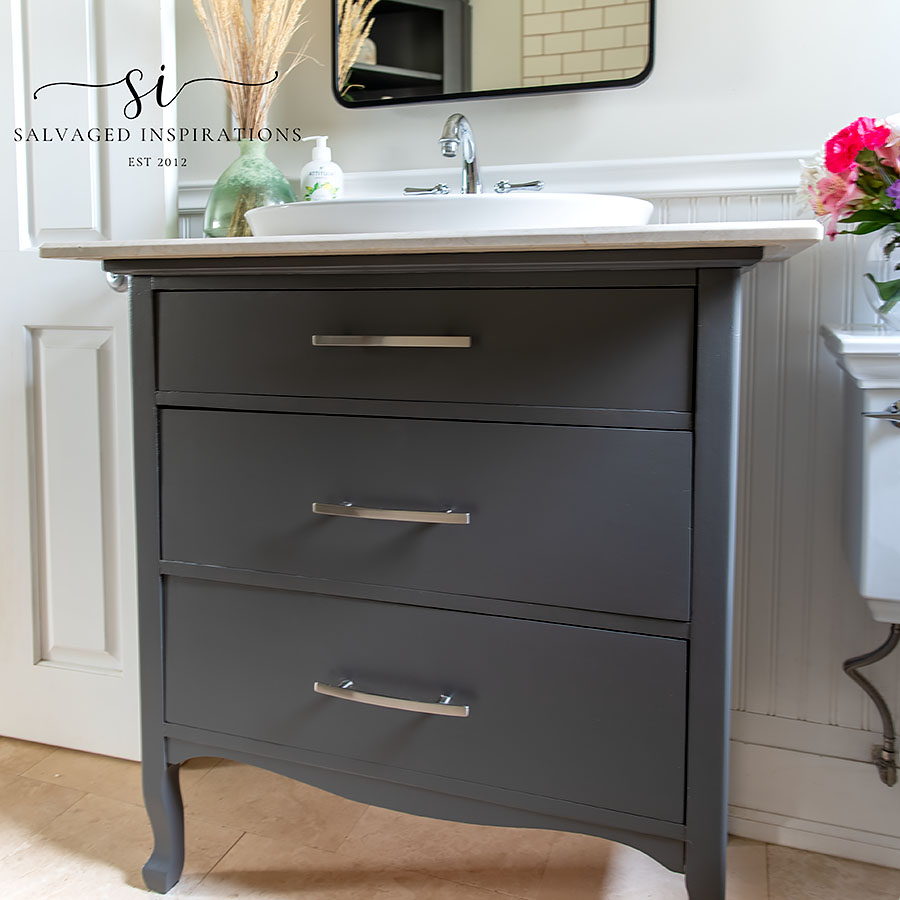
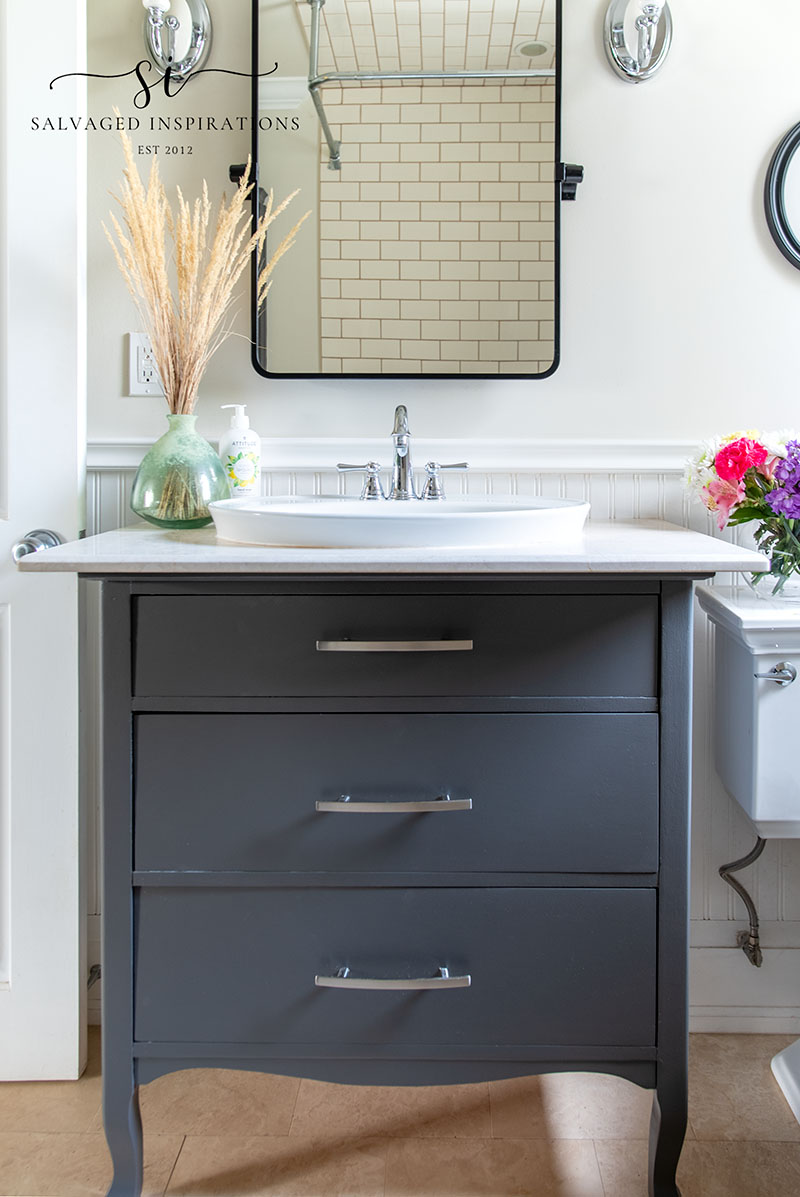
FINISHED LOOK
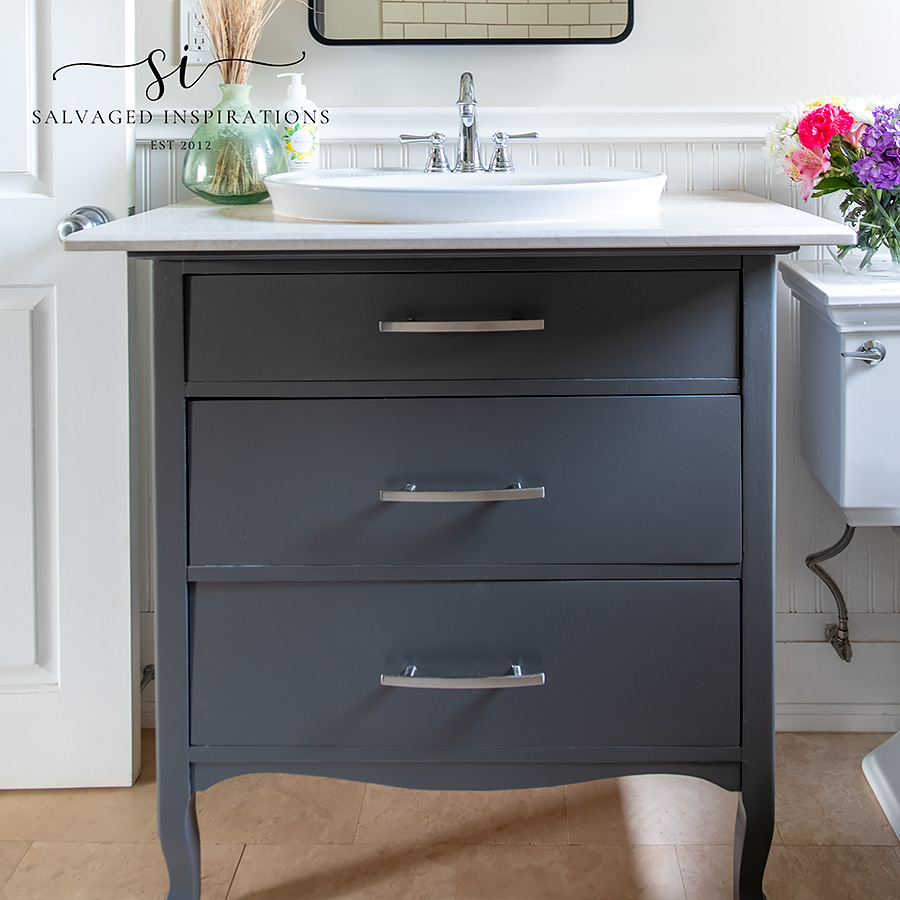
And here’s how this bathroom vanity all came together. Look #3!

What do you think? I added the same hardware handles I used on the corner cabinet so it ties in nicely.
Nick also bought me this new Swivel mirror to go with the painted vanity. This helps the bathroom look more updated! Now I have to figure out my lighting situation. I’m thinking of new sconces or painting the white parts of these ones black… any suggestions?
Feel free to chime in with your decor thoughts. I always appreciate your styling opinions! xo
Here’s another look at my bathroom cabinet before and after. I hope this simple makeover has inspired you and given you some new ideas on how to update your bathroom cabinets.
LET ME KNOW WHAT YOUR FAVORITE BATHROOM PAINT IS AND FEEL FREE TO CHIME IN WITH DECOR IDEAS! ASK ANY QUESTIONS YOU MAY HAVE… I ALWAYS LOVE HEARING FROM YOU. IT MAKES MY DAY! 🙂
Happy furniture painting my friends!
Denise x
RELATED POSTS::
SALVAGED BATHROOM REVEAL
CORNER CABINET WITH BARNWOOD BACKING
PAINTING FRENCH DOORS IN BLACK
PAINTED LACE SECRETARY DESK
SALVAGED SEWING DESK MAKEOVER
PIN AND SHARE!

I love what you’ve done with the corner cabinet and vanity. It has inspired me to paint mine! For the lighting, what about buying a wood-looking sconce to warm things up a little? Or I really like the idea of painting the white black. The contrast would look striking!
Yay! So happy it’s inspired you Nicki, and if you give it a go have fun! I’ll have to check out what types of wood wall lighting are available – I never thought of that!
WOW! That’s beautiful. Now I’m inspired to paint my bathroom cabinet.
Yay! Thanks Lea. If you give it a go have fun! 🙂
It looks fantastic, Denise! The contrast of the dark cabinet base and white really works in this bathroom. Well done. 🙂 Now I need to get my rear in gear and tackle our outdated bathroom cabinets. Thank for the inspiration.
Thanks Do! It was long overdue so I’m happy I tried something different. XOXO
Love the new color, it is almost the same color that is on my rented apartment vanity and I love it! So easy to decorate around! I have found that when painting with a roller, if I go over the area a few times, lifting the pressure a bit each time, I can get a very smooth finish.
That’s exactly what I do when painting with a roller as well – so glad you included this! Depending on the brand of paint I’m using, when I first roll it on I sometimes get tiny air bubbles. Going over it a few times with lighter pressure eliminates them. Thanks Kay! 🙂
This color is the best of the 3 for this space. Thanks for the tutorial!
Thanks Lizzy! I wasn’t sure because my bathroom is SO SMALL but I’m really liking it. Thanks for all your encouragement and support. XOXO
What color is your black paint?
Hi Paige. It’s called Semi-Sweet by Valspar.
Hi Denise.
Definitely go dark on the sconces. The globes could look like marble?
You’re the second vote for faux marble Caye… this just might have to happen. I better start looking for my faux marble resins!
Hi Denise. I’m in L O V E with your bathroom makeover. Your vanity looks completely different and updated. Gorgeous color choice!
Ohh, thanks so much, Monique! XOXO
Your vanity looks so good, Denise!! As much as I love white, I think this final version is my favorite! So sleek! XOXO
Awww, thanks so much my friend! I LOVE white as well but I think I needed a change.🤗
Love, love, love color and you do color so well!!!
Re: the sconces. What if you painted the silver dark and did some type of marbling or faux on the white part? They would really pop on the white wall!!
Marbling or faux on the white part… I never thought of that! Brilliant Cara!!! And I’m planning on painting the wall a ‘brighter’ white as well. This is an antique white so I think to make it a little more modern I’m going to paint it the same white I have in my living room/dining room. I love your idea!
Cara my thoughts exactly on the scones!
Marbling on the globes could possibly hinder the lighting brilliance is my thought. The vanity looks totally stunning n upgraded with the long pulls!
Well done Denise n thx for the paint info!
Dawn
Thanks so much Dawn! XOXO
Nailed it! I love the dark color!!
Yay! Thanks so much Lisa. Not going to lie… switching to such a dark color was a little intimidating. I had to keep reminding myself that it was just paint!