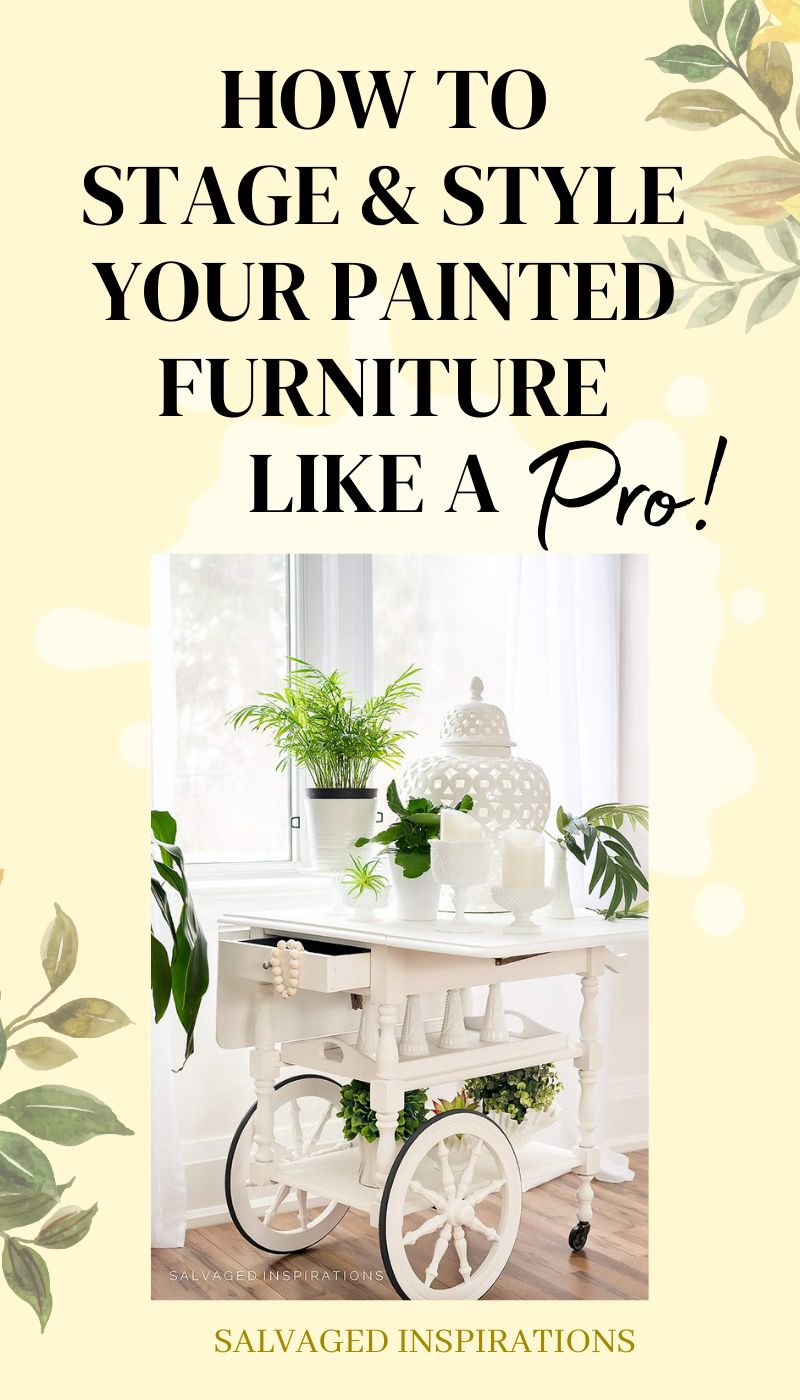
FOLLOW THESE 14 STAGING AND STYLING TIPS TO MAKE YOUR PAINTED FURNITURE MAGAZINE WORTHY AND PROFITABLE!
I’m ALWAYS learning new ways to stage my painted furniture and over the last 12 years, I’ve picked up some valuable styling tips. Today I’m sharing 14 Tips For Staging and Styling Your Painted Furniture like a PRO! These styling tips will help your painted furniture look magazine worthy AND maximize your profits!
Last week I wrote this blurb in my posts…“When I first started painting my furniture, it took me DAYS to style a piece. I’m not exaggerating when I say it was agonizing for me. I couldn’t figure out why other painters’ furniture looked so beautifully styled while mine looked forced and unremarkable. It took me years to get comfortable with styling my pieces.”
Many of you either emailed me or left a comment saying you feel the SAME way!
So if you’re having a challenging time staging and styling your painted furniture I hope this list is helpful. Let’s get right into it starting from the bottom up. I’ve also included links to the original makeovers by clicking the image or links provided.
THIS POST IS SPONSORED/CONTAINS AFFILIATE LINKS TO PRODUCTS I USE. YOU CAN SEE MY FULL DISCLOSURE HERE.
#14. FLOORING
My go-to flooring choice is my painted white boards. I find a white floor showcases painted furniture beautifully. It’s a super clean look and doesn’t distract from the furniture at all. As you can see in the pic below these floorboards are in need of a fresh coat of paint but they still showcase the details of the furniture beautifully.
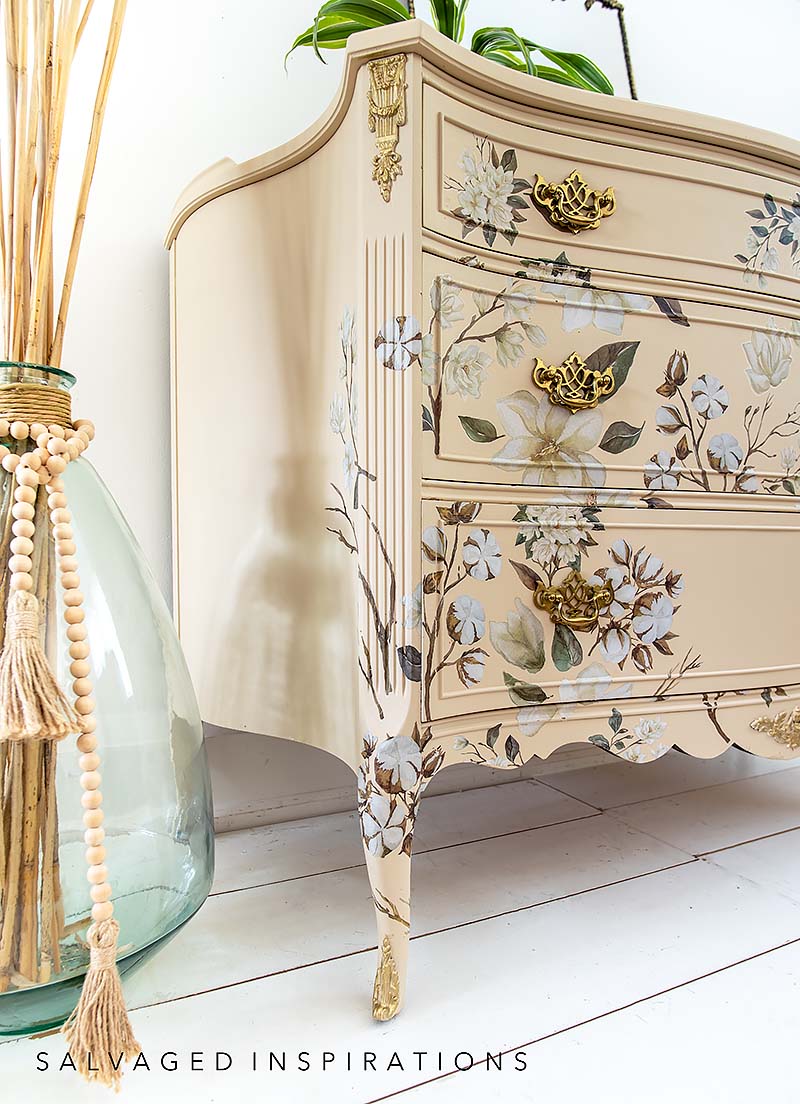
Magnolia Garden Dresser Makeover
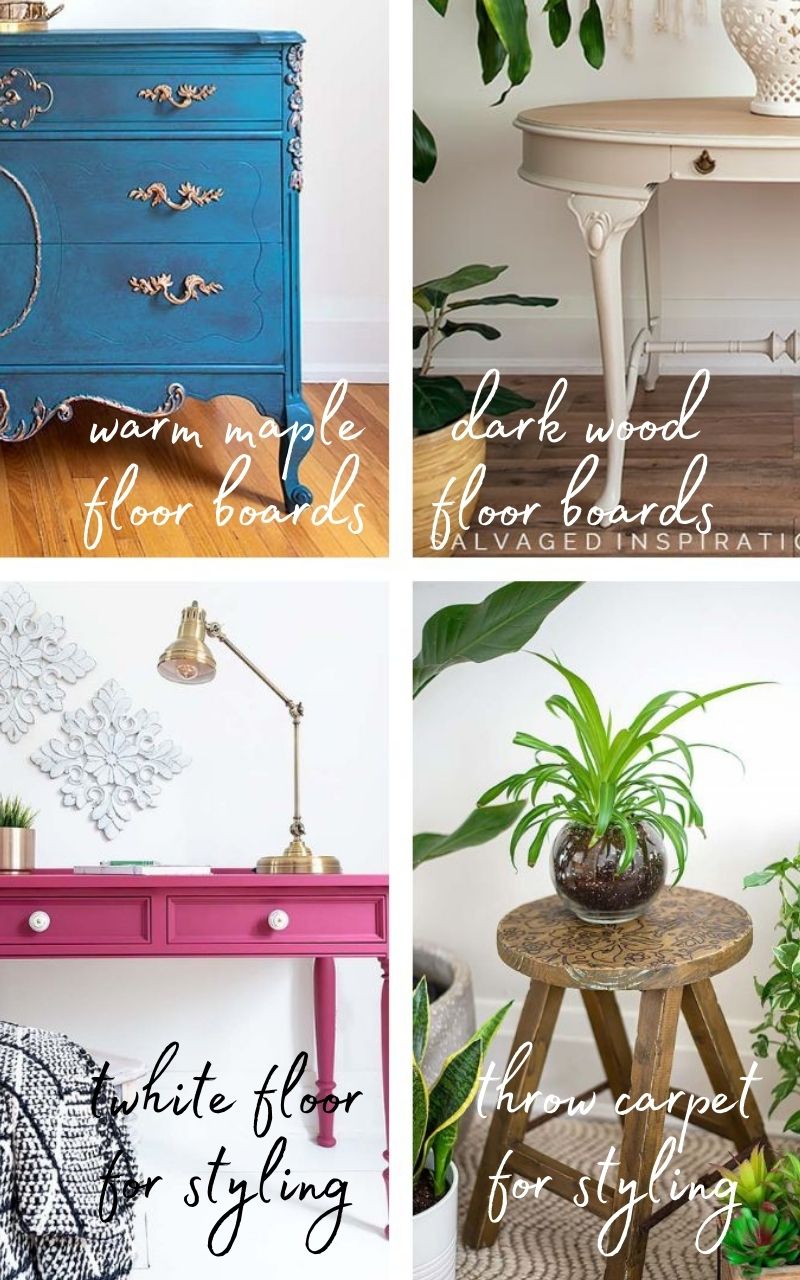
Even though I LOVE the white floor and use it often, I picked up a few boxes of floorboards (from the Restore) and a few throw rugs to keep these on hand as well. For instance, when I have a farmhouse-looking piece of furniture, I use a warmer wood floor. As in the examples below, you can see how the floor color changes up the entire look.
#13. NEUTRAL BACKDROP
When I first started my furniture painting business I tried many different backgrounds for my furniture.

I found a neutral backdrop is the best. Why? Because it draws the focus TO your painted furniture rather than what’s going on behind it.
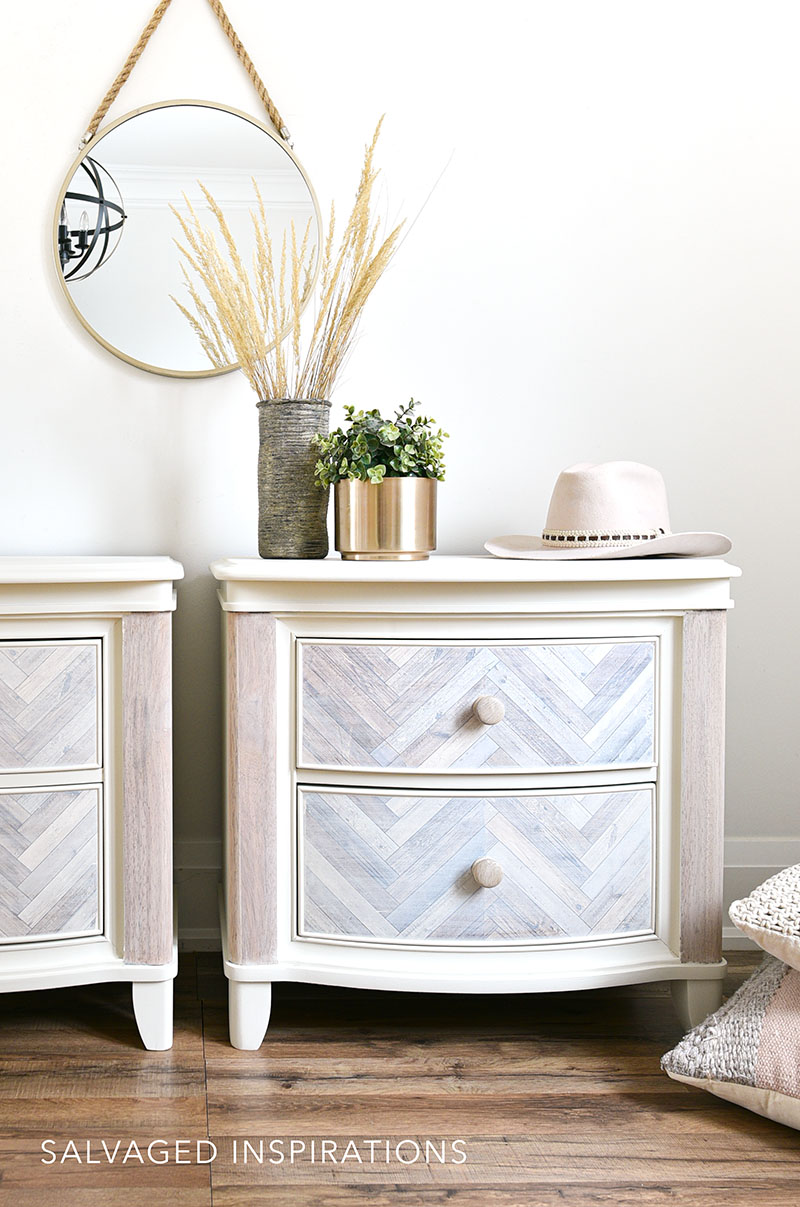
Herringbone Nightstand Makeover
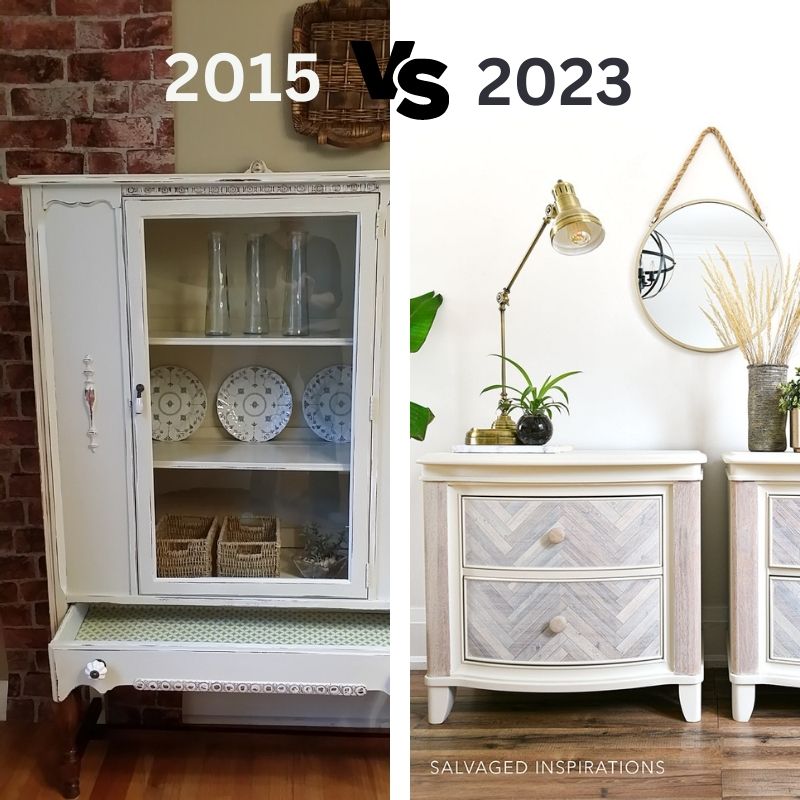
Look at the difference side by side.
#12. VARIED HEIGHTS
When looking at my older images, I noticed that there wasn’t very much variation in prop height. I used my styling props on one level – in the case of this 2013 image on the left they were all on the desk and almost all the same height.
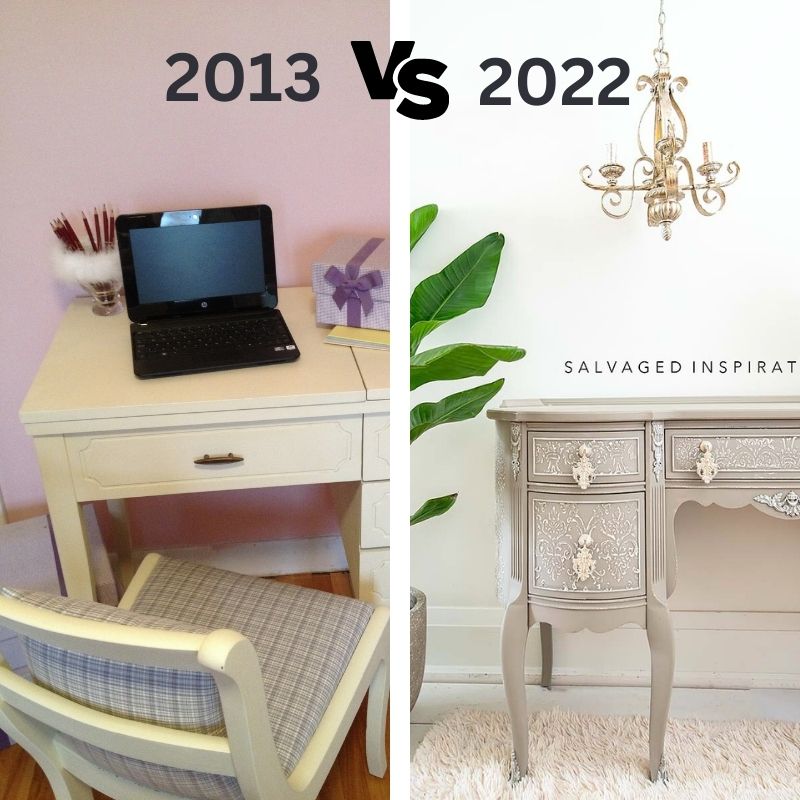
Now when I style, I make sure that I have a variety of heights. In the above example, the plant beside my desk on the right (2022) stands higher than the desk. I’ve added a hook in my ceiling so I can hang hanging chandeliers or hanging plant baskets to add variety. Varying the heights of your styling props will add a ton of visual interest to your painted furniture.
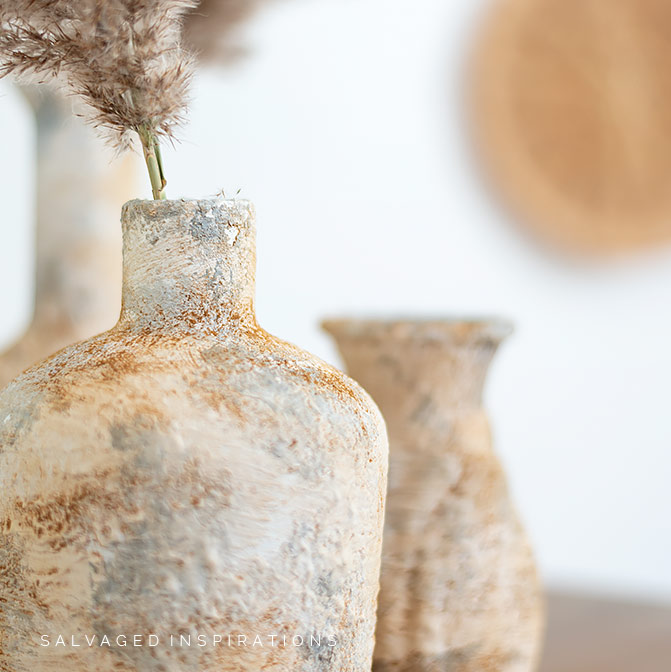
#11. THE RULE OF 3
You may have heard of “The Rule of Three” or “The Rule of Thirds” as it’s often brought up in photography, and decorating. It’s a common way to create balance and harmony in any type of design and this includes staging and styling painted furniture! Using three vases, three wall hangings, three throw pillows or a group of three objects that complement each other is a great way to create a vignette. This is a useful rule to keep in mind when staging and styling your painted furniture for images.
How To Paint Glass w Cinnamon
#10. LIGHTING & CAMERA
I prefer natural light from a window but photography lighting is a great substitute if you shoot in a garage or basement that doesn’t have much natural lighting. The key to playing with light to improve your images is also getting comfortable using your camera equipment… so don’t be afraid to play around! I’m often asked what camera I’m using – it’s this Nikon D750.

Silk Tea Cart
#9. TEXTURES
This tip took me a while to figure out but I always try to include a variety of decorative textures when styling my pieces. For example, as shown below with this Drop Cloth Painted Dresser below, a combo of fabric (the blanket, pillow, and throw rug), metals (hardware and mirror frame), glass (small round vase) wood (natural wood ladder), plastic (black hand and face planter) or mirror (round mirror) gives interest to a piece and image.
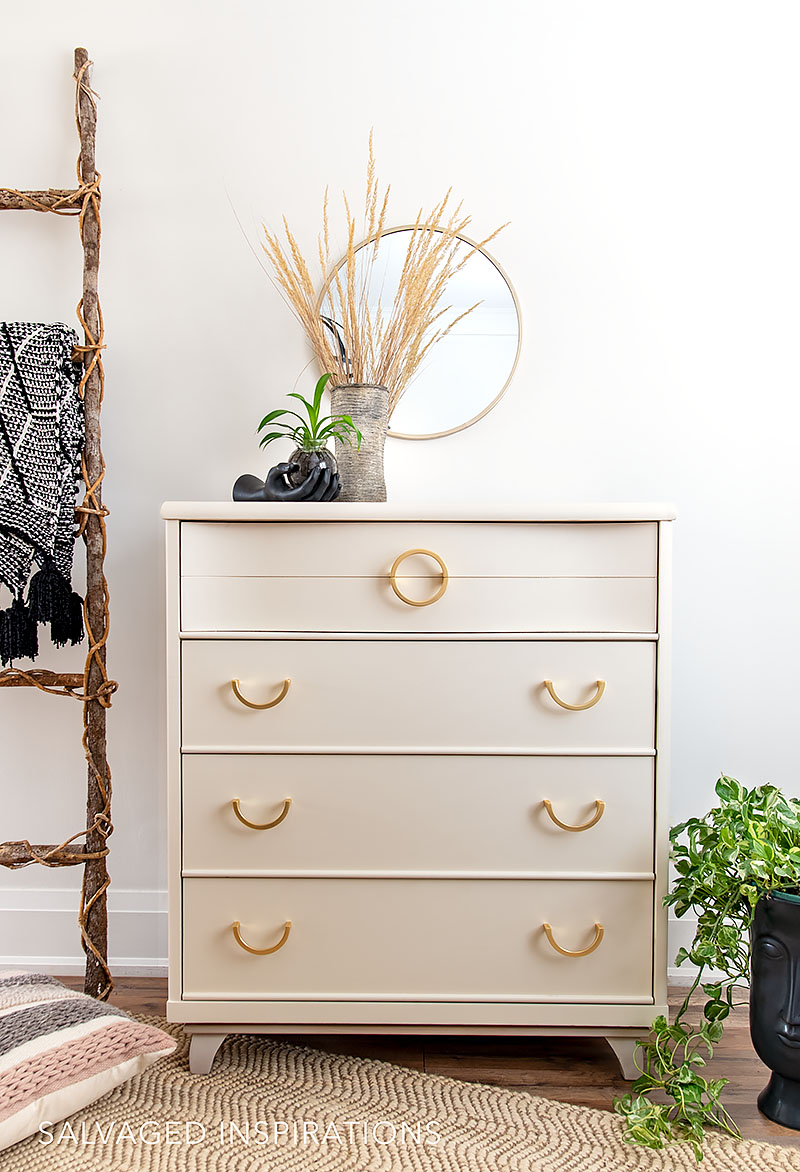
Drop Cloth Painted Dresser
#8. LIVING ELEMENTS
Adding living elements like plants and flowers is visually pleasing and brings some warmth, color, and nature to an image. And if you don’t have a green thumb OR don’t have money for fresh flowers, no problem. When I was bootstrapping my furniture painting business, I would go outside and see what I could find. Check out this Millionaires Daughter Cabinet using RAGWEED on the top! I didn’t even know it was ragweed until one of my readers pointed it out…hehe.
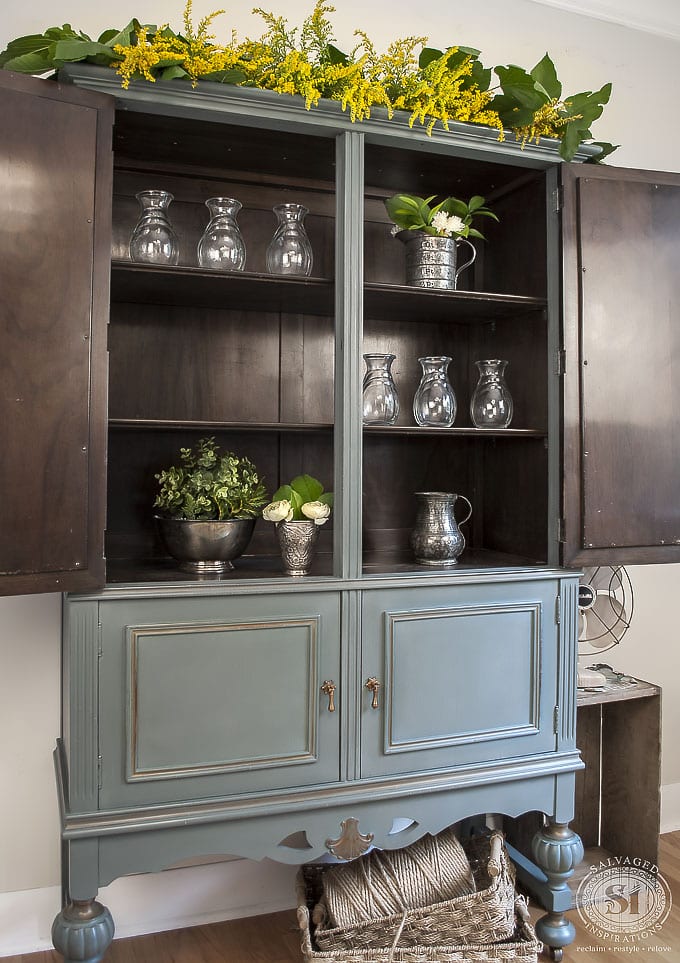
The Millionaires Daughters Cabinet
Here on this Hampton Olive Entry Table, I’m using fall leaves from my backyard! These leaves added gorgeous fall color with a ‘live’ warm element for the Autumn season.
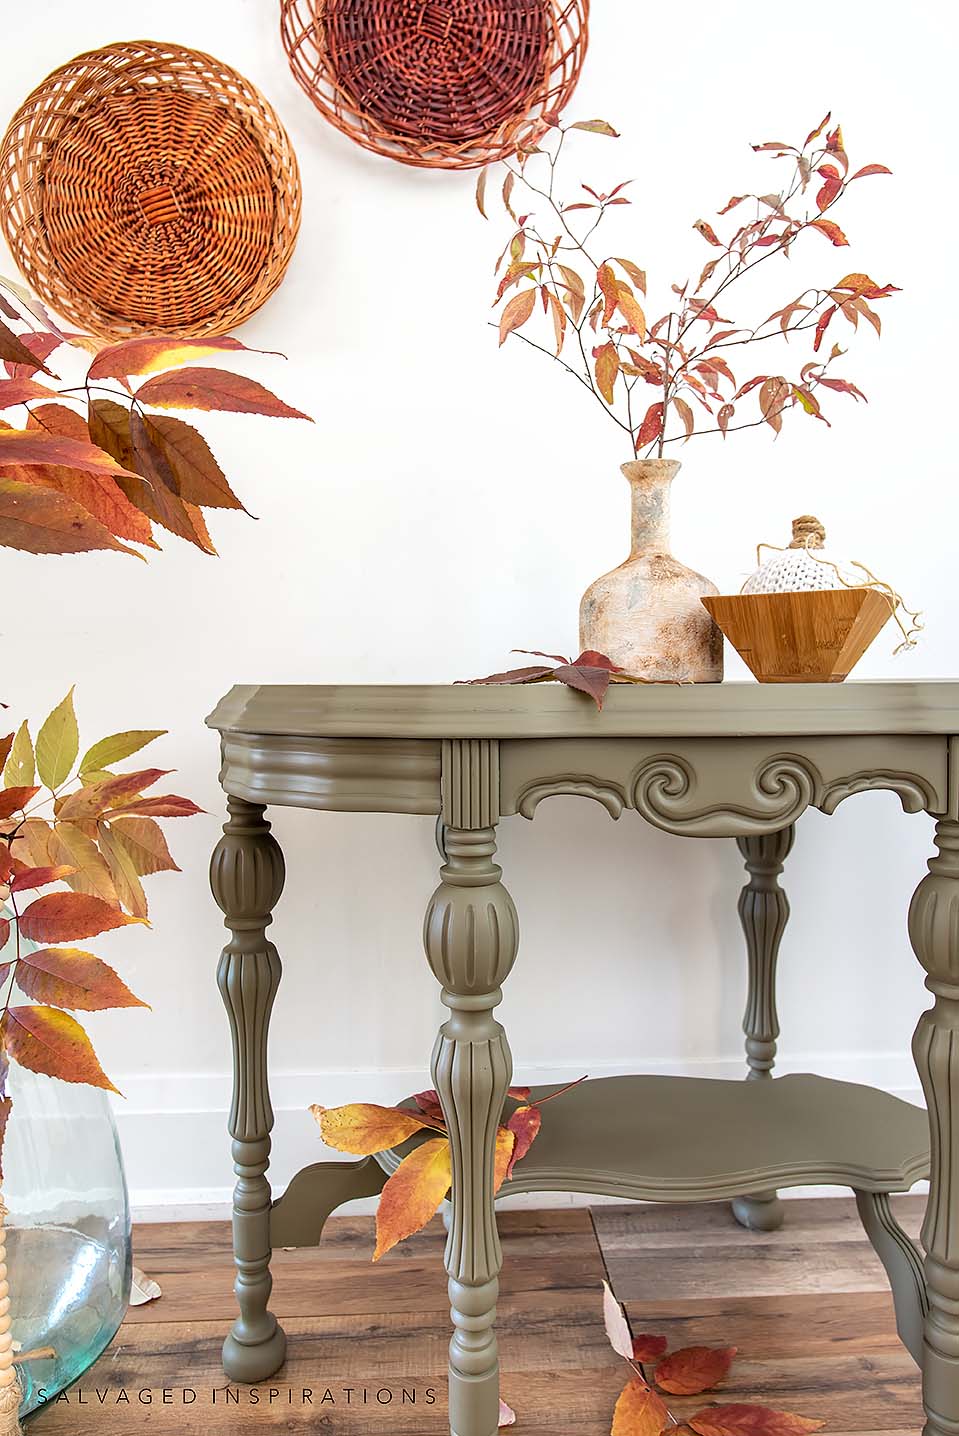
Hampton Olive Entry Table
#7. CONSIDER THE ERA/STYLE
This one is pretty self-explanatory but I always consider the style or era of the furniture. For instance, I wouldn’t style a Mid-Century-Modern (MCM) piece of furniture with say Shabby Chic or Farmhouse style decor. Rather I would look for cleaner-looking styling decor that matches the era of the furniture.
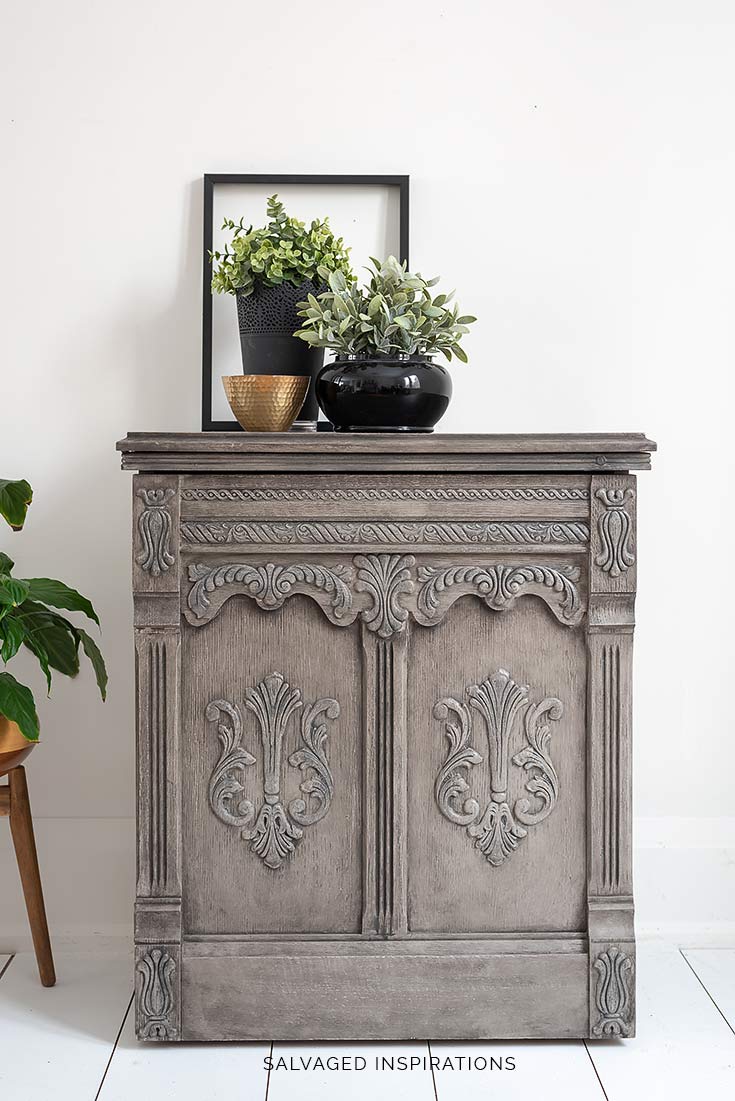
Gray Wash Wood Finish
Both these are styled simply and thoughtfully for the era and lines of the piece.
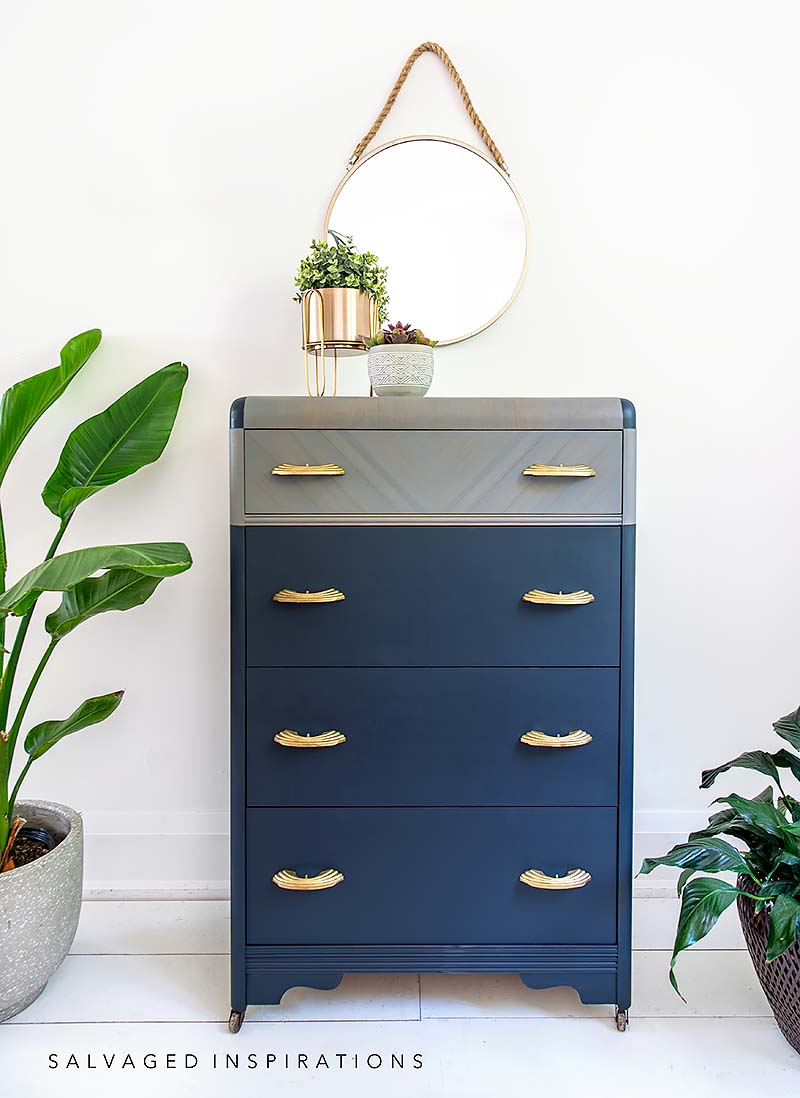
Painted & Stained Waterfall Dresser
#6. FURNITURE IS THE FOCUS
As I’m staging and styling my furniture I’m always making sure the PAINTED FURNITURE is the focal point! If I add something to the styling that takes the attention away from my piece, I’ll remove it and try something else. All your ‘props’ should be to enhance the look of your furniture and draw the eye in, not detract from it and draw the eye away.
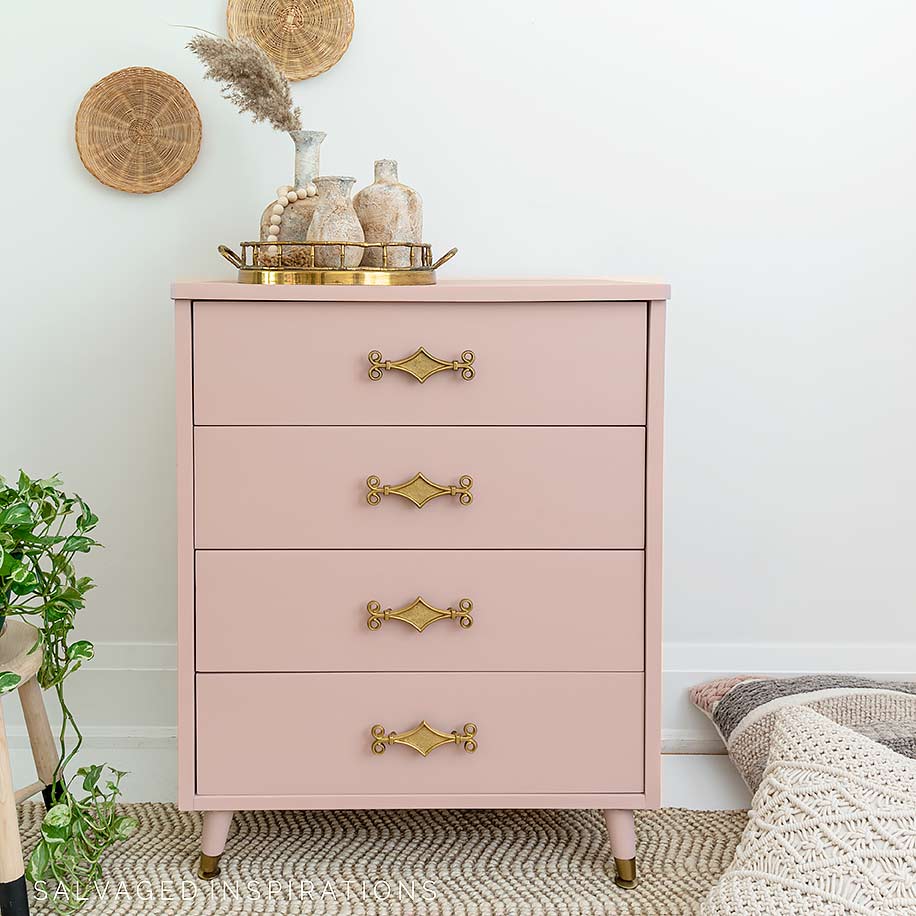
Morning Sunrise Painted Dresser
#5. KEEP IT SIMPLE
After all these years, I still keep my staging and styling on the simple side. A cluttered image can detract while clean and clutter-free styling allows the furniture to shine. Even when I’m taking detail shots, I try to keep them clutter-free as in the dresser drawer below.
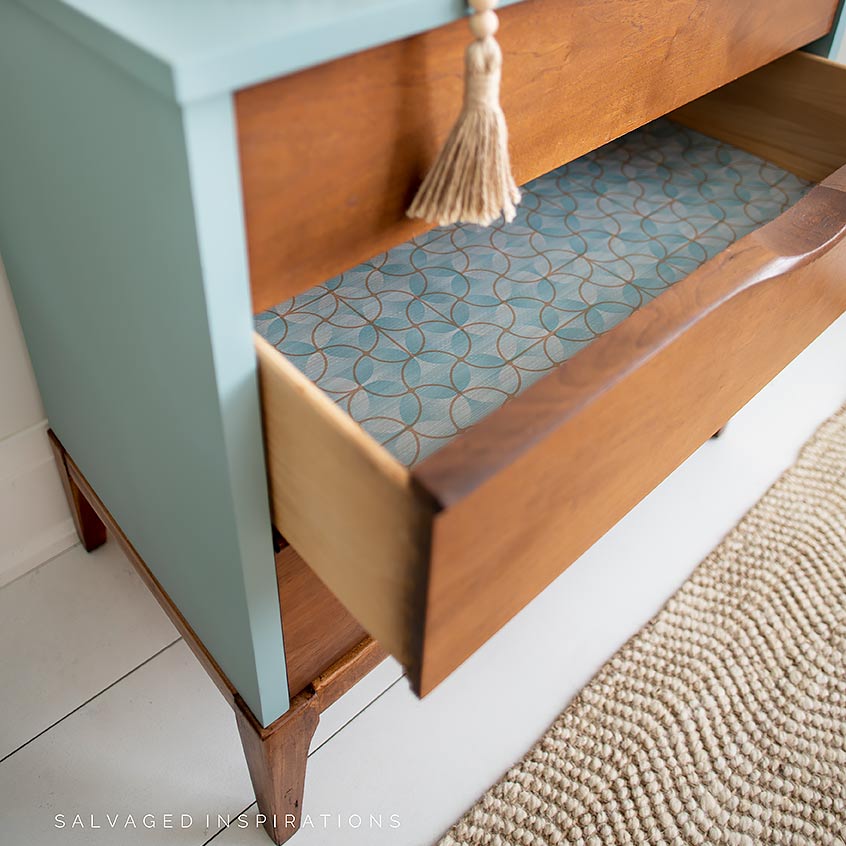
Painted & Stained MCM Dresser
#4. STAGING PROPS
Over the years I’ve been having fun creating props to use for the styling of my painted furniture. Props I use over and over again include books, plants, vases, chairs, pillows, blankets, and lighting… things you would find a piece of furniture in your home styled with! The key is creating a cohesive look by thinking of textures, color, and the arrangement of these items and how they work with the furniture – not against it. Below are a few DIY prop projects I’ve created. You can see more of them here, here, and here!

- Woodubend Gold Mirror
- DIY Rope Mirror
- DIY Doll Head Planters
- How To Paint Glass Vases
- Spring Book Bundles
#3. PLAY WITH ANGLES
When photographing your styled-painted furniture, try playing around with different angles. I NEVER shoot my furniture standing up. Well, let me rephrase… I use to shoot my furniture standing up as seen below. But take a look – it’s not a very flattering angle for the furniture.
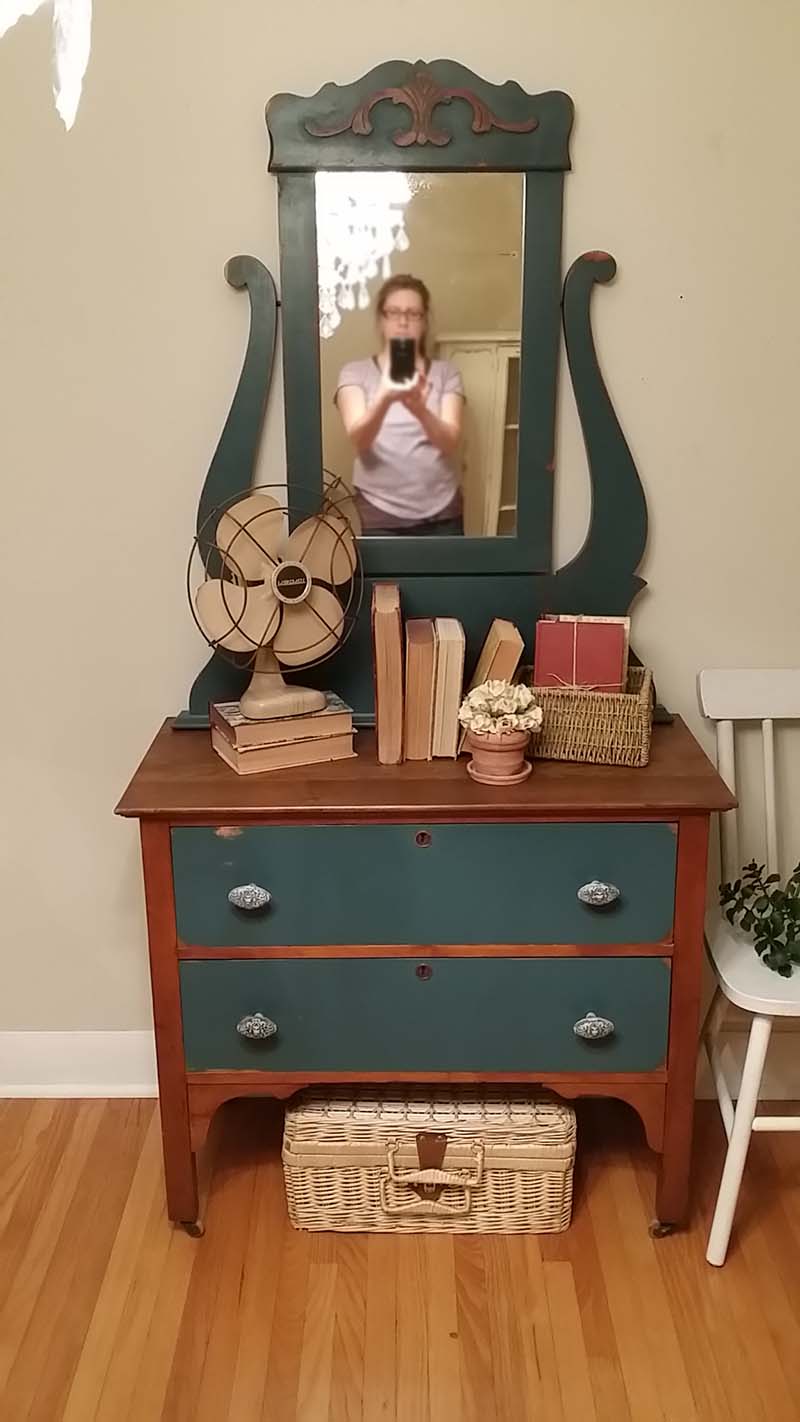
Compared to this image below. For this image, my camera was waist-high. MUCH better, right!?
How To Paint OVER High Gloss Furniture
My camera and tripod are always at waist height to get a good shot. Sometimes I’m on the floor taking detailed shots of the leg or hardware details, or the insides of the drawers. Think about what a prospective buyer would want to see a close-up of, ie inside of drawers, close-up of hardware or wood details, and don’t be afraid to get down into the ‘weeds’ to make the shot!
#2. EDITING
Finally, don’t be afraid to edit your photos with some sort of photo editing software. Tweaking the brightness, contrast, or color balance can make all the difference. Or cropping out any distracting items can make or break a styled image. Just be sure to not OVER EDIT as this can make them look altered, fake, and unappealing.
#1. HAVE FUN
Lastly, in my experience of painting and selling furniture over the last 12 years, HAVE FUN! Don’t be afraid to showcase your personality using items and props that you love! For the most part, I still prefer the ‘less is more styling’ to keep the piece of furniture as the main focal point. But finding your own style is an important part of selling your furniture. If you learn how to let your “style” showcase your art, it will make a huge difference in how fast your piece sells!
**BONUS TIP | AI FURNITURE STYLING
Now that AI is available, photo editing and styling couldn’t be easier. I’ve been playing around with AI in Photoshop and Canva, and WOW, it can create entire roomscapes around your painted furniture and add in anything you can imagine with a simple prompt. If you joined me for last week’s Scrap Wood Table Makeover, here’s the original ‘real’ styled image VS AI-generated image. I can’t wait to hear your thoughts on which pic you prefer and how you’re feeling about using AI for your project images!


I hope you’ve found these tips helpful! If you’d like an interactive page for staging and styling, my friend Roz from New Old Finds has this Styling & Staging Your Furniture Facebook Page! (Request to join)
I’ll be back this Thursday with my Furniture Fixer Upper Crew and a new fixer-upper makeover!
DO YOU HAVE ANY TIPS ON HOW TO STAGE AND STYLE PAINTED FURNITURE?… I’D LOVE TO HEAR! OR FEEL FREE TO ASK ANY QUESTIONS YOU MAY HAVE… I ALWAYS LOVE HEARING FROM YOU. IT MAKES MY DAY! 🙂
Happy furniture painting, friends!
Denise x
RELATED POSTS:
HOW TO PRICE YOUR PAINTED FURNITURE
22 SALVAGED FURNITURE FLIPPING IDEAS
FURNITURE STORIES – WHERE ARE THEY NOW?
HOW TO SAND SPINDLES EASILY
SCRAP WOOD DIY GARDEN TABLE
PIN AND SHARE!

How kind of you to share these tips. I’m always styling in my head. Can’t help myself! Thanks so much for the pictures. I no longer paint furniture, but seeing the quality of your work is inspirational.
Very sweet of you, thanks Deborah! And ya, for some people like yourself, the styling is like second nature. I have a few colleagues who enjoy the styling more than the actual painting… as they’re painting they are thinking of how they are going to style it! I wish I was more like that hehe. 😉
Thank you for all the great tips. And, just fyi, it wasn’t ragweed, which is an inconspicuous off-white flower, but goldenrod (which I absolutely love). Some people confuse them for some reason. Have a great day!
ahhhh no waaay…GOLDENROD!😃 That’s too funny! I really like the looks of it too. Thanks so much Amy! XOXO
As usual, Denise, you knocked it out of the park! Awesome blog post!
Oh thanks so much, Libby! This means a lot! Hugs
Oh my gosh, Denise! What great information you’ve shared with us/me!!! I would never have thought to get boxes of various floorings to use for shoots; and now I’ll have to keep watch for throw rugs too. You did me a world of service, and I THANK YOU SO MUCH. If we could meet now, I’d give you a huge hug.
Awww, I’m soooo glad Caye! Thanks for encouraging me to write this post. I really appreciate you chiming in as it helped ‘refresh’ my memory as well. I’m always learning and it’s a lot more fun when I get to do it with all of you!! Hugs to you! XOXO
Hi Denise !!!!
You’re soooooooo generous sharing all these tips …!!!
This week and last week …
I enjoy going through your newsletter every week !
You’re an angel, please keep doing !!!!
Again, greetings from Malaga ! (Spain)
Malaga Spain!!! I would LOVE to visit one day as I’ve heard it’s absolutely gorgeous with so much history and gorgeous architecture! I’m so happy you’re enjoying the weekly newsletter and thanks so much for being part of the #sifamily! Hugs from Toronto! 🤗
Great idea coming to visit !!!
If you make up your mind, send a note, I’ll be glad to be your guide !!😃😃😃
👍👍 Great tips Denise!
Like you when I first started staging my furniture I struggled a lot 🤦🏻♀️ It would take me days and 100’s of shots before I would finally decided on something that would “do”.
Even though I’m currently not refinishing furniture I always enjoy your posts and tutorials.
Keep up the good work 💕
Thanks for sharing this Annie! I was the same…I struggled bad. I don’t know about you but it felt like it took me the same amount of hours to stage and style a piece as it did to paint and refinish it.🤦♀️ So I really hope this post helps a few people.
Great tips, Denise! Your photos are always amazing! I too look back at old photos and cringe lol. XOXO
Right!?!😂 Thanks my friend! XOXO
Your last 2 posts have been very helpful. Thanks for sharing with us Denise!
I’m so glad! Thanks Nicki!💕
Thank you so much for these last two very helpful posts! I will save them both and even though I have been in the biz for years you shared some great tips!
My pleasure and thanks for chiming in Laura! I’m always learning something new in this business as well… that’s what keeps it fun and interesting. 😉
Hi Denise. These are great tips, not only for staging furniture but also for styling one’s home. Thanks for the tips.
Thanks so much, Monique! XOXO
These are all great tips-thank you for sharing! One question-what type of paper is used for the book bundles?
These are all great tips-thank you for sharing! One question-what type of paper is used for the book bundlesa?
My friend Carol made these book bundles. I’m not sure of the specific brand/designs she used but I believe she used rice paper. 🙂