
Hi, sweet #sifamily! Who doesn’t LOVE receiving a warm thoughtful gift? A gift from the heart. A gift that someone took the time to handcraft with you in mind? I had one of these generous gifts delivered to me yesterday. My girlfriend out in BC sent me a handcrafted Sun Catcher that warmed my heart and put a smile on my face that lasted all day.
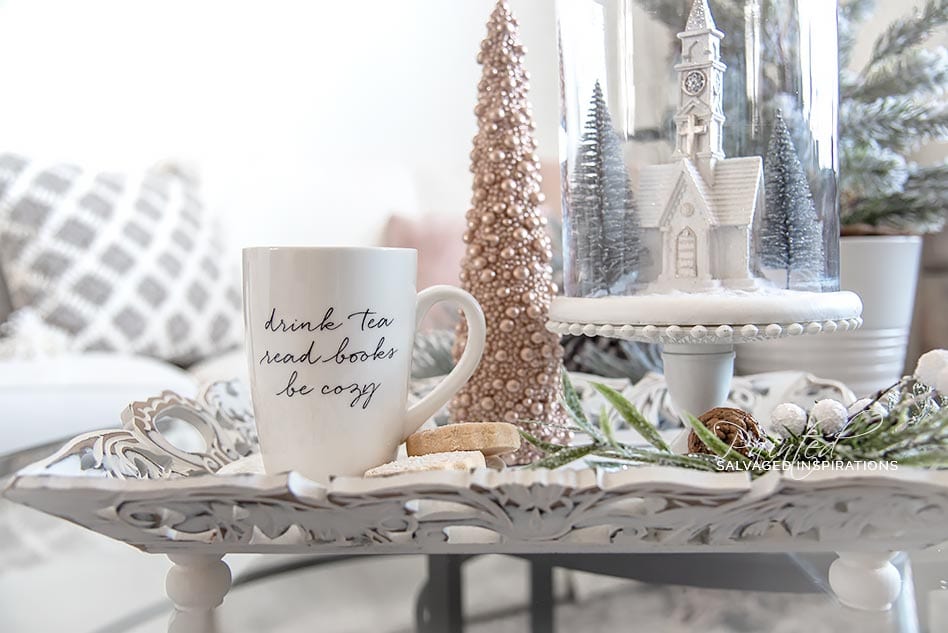
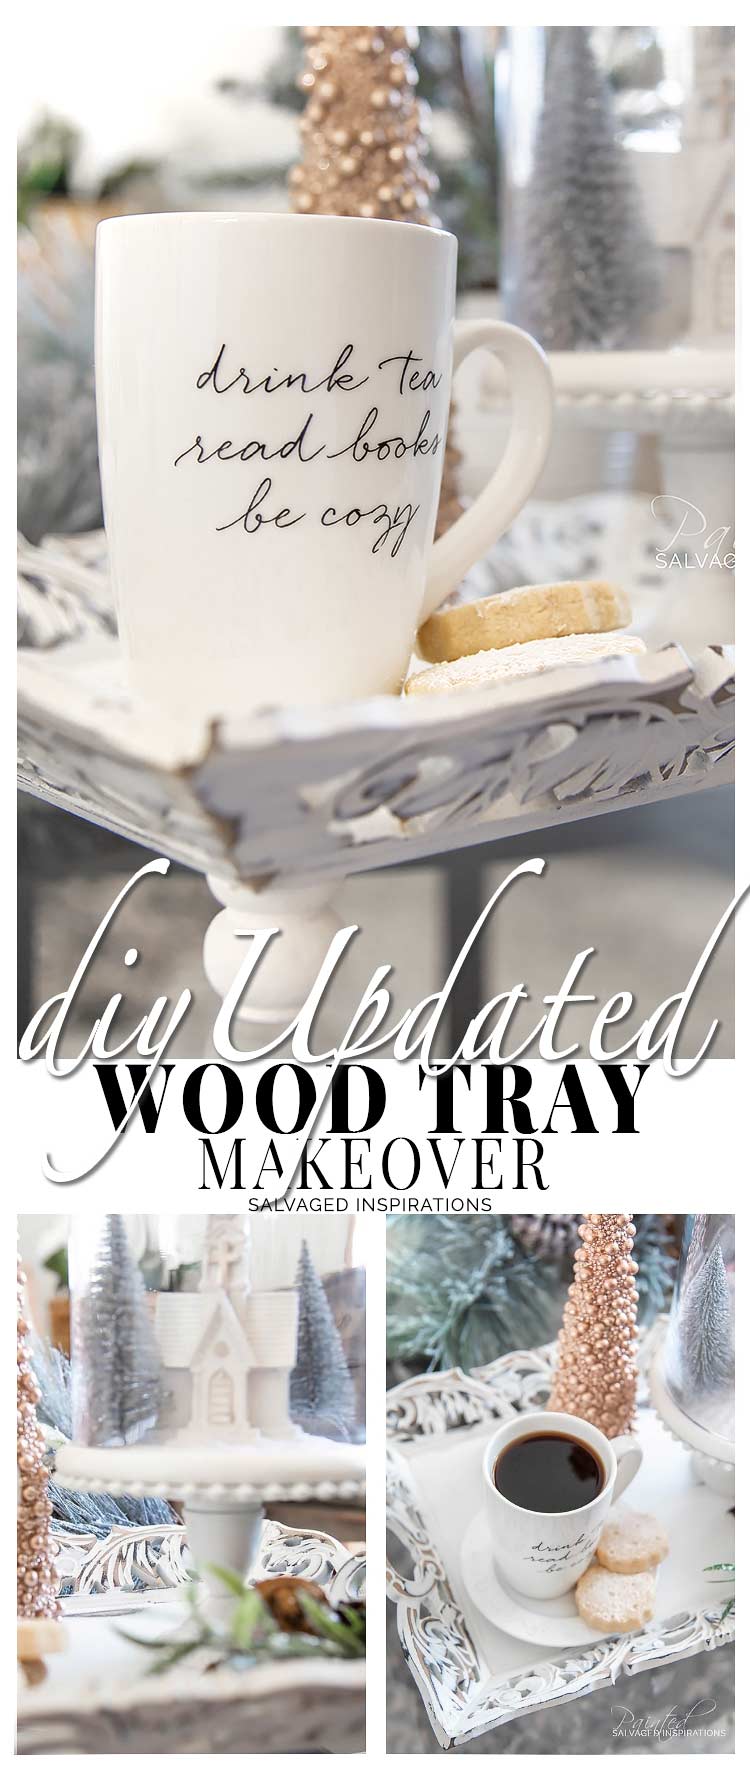
A furniture makeover may be a little large to gift (or maybe not!) so here’s a little makeover I salvaged last Christmas. {repost} I made it for my own living room but it makes for an amazing last-minute gift idea!
This DIY wood tray makeover is SO quick and easy… and stink’n cute, I hope it inspires you to take a second look at what YOU have around your home. Sometimes, all an old boring piece needs is a ridiculously simple tweak to make it fun again!
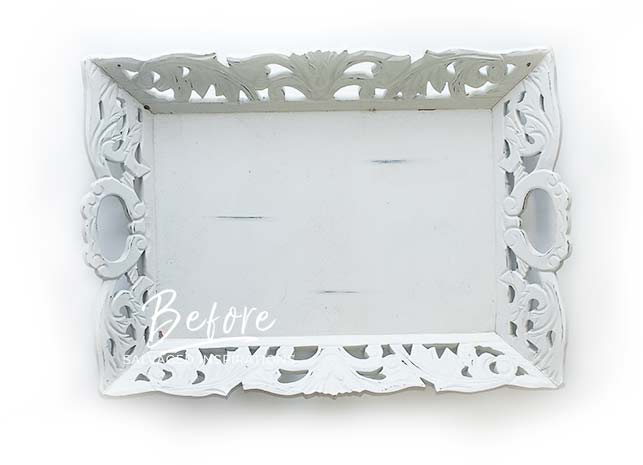
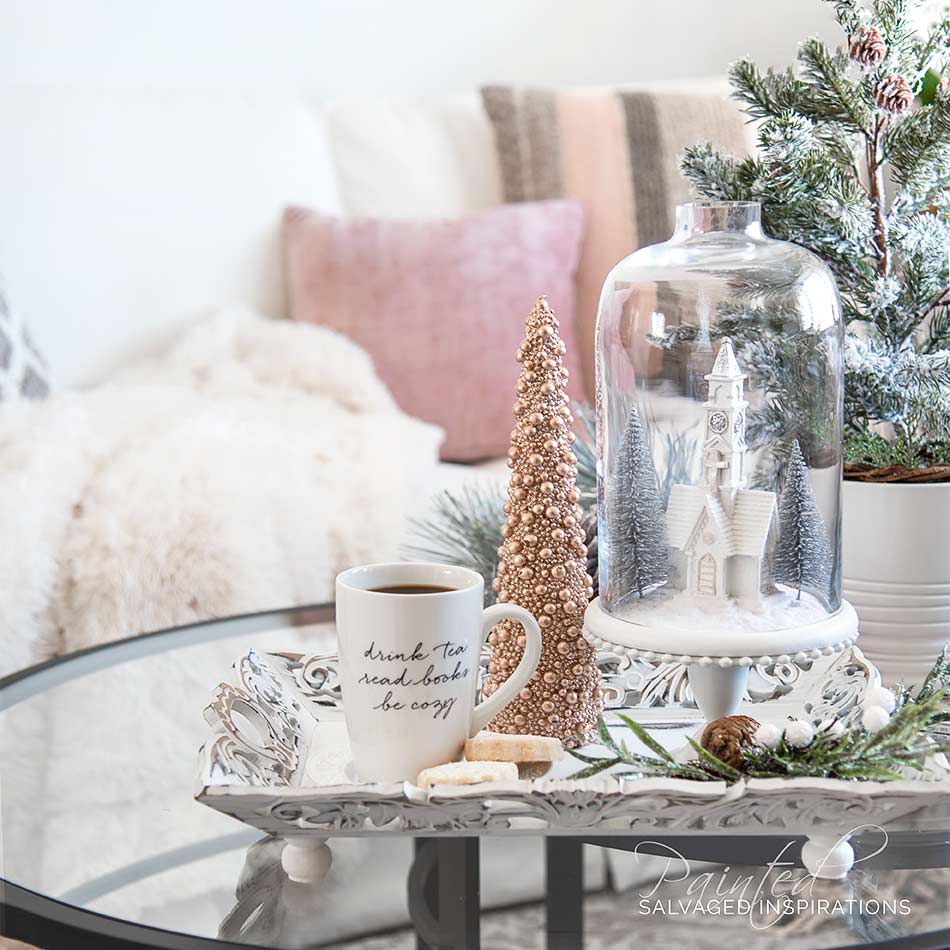
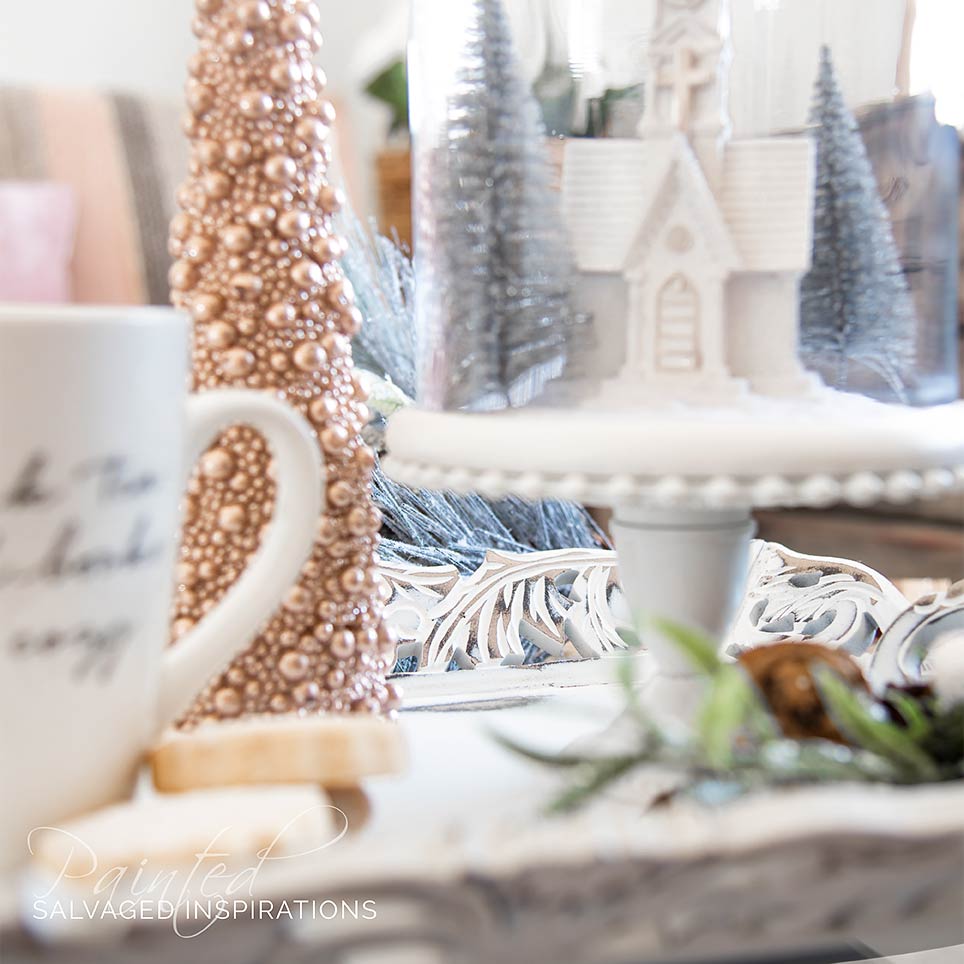
Here’s what I started with. A white-painted HomeSense tray that I bought 10+ years ago. There was nothing wrong with it other than it was collecting dust in my basement because I was tired of looking at it.
I did a little sanding and added an old chair spindle (like I did on this DIY riser) to the mix and WOW… look at her now!

THIS POST CONTAINS AFFILIATE LINKS TO PRODUCTS I USE. YOU CAN SEE MY FULL DISCLOSURE HERE.
SOURCE LIST::
-
- Old Painted Tray – SALVAGED
- Old Chair Spindle – SALVAGED
- Carpenter’s Wood Glue
- Dewalt Sander
- Small Artist Paint Brush
- Cotton Chalk Mineral Paint
- Clear Wax
DIY WOOD TRAY MAKEOVER::
Do you remember the Indian Mirror I bought from HomeSense and used in my bathroom makeover? That mirror was my inspiration for this tray. And it’s funny. I’m usually all about painting to create a new look, but in the case of this wood tray makeover, it was taking OFF some of the paint that created this amazing look!
Step #1:: Clean
I gave it a good wipe down with a sponge and warm water.
Step #2:: Sand
I used this Dewalt sander which makes it effortless to sand. It took me all of 3 minutes [maybe not even] to sand the high spots off this tray. Here you can see the left side is sanded and the right is not. Look at the difference in all that detail!
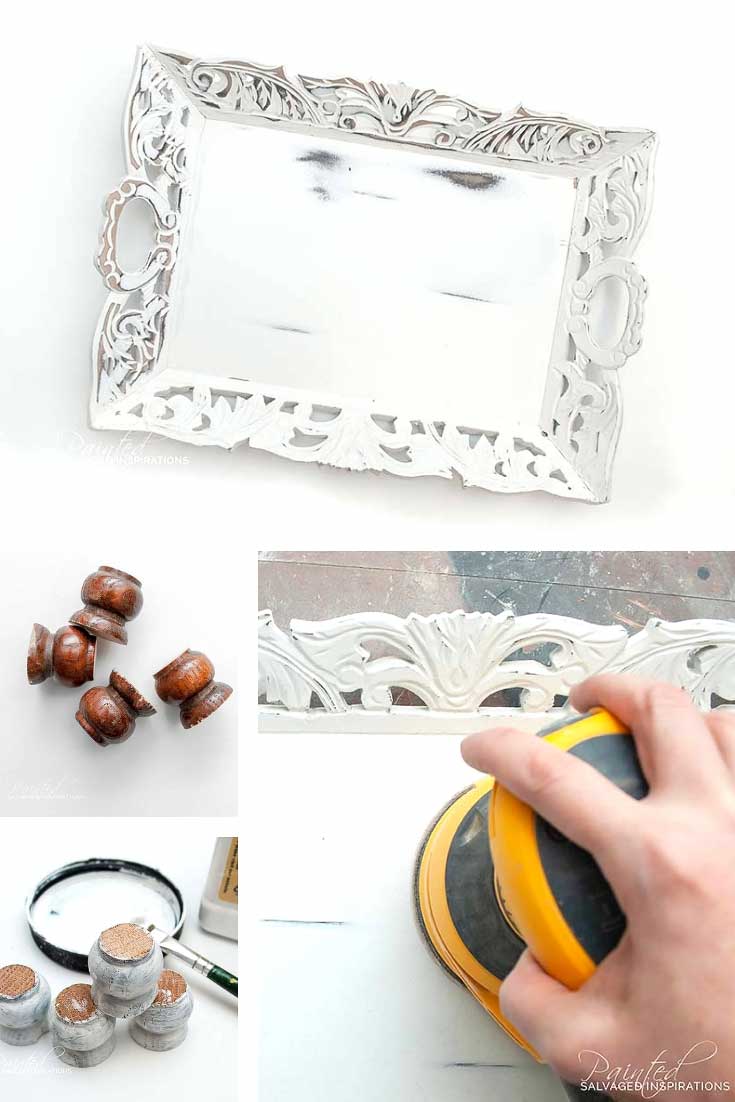
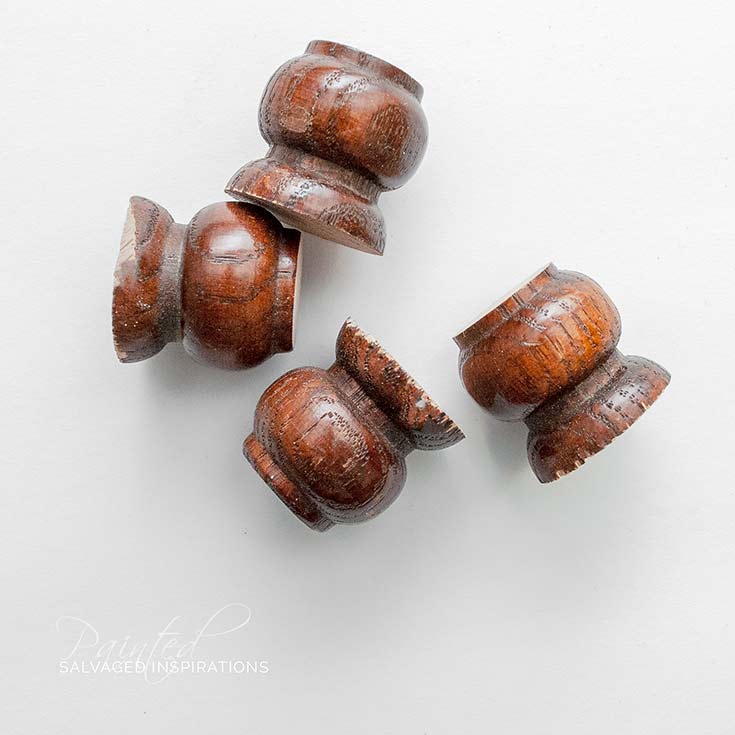
Step #3:: Cut Spindles into Bunt Feet
I already had the little bunt feet prepared for this tray because I cut up this entire chair spindle when making these wood tray risers.
Step #4:: Paint Feet
I painted the feet in this clean white to match the existing white paint on the tray.
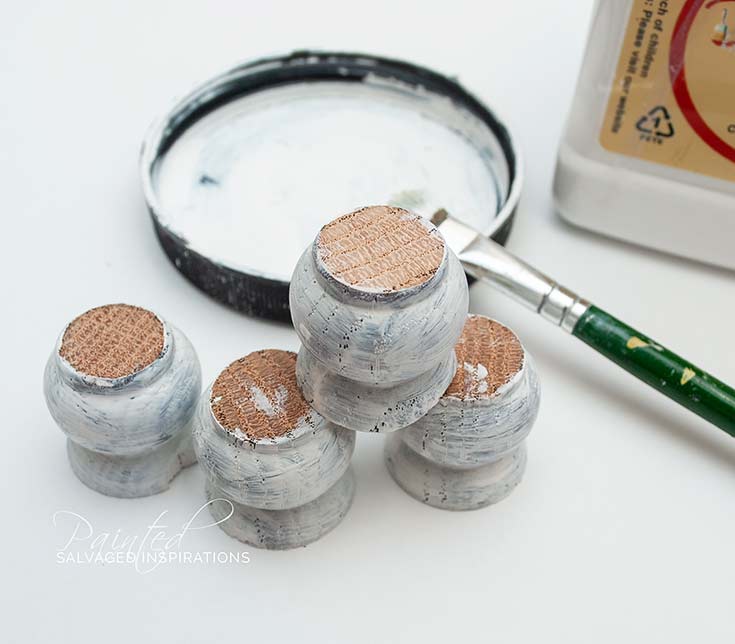
Step #5:: Glue Feet On
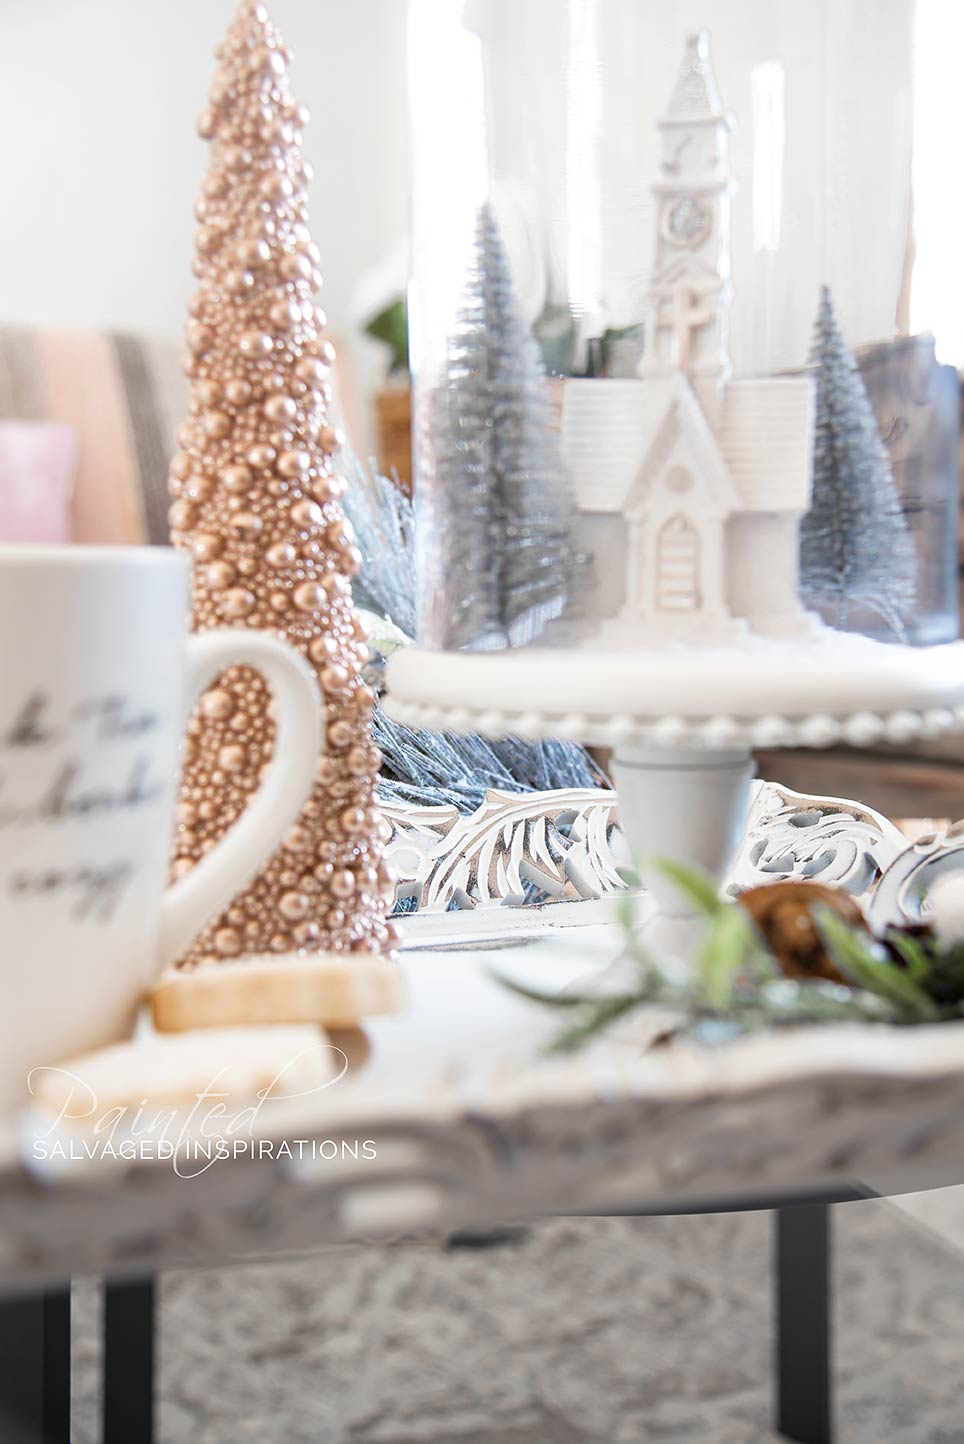
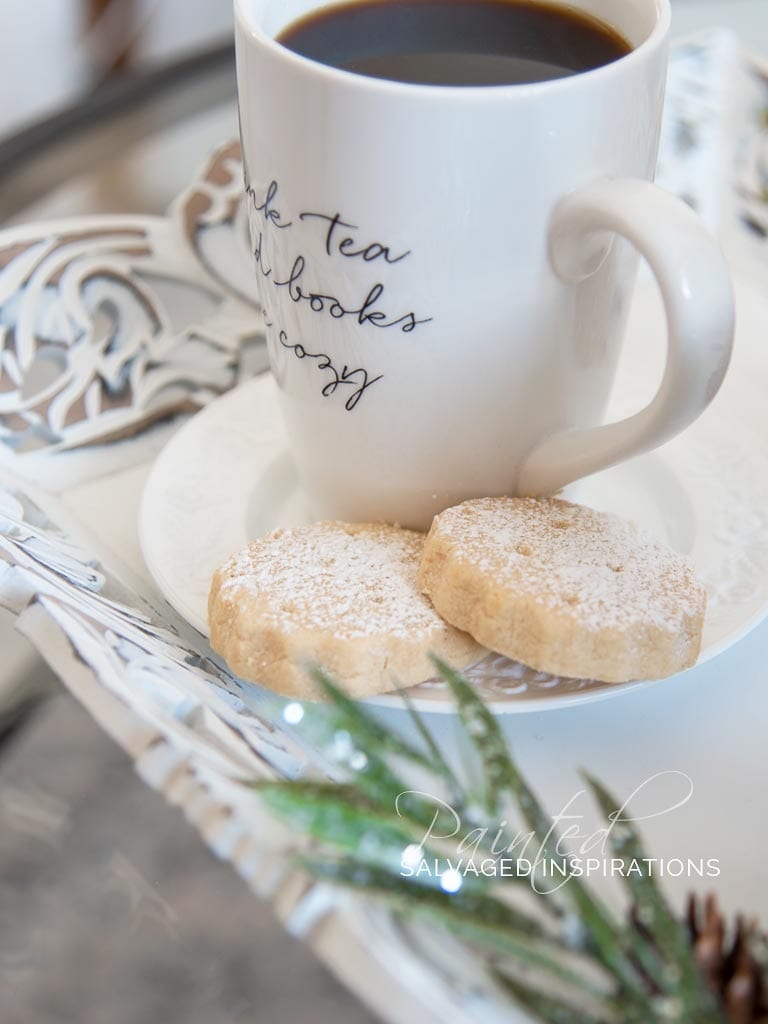
After I added 3 coats of white paint and let the feet dry, and then glued them onto the bottom corners of the tray with this wood glue. What do you think?

The feet really add a nice touch, don’t they!?
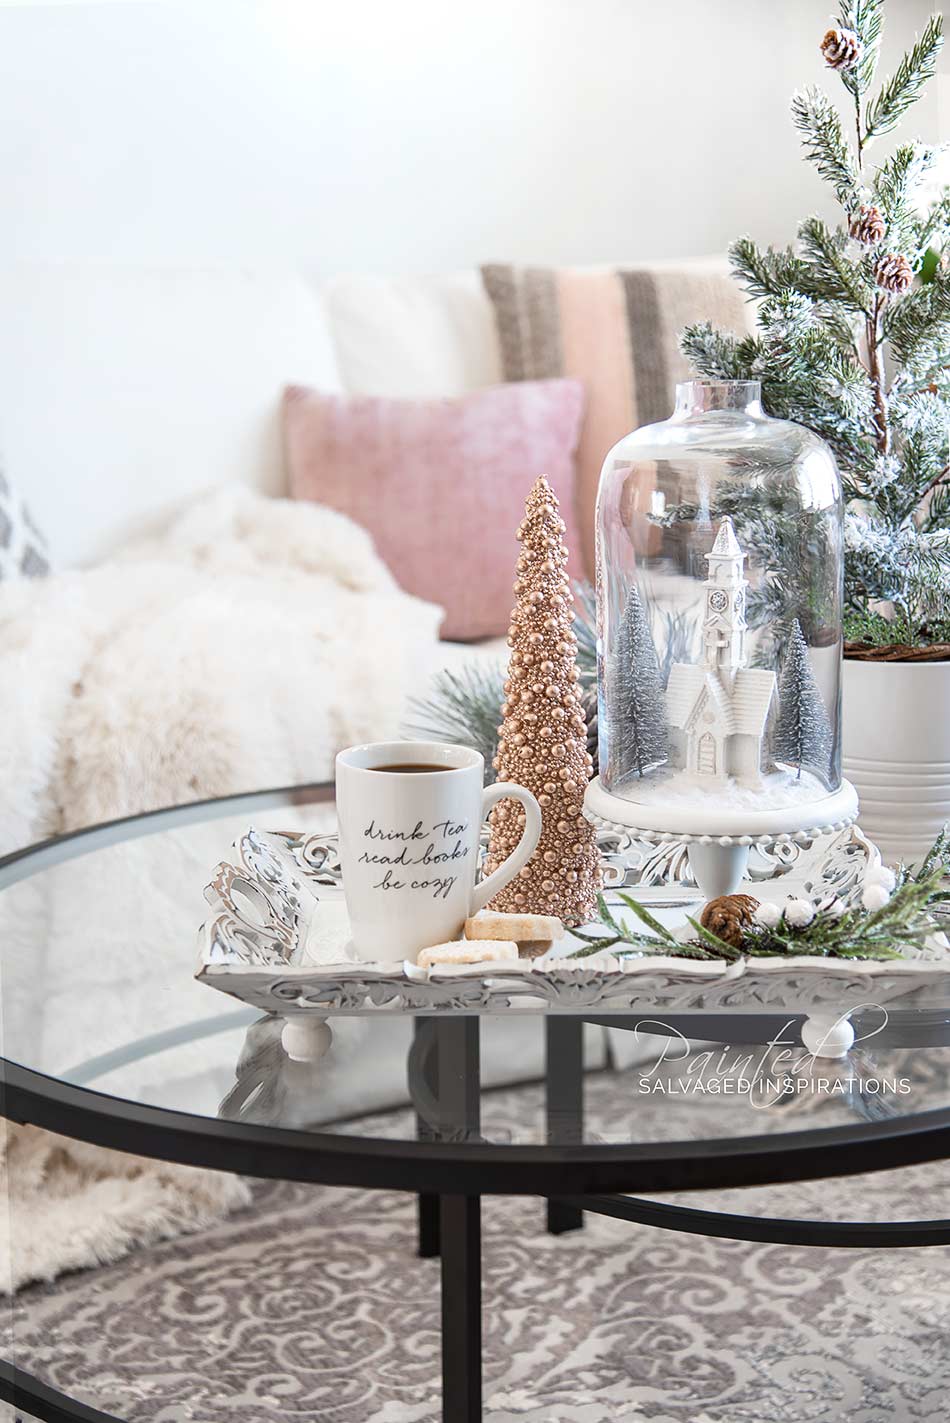
This is a super cute last-minute gift idea. Because who couldn’t use an extra tray, right!

I’ll be back tomorrow with a desk turned nightstands. I can’t wait to share!
Happy furniture painting my friends! 🙂
Denise x

Always great and so stricken cute. I recently painted an old silver plated tray and candy dish. I love it in my quest room on top of the bed. Keep-em coming Denise. Merry Christmas!.
It’s amazing what a little paint can do, right!?! Merry Christmas Roseann! xo
Hi Denise. I always love seeing how you turn old into new again. The sanding really brings out the gorgeous details of the tray. And the little feet are pure genius. Beautiful project:)
Thanks so much, Monique! XOXO
It’s really cute and can be used in a number of rooms. It was also nice to see a project from the group of bloggers I follow that didn’t have to be used for xmas. Some of us don’t celebrate that holiday. Good work!
Thanks Lizzy! And yes, this looks amazing ALL year round in ANY room! x
Love it! I have some broken chairs and can use them for feet:) Your ideas never cease to amaze me and so easy! Good indoor projects are always welcome with the nasty weather we have going on down here is SW Georgia. Merry Merry Holidays!
Thanks Cecilia!! 🙂 Any broken spindle works amazing for little feet! Does SW Georgia get snow or cold weather? My sister and I visited Savannah GA during a heatwave years ago and it was one of the hottest trips ever. We were sweat’n buckets…lol! 😉
Hey Denise,
Just love your ideas!! I LOVE to update old stuff!!! My little store is Junk to Treasure! Love the tray! Need to make a thrift store run and see if I can find me one!!!
Love the Blog!!
Susan
Hi Susan and thank you so much! I see dated trays at the thrift stores all the time. Regardless of shape or color, restyled they look amazing! Love your store name btw. 🙂
Very nice, love the feet. I checked out your bathroom, it turned out so well. I also have small house, built in 1957. Your bathroom makeover has given me some great ideas..
Cynthia
Thank you. And yes, bathrooms are cozy in older homes… and ensuite bathrooms weren’t even a thing! I’m happy mine gave you a few ideas! Have a super day Cynthia!
Always inspiring… another beautiful project. Thanks for sharing this with us. 🙂
Thank you! And thanks for dropping by my friend! XO
Simply lovely!🌿
Thank you Donna! XO