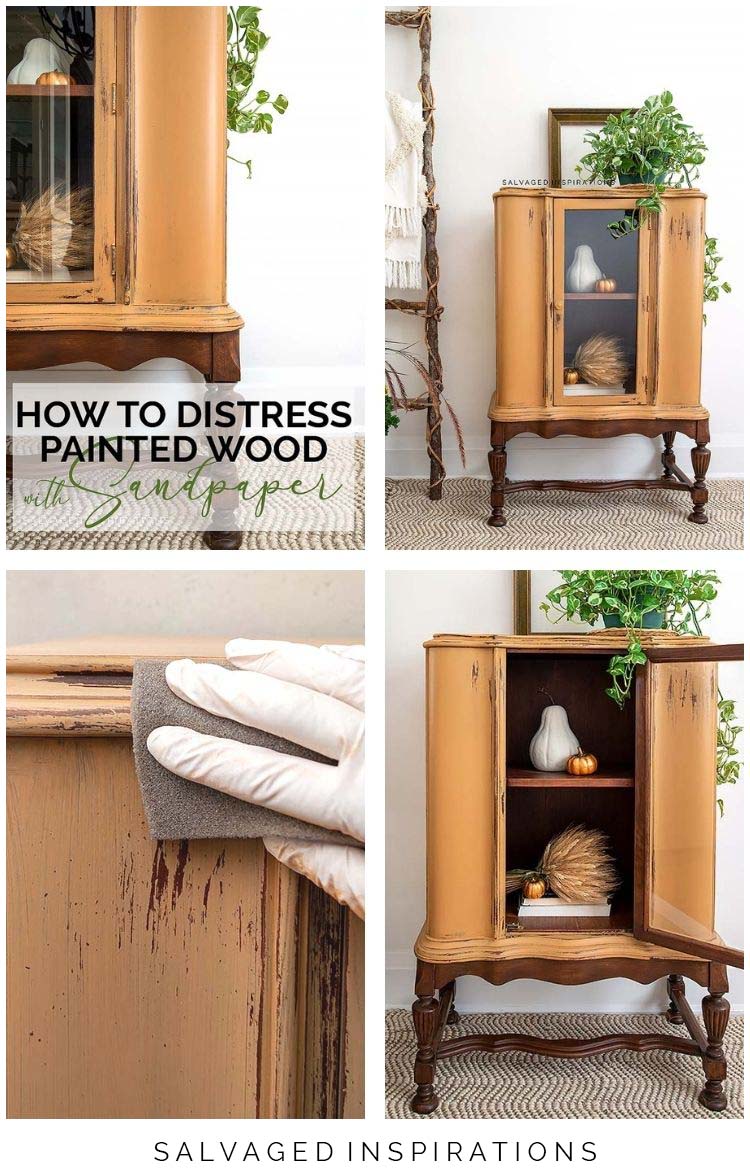
HERE ARE 7 EASY TIPS TO DISTRESS PAINTED WOOD WITH SANDPAPER FOR A GORGEOUS AND NATURAL-LOOKING VINTAGE FINISH!
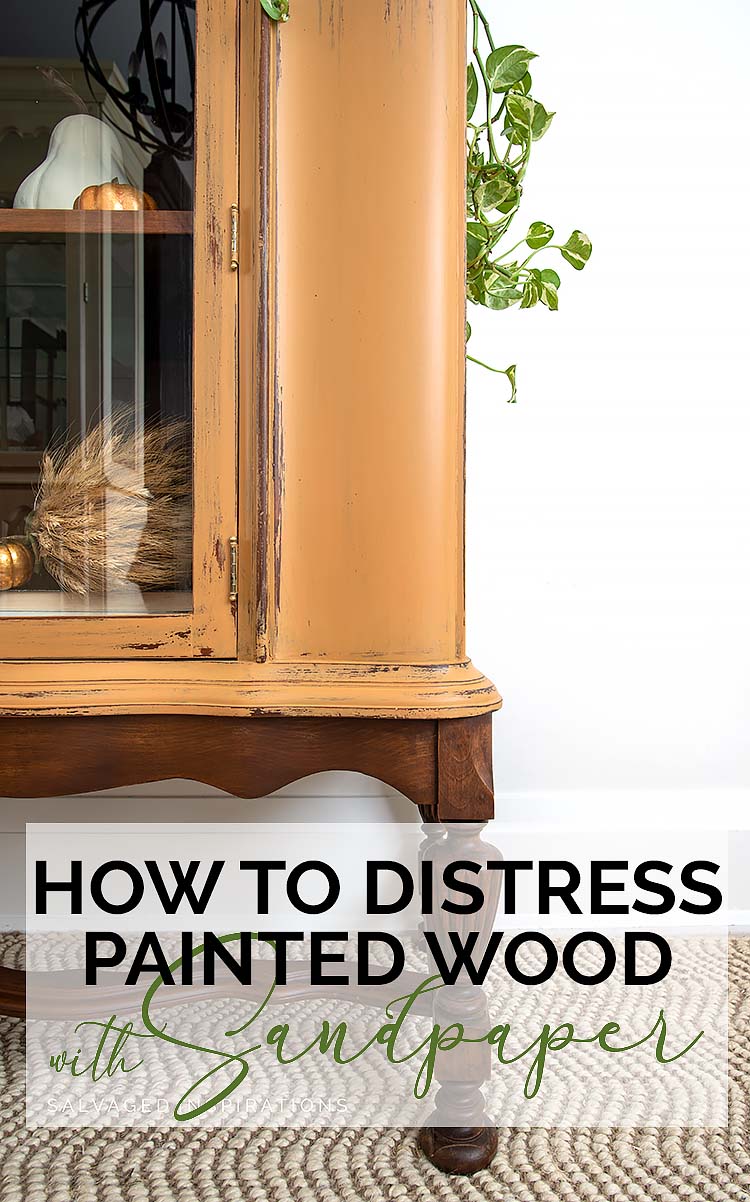 Are you looking for an easy way to create a naturally worn distressed finish? It’s REALLY easy to do and lends itself to a gorgeous vintage look. I can’t tell you how much fun this Pumpkin Spice Mini China Cabinet was to work on. I enjoyed every minute and I hope these 7 Tips on How To Distress Painted Furniture with Sandpaper will help you achieve a similar look!
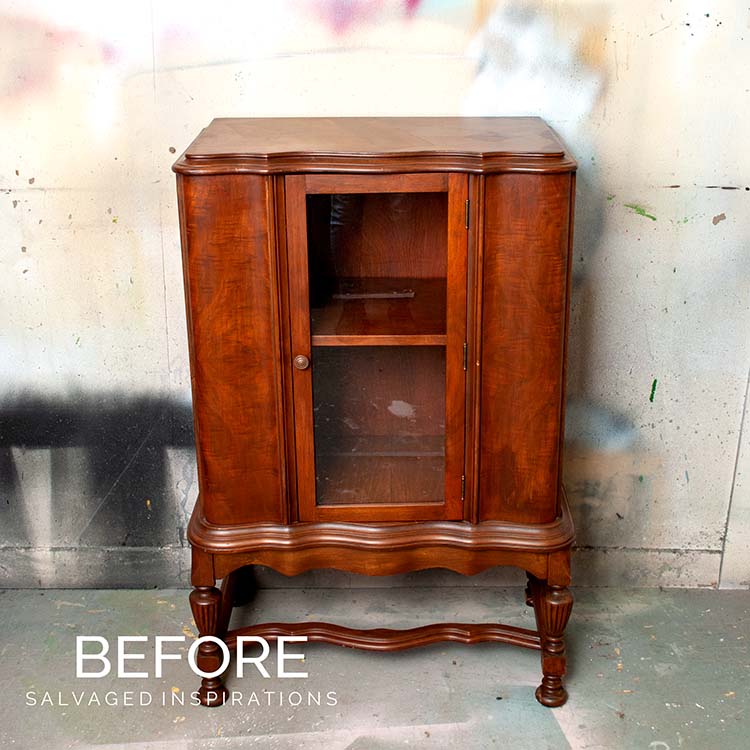
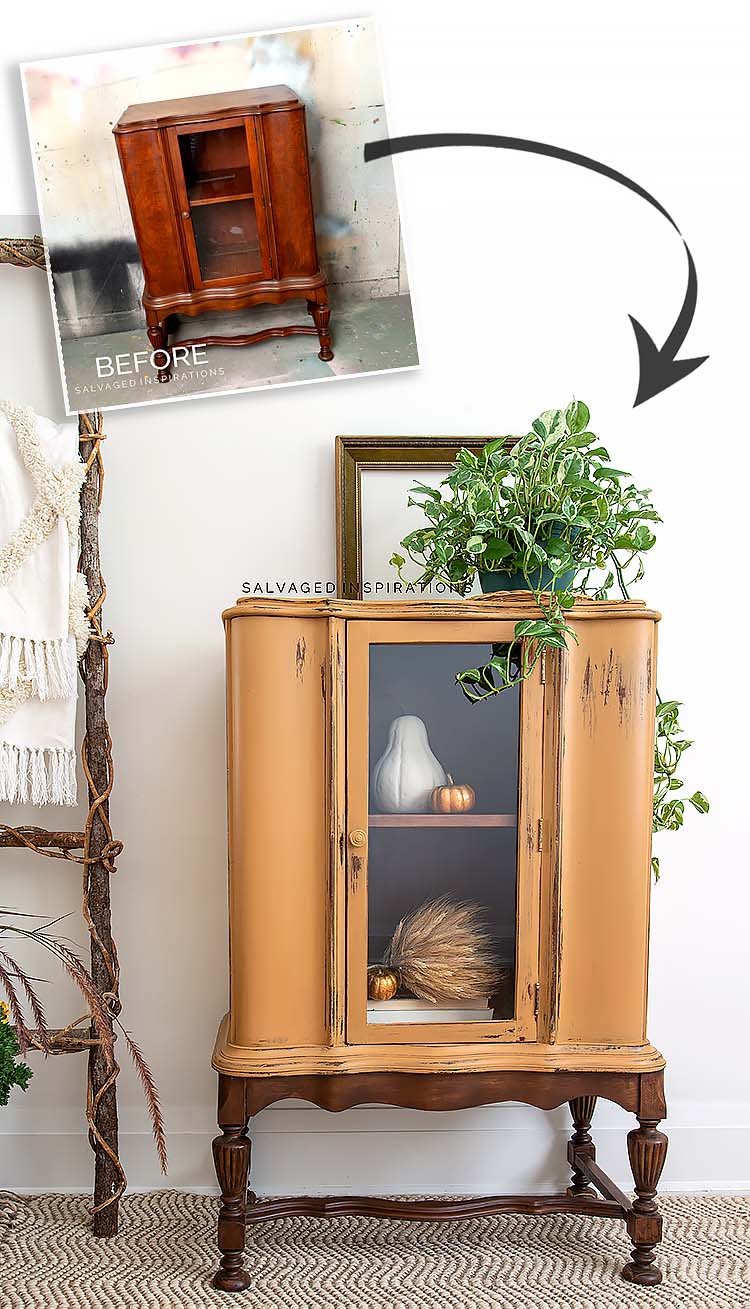
Here’s the vintage cabinet I started with…
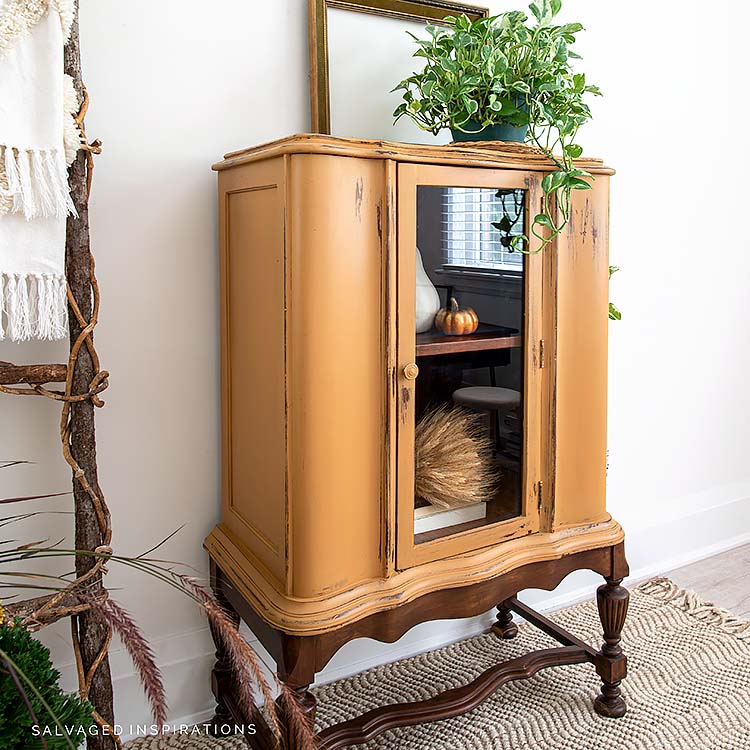
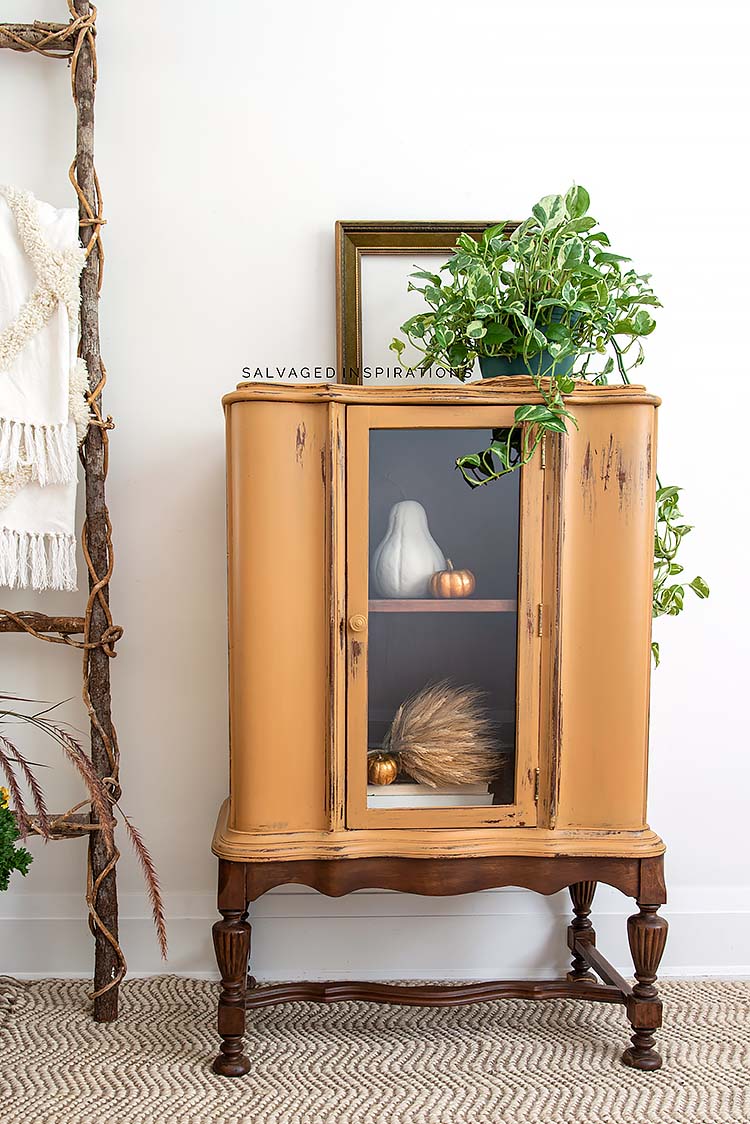
And here’s the cabinet now. I love the dark contrast against this gorgeous Pumpkin Spice Fall Paint Color.
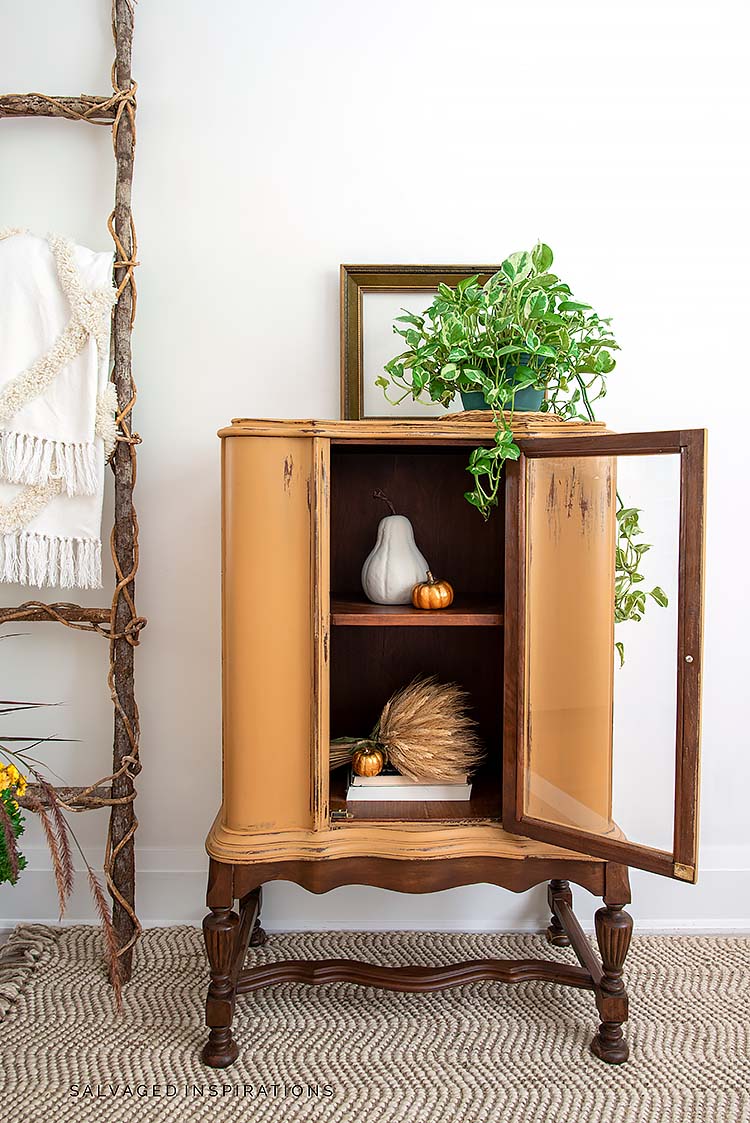
And the distressing is the icing on the cake that ties everything together! What do you think?!
THIS POST IS SPONSORED/CONTAINS AFFILIATE LINKS TO PRODUCTS I USE. YOU CAN SEE MY FULL DISCLOSURE HERE.
SOURCE LIST
Vintage Cabinet – SALVAGED
Paint Brushes
Shop Towel
White Lightning (Cleaner)
Sanding Sponge | Tack Cloth
Water Mister
Pumpkin Spice Paint
Clear Wax
VINTAGE CABINET
This cabinet was an add-on when I bought this greased-up table. While my sister and I were loading up the car, the gentleman asked if we were interested in any other pieces. He had this cute vintage cabinet he was about to list on FBM. I’m so glad he offered because I ended up with two gorgeous pieces of vintage furniture and it saved him from listing. Win-win!
Here’s how this distressed Fall Cabinet all came together…
PREP
This cabinet was cleaned inside and out using this cleaner. After it was clean and dry, I gave it light once over with this sanding sponge to add a little tooth for the paint to adhere to.
PAINT
I used Pumpkin Spice from Dixie Belle’s Suzanne’s Fall Color Collection. This was a special edition paint that is no longer available BUUUT you can create the exact same color. Mix equal parts Pine Cone + Terra Cotta + Colonel Mustard = Pumpkin Spice
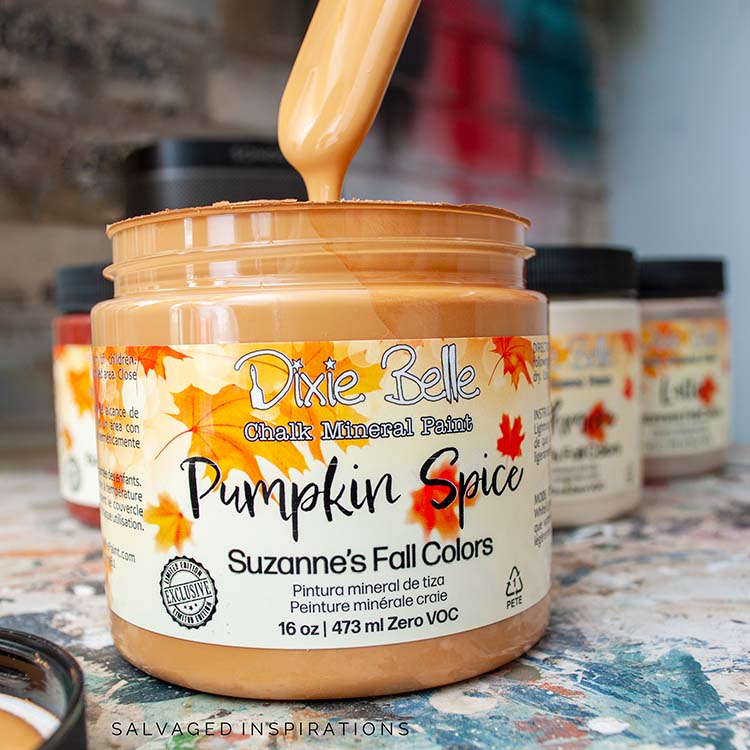
This Chalk Mineral Paint brushed on beautifully and took two coats to get the coverage I wanted.

HOW TO DISTRESS PAINTED FURNITURE W SANDPAPER
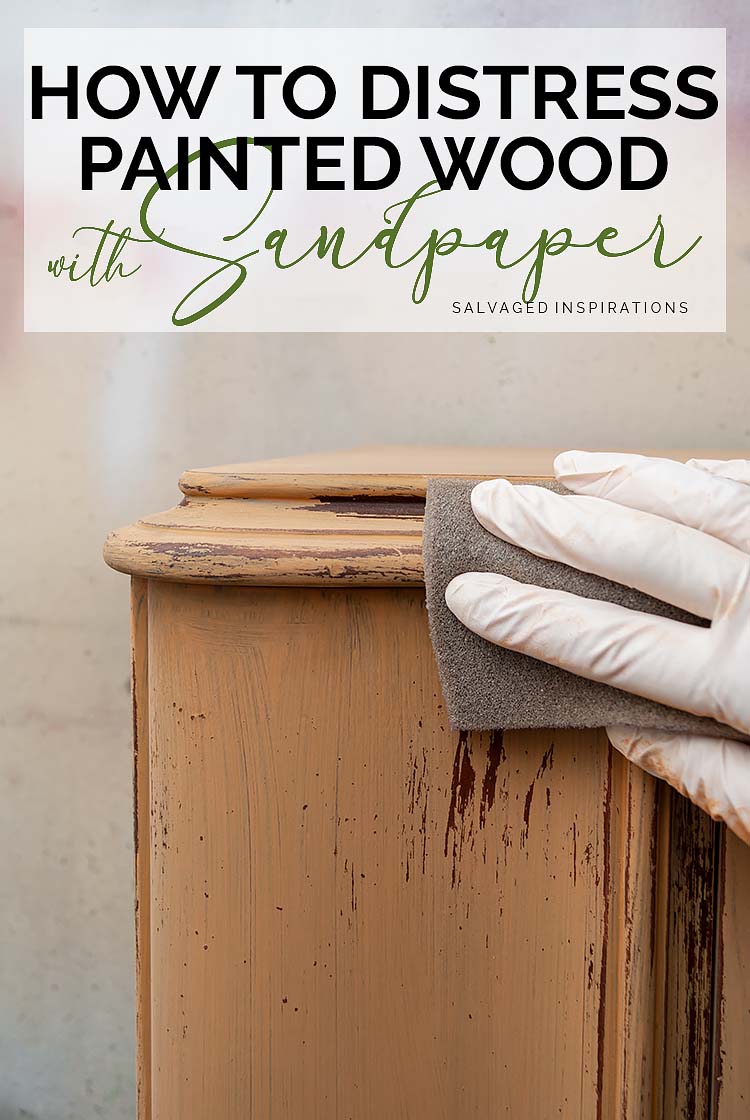
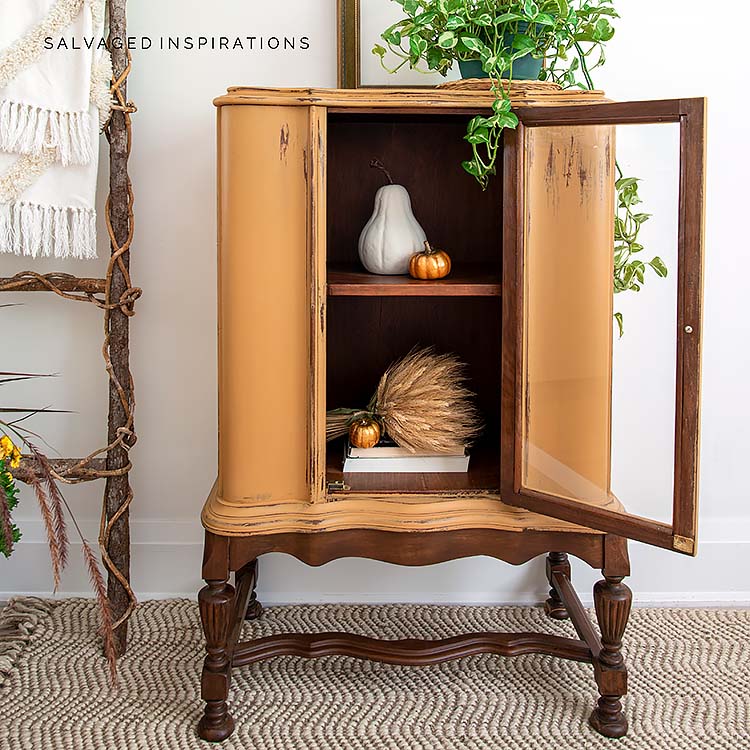
I haven’t painted a distressed piece in a while so this was a lot of fun! Using this 220 sanding sponge, I lightly sanded to the first coat of paint to remove some paint and expose the stained wood in areas it would naturally wear over time. Like the hinge area, corners, and around the doors and knob.
Once the first coat of paint was distressed with this 220 sanding sponge, I applied the second coat of Pumpkin Spice. I used my water mister to thin out the paint around the distressed areas and applied it heavier in non-distressed areas.
7 TIPS FOR DISTRESSING WITH SANDPAPER
- Sand and distress between EACH coat of paint
- Start with a higher grit and work your way to a lower grit
- Use higher grit sandpaper (220) for a softer distress
- Use lower grit sandpaper (120-180) for a stronger distress
- Apply additional coats of paint ‘lighter’ in areas you want the worn distressed look
- Sand with a light hand so as to not remove the original finish of the wood furniture
- Use a water mister to help thin out the paint where distressed
PAINT SECOND COAT
After the second coat was applied and I repeated the distress sanding once again.
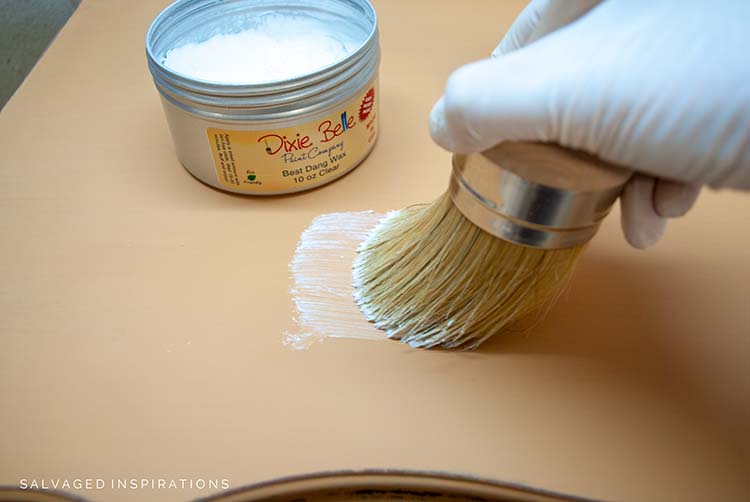
WAX TOPCOAT
To seal and protect, I used this Clear Wax. It buffed beautifully to create a lovely satin sheen.
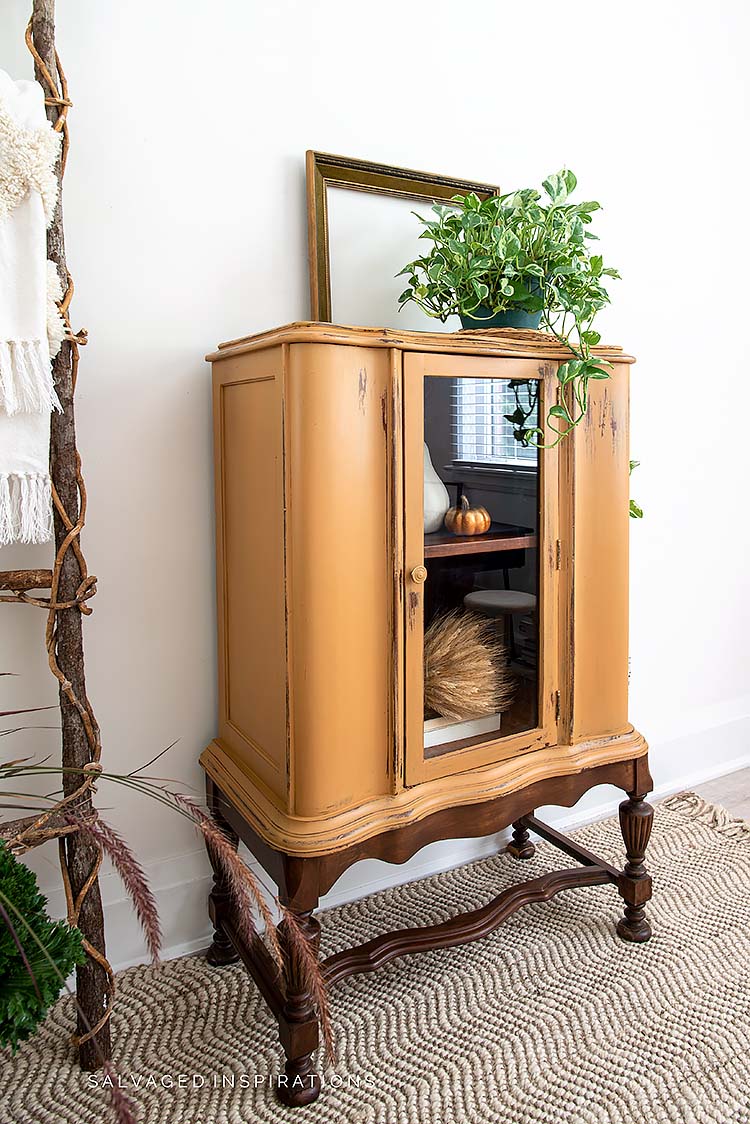
This was a simple makeover but I love how it all came together. The Pumpkin Spice with the original wood legs and distressed finish — such a gorgeous Fall finish!
Here’s another look at this before and after. I hope it’s inspired you and given you some new ideas for your distressed painted projects.
LET ME KNOW WHAT YOU THINK OF THIS DISTRESSED PAINTED WOOD FINISH. FEEL FREE TO ASK ANY QUESTIONS YOU MAY HAVE… I ALWAYS LOVE HEARING FROM YOU. IT MAKES MY DAY! 🙂
Happy furniture painting friends!
Denise x
RELATED POSTS::
DISTRESS FURNITURE WITH VASELINE
SANDING FURNITURE | 15 PRO TIPS
HOW TO WET DISTRESS PAINTED FURNITURE
HOW TO DISTRESS A MIRROR
WHICH DISTRESSING TECHNIQUE IS RIGHT FOR YOU?
PIN AND SHARE!


JOIN THE SALVAGED INSPIRATIONS FAMILY!

Such a refreshing look! I can picture it in a white farm house kitchen as a focal point. Love it!
yesssss… you just gave me a visual! Thanks Tracy!!
Denise,
I really like the Pumpkin color, it’s unexpectedly a pretty color!
I must say in all honesty, that I wasn’t excited about this pumpkin color on this cabinet, however.
I was impressed with the cabinet, it had that vintage look of solid furniture of yesterday.
In my mind this cabinet would have looked good in a cooler color.
Worthy of revisiting this amazing makeover again. The color is stunning and so appropriate for Fall. As always, a beautiful makeover. Thanks for the feature in your furniture flipping tour. This was fun and I can’t wait to see what you share with us next month. 😘
Thanks my friend and can’t wait for next month as well! Honored to be part of this talented Furniture Flipping Friends ‘crew’. 😉
Love this piece! Such a beautiful transformation.
Thanks Ashley! x
I love it, what a great transformation, and super tips. Thanks!!
Thanks Kevin! 🙂
This piece is stunning and the read was stellar! Excellent!
Awww, thanks Cortlyn! Much appreciated. 🙂
I love this piece so very much. I love the contrast of this gorgeous color and the natural wood legs!!
Thanks Mary Ann!!🤗
You do such beautiful work!
Thanks so much Deb! x
What a yummy color….so beautifully done; love it!
Thanks so much Susan! x
So pretty! I love the pumpkin spice paired with the natural wood!!
Thank you Nikki!😊
So dreamy!! Love how this piece turned out!
Aw, thanks Julia! XOXO
This is so amazing!
Thank you Logan!😊
BEE-YOU-TEE-FULL!!!!! Makes me want some pumpkin pie! LOL
Thanks and meeee toooo! Such a yummy color!🤗
Hi Denise,
I love it! I do love the color a lot and it’s perfect for fall. I did a tabletop carousel horse in linen white but got the idea from a lady on You Tube. She first rubs candle wax on the areas that she will distress and applies the paint. Once the coats are dried she takes a plastic scraper to make the piece look distressed. Have you tried that method? I did it to my carousel horse and it was easy.
Hi Sandi and thanks! And YES… I tried the relief method with wax and vaseline.
Oh, I absolutely love that! And you styled it perfectly. Looks great.
Thanks so much Michele!!!
Absolutely STUNNING! I have never liked anything Pumpkin Spice….. until now! I won’t eat it, but I will surely paint with it!🧡🧡🧡
Aw, thanks Paula! And I’m the exact opposite… I could eat everything Pumpkin Spice ALL day long…lol. 😉
Bravo! Way to integrate fall into a piece that will go all year round oh my its my favorite of your pieces so far. You go girl!
Thanks so much… I’m so happy you like it Amy! 😊
This is a beautiful color and I love how you paired it with some natural elements. Show stopper.
Thank you Michele!!🤗
Denise,
Where did you find such a beautiful cabinet??? I love it! Question, You said the seller was going to list it it on FBM. what is FBM?
Hi Michael! I don’t know where the seller got it from but I agree, it is a beautiful little piece! And I should have written out in full FBM = Facebook Marketplace. 🙂
Gorgeous piece, and your technique does it justice! Thank you for all the tips.
Thanks, Tracy! And Happy Thanksgiving weekend to you my friend! XOXO
Oh my, that color is gorgeous and compliments the natural wood beautifully. The distressing adds such lovely vintage charm. Thanks for the tip on distressing on the first coat. I’ve always done the distressing after the final coat of paint is dry. This method would make the distressing far easier and look more natural tool. Noted and pinned for a reminder 🙂
Thanks Marie… and I find doing it in between coats a lot easier. If you give it a go I’d love to hear your thoughts! 🙂
You find the sweetest pieces of furniture, Denise! Or maybe they find you…. :o) Thanks for the tips!
ya lol… I think this one found me! Thanks my friend. XOXO
This turned out beautifully, I see caramel and chestnut! One question, the original finish looks shiny but you didn’t say you used Boss, was a light sanding enough to get the paint to stick?
Caramel… YES! And ya, a light scuff sanding was perfect for this piece. The DB Chalk Mineral Paint adhered beautifully.
Denise this is mind-blowing beautiful! Or should I say, breathtakingly beautiful? Lol. Whichever, it’s amazing and I love it. A couple of questions though. What did you do to the bottom half? It looks so chocolatey. Also, I have a large entertainment center that makes you think of an old China cabinet, or book case, with shelves across the upper middle and down both sides, but without the glass doors. A large space in the lower middle section with the bottom half of the center having two doors on it. I would like to do something like this pumpkin spice/chocolate combo but I think I need to reverse it and do the pumpkin on the entire open inside areas to lighten up the shelving spaces, and use all the exterior framing and two bottom doors in the chocolate. What do you think? Or is this as clear as mud! But….I was also wanting to do some kind of transfers on the doors…..do you see my dilemma?
Help!! Any ideas or suggestions would be appreciated. Thank you for the wonderful inspirations and tips you so graciously share.
Hi Sharon! Thank you, I’m so glad you like it! I did nothing to the bottom half or the inside other than a really good cleaning. From what you’re describing, I think the reverse on your large entertainment center would look amazing. And why not add transfers on the doors as well. So long as the transfers complement the painted and stained combo, it could look stunning IMO!
Hi Denis! I got the Juniper but this. Okie is really pretty. Maybe Apricot and Chocolate? Such a pretty piece.
Can’t type.
lol…no worries. Happens to me ALLLLL the time.🤣
Hi Cheryl! So glad you got the Juniper… so gorgeous–you’re going to love it! And you might be right, maybe Apricot and Chocolate? If DB shares the exact recipe I’ll be sure to update this post as well. 🙂
This piece is beautiful! I was wondering if you painted the hinges? It’s hard to tell in the photo. Thank you for all of the inspiration!
Thanks, Jennifer! Yes, I painted over the hinges and then distressed them back so the original finish shows through.
The color is divine, and the distressing makes it a real show stopper—beautiful work as always. 🙂 xo
Thanks my friend! XOXO
I’m not an orange fan but I do like that pumpkin spice. I mostly see whites and sea-inspired blues in a cabinet like that. I love to see other colours. Thanks for that Denise!
Thanks Char! 🙂
Beautiful cabinet – it looks like Fall! Great job; thank you for sharing.
Fall-inspired for sure… thanks Nan!😊
I wasn’t so sure about a Pumpkin Spice painted china cabinet but this is AHH-MAZING! What a beautiful color and it pairs so well with the stained wood legs and interior. Thanks for sharing!
Aw thanks, Nicki! So glad you like it! XOXO
Beautifully done. Love the cabiinet
Thanks so much Linda! x
Hi Denise. I love the warm orange paired with the natural wood on this cabinet. Wonderful sanding tips. I didn’t know to sand between EACH coat of paint. Thank-you for sharing your tips and your beautiful re-do:)
Thanks, Monique! And yes, I find it MUCH easier to sand between each coat. When I used to leave all the distressing till the very end, I always ended up sanding through the paint and the original finish.