HERE’S HOW TO PAINT PERFECT STRIPES ON YOUR FURNITURE. TIPS ON HOW TO GET CRISP CLEAN LINES WITH NO BLEED THROUGH EVERY TIME!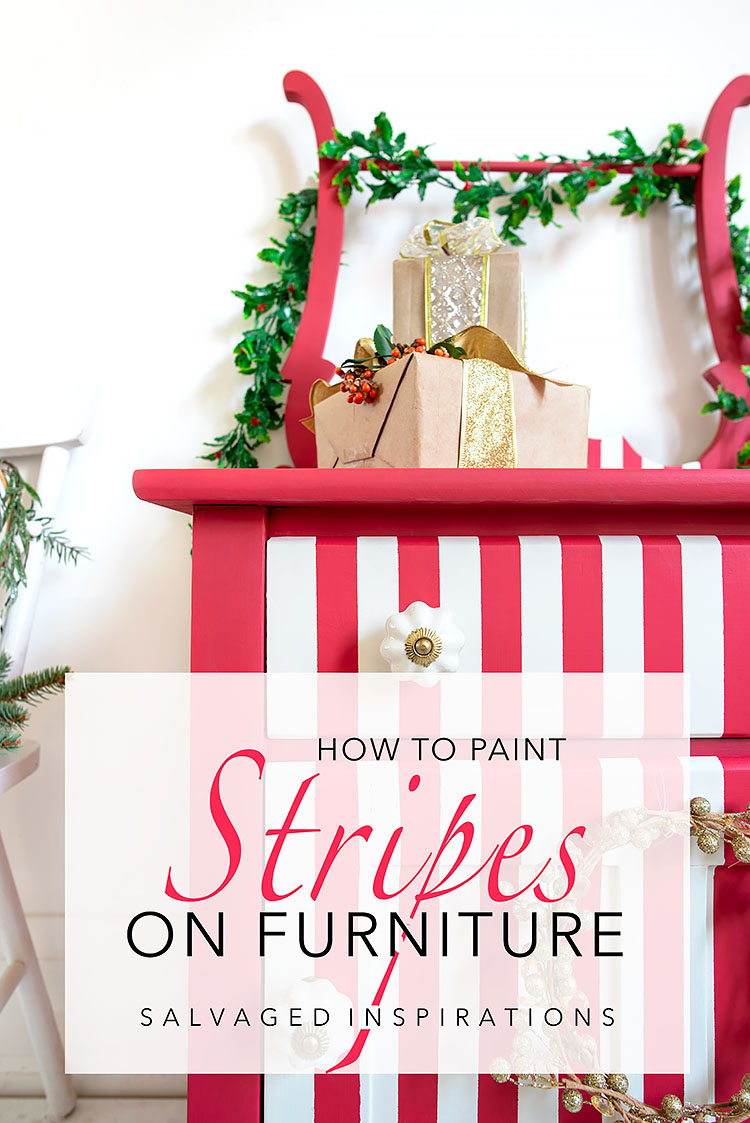
Hi, sweet #sifamily! It’s that time of the year again – Christmas Washstand Makeover time! If you’re new here, this curb shopped washstand has been getting a Christmas makeover for the last four (4) years. It has become a holiday tradition here on the SI Blog! It’s fun to see how many unique looks we can give this piece using a little paint and different painting techniques.
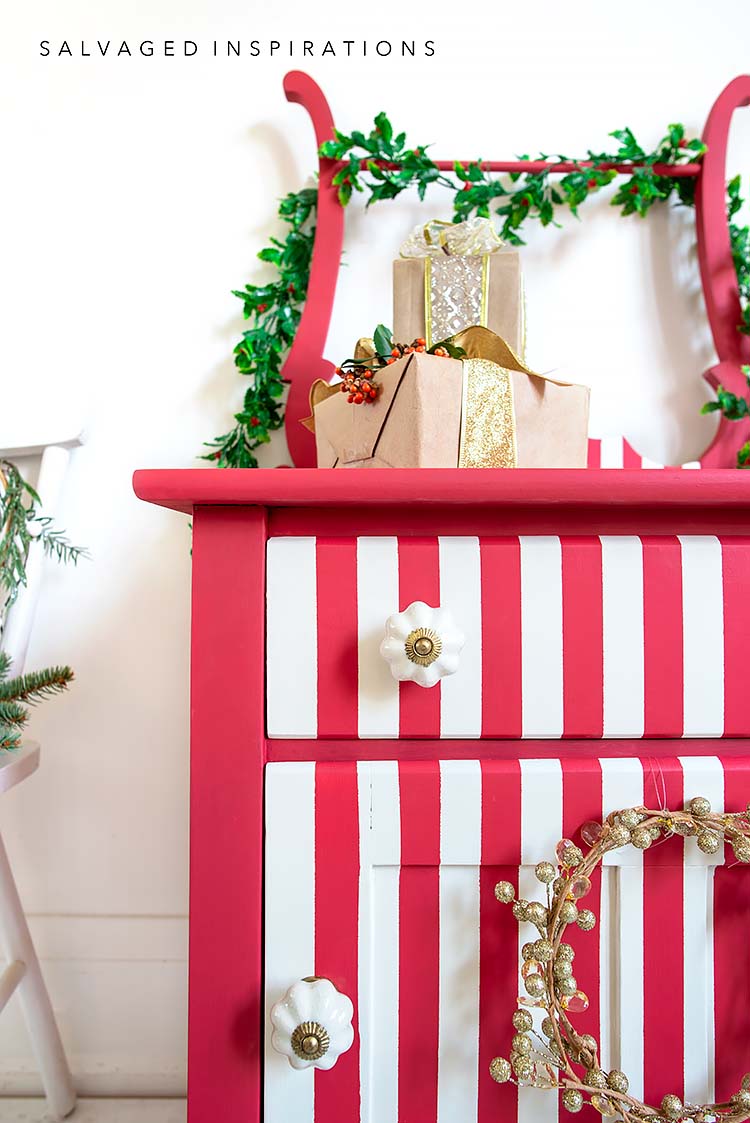
This year I went whimsical with painted stripes so I’m sharing How To Paint PERFECT STRIPES without bleedthrough. These six (6+) easy tips gave me perfectly crisp-clean painted stripes for such a striking vibrant look!
It’s also Trash To Treasure Tuesday – one of my favorite days of the month! I’m joining my furniture painting besties and linking to their makeovers below… so be sure to check them out.
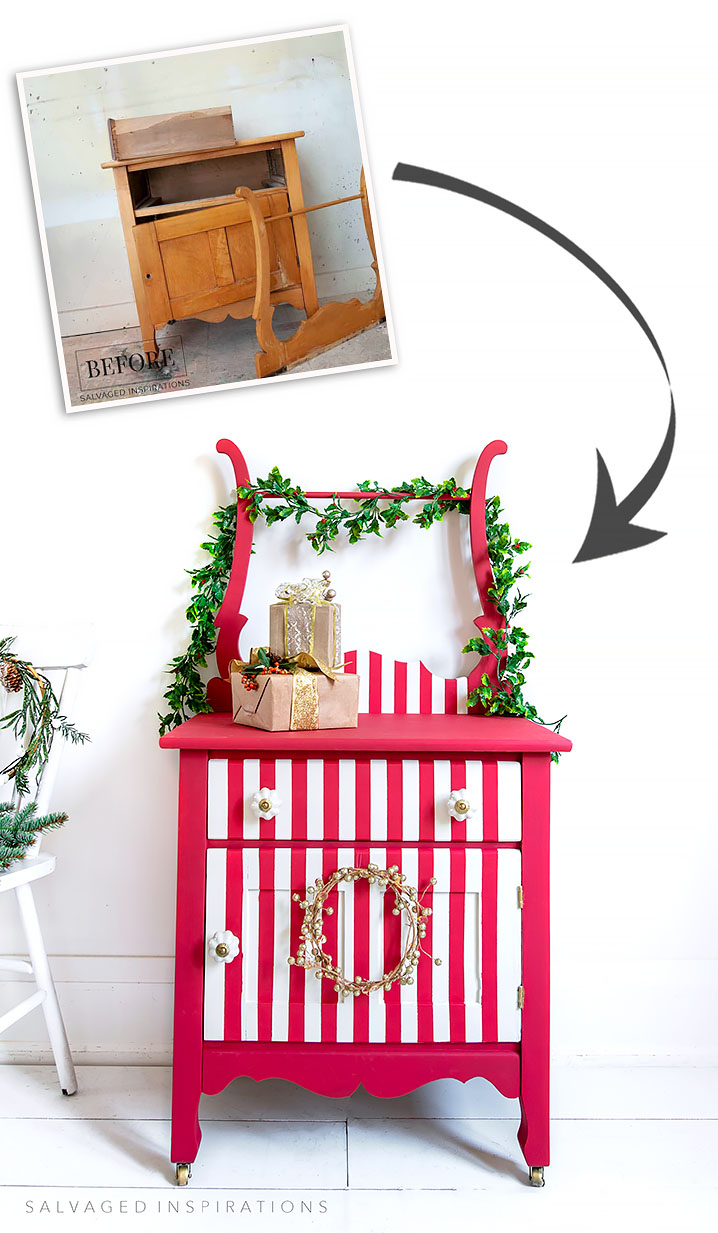
But first, here’s the salvaged curb-shopped washstand in its original ‘before’ state.
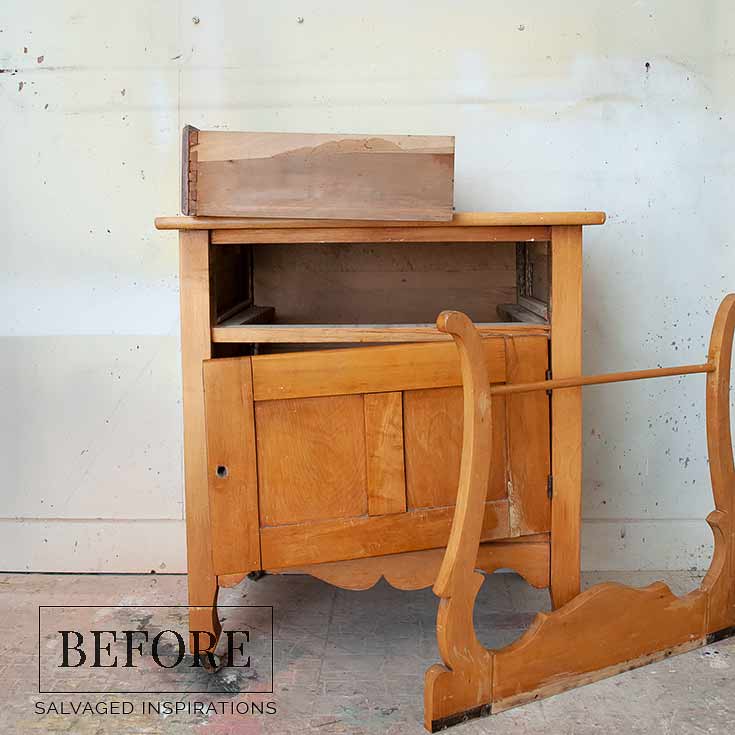
The great thing about vintage furniture is its durability and versatility. This washstand will probably be up to another umpteen makeovers before it retires.
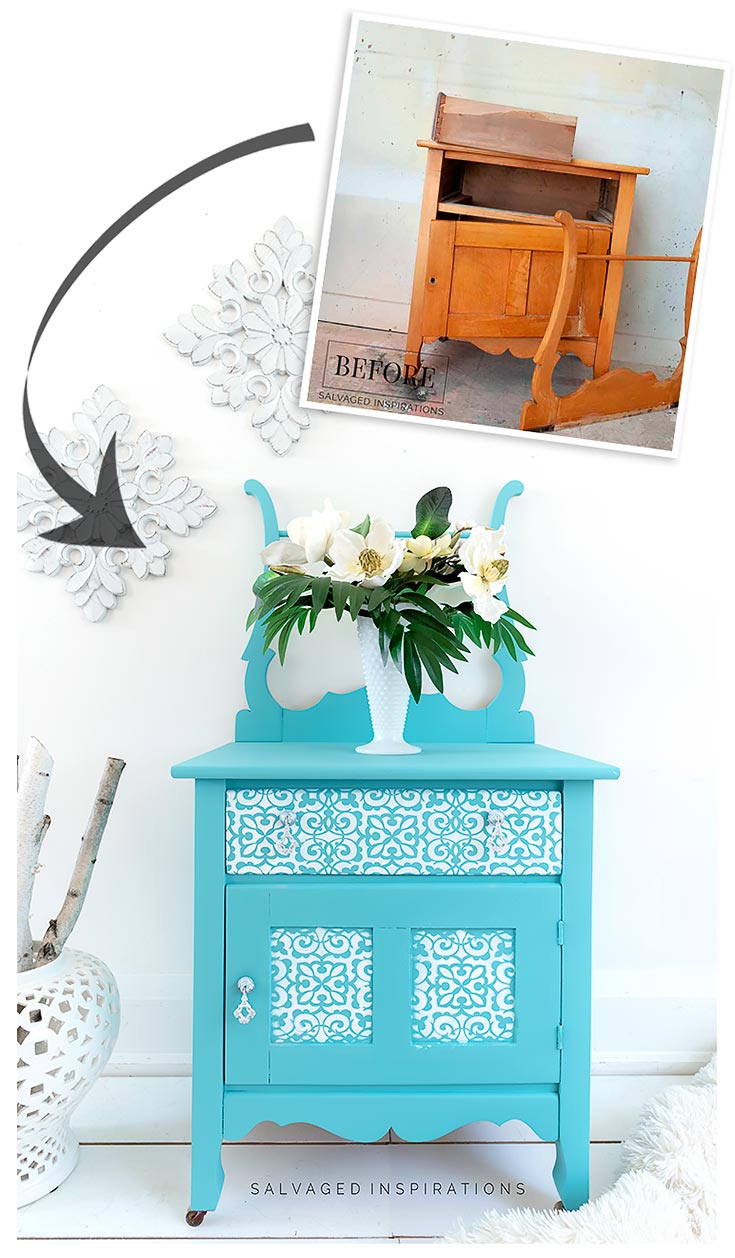
Here’s last year’s 2020 makeover. I’ve included the rest of the looks in the “Related Posts” below but I want to share this one so you have an idea of what I was painting over this year… soooo cute, right?!
THIS POST IS SPONSORED/CONTAINS AFFILIATE LINKS TO PRODUCTS I USE. YOU CAN SEE MY FULL DISCLOSURE HERE.
SOURCE LIST
Curbshopped Washstand – SALVAGED
Paint Brushes
Shop Towel
Dewalt Orbital Sander
Sandpaper | Tack Cloth
1″ Painters Tape
Water Mister
Flat Clear Coat
Buttercream Chalk Mineral Paint
Honky Tonk Red Chalk Mineral Paint
Peony Chalk Mineral Paint
Gold Wax
CHRISTMAS WASHSTAND MAKEOVER 2021
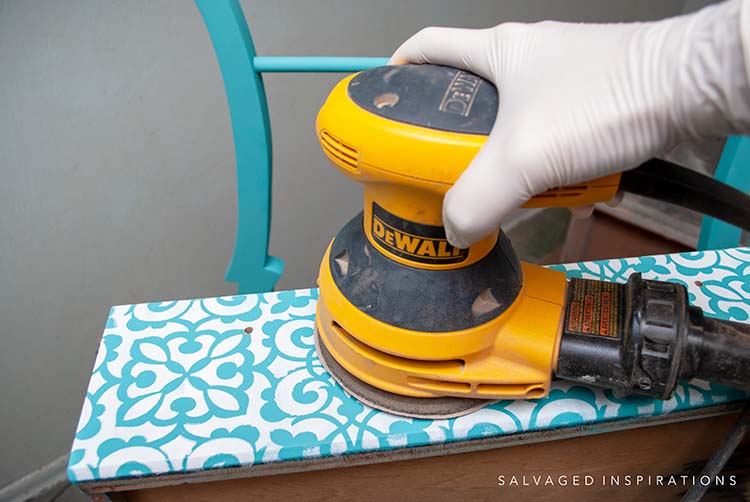
PREP
I didn’t bother cleaning it because it’s been wrapped and protected all year so I started by giving this washstand an overall scuff sanding. I used my Dewalt Orbital Sander with 150 grit sandpaper. If you missed my post on how to sand in your home – DUST-FREE for Under $15 you can see it here!
CREATE A CUSTOM COLOR
To create a vibrant custom color, I tried using Dixie Belle’s new Color Lab. This online color mixer is such a great idea! Now we can see what mixing our leftover paints will actually LOOK LIKE before we haul out all our paint and play colorology mixing and matching. This will work great for my leftover paints but also to color-match something online that I’d like to replicate!
If you are interested, in the new year I can create a post or Youtube video on how I used this app and we can learn and explore it together. Let me know if this is something you’d be interested in in the comments.
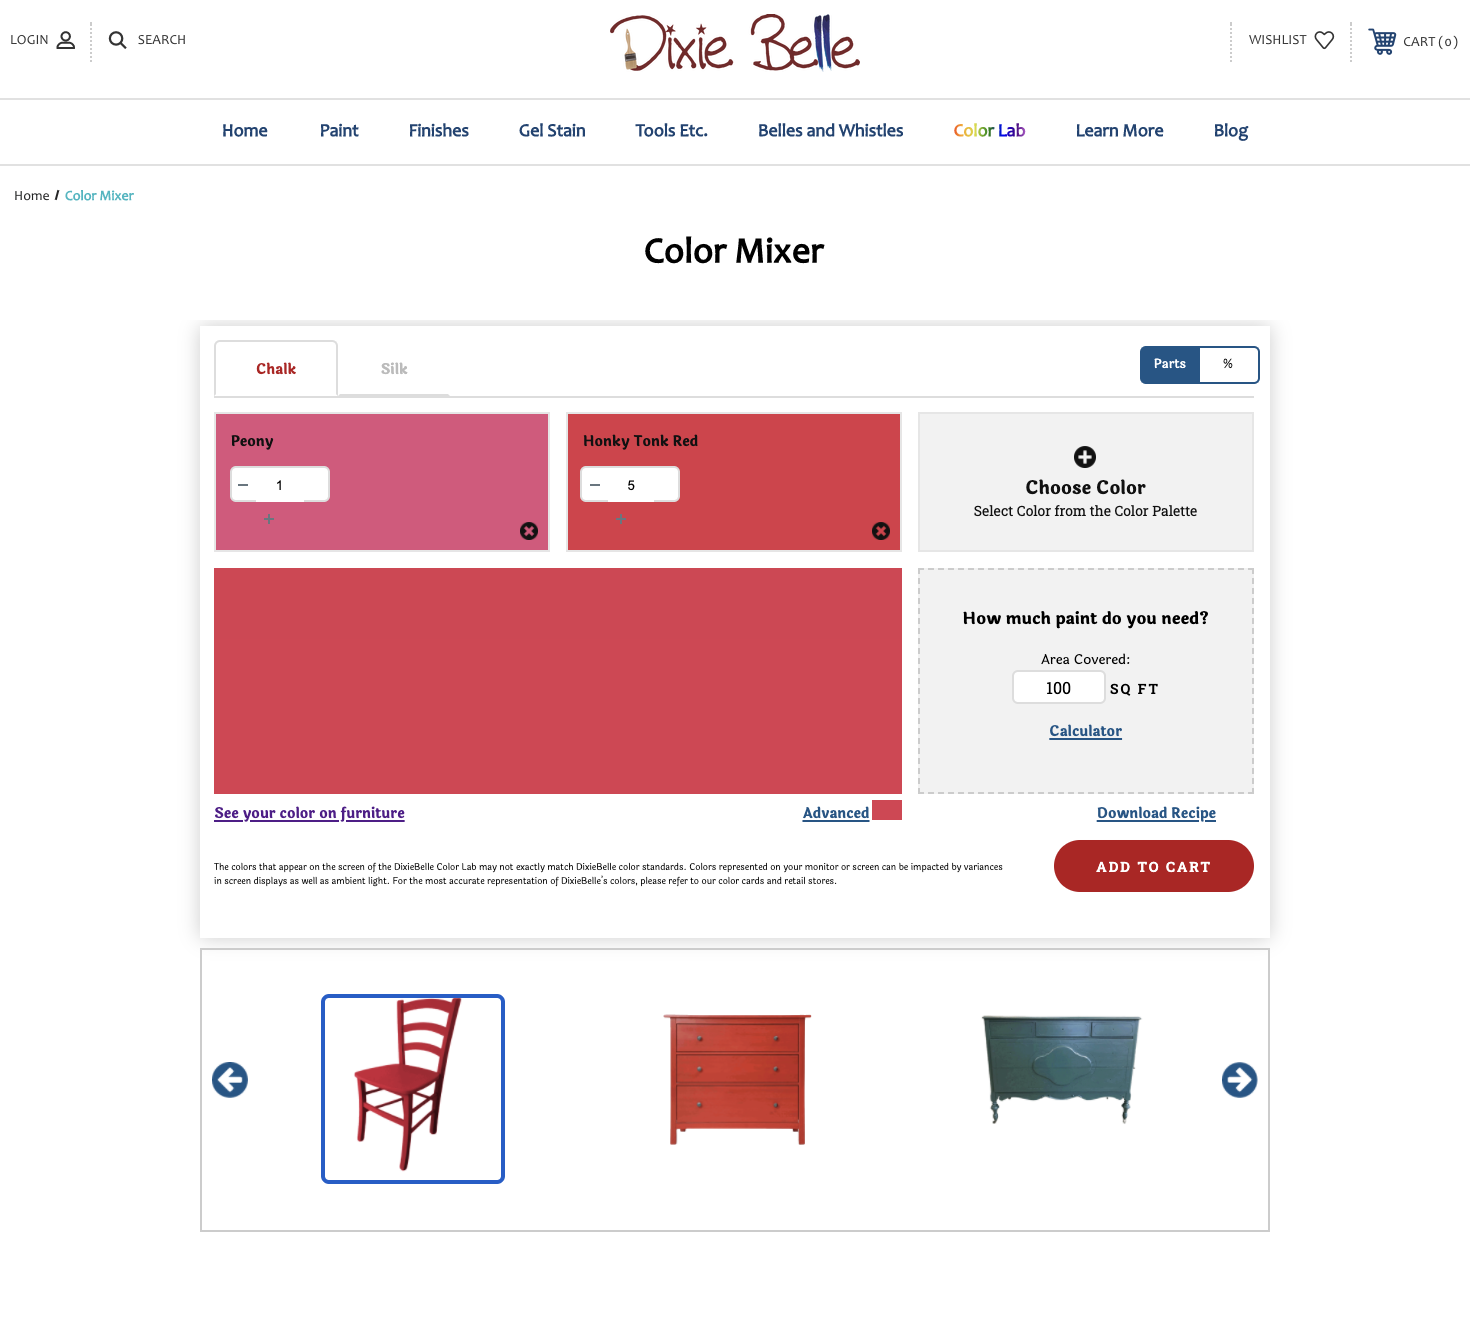
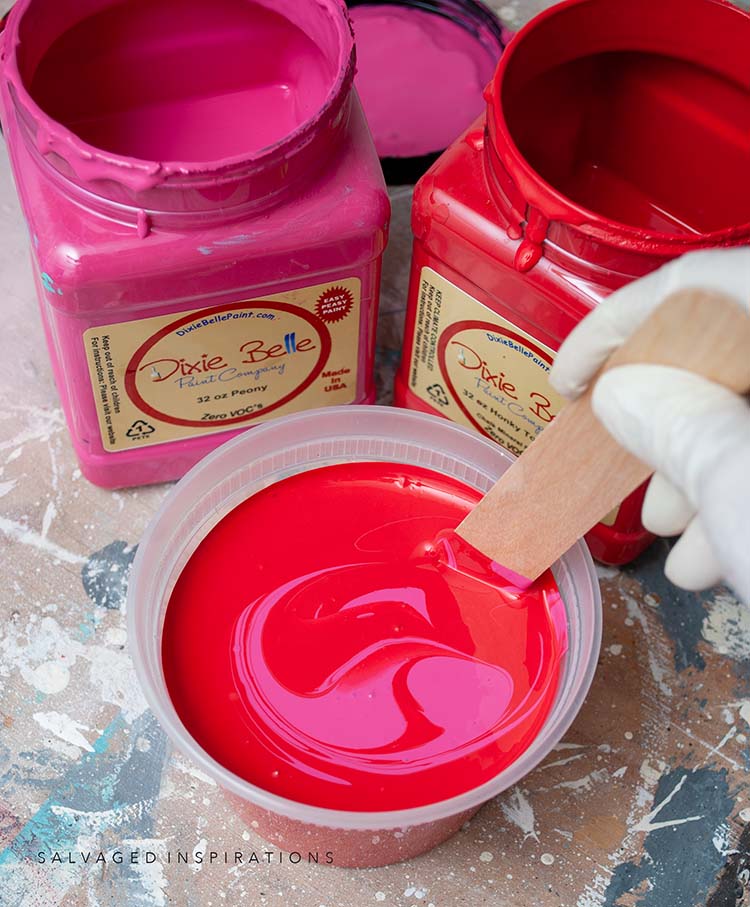
I used one part Peony to approximately four parts Honky Tonk Red to give me this vibrant whimsy holiday red!
PAINT
Once I picked my colors, I painted the BASE of the striped areas in this Buttercream.
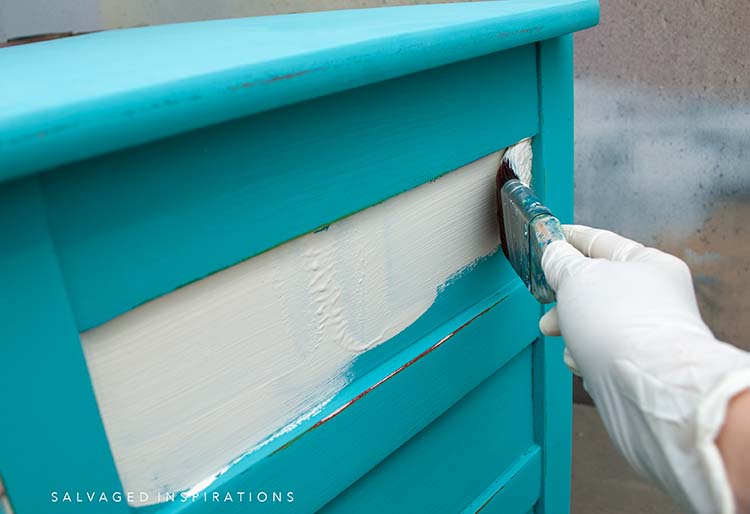
I probably should have primed first because it took three generous coats to cover the stencil design and the previous blue.
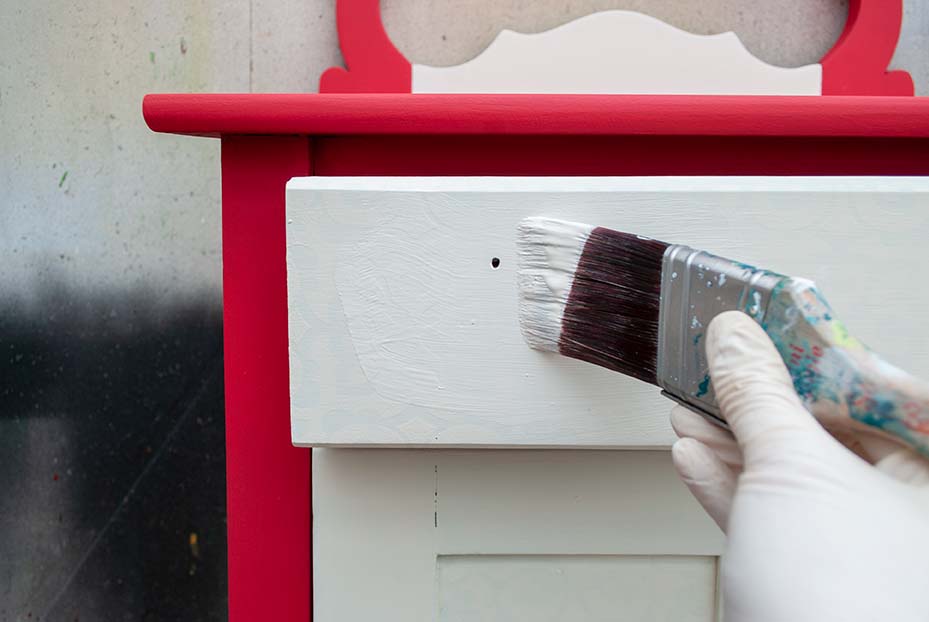
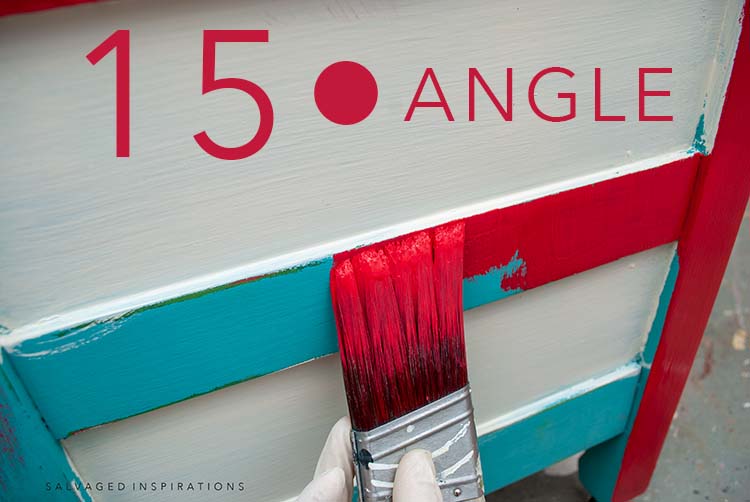
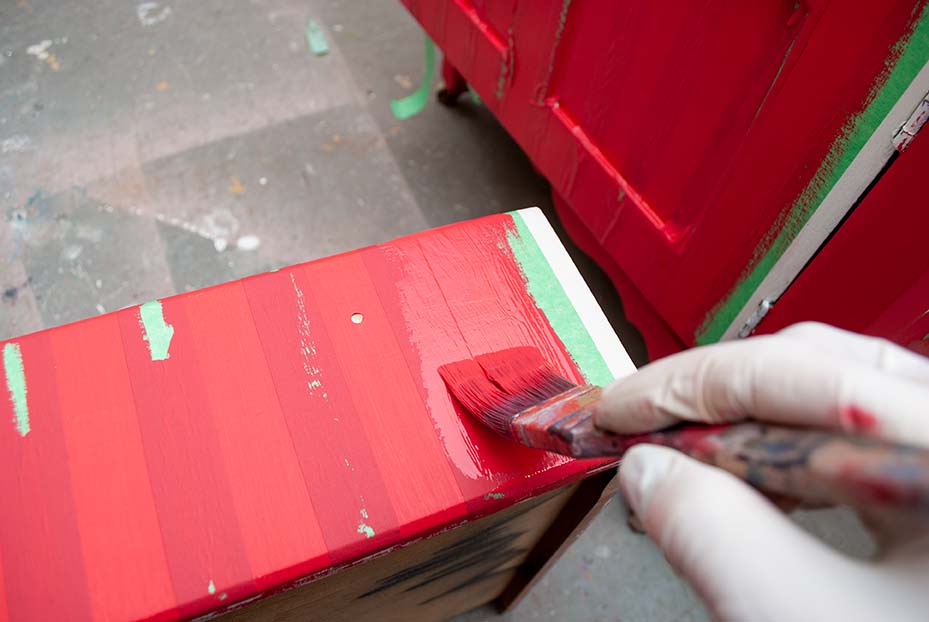
TIP – CRIPS LINES W/O MASKING
To paint nice crips edges between the Buttercream and custom red, I painted at a 10-15• angle. Applying the paint horizontally would have resulted in a big mess (red in my white) so I angle the brush and apply the paint vertically. Then once it’s on, I brush very lightly horizontally to smooth out any brush strokes. This gives me nice crips edges between the colors!
HOW TO PAINT STRIPES
Here’s how I painted my stripes onto this washstand.
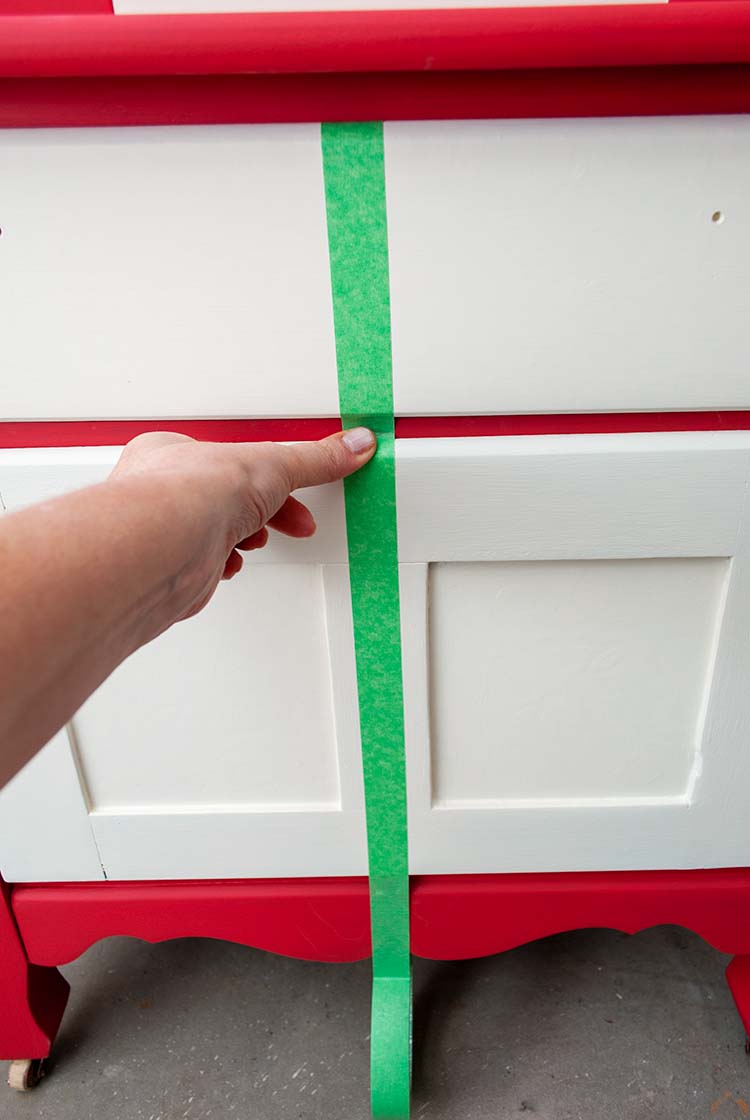
MEASURE
I measured the center of my piece and added my first strip of painter’s tape right down the middle as seen below.
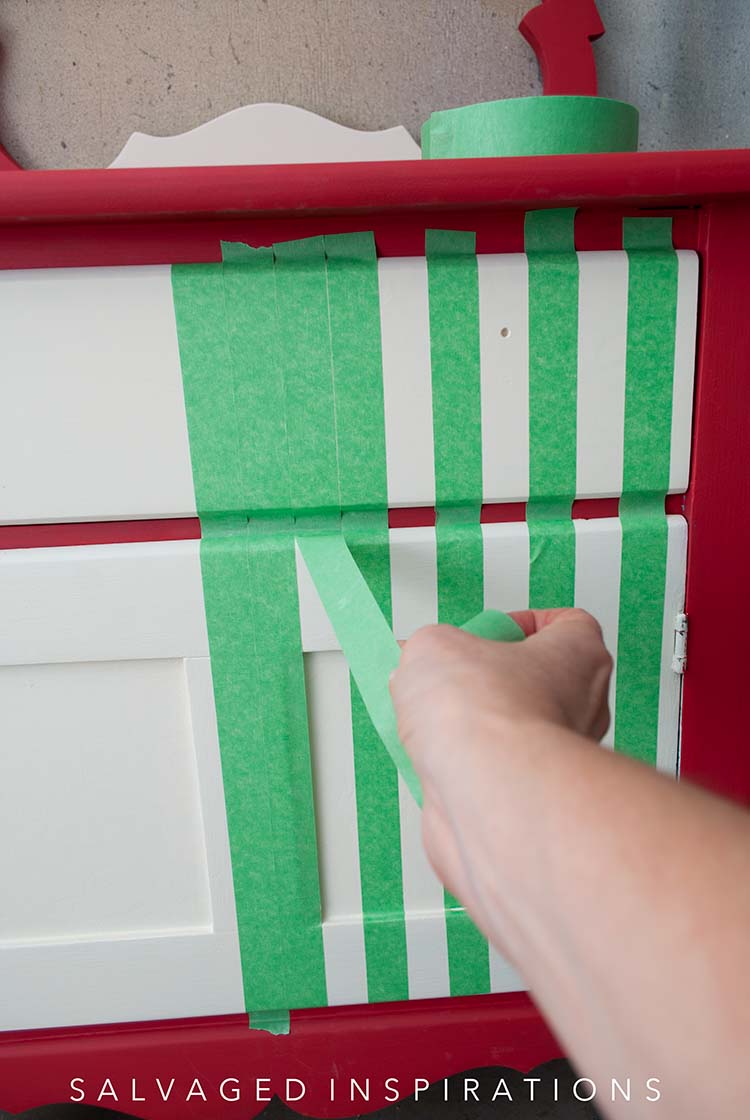
MASK
To get perfectly straight lines, you don’t have to keep measuring. Just keep applying strips of tape butted right against each other until you reach the edge of your piece. This is a quick and easy way to create perfectly straight stripes without measuring.
Once I lined up all my painter’s tape, I removed EVERY OTHER piece to create my striping pattern. Remember, where the tape remains will be your base color. Where the tape is removed will be your painted stripe color.
Pro Tip – Use the painter’s tape roll to help adhere the tape 100% as seen here.
SEAL THE EDGES TO PREVENT BLEED-THROUGH!
The worst thing is messy stripes and this WILL happen if you don’t seal the edges of your painter’s tape first! An easy way to seal is to use a clear coat OR your base color. For this washstand, I used this Flat Clear Coat but I could have used this Buttercream (my base coat) as well.

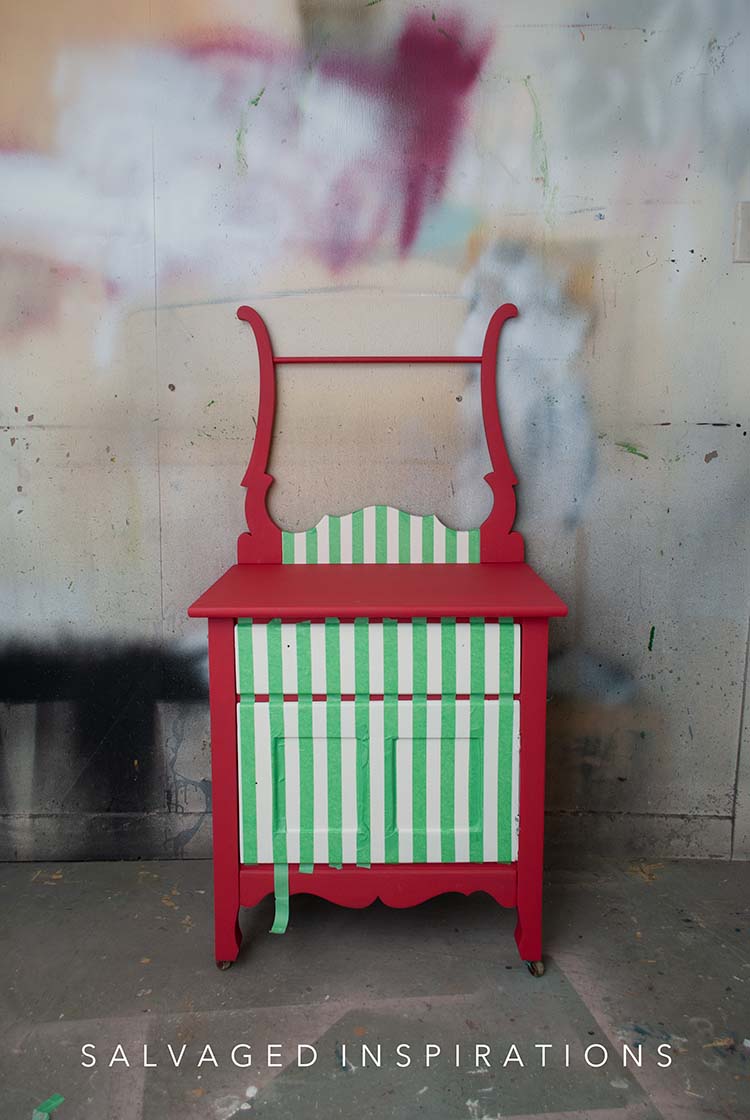
Here’s what the washstand looked like all masked off with the clear coat masking the edges of the tape. Now it’s ready for holiday striping!
PAINT STRIPES
Once my clear coat had dried, I painted the stripes in my cheery holiday red custom color. I used two coats to get good coverage.
ProTip – When painting your stripes, it’s always easier to start with your lighter paint color and end with your darkest paint color!
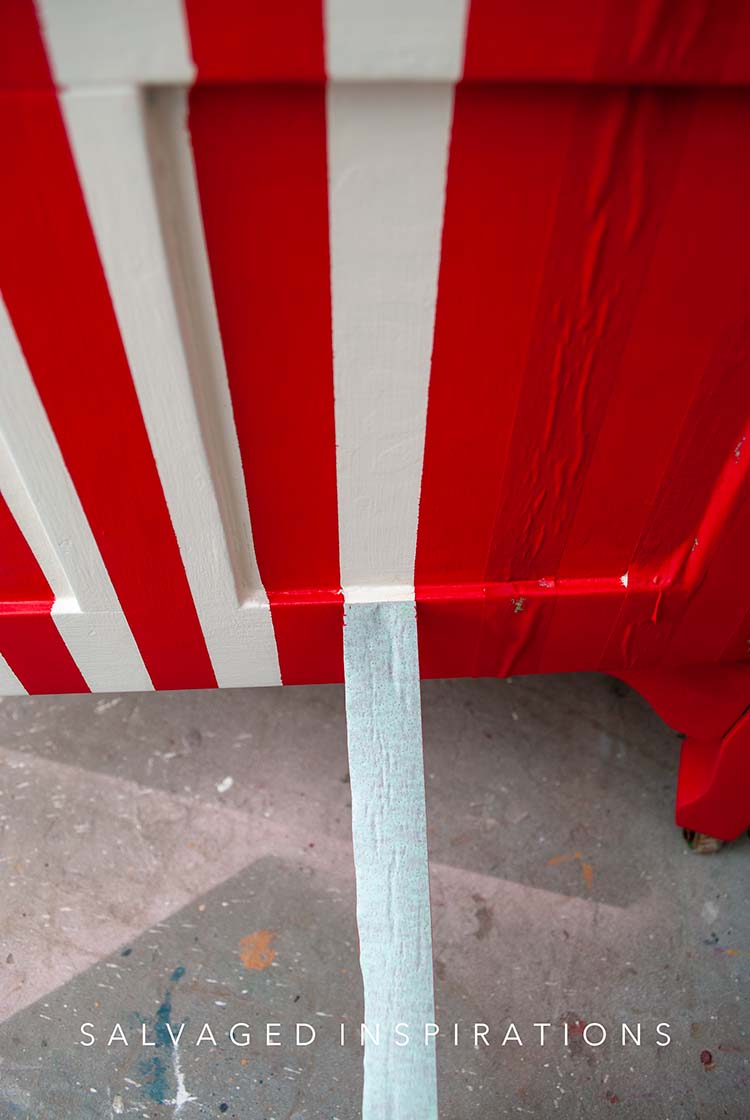
REMOVE PAINTER’S TAPE
Once my two coats were painted, I removed all the painter’s tape for the big reveal! I still ended up with a few imperfections where I didn’t adhere the painter’s tape 100%, but overall I’m SUPER happy with how crisp these stripes turned out!!!
For the last details on this piece, I used this Gold Wax to highlight the wheels and hardware knobs. So charming and cute!

6 TIPS FOR THE PERFECT CLEAN STRIPES
- Use painter’s tape to create perfectly straight stripes
- Make sure the painter’s tape has adhered 100%
- Start with a lighter base color and work up to your darker color
- Use 2-3 coats to paint your stripes for full coverage
- Seal the edges of the tape with your base color or clear coat before painting your stripes
- Use an artist brush for any touch-ups if necessary
And here’s the new Holiday Look for 2021!

I’m really happy with this festive look… what do you think?
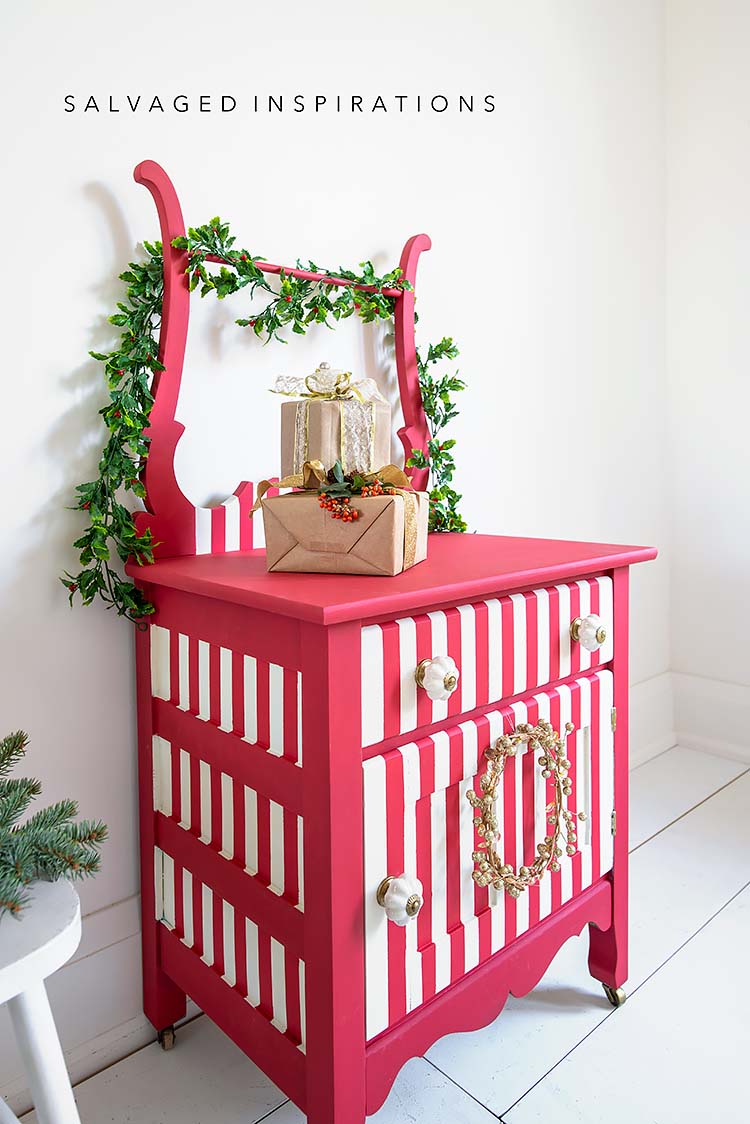
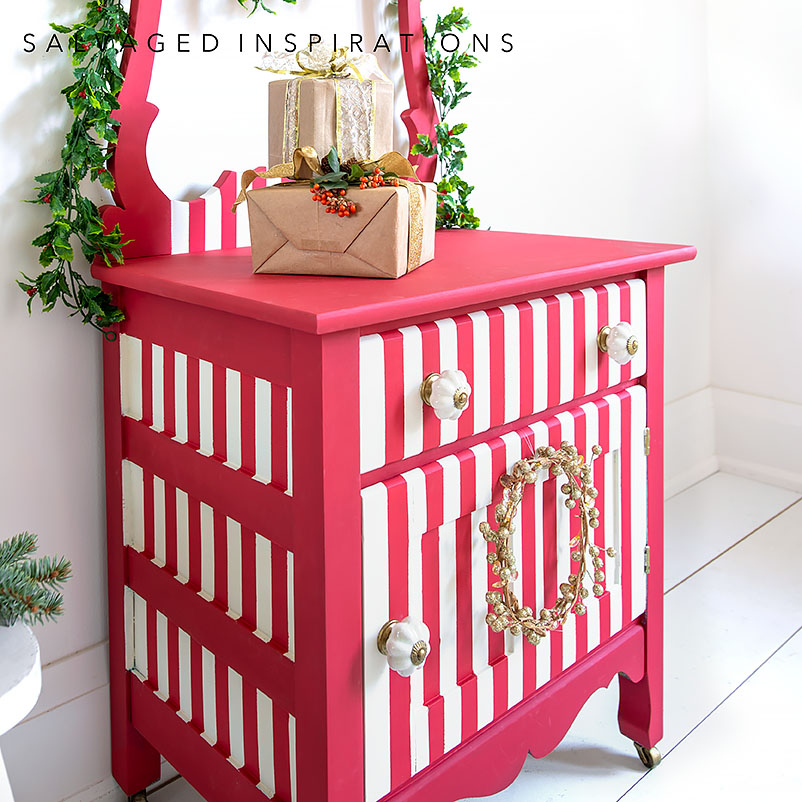
And I can’t leave you without a few close-ups of these stripes!

I don’t paint stripes on my furniture makeovers too often but I love this piece so much. I hope it’s encouraged you to give it a try because believe me if I can do it – YOU can do it!
AND NOW FOR SOME TRASH TO TREASURE FUN!
You’re going to LOVE what my creative team of T2T ladies do! Below are their BEFORE photos. Visit the links underneath to see the amazing AFTERS and learn how they did it! I’m heading over to take a peek as well! x
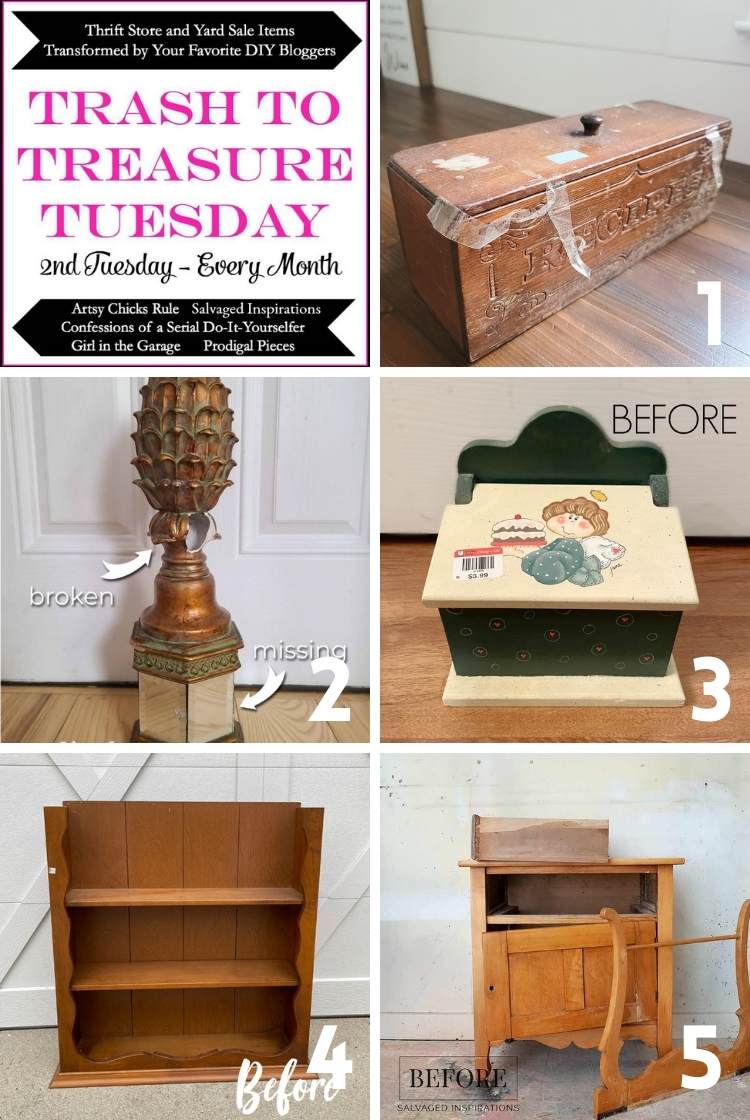
1. ARTSY CHICKS RULE
2. PRODIGAL PIECES
3. GIRL IN THE GARAGE
4. CONFESSIONS OF A SERIAL DIYER
5. SALVAGED INSPIRATIONS (HAPPY YOU’RE HERE!)
Here’s another look at this Christmas Washstand before and after. I hope it’s inspired you and given you some new ideas for your projects.
I’ll be back this Thursday with my Furniture Fixer Upper Crew for my VERY last post of 2021. I can’t believe this year has flown by so quickly and I feel so blessed to have shared it with all of YOU!
LET ME KNOW WHAT YOU THINK OF THIS 4TH HOLIDAY MAKEOVER. I’D LOVE TO KNOW WHICH VERSION YOU LIKE BEST SO I’VE POSTED THE PRIOR YEARS IN THE “RELATED POSTS” BELOW! FEEL FREE TO ASK ANY QUESTIONS YOU MAY HAVE… I ALWAYS LOVE HEARING FROM YOU. IT MAKES MY DAY! 🙂
Happy furniture painting friends!
Denise x
RELATED POSTS::
2018 – WASHSTAND MAKEOVER
2019 – WASHSTAND MAKEOVER
2020 – WASHSTAND MAKEOVER
DIY CHRISTMAS COUNTDOWN
DIY LAST-MINUTE GIFT IDEA
PIN AND SHARE!
 JOIN THE SALVAGED INSPIRATIONS FAMILY!

I have striped walls, but never furniture! When taping walls you have to measure to tape off stripes due to the scale of the job; however, I like the tip you gave for furniture that requires no measuring! All your pieces turned out beautiful and festive. Thanks for sharing.
I thought this washstand looked familiar and didn’t realize you had a makeover tradition going on. How fun! Love the festive custom color, Denise, and those stripes are gorgeous! Merry Christmas xo
Thanks, it IS FUN! A different look every year… we’ll see how many I can come up with before I retire this sucker…lol. Merry Christmas Marie! Big hugs from Toronto! XOXO
You sure are getting lots of great mileage out of that piece! Love seeing its different lives. Just like a cat, you may have to stop at nine – that leave you 5 more lol 🙂
lol… too funny Sara! Thanks so much! XOXO
It looks Fantastic! Thanks for showing us how.
Thanks, Matthew! x
Wow! That’s very cool, great tips, and a lot of super information. The piece turned out beautiful. Love it!!
Aw, thank you, Kevin. Much appreciated and glad you like it! x
What a fun and festive piece!
Thanks Nikki! x
It looks so fun and festive, Denise!! xo
Thanks my friend! XOXO
How fun and vibrant!!! So nice to look at on gloomy winter days!!
Thanks Suzanne! Here in Toronto it’s been super gloomy winter weather so this piece was fun. The custom color put a smile on my face! x
I love the color that you ended up with when you mixed Peony and Honky Tonk ❤💕 Gorgeous piece!! Thank you for sharing!!
It just brightened that Red up to the next level, right?! 😉 Thanks Mary Ann!
How festive! So pretty! I can’t wait for Christmas!
Me tooo… and thanks Alanna! x
Love it…so cheery, festive and fun!!
Thanks Susan! x
This is absolutely stunning! I love the vibrancy of this piece.
Aw, thanks Cortlyn! So happy you like it! XOXO
End result was lovely! Such a charming piece!
Thank you Kayla! x
What a darling, festive piece! You’re so talented!
Thanks so much Julia! x
So So Adorable! Thank You for sharing! Wishing you & yours a Blessed Holiday 🎄♥️💙
Thanks so much, Marcia and I’m wishing you and yours a Blessed Holiday as well! 🙂
It’s beginning to look a LOT like Christmas! I love that you used our new Color Lab! Super fun and such a pretty piece. Thank you Denise!
The color lab is A LOT of fun and will really come in handy when I have a little bit of paint in the bottom of each jar. Brilliant idea! XOXO
Love this years make over. Can’t wait to learn about the mix app.
Thanks so much Robin! And ya, that Color Lab is super handy and fun to use!
This is a festive happy piece! Thanks for sharing all the different styles and tips along the way!
Thanks Nicki and so happy you like seeing all the styles!
I thought this piece looked familiar ha ha! I love the new festive look and it might be my favorite of the bunch! XOXO
You were so right…lol. I gave myself the challenge of how many looks I can give this cute little bugger…lol.😅
I thought of these lyrics while scrolling through your post.
It’s beginning to look a lot like Christmas
Everywhere you go
Take a look at the five and ten, it’s glistening once again
With candy canes and silver lanes that glow
It is very festive and reminds me of candy canes. How fun!!
I just sang your comment out loud…🤣 Thanks so much Nicki! XOXO
Your Christmas washstand is one of my favorite posts. Merry Christmas
Awww, thanks so much Brenda! You just made my day!!🥰
I love it! I also liked it taped off with the green frog tape – ha!
Thanks for the striping tip!
haha,I thought the same thing after I taped it all off – the green wasn’t bad!
Hi Denise. I can’t believe how different you make this adorable little washstand look each year. And I definitely CAN’T choose a favorite. All 4 makeovers are beautiful and festive. Thanks for showing us what some time, some paint, and a lot of imagination and skill can do to completely transform a piece of furniture.
Aw, thanks my friend. I’ve been painting furniture for a lot of years and I’m STILL amazed at what a little paint can do! XOXO
Love it.😍Thank you for sharing your tip on painting stripes! You smarty you😉 I like this way rather than measuring. Merry Christmas!
It’s so much easier and saves so much time, right?! Thanks Lorri! XOXO
It’s SO festive and fun!! Beautiful job, Denise. ❤
Thanks so much Larissa! XOXO
Wow Denise, what a.pretty color. I love your whimsical Christmas piece.
I love ‘wows’ so thank you…lol.😉