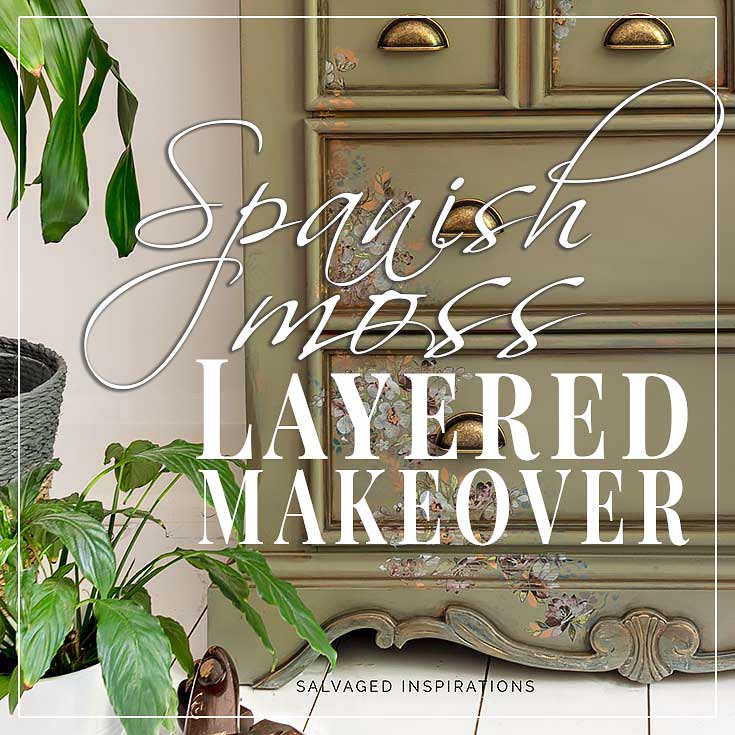
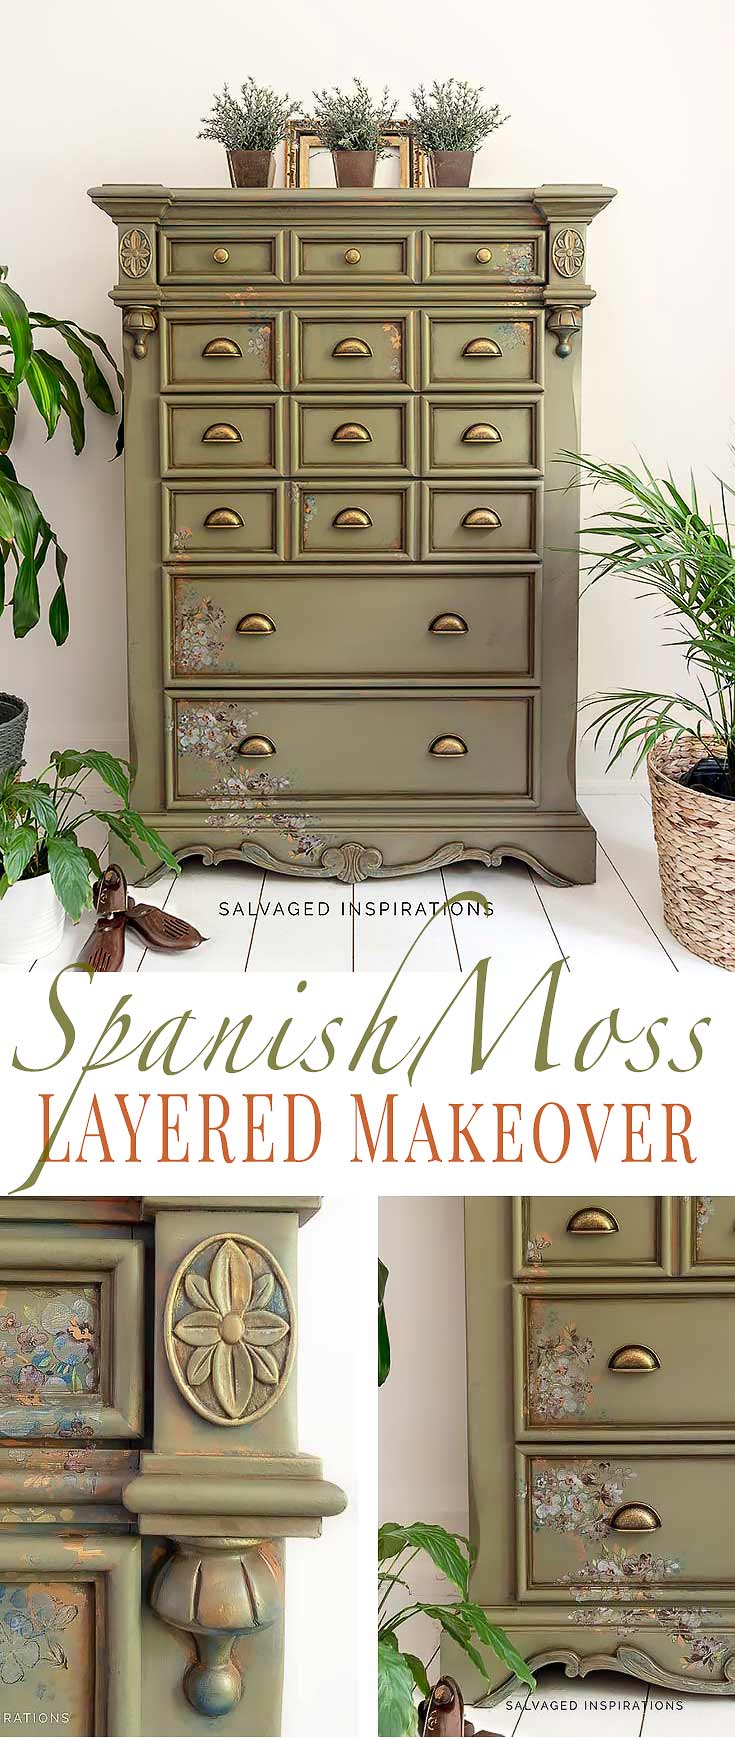
HOW TO LAYER PAINT AND PRODUCTS TO ACHIEVE THIS GORGEOUS SPANISH MOSS LAYERED VINTAGE DRESSER MAKEOVER!
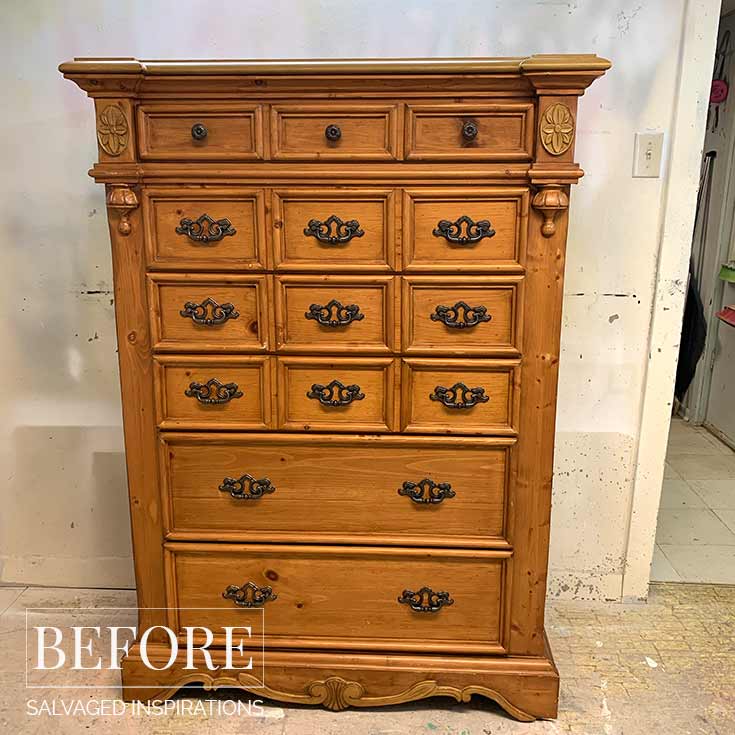
Even after all these years of painting furniture, I had a nervous-excitement starting this dresser because I really wanted to do it justice. I don’t often work on ‘perfect-as-is-pieces’ like this. This dresser required NO repairs, NO fill, NO adjustments. It was a pick-up and paint project.
For you wood lovers, out there, you may have mixed feelings about covering up this pine, but that said, I’m ecstatically happy with the new look.
I implemented some of YOUR ideas and suggestions you left me on Facebook to come up with this Layered Spanish Moss Finish! I have to admit, amalgamating your FB suggestions is becoming a fun challenge for me, so thank you!
Here’s what I started with…
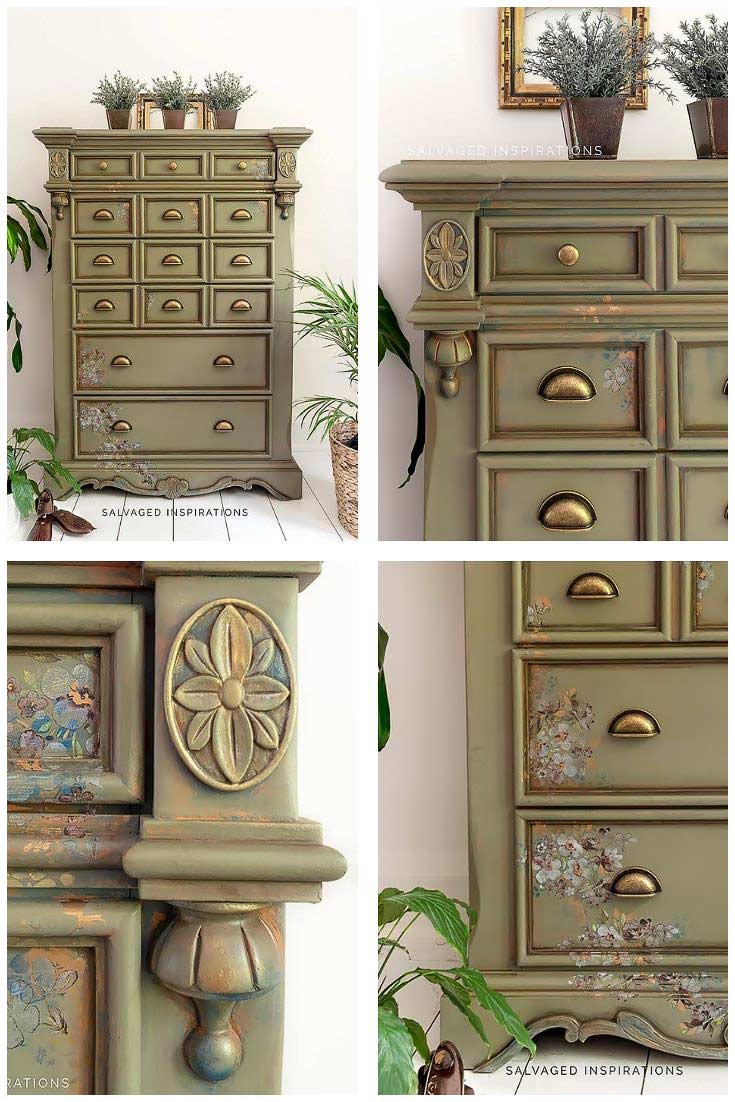
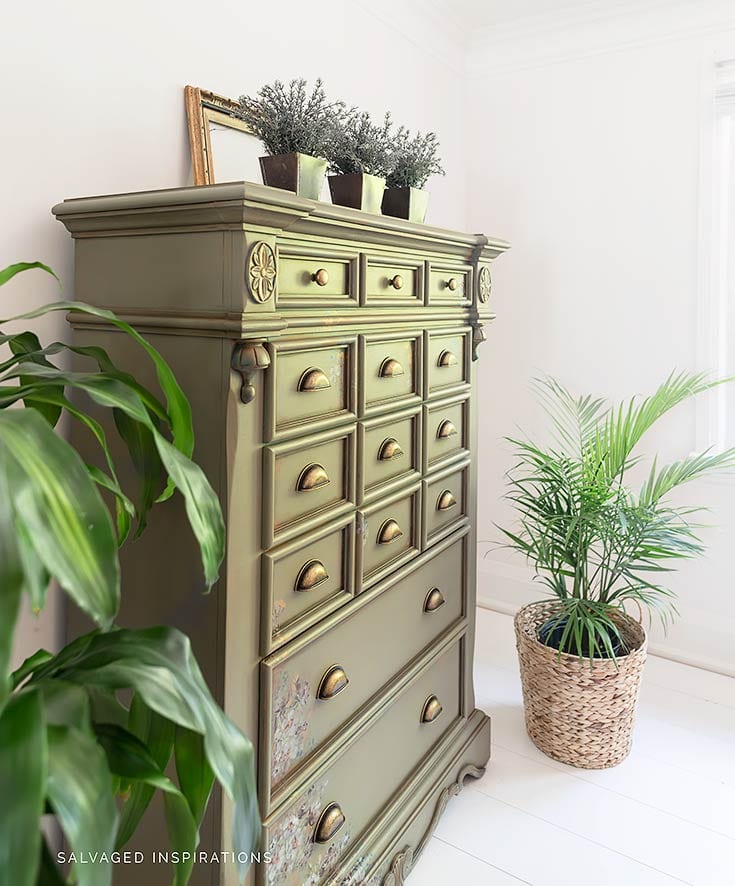
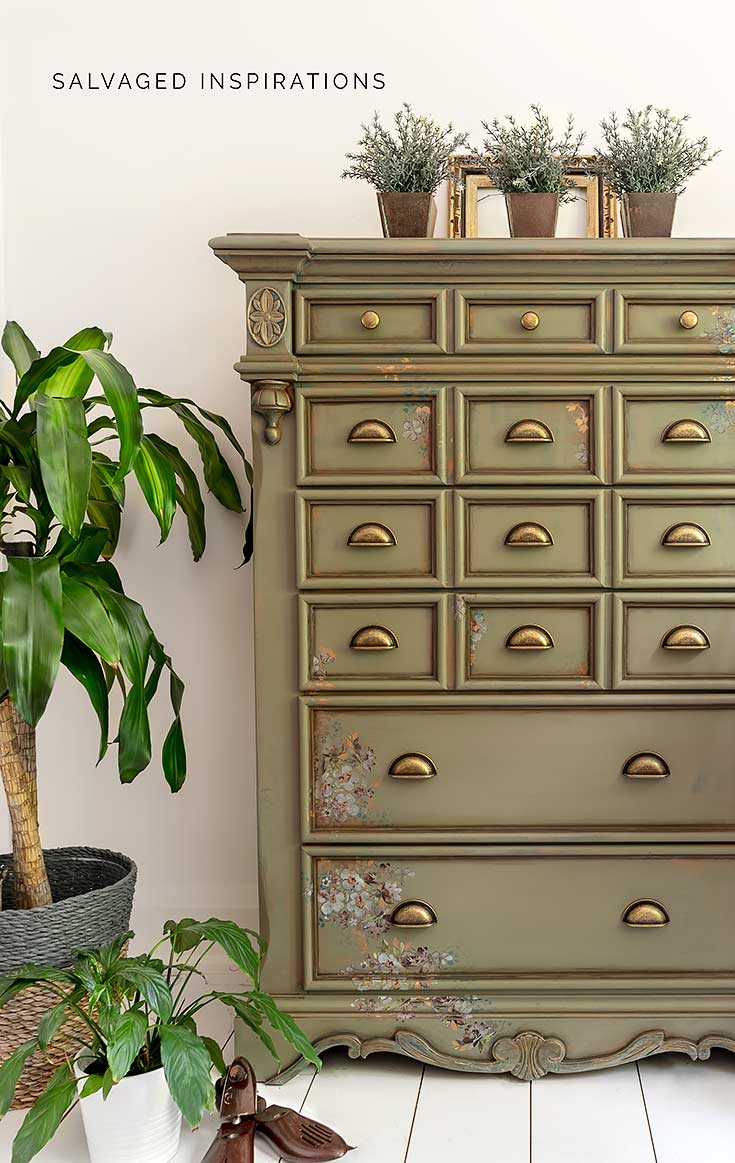
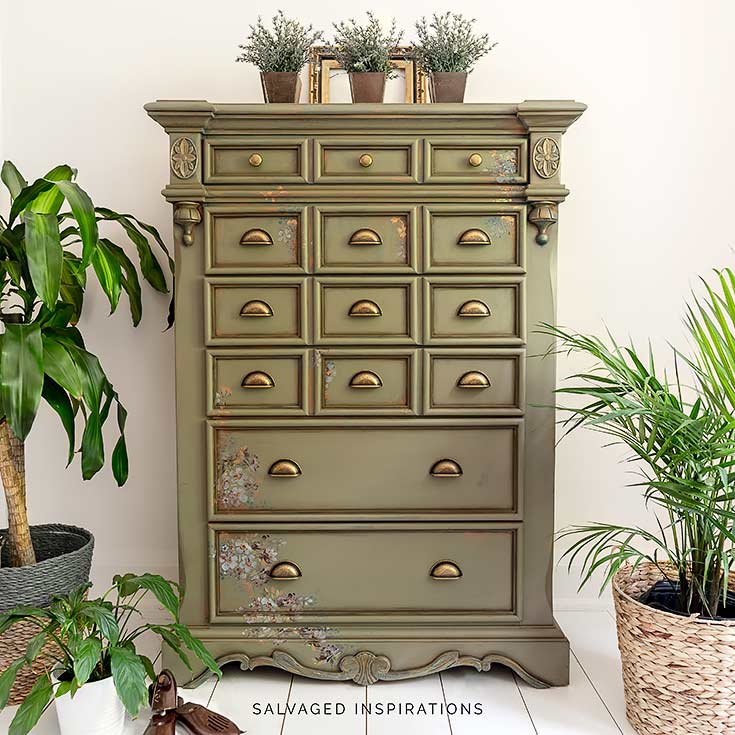
Here’s the after. Feminine. Stately. Regal. Simply lovely… what do you think?

THIS POST IS SPONSORED/CONTAINS AFFILIATE LINKS TO PRODUCTS I USE. YOU CAN SEE MY FULL DISCLOSURE HERE.
SOURCE LIST::
SPANISH MOSS LAYERED DRESSER::
I started by giving this tallboy a good cleaning and then layering on a few colors. I started with Stormy Seas blue/gray, then added a terracotta. I know – looks a little scary at first.
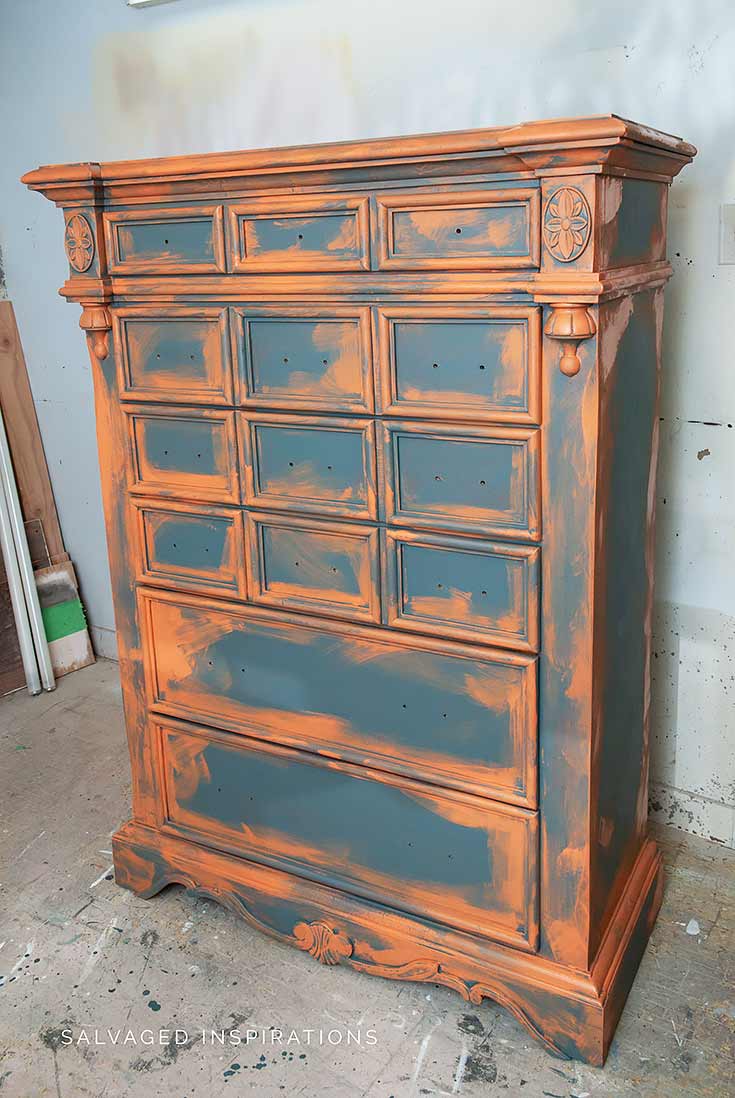
After the first 2 layers dried, I applied my first coat of this Spanish Moss. The first coat still has quite a bit of the base colors showing through. When layering paint, it’s easy to adjust how much of the base colors show through simply by applying another coat.
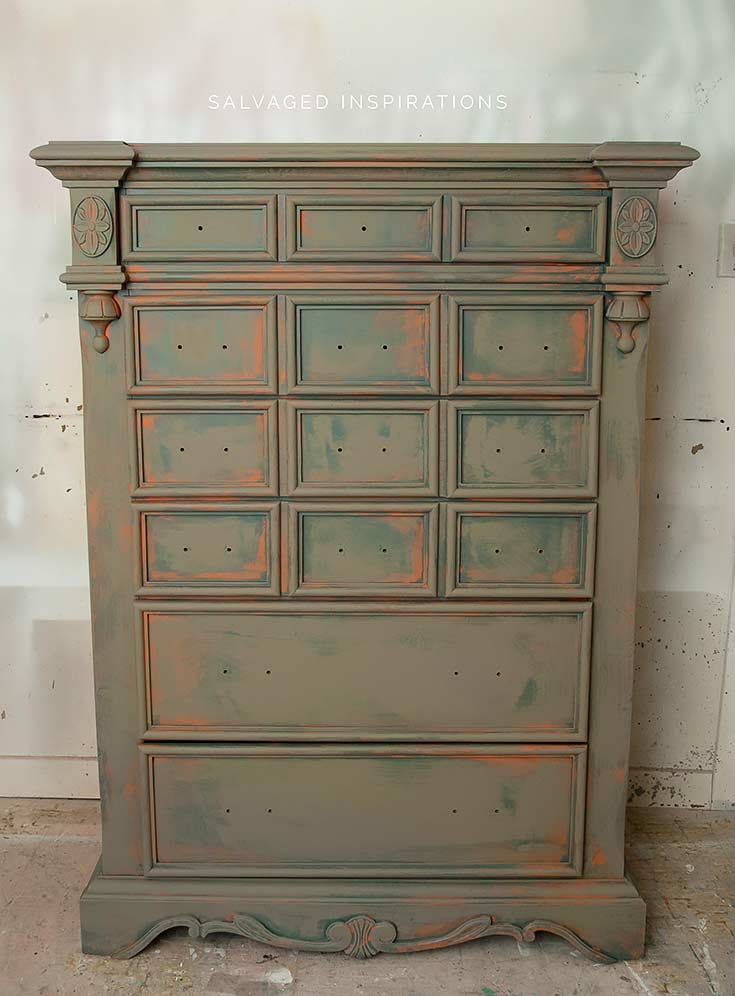
After I added another coat of Spanish Moss I started layering products.
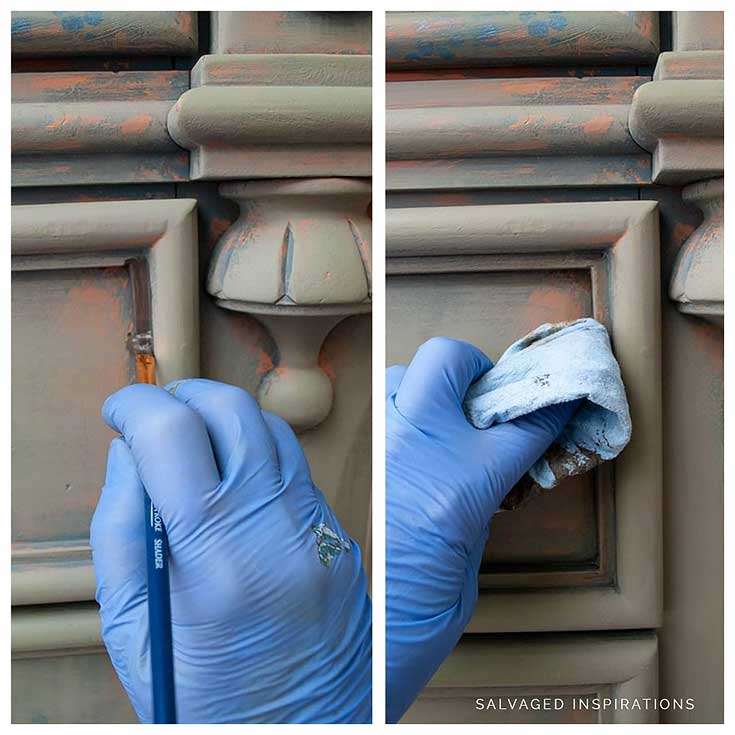
To add extra depth to the drawers, I used Van Dyke Brown Glaze on the inside of all the drawer frames. A small artist’s brush got right into the corners and edges and then I wiped off the excess glaze with a shop towel.
Royal Ann Garden Stick and Style Stencil with Blue and Gold Decor Waxes were applied randomly to some of the top drawers and to the bottom left side.
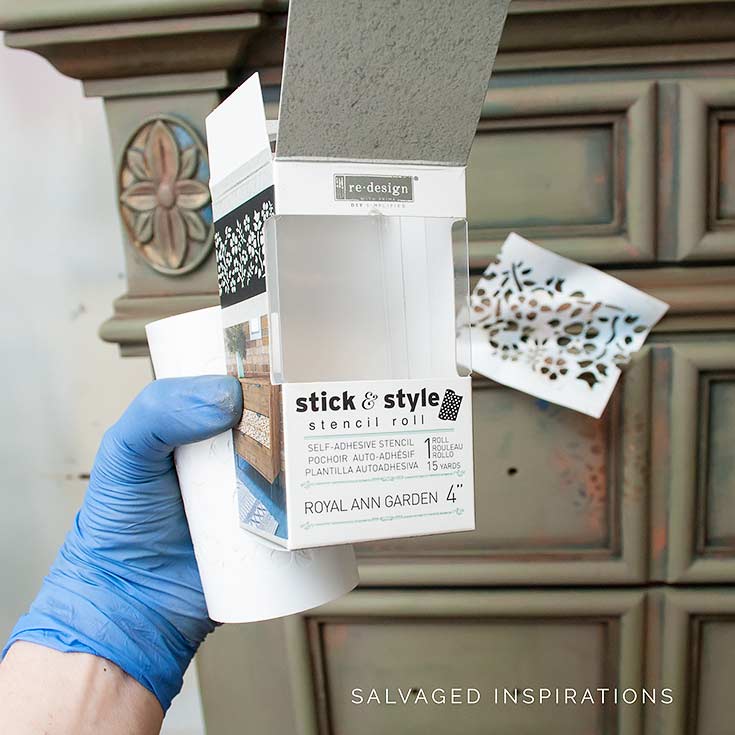
Then used the same color decor waxes to highlight the details on this piece.

Lavender Fields Furniture Transfer was applied over the stencil for a layered peek-a-boo effect.
This is a little trick I use to finish off leftover furniture transfers. I don’t want them to go to waste but sometimes what I have left looks a little sparse on its own. If you layer it over a stencil design, they blend nicely and cover a larger area.
Can you see the metallic stencil design peeking through? They work beautifully together.


The Terracotta, blue and golds tie this piece together really nicely.
And can we talk about hardware ugggh? I ALWAYS fill the original hardware holes because it provides me the option to pick whatever type of handle or knob after my piece is painted.
This time I thought I’d keep the old hardware…I figure it suited the piece nicely.
NOPE.
Once the piece was restyled, I knew cup handles were the way to go so I was running around yesterday shopping for new hardware to fit the original holes. I’m really happy with the new hardware though!


LET ME KNOW WHAT YOU THINK OF THIS SPANISH MOSS LAYERED MAKEOVER… OR FEEL FREE TO ASK ANY QUESTIONS YOU MAY HAVE… I ALWAYS LOVE HEARING FROM YOU. IT MAKES MY DAY! 💙
Happy furniture painting my friends!
Denise x
RELATED POSTS::
How To Apply Furniture Transfers
7 Furniture Stenciling Tips
How To Apply Gilding Decor Wax
Stop Bleed Through When Painting
Layering Chalk Paint | Empire Makeover
PIN AND SHARE!

I just saw this piece on Pinterest explaining how to layer transfers. I follow you and have seen many of your pieces. Thay are all beautiful, but this has to be the most beautiful piece I have ever seen. The combination of colors you used and the details are perfect. Bravo!
Thank you so much Leslie, do glad you love it! And very kind of you to drop in from Pinterest and leave a comment!🤗 Have a great weekend.
Hi Denise,
Thank you for the detailed post on how you created such a gorgeous piece! I’m planning to attempt a hutch using what you used here. I was wondering, did you poly the entire dresser to finish it? I saw poly in the supply list. If so did you do multiple coats? Thank you for the inspiration!
Hi Crystal and thank you! Yes. This piece was sprayed with two coats of Varathane Waterbased poly for protection. If you don’t have a sprayer, you can also brush on 2-3 coats for extra protection. 🙂
Hi Denise! I keep going over your transformations hoping i can pick up your techniques and this piece, my friend is true artistry. I cannot think outside of the box like you. I really try. Keep posting these beauties. I think i am going to blow this picture up and tape it to my wall so i can try and copy. it. I have opened up a booth and i need to step up my game.
Thank you for sharing your talent
Heeeey, a booth!!!! Congratulations Cheryl that’s super exciting. I’m wishing you all the best and much success! XO
Gorgeous!! I’m a fan of your work now. And you’re so cute on your videos!!
Thanks Ionara! I’m new to Youtube/videos so I’m learning as I go. 🙂
That’s the most beautiful furniture redo I have ever seen! Thanks for sharing the great photos!
Thanks SO much Mary! XO
EVERY time i see a piece that I love I tap on it and it’s ALWAYS you Denise once again you made an ugly color awesome!!
awwwww, thanks Colleen!! … “once again you made an ugly color awesome”… this gave me a chuckle. Beautiful compliment. Thanks again.😘
Beautiful job! Really subtle the way the blue, terracotta and green are enhanced by the gold shimmer. A work of art! Always enjoy your transformations! Kind regards from Penny 😊
Thanks Penny! x
I didn’t think the tallboy could have been any more gorgeous but, I was wrong! It’s amazing!
Aw, thank you Bobby! 🙂
OMG! Awesome transformation Denise! This is real work of art.
Thanks so much Beata!🌸
This piece is absolutely stunning, Denise! True art. I adore the color too! xoxo
Thanks so much, Nancy! I thought the red would be slightly brighter but I’m super happy with it. 🙂