I hope you all had a wonderful holiday with family and friends! My ‘official’ back-to-work date is Monday, but there’s flexibility in being self-employed… and I miss you all!
So, as we say goodbye to 2015 and get ready to ring in the new year, I’m sharing my my Top 10 Trash to Treasure Furniture Restyles of 2015.
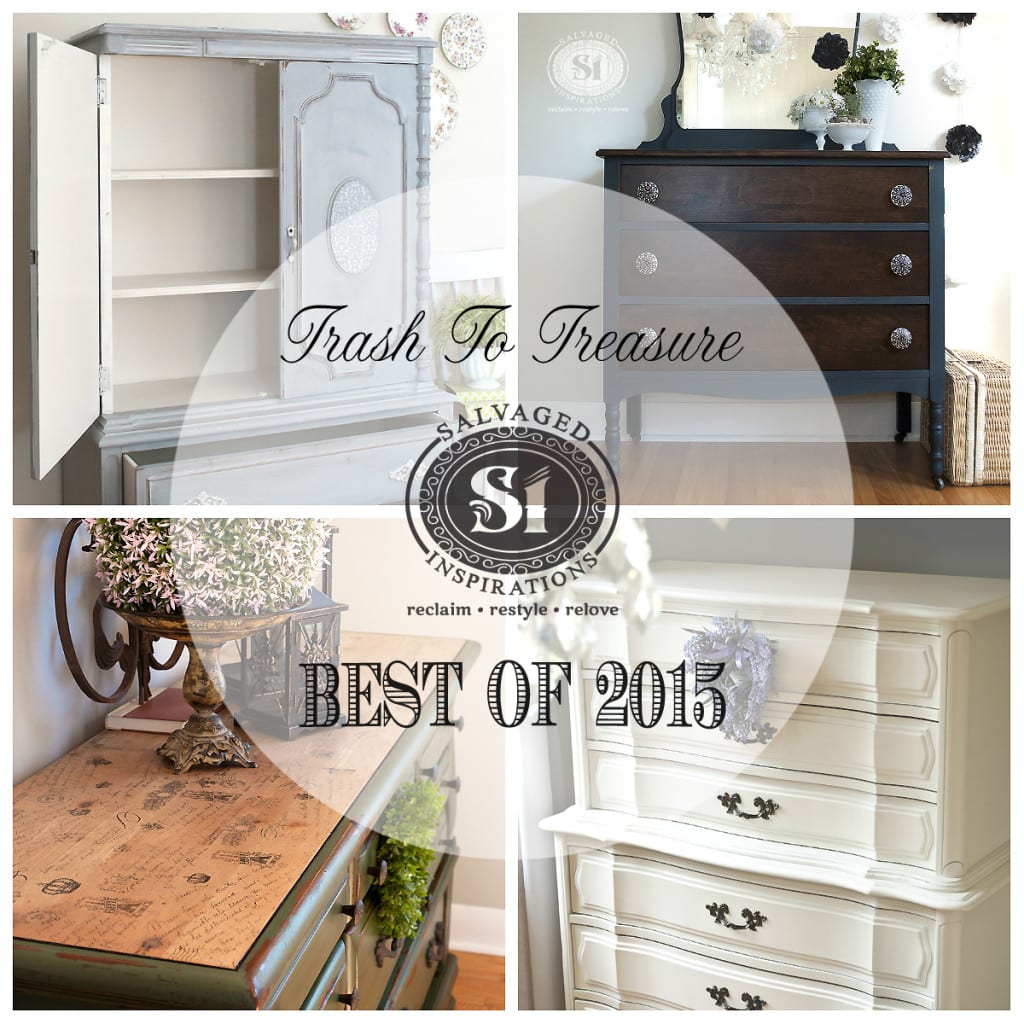
Most of the furniture pieces below are salvaged roadside rescues – real life trash to treasure transformations. Some of these are your favorites which had the most views, comments and visits – and I’ve thrown in a few of my favorites for sentimental reasons.
Let’s start the countdown!
![]()
10:: Classic French Provincial
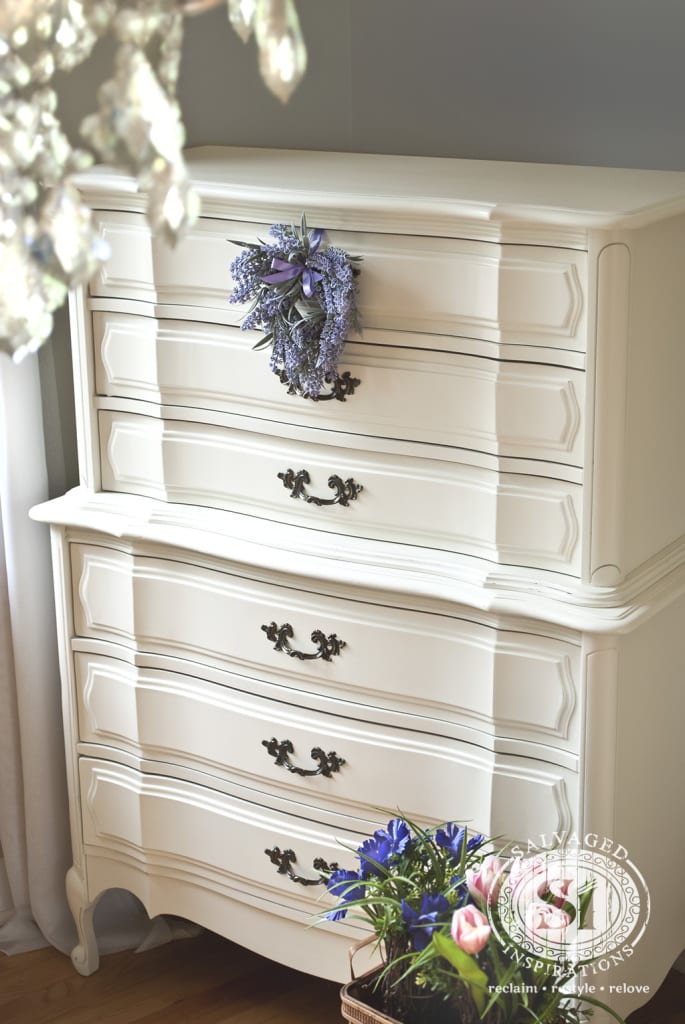
I was super pleased with this Classic French Provincial Dresser that M-M-M found curbside on the streets of Toronto.
It looked pretty sad when he sent me a text picture inquiring if he should haul it home. To make it look fancy-new again, I used General Finishes Antique White and my paint gun.
This classic simplicity and flawless spray finish made this piece one of my favorites of 2015.
9:: MMS Boxwood Dresser
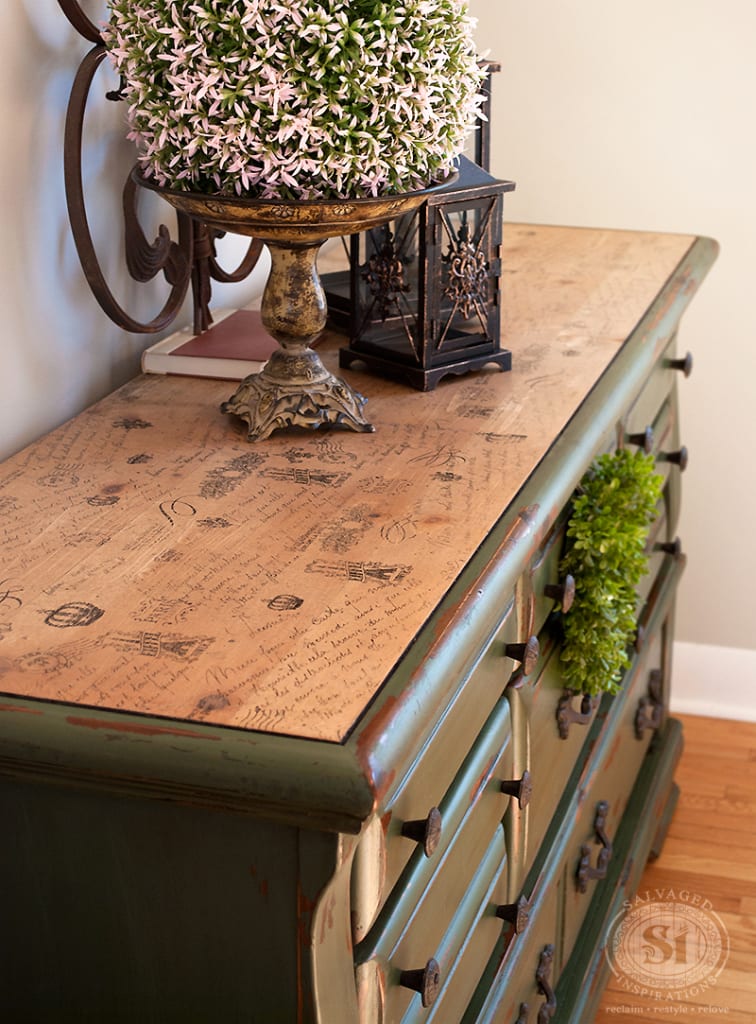
This roadside rescue was one of your favorites. It was painted in Miss Mustard Seed’s Boxwood and was decoupaged with a french script tissue paper and then sanded back to reveal its natural wood top.
This salvaged 80’s dresser redo has been pinned over 4K times on Pinterest and I’ve received a lot of comments and questions on the technique that was used to reveal the wood.
Truth be told, although the end result was amazing, this dresser gave me hard time. It fought me every step of the way. It was a lesson in patience and I shared some of my failed attempts with you on Some Bad Takes and Some Good Advice post.
I do love how it all came together in the end though.
8:: Vaseline Distressed Desk
Another one of your favorites of 2015 was this charming little desk redo. This unremarkable desk was also curb-shopped.
Made of solid maple with good bones, this desk developed some real character when it was painted with MMS Typewriter Black and then Vaseline Distressed using MMS Luckett’s Green.
This before and after has been pinned over 3K times on Pinterest. Thank you all for sharing! It was my very first project of 2015.

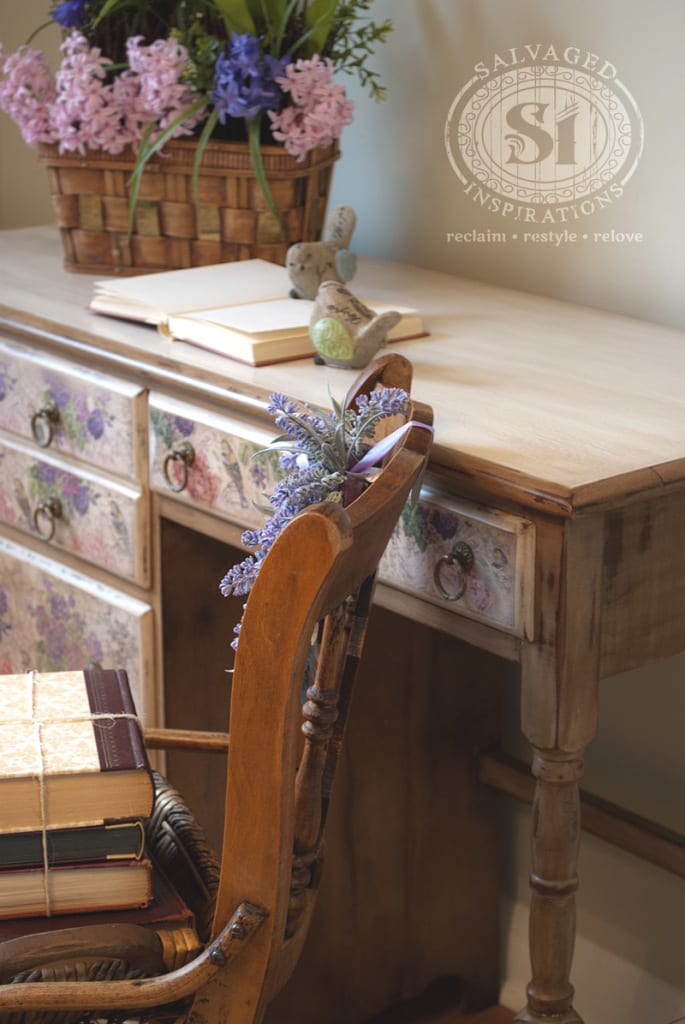
7:: Decoupage Napkin Desk
This plain trash to treasure desk also had wonderful bones and great potential. Because I love trying new techniques, I didn’t let last year pass without trying to Decoupage with Napkins.
A feathered glazing method was used to add depth to the painted areas and the colorful bird motif napkin(s) transformed this desk into a unique beauty. This one-of-a-kind desk sold very quickly!
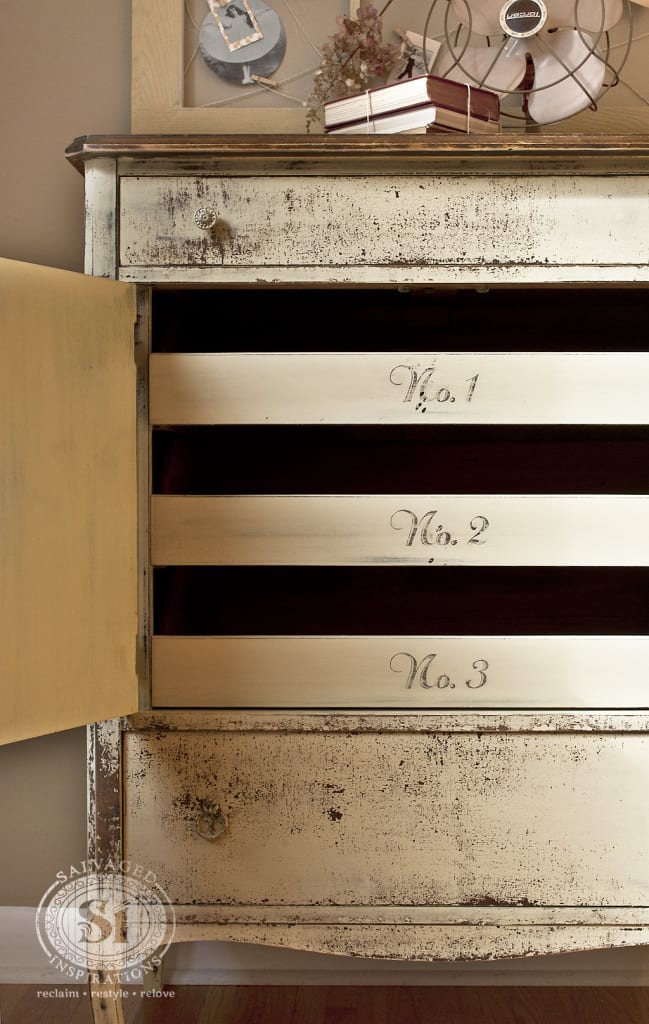
6:: Chippy Vintage Dresser
A color I’m always drawn to is soft yellow. I’m not sure why I don’t paint more of my furniture in yellows? It’s so cheerful, soothing and warm.
This Chippylicious Vintage Dresser was easy and fun to work on. It was one of those pieces that spoke-to-me for the ideal finish.
This was a really old piece and lent itself perfectly to a chippy vintage patina so I let the milk paint do-it’s-own-thing. Perfect. It chipped in all the right places.
To try something different, I transferred the numbers on the drawers using regular wax paper and my household ink jet printer.
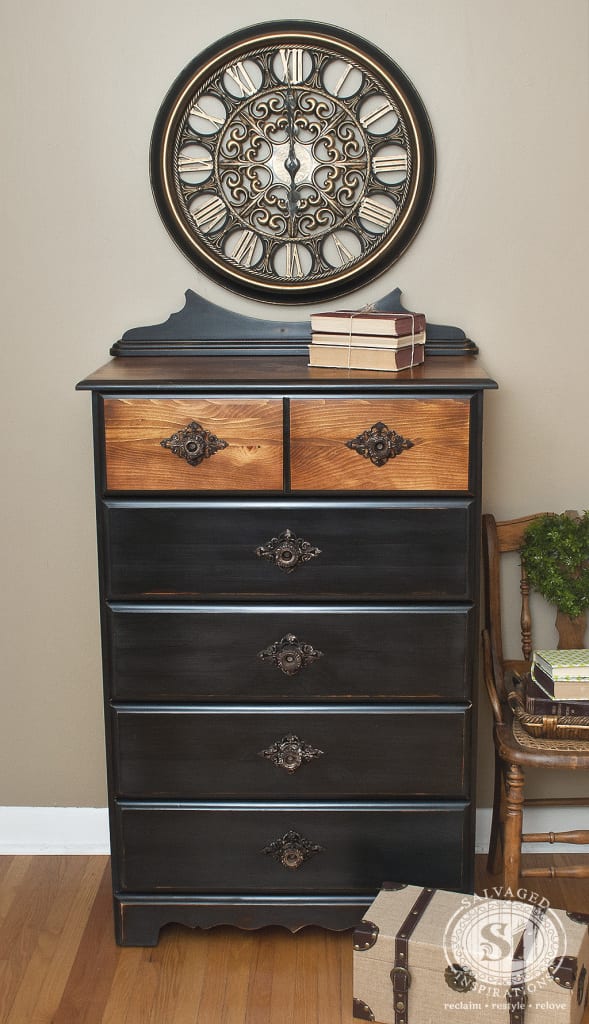
5:: Small Find Dresser
This dresser made it into my roundup because it had sentimental value to me. The dresser was plain and boring, however the paint and stain finish with the detailed hardware made a huge difference.
What added the finishing touch was the small find my Dad and I spotted while driving to one of his appointments. The fun my Dad and I had salvaging this piece will always make me remember this roadside rescue fondly.
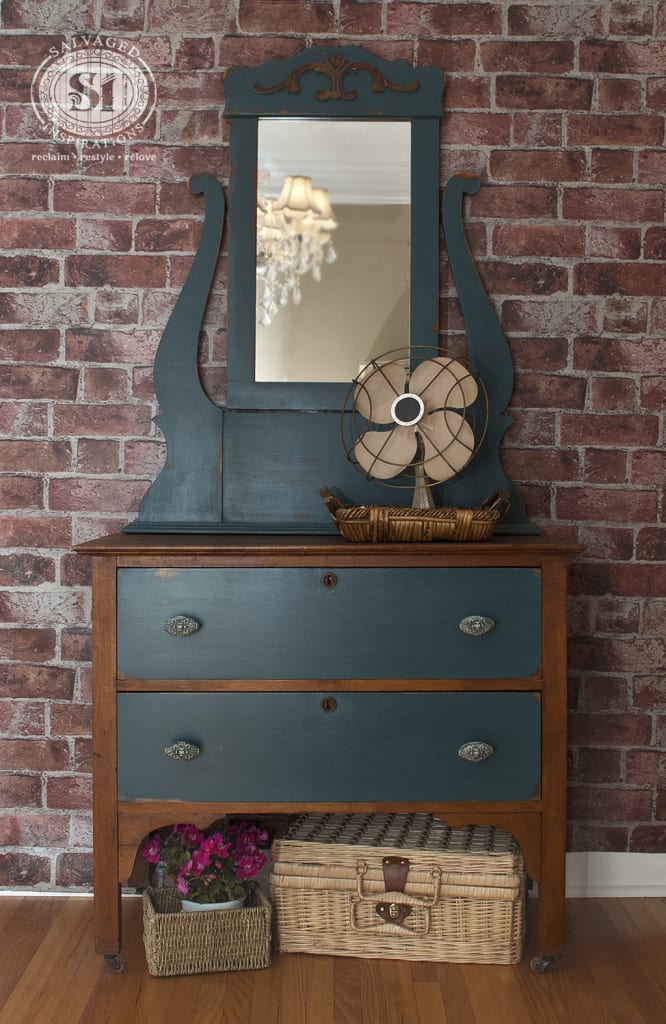
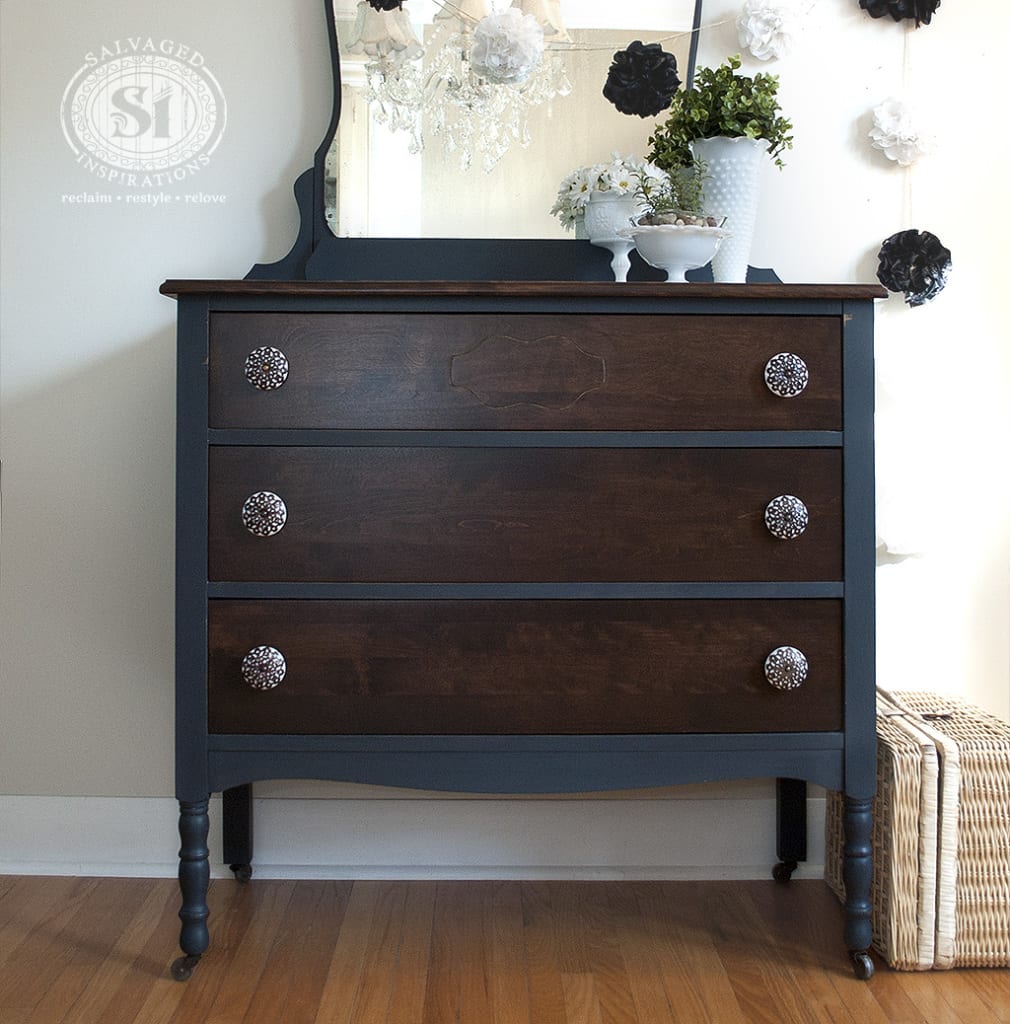
4:: Vintage Dresser+Mirror
This Vintage Dresser and Mirror made the Top 10 List because it sold in record time! I had a blast painting it with Bluestone House New Chalk Patina Paint that had been generously given to me at the Christie’s Antique Road Show.
While working on it, I also discovered a non-sanding product for hard to sand areas! I posted this Vintage Dresser+Mirror on my Facebook page and within a few hours it was sold.
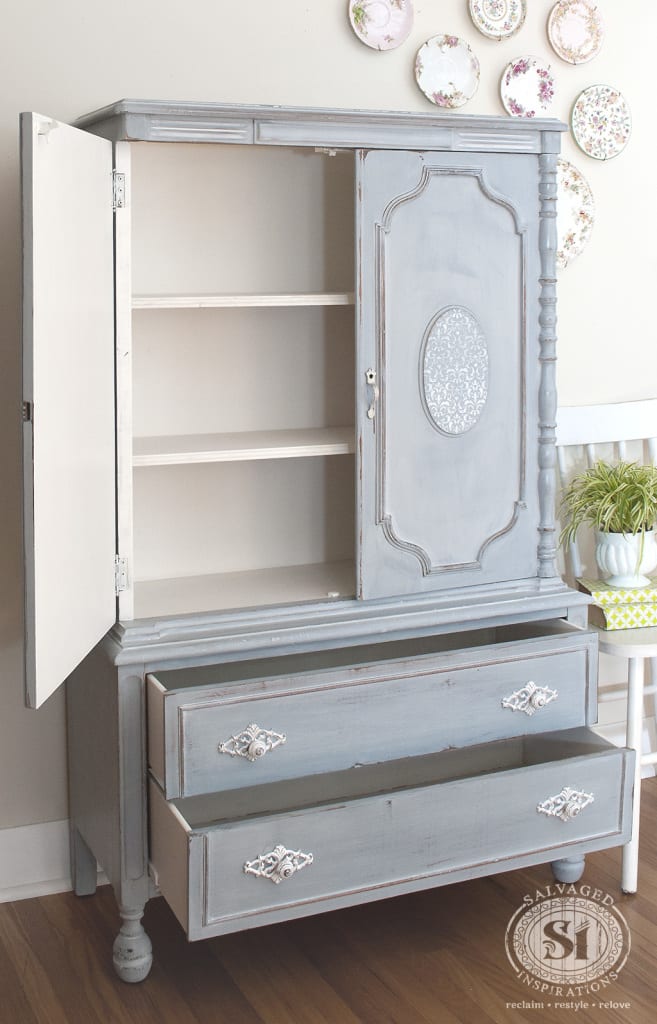
3:: French Country Armoire
Another hand painted and stenciled piece that was popular in 2015 was this French Country Armoire.
It was painted it in MMS Shutter Gray with a soft white glaze which added a faded country style.
There was a lesson to be learned with this piece too – read the ad 100% before purchasing! I was under the impression this was a full sized armoire but it turned out to be slightly over4 feet tall. All is well that ends well. I love that this formerly unattractive piece blossomed into a French Beauty.
2:: VINTAGE VELVET DRESSER
I’ve included this Vintage Velvet Dresser in the round-up because it signifies a bit of a turn-around for me. I learned of another NEW product, which is always exciting and it was one of those pieces you just have a lot of fun with. No pressure in deciding on colors, stains, staging etc. Easy peasy and looks amazing.
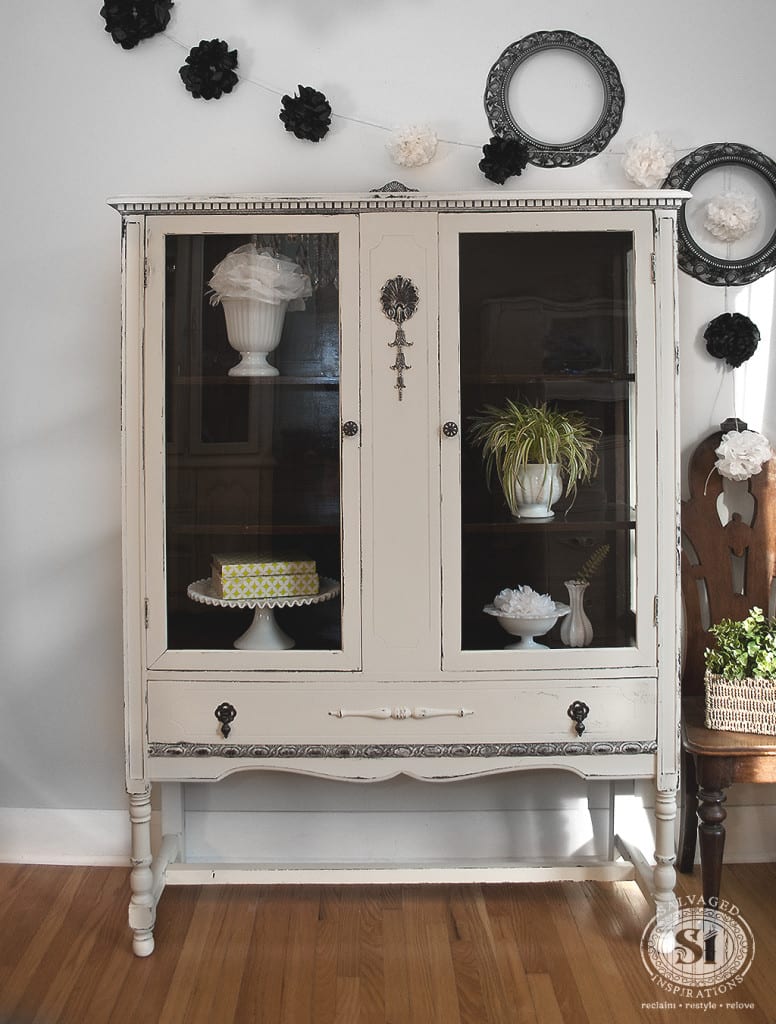
1:: Antique China Cabinet
I’ve included my very last painted piece of 2015 in this round-up because it’s a great reminder to me ~ Seek & You Shall Find. I was looking for one of these Antique China Cabinets with the glass on all four sides ALL YEAR LONG! I finally found one (not in particularly good shape) selling on Kijiji for $50. After some repairs, replacement glass and some TLC, this cabinet painted in General Finishes NEW Chalk Style Paint turned out beautifully.
She’s sitting in my dining room as I write this post… and I’m still not sure if I’m going to sell her or not.
I hope you enjoyed the round-up of my trash to treasure furniture finds! If you have Top Projects of 2015 you’d like to share, Rhonda at Southern Hospitality is hosting her end of the year party again! Have fun ringing in the New Year. Be safe and see you in 2016!!!
Did your favorite piece make the list? Chime in because I’ve missed you! 🙂
~ Denise ~
_____________________________

Your work is absolutely beautiful! Thank you for sharing.
Thank you Adela… beautiful name btw 🙂
I just found your site today from a picture on Pinterest of the decoupage with napkins piece!! Love your site & signed up for your newsletter!
I wanted to share a tip (not my original one & I came across it so many years ago I forgot the source-oops) about decoupage with napkins.
After you separate The plies SPRAY lightly but thoroughly with Mod Podge sealant or some other general sealant and let dry. The napkins do not tear as easily I think because the sealant acts a bit like a ‘glue/adhesive making the napkins have a bit more body.
Like you, my first attempts at using napkins were disastrous but I tried this and got much better results. Not foolproof from tears but almost!
Thanks for sharing your projects, they are so lovely! Excited to have found your site!😃 Now, to follow you on Pinterest…😉
Hi Renee… so happy you’ve found the #siblog, WELCOME! 🙂 Thanks for this tip, love it! I’ll have to give it a try. Hope to chat again soon. 🙂
Have a Wonderful New Year Denise ,thank you for the inspiration and help you so lovingly share , looking forward to the fun and joy of opening your page . Peace to all .
Thank you Catherine! Hoping you have a wonderful New Year as well! 🙂
Denise, as they say in French…chacun plus beau que l’autre! (Each one more beautiful than the last!) Congratulations on a prolific year, hope 2016 brings new adventures & success.
Thank you Tracy… and thanks for translating!:) I’m wishing you a fabulous 2016!!! x
I have knotty pine panelling throughout my lake house (kitchen, living room, dining room, halls). All the rooms are different shades and some are very dark and have yellowed quite a bit, including the ceilings. I would like to paint it all to make it more cottage looking and consistent throughout the house. Is it possible to mix the calcium carbonate with a semi gloss latex paint and therefore not have to poly after? I am nervous about the yellowing, but read your posts about needing to apply poly on kitchen cabinets. Maybe a gloss or semi gloss would protect it but not sure how that works with calcium carbonate. Thanks!
Martha, pine is notorious for bleed through so I would suggest using a good primer prior to painting. A great one that I like (specific to blocking stains) is BIN Shellac Primer…love it! Then go ahead and add your semi-gloss latex or a flat/eggshell latex for easy cleaning or wipe down. Poly topcoat is not needed for walls. (Adding the calcium carbonate will make the wall paint more porous which can attract more dirt/oils etc.)