THIS CURB-SHOPPED STOOL GETS A FLORAL WOOD BURN DESIGN TOP | 7 BEGINNER TIPS FOR WOOD BURNING ON YOUR FURNITURE | YOUTUBE VIDEO

Hi beautiful creative friends! I’m not sure if I mentioned but my sister recently had surgery. She’s healing nicely and getting stronger every day but she’s not allowed to lift or do anything strenuous for several weeks. Because she’s used to being active and on the go, I wanted to find us something to do where she could stay seated yet create — so I pulled out this curb-shopped stool. Andrea suggested we keep it really rustic and try the wood-burning tool I bought at Hobby Lobby. Brilliant because Wood Burning on Furniture is something I have never tried!
As I mentioned last week, the amazing thing about curb-shopped furniture is it allows me to be more adventurous and try new techniques. NO GUILT if it doesn’t turn out. Both Andrea and I have mixed feelings about how this turned out so I can’t wait to hear what YOU think!
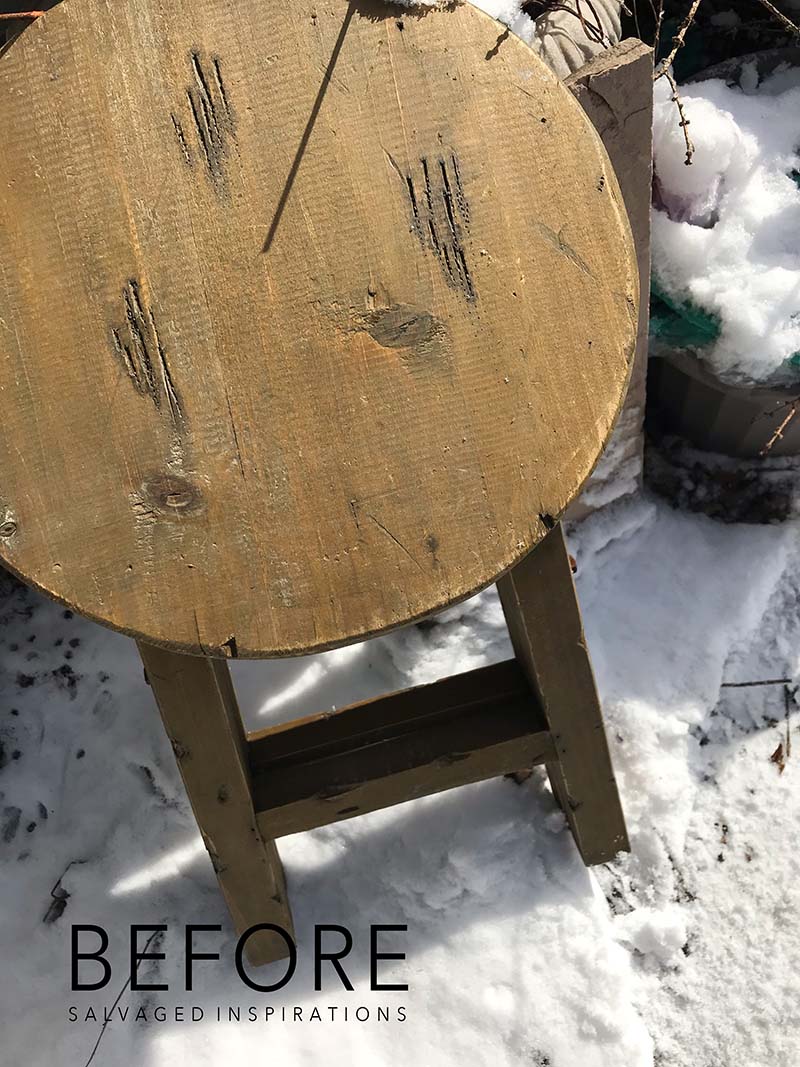
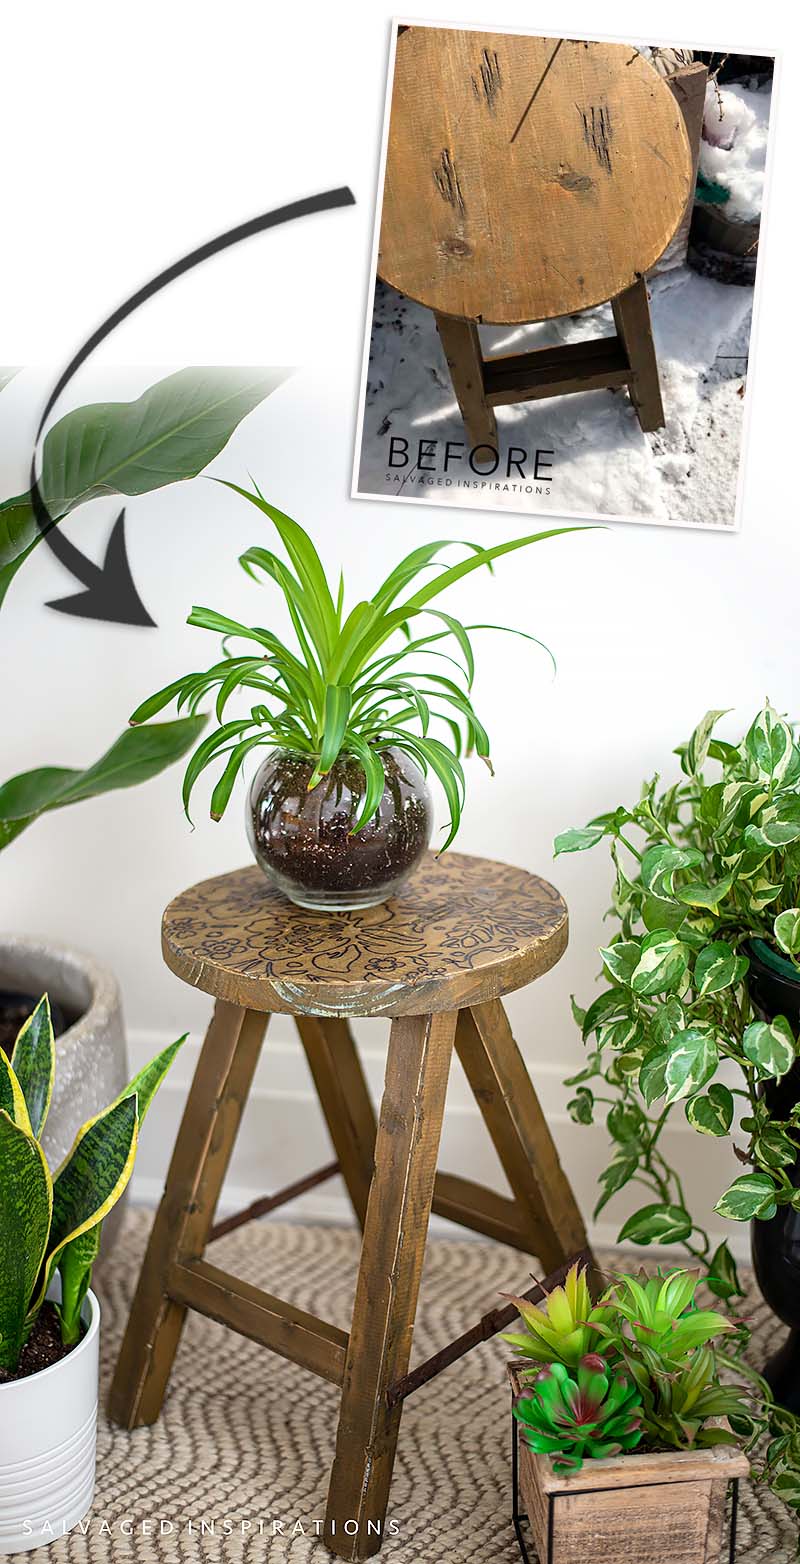
Here’s the curb-shopped rustic stool I started with. I found this on our Bulk Pick Up Day a few months back.
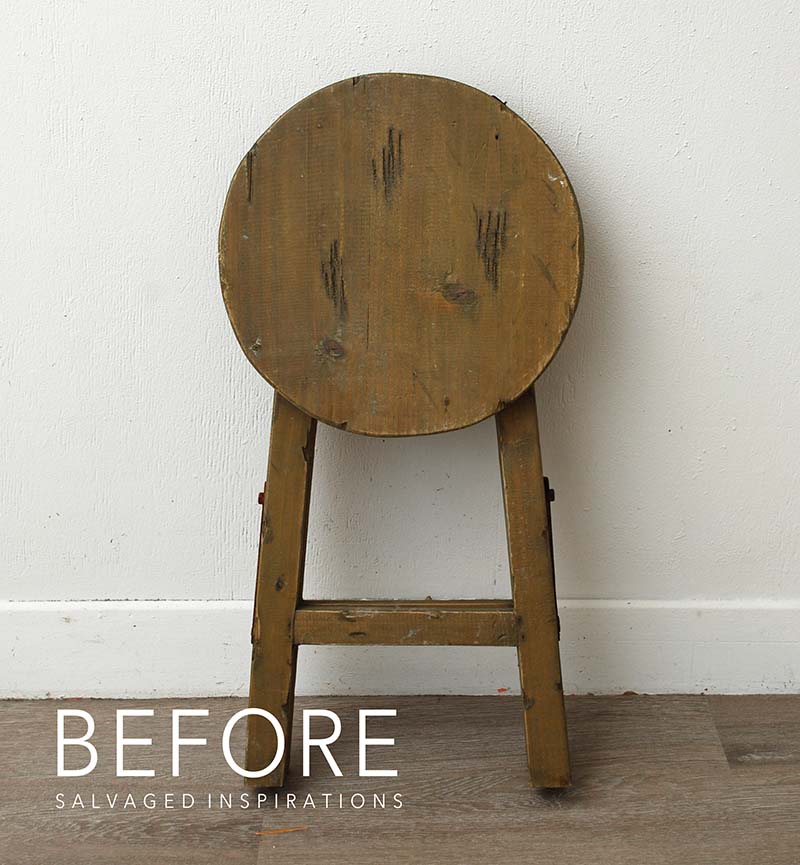
To give you a better look at this before without all the snow and junk, I took a before pic in my studio. This piece is super rustic and super cute. The seat folds down so it can be tucked away or hung on a wall.
THIS POST IS SPONSORED/CONTAINS AFFILIATE LINKS TO PRODUCTS I USE. YOU CAN SEE MY FULL DISCLOSURE HERE.
SOURCE LIST
Wooden Stool – SALVAGED
White Lightning
Floral Stencil
Pencil
Scrap Piece Of Wood
Wood Burning Kit (similar)
WOOD-BURNING STOOL MAKEOVER
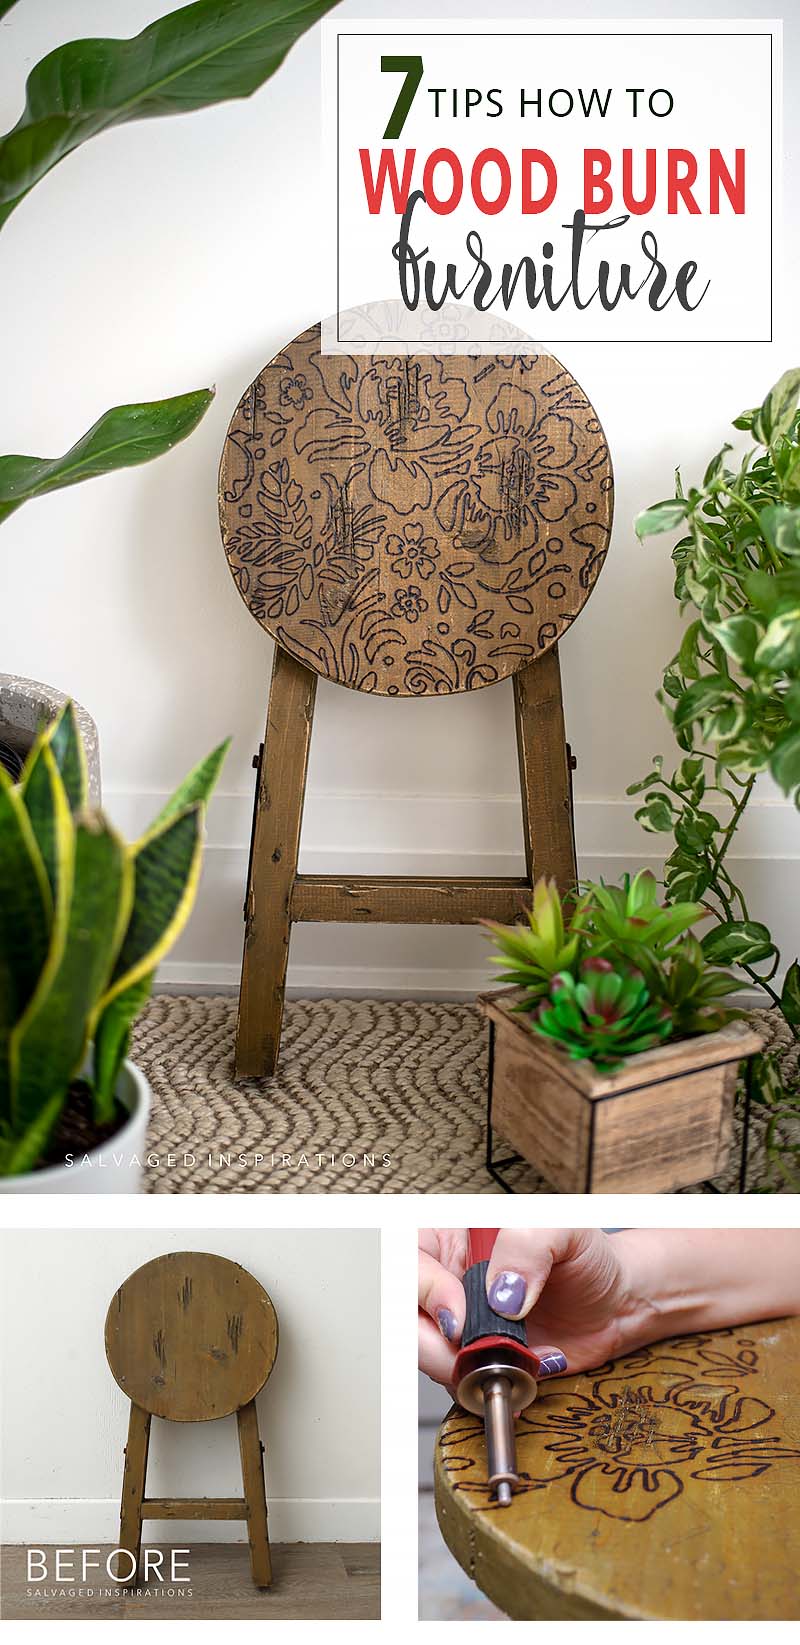
If wood-burning your furniture (aka pyrography) is something that interests you, I strongly recommend giving it a try! Today I’m taking this curb-shopped flip stool and creating a wood-burn floral design to add interest to the seat. This is a 101 beginners tutorial because well…I’m a total beginner! But I’m also including 7 Tips for Wood Burning because it’s an art that’s EASY to learn!
This is one of those times I like to say if I can do it… YOU can do it! Here’s how it all came together…
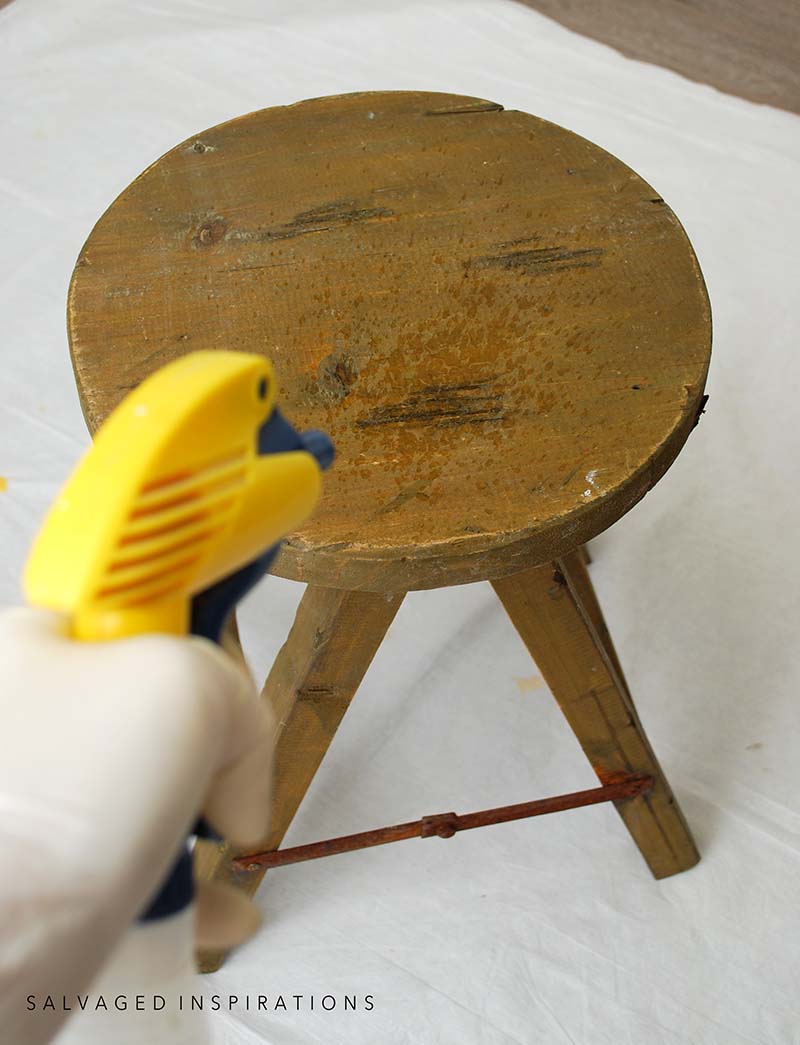
CLEAN
This stool was found curbside and then sat in my garage for a few months so it needed a REALLY good cleaning. I used this White Lightning Cleaner, a TSP substitute, making sure the top, bottom, and underneath were spotless. When I share this video on Saturday, you’ll see how DIRTY this piece really was!
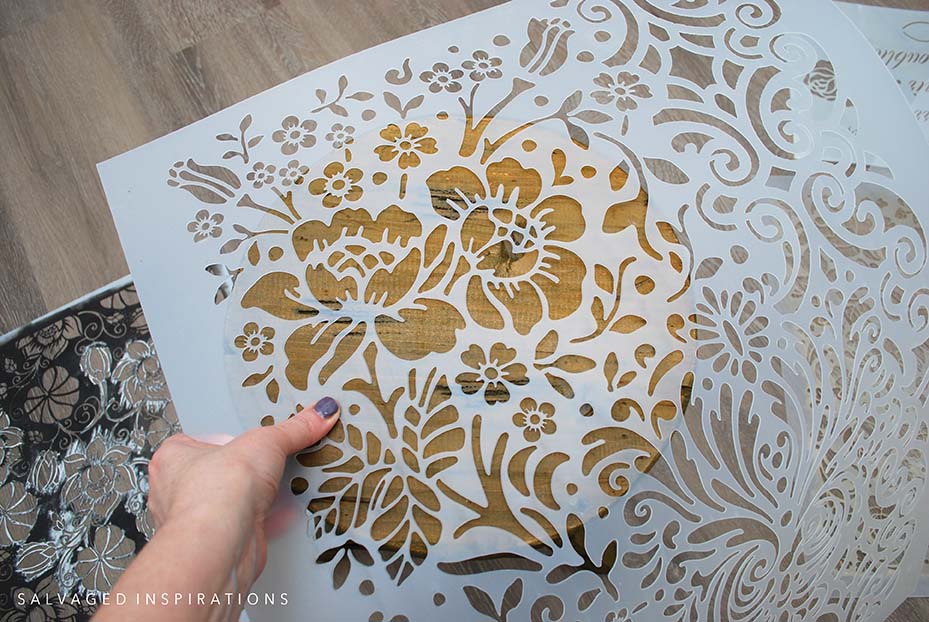
PICK A DESIGN
We tried about 6 different stencil designs on for size. Andrea liked this floral one best. I’m glad we didn’t go with anything more intricate. For a first-time wood burner, this larger design worked perfectly. If we had picked something more intricate, we would have been wood burning all day…lol. I’ve included the cost and time breakdown at the end of this post.
TRACING THE DESIGN
Once we positioned the stencil on the seat and liked the placement, we traced the design onto the seat using a pencil.
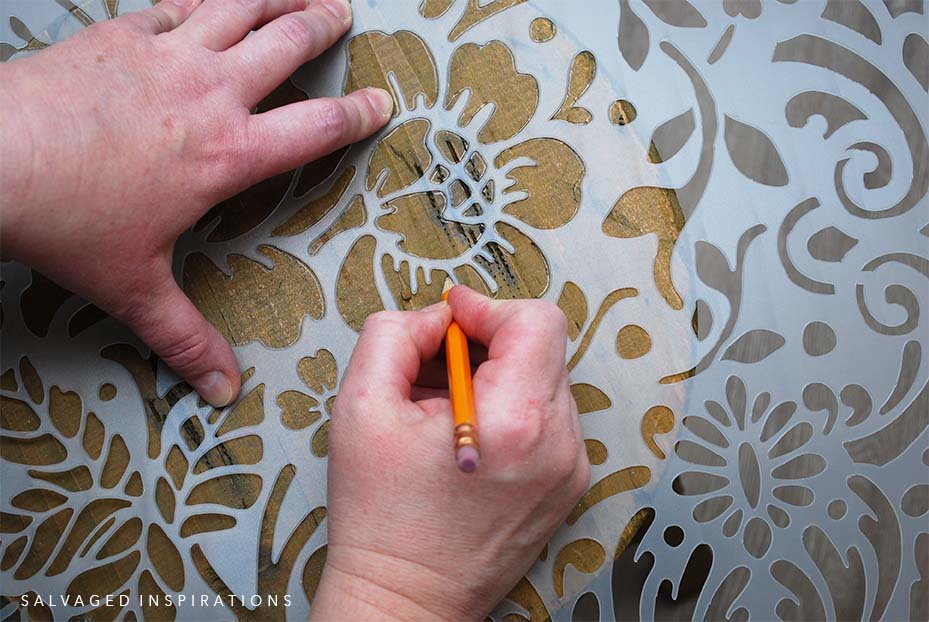
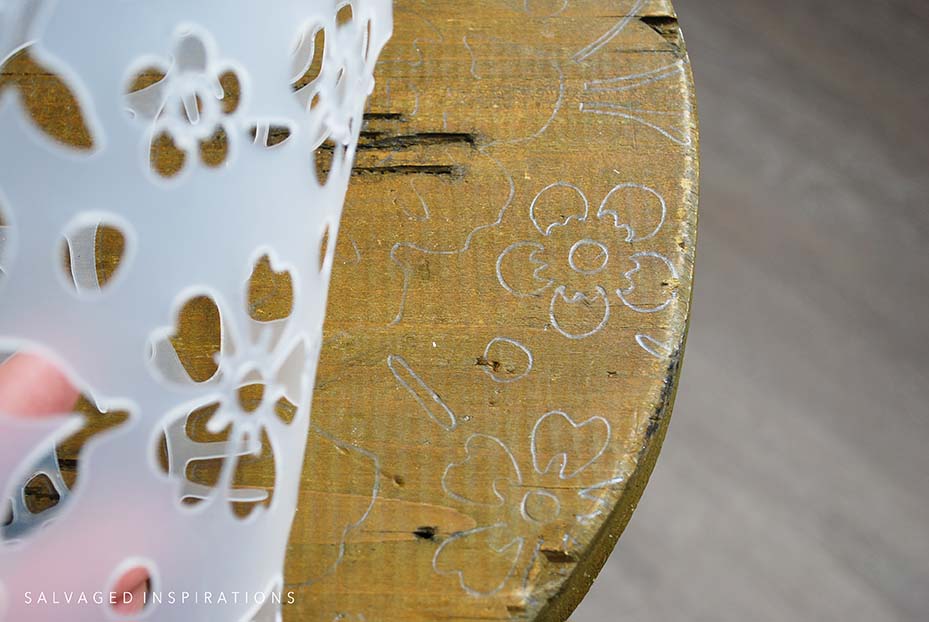
CHECK LINES ARE VISIBLE
We checked to ensure the pencil lines were visible before tracing the entire design.
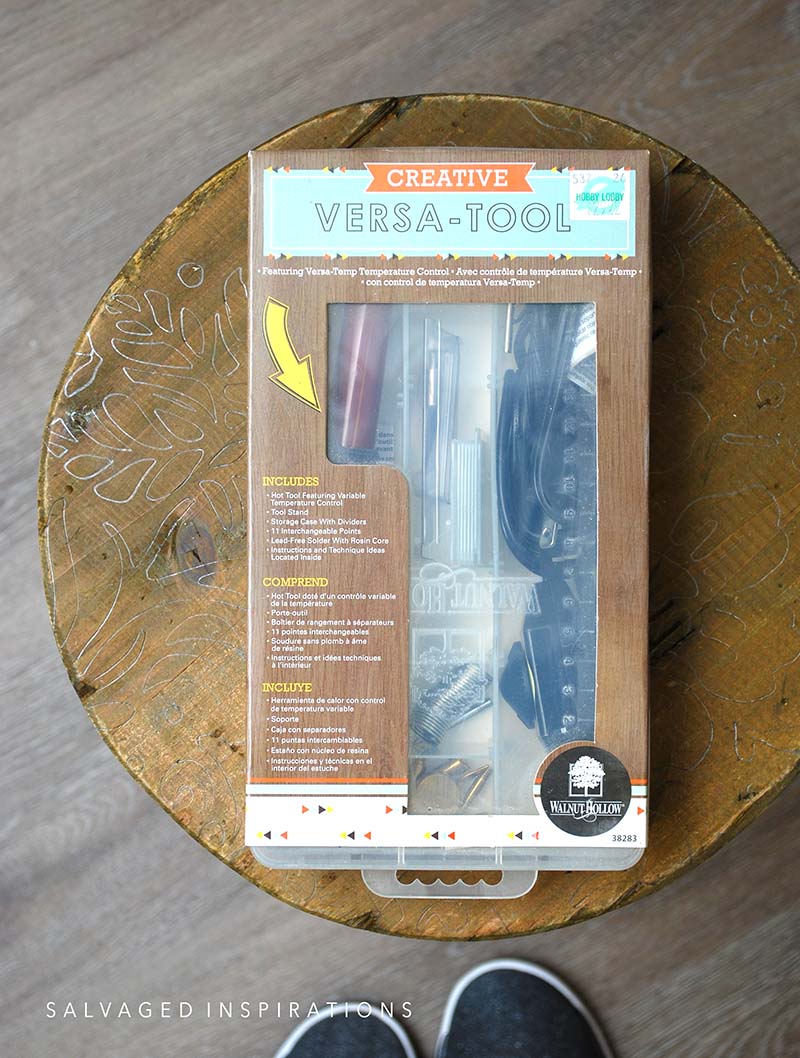
WOOD BURNING TOOL
Now for the fun part! I picked up this wood-burning tool (similar) at Hobby Lobby years ago. It was selling for $29.99 but I had a 40% off coupon so it was a great deal! It comes with a stand to hold the hot pen when not in use and a variety of tips to get different looks. I have used this Pyrographic Wood Burning Tool once before on this Faux Brick Wall Project, but never on wood.
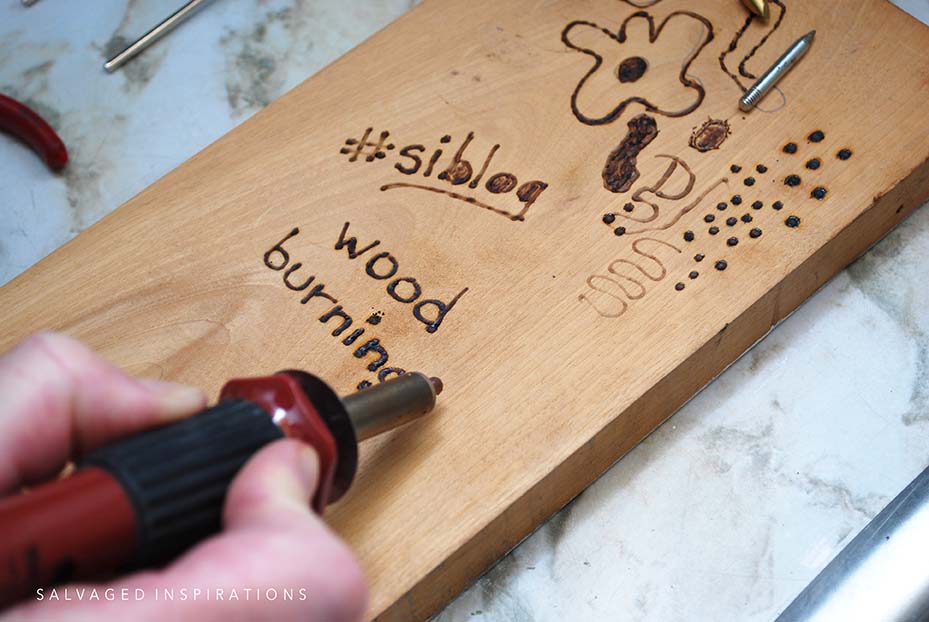
TEST!
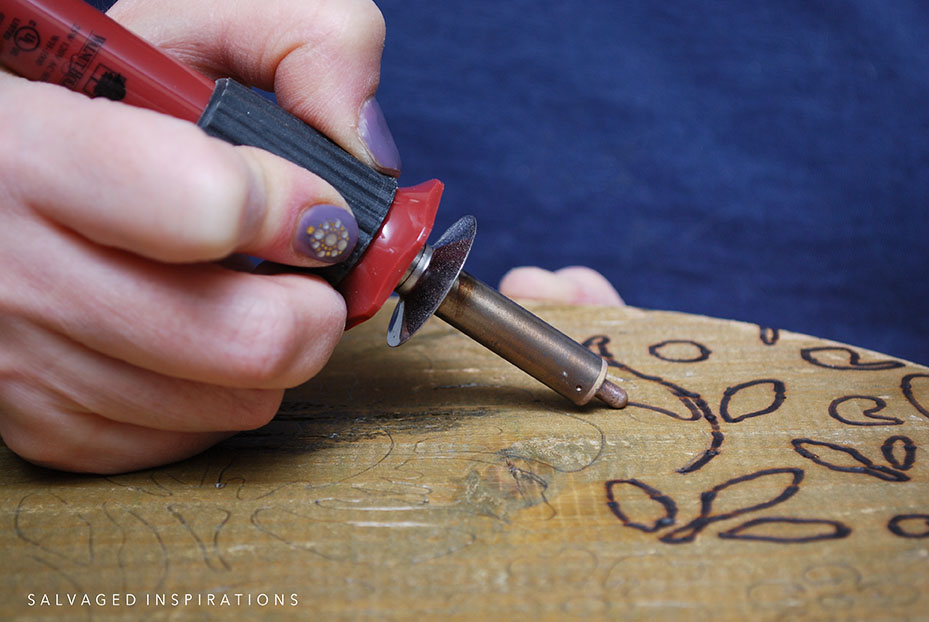
Before starting on the stool, Andrea and I tested the different tips on a scrap piece of wood. The rounded tip she is using in the pic below is the one we decided to use on the folding stool.
BURN YOUR WOOD DESIGN
To burn the stencil design into the seat, we took turns following the penciled lines. I found it much easier to control with a light touch. Also moving the pyrography pen slowly while letting the heat do the work is key!
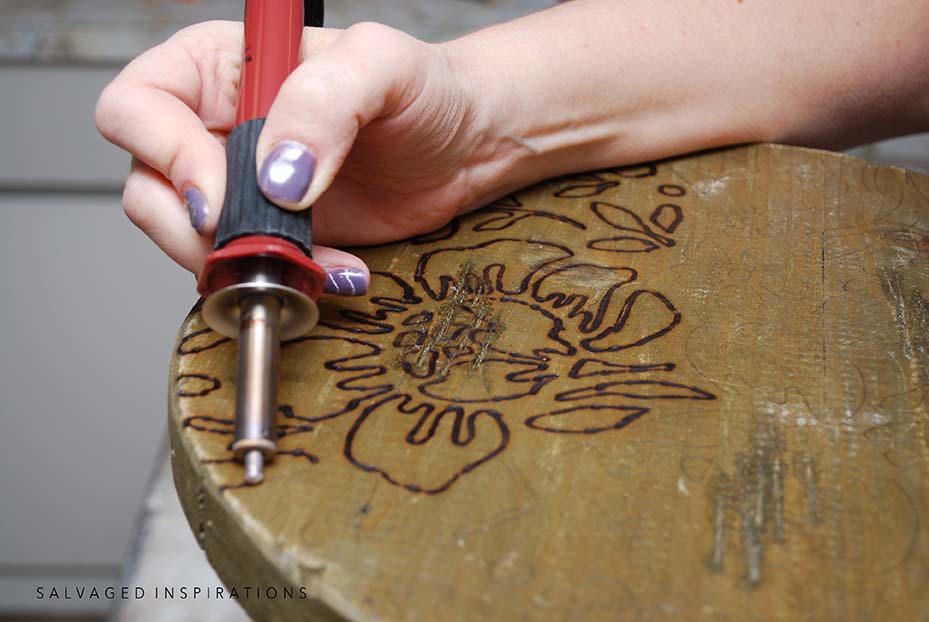
We also found that moving the tool towards you (pulling) rather than moving it away from you (pushing) makes a difference. Depending on which way the grain of the wood is lined up with your design, you may find one way is easier than another.
Another tip that made a big difference in the smoothness of the design was making sure there was something to rest our hands and arms on. As you can see from the image below, my arm is firmly rested on the project while burning the design.
REMOVE TIP RESIDUE
While using the tool, we noticed some carbon or black residue would accumulate on the tip. Wiping it off on a scrap piece of wood before continuing the design made burning the wood a whole lot smoother.
7 TIPS FOR BURNING WOOD ON FURNITURE 
And before I share the reveal, here are 7 Tips for Wood Burning a Design Onto Your Furniture.
#1 Safety First!
Work in a well-ventilated room and wear a mask. It’s also best to find a quiet space where no children or pets could tip the tool over. Also never leave the tool unattended and unplug it when not in use. Always use the stand when it’s not in use and be very careful – this tool is HOT! Keep some cold water close at hand for any mishaps that may occur.
#2 Pick a design that matches your wood-burning experience.
The more intricate the design, the harder and longer it will take to burn the design. If you’re a pro this is fabulous. But if you’re a beginner, start with something more simple.
#3 Practice on a scrap piece of wood or the back of your project.
Testing out the different tips will give you a good idea of which will work best for your design.
#4 Burn towards you for better control.
Dragging the wood-burning pen towards you will yield a smoother line rather than pushing it away from you. For a more controlled design and for safety reasons, keeping your hand and arm on the firm surface of your projects is very helpful.
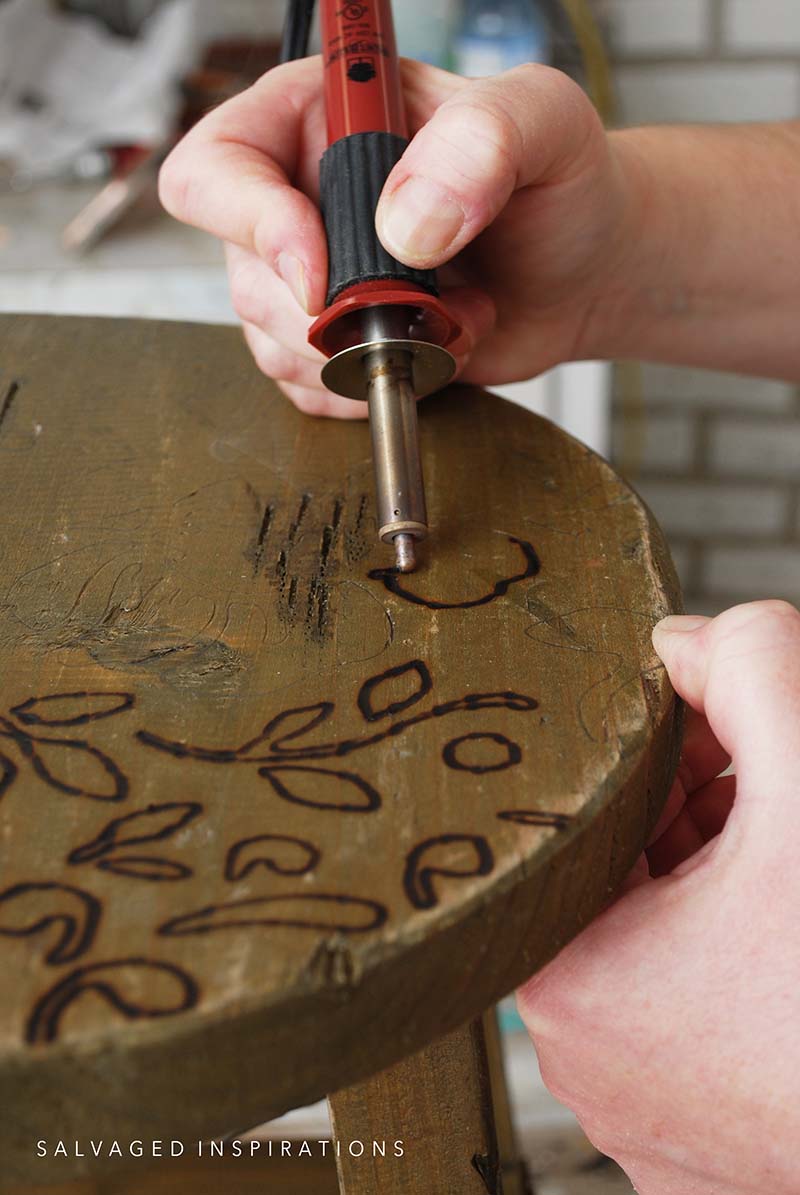
#5 Rotate your project.
Keep rotating your piece so the pyrography pen does not get ‘caught’ in the grain of the wood.
#6 Take your time.
As you’re wood-burning, you’ll notice you can’t rush the process because the wood will burn at its own pace. Take your time. Enjoy the process. Listen to some music or share in some good conversation with your sister or a friend. 🙂
#7 Press lightly.
Press lightly and let the tool do the work. If you press too hard the pyrography pen tip gets caught on the wood grain. If this happens just lift and continue.
BONUS
• Remove the carbon.
Remove the carbon or black that accumulates on the tip of your pyrography pen. You’ll notice that once you have a bit on the tip, it won’t burn as well. I wiped the tip onto my work table but having a scrap piece of wood nearby would work just as well.
• Buy the best Pyrography Tool Kit you can afford.
If you’re serious about this art form, buy the best pyrography tool you can afford. I bought a relatively inexpensive craft kit but I know I’m not going to use it that often.
• Enjoy and have fun!
YOUTUBE TUTORIAL
Here’s a step-by-step tutorial on Youtube. If you have any problems viewing below, feel free to watch it on my Youtube Channel here… and don’t forget to subscribe! I can’t believe I hit 12.7K Subs! So exciting, thank YOU! 🙂
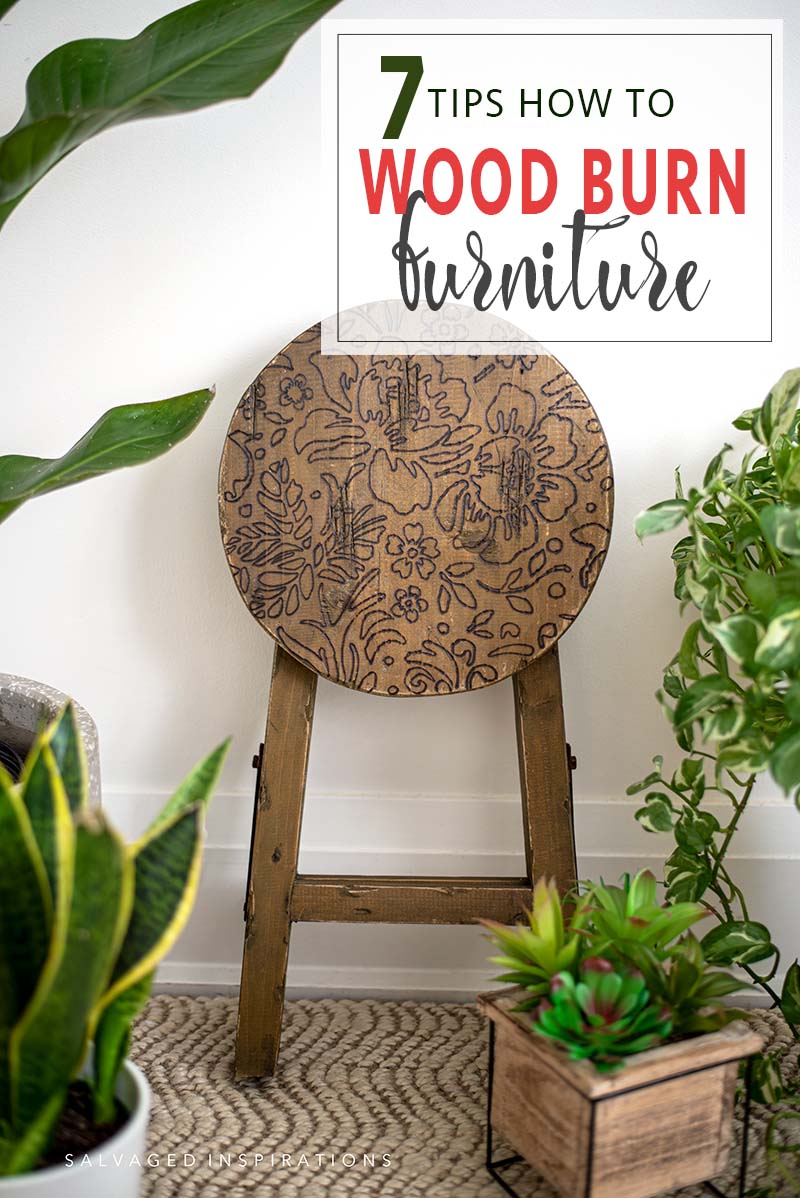
THE FINISHED STOOL
Here’s the end result! I’m so happy I stepped out of my comfort zone to try but I have mixed feelings about this finish. Andrea and I were saying that from a distance, it looks like we used a Sharpie to draw it on. 😆

Upon a closer look, you can see the stencil design has been burned into the wood.

I have to admit, this was a really relaxing process. Both Andrea and I got lost in this project and found it quite meditative.
This project took three hours from start to finish. The cost of the pyrography tool kit was $18 from Hobby Lobby (40% off coupon) and the stencil was around $20.00.

I can’t wait to hear your thoughts on this curb-shopped stool. My sister says it is perfectly rustic and that in the summer she will be using it as a plant holder on her front porch. I’m happy it’s found a new home but even happier it gave me the opportunity to spend some time and create with my favorite person. 💕
Here’s another look at this before and after. I hope it’s inspired you and given you some new ideas for your projects.
LET ME KNOW WHAT YOU THINK OF THIS WOOD-BURNING STOOL MAKEOVER IN THE COMMENTS BELOW. AND, IF YOU’VE EVER TRIED PYROGRAPHY, I’D L*O*V*E TO HEAR ANY TIPS YOU HAVE FOR ME! I ALWAYS ENJOY HEARING AND LEARNING FROM YOU. IT MAKES MY DAY! 🙂
Happy furniture painting friends!
Denise x
RELATED POSTS::
TRANSFERS ON FABRIC | STOOL MAKEOVER
15 PROJECTS YOU CAN FINISH IN A DAY
HOW TO USE SILK SCREEN STENCILS
APPLYING A TEXTURED STENCIL
HOW TO STENCIL ON FURNITURE
PIN AND SHARE!

This turned out really nice! I love the outlined look and it suits the stool so well. Great job <3
Also, lots and lots of non-copyright designs online can be printed and pencil-rubbed onto wood (that's what I do)
Fabulous tip! Thanks Gioia!!
I love it not only for the new look you gave it, but because I LOVE the stool. Super cool piece.
Thanks and I agree, this stool IS a super cool piece. I love the rustic look and the hinge that allows it to fold down!
This stool was a real find. How could anyone just throw it out? It had so much rusticnes (I know, it’s not a word!) to begin with but also looks nice with the burnt on design. I think I might have used one of the fine tips and added a little detail to the flowers. But all in all, you and your sis did a fine job.
I bought a craft burner with different tips some years ago and other than playing around with the tips on an old piece of wood, I’ve done nothing with it. You’ve given me some ideas so I’m sure I’ll drag it out this spring and give it a go. Thanks for sharing with all of us. 🥰
Thanks Lis and I luv your “rusticness” word! I might just have to use it here on the blog…hehe! And yes, if we were to practice using the different tips, I so agree! More detail would be amazing!🤗 At this point, I might have just mucked it all up though 😂
This turned out beautifully, Denise! I think this will be so perfect as a plant stand. I wonder about doing something like that on a charcuterie board? Could it be appropriately sealed?
I love this idea! And yes, what about hemp seed oil? All-natural. Food safe. 🙌
That’s such a cool little stool. I can’t believe the things people throw away. I love what you did with it and now I want a wood burner, too!
Thanks Toni and it is a cool little stool. I really like the flip and hang – super cute, right!? 😊
This turned out so stinking cute, Denise! I just love it! Sisters are the best… I’m so grateful for mine too! XOXO
Thanks! We are so lucky that our sisters are not only sisters but our very best friends. Sisters ARE THE BEST! XOXO
Turned out amazing Denise! I have the same tool and love it for all sorts of things (I even cut felt) so thanks for the reminder to use it more!
Cut felt?… so BRILLIANT Sara! My sister wants to try it on leather next.🙌
I love this stool and would like to have one like it for my plants inside ir on my patio. I’ve also wanted to do something in the way of woodburning but with very simple designs or stencils so thank you for sharing your woodburning tips and experience.
Thanks so much Linda! And if/when you give it a try, have fun. I wasn’t expecting to get into it but I realllllly did…lol.
What a wonderful project for you and your sister to share. It turned out beautiful! Thanks for sharing!
We had a lot of fun! Thanks Nicki! XOXO
Well Denise, you have given me a good reason to try out a wood burning tool! I’ve been tempted to get one, but wasn’t sure just how I would use it. Thanks for the great idea! You are always sooo inspiring. I appreciate you!
I appreciate YOU Caye! And as a side note, it’s a VERY relaxing process… surprisingly calming. A great way to create and destress all at the same time. If you’ve been tempted, I encourage you to give it a go!🤗
Thanks for the great woodburning tips, Denise. I have the same woodburning kit and have used it once. What a fun way to upcycle a thrift or curbside wooden stool! I think it looks terrific and will get a very cool weathered patina on Andrea’s porch. As always, your staging and photography are gorgeous.
Thanks Marie and yessssss, I didn’t even think of the patina but I bet you’re right!🤗
That’s so cool! I’ve never tried it, but I may just. Thanks for sharing. 🙂
It was a lot of fun. 🙌 Thanks Donna! XOXO
Hey Denise! I’m glad you tried this and shared. I have a wood burning tool and I have never even opened it. I think the school turned out very cool. Cant fo wring with flowers my friend.
I think your spell check went crazy like mine does ALL the time 😂 …but I totally agree. Can’t go wrong with flowers.🌸 And ya, my wood-burning tool sat around for yeeears before I tried using it as well! Have a super day my friend. XOXO
Personally, I love it! Wood burning is certainly not for everyone. I grew up in the 50’s thru 70’s and wood burning was very popular but in a much different way than it is today. This piece reminds me of the early 70’s where there was a lot of freehand work. It’s definitely something that can be perfected with time. For your first attempt, I’d say you did pretty darn good!
Yaaaay, I appreciate this Shirley! Thanks so much!💜
Like you, I’ve always been intrigued by this art form. You did a nice job. I wonder if the contrast would be better if you bleached or whitewashed the wood first. There’s always another possibility, isn’t there? Thanks for sharing and I’m glad your sister is mending well.
Hi Gayle! We tried a sample wash and wax on the back of the stool and on our test board but this was after we did the woodburn design. I wonder if it would make a difference whitewashing prior to burning?! Might need to try this!!! Thanks so much!💕
That is just too cute, great idea! Great tool for making signs too.
Yes! Signs would look great. I also saw smalls– keychains with your initials and leather jewelry! They all look amazing! Enjoy your day Tracy! Hugs
I love this, I have had a wood burning tool for years too and have never used it, now I am inspired. How lucky you are to have a sister. I hope you are both ok. Hugs Julie
Oh, with your artistic talent, I know you’d do AMAZING things with your wood burning tool Julie! And yes, I’m extremely lucky. She’s not only my sister, she’s my very best friend.👯♂️ Have a super day. XOXO
Hi Denise. What a cute little project. I think the flower design you and your sister chose is perfect for this rustic looking stool. When my son was a boy, we bought him a wood burning tool kit. It had little wooden cars and such for him to burn designs on. He loved it and spent many hours creating. I don’t imagine anybody nowadays would give a 10 year old such a gift! I hope your sister has a speedy recovery. I’m sure she appreciated you finding her a project to do together.
Thanks Monique! And yes, things have changed so much when it comes to kids’ activities/toys etc! Remember the Easy-Bake Ovens?! I don’t think they sell those anymore because of the heat… never mind one of these pyrography tools!😮 Thanks for the well wishes and have a super day my friend! XOXO