HERE’S A SIMPLE WAY TO GET AN AUTHENTIC COPPER PATINA LOOK ON *ANY* SURFACE IN 5 EASY STEPS! | YOUTUBE VIDEO
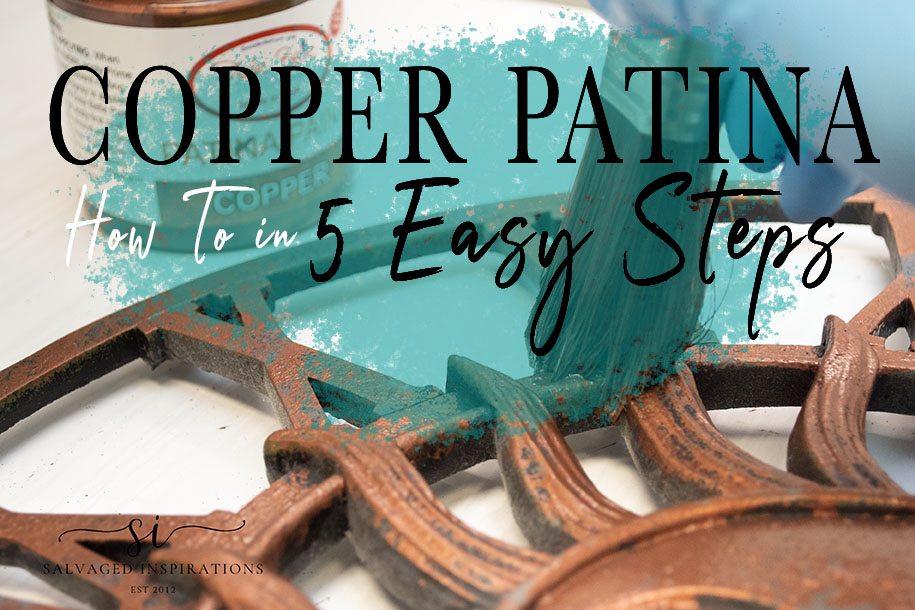 Hi SI family. Happy Tuesday and thanks for joining me today. Do you love the look of a patina but aren’t sure how to get a patina finish on your project? I LOOOVE the look of an authentic patina aka verdigris. It’s that gorgeous blue-green weathered look that takes place on copper, bronze or brass when these metals are exposed to the elements and oxidize over time. The good thing is we don’t have to wait years to get this look… I’m going to share how you can create an authentic painted patina in a few hours. I have an EASY 5 Step DIY process you can use on ANY surface!
It’s also Trash To Treasure Tuesday where I join my T2T crew and share links to their projects down below. I can’t wait to see what they’ve done and I hope you join me on the tour as well.
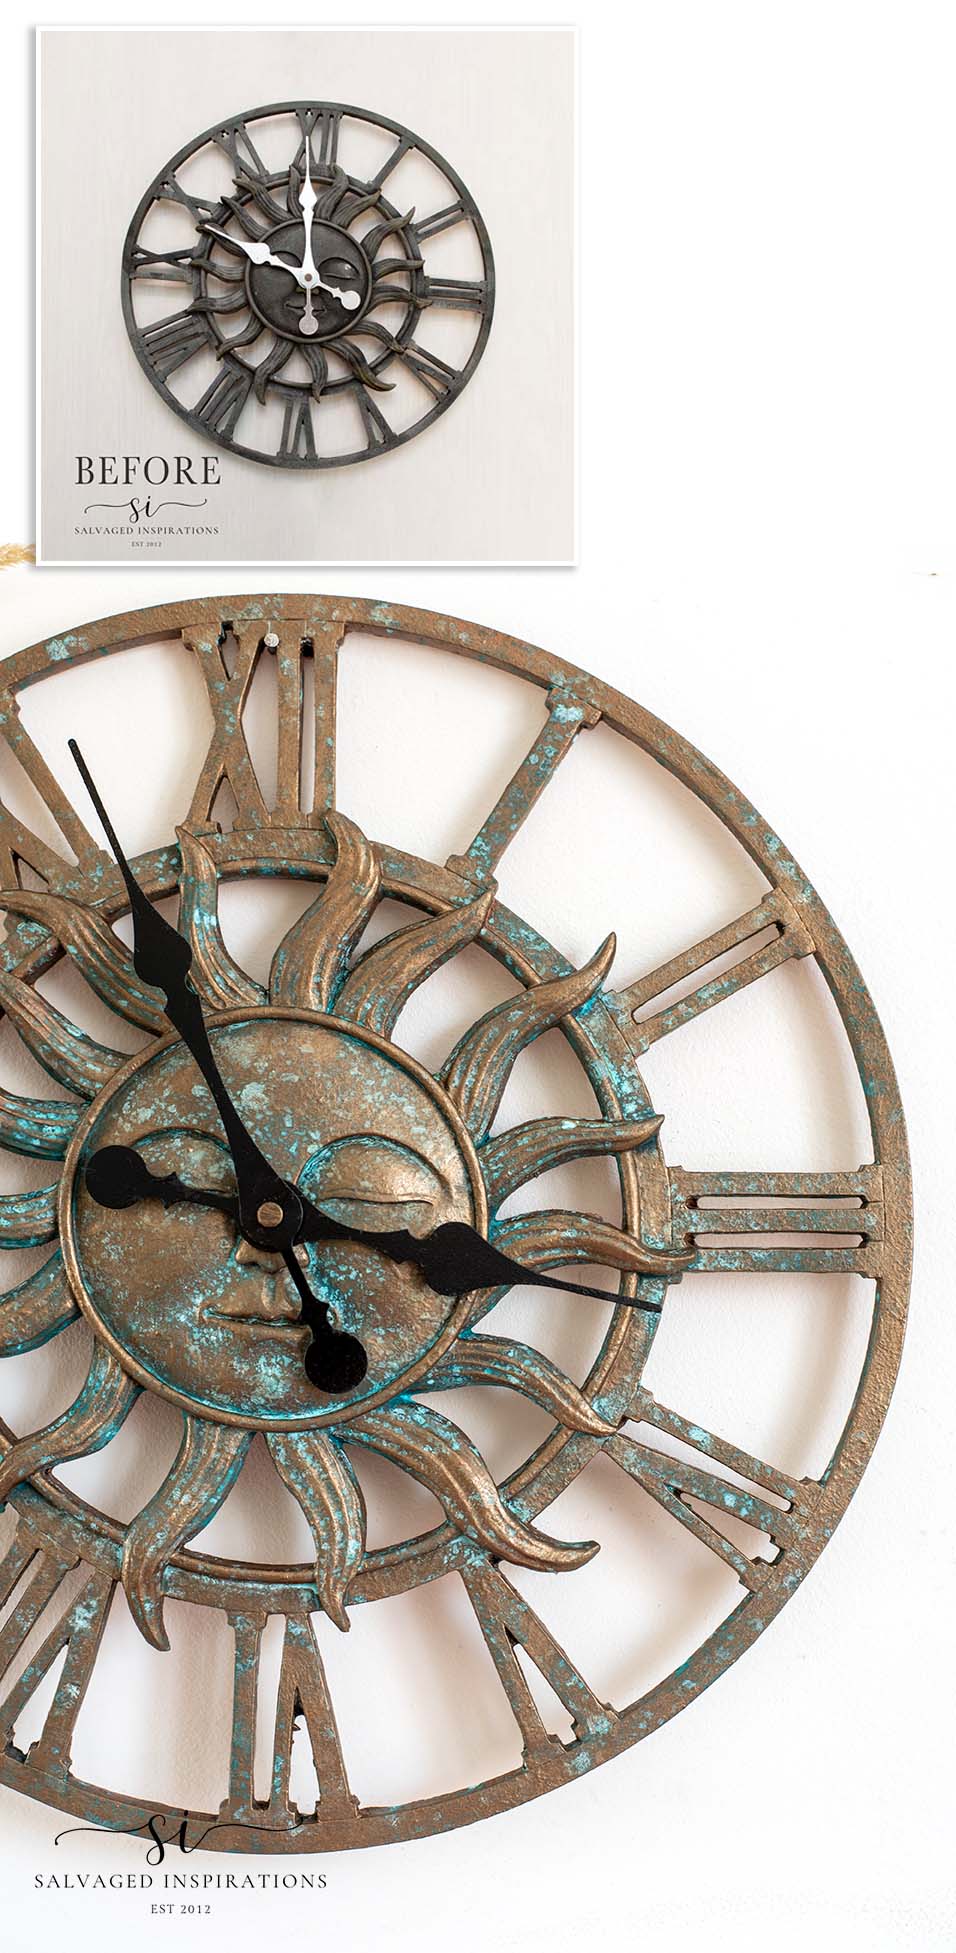
Here’s the ‘trashed’ garden clock I started with. I’ve had this clock for so many years I don’t remember where I picked it up but I’ve always wanted to restyle it so I can use it in my backyard.
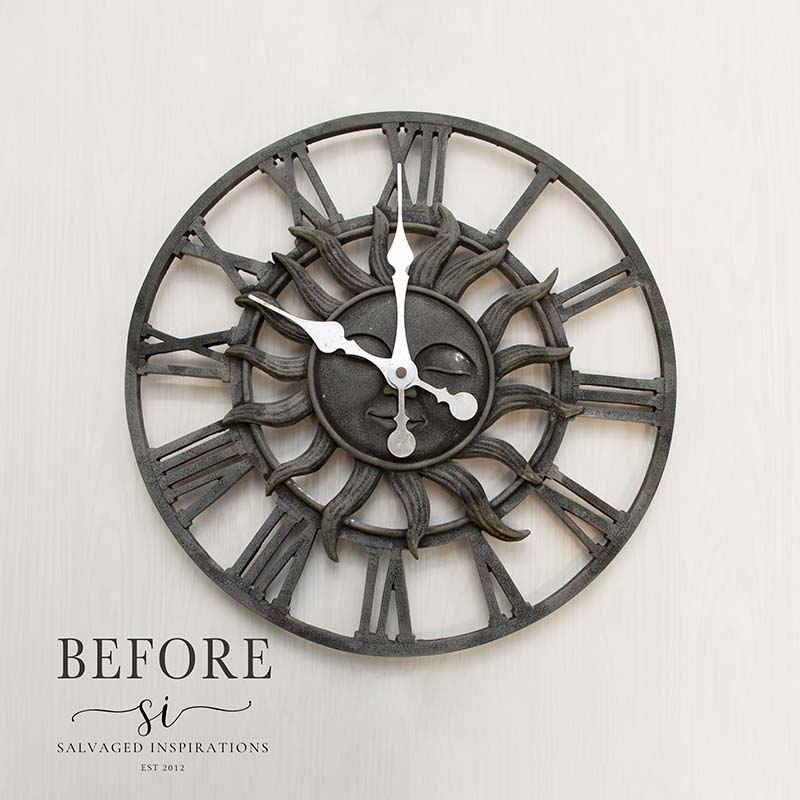
Here’s a close-up. It’s a dull-looking metal clock. Covered in cobwebs and in need of a good cleaning.

THIS POST IS SPONSORED/CONTAINS AFFILIATE LINKS TO PRODUCTS I USE. YOU CAN SEE MY FULL DISCLOSURE HERE.
SOURCE LIST
Outdoor Clock – SALVAGED
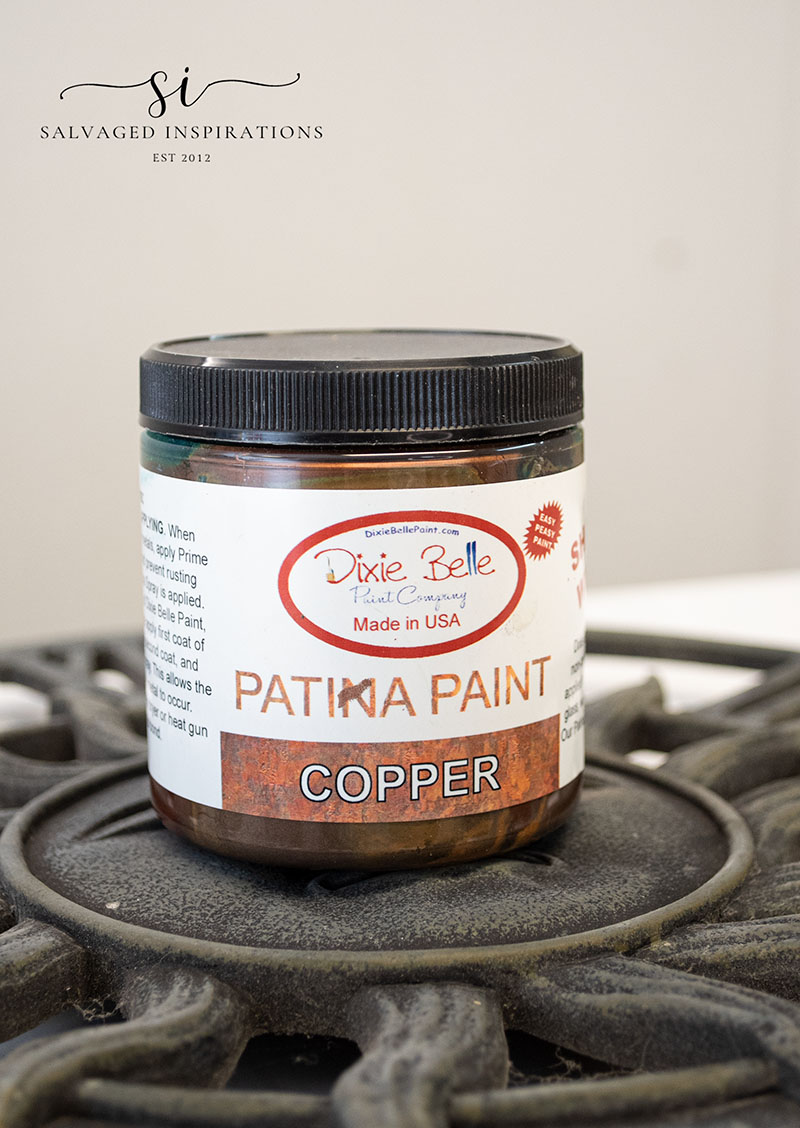
Copper Patina Paint
Blue Patina Spray
Paint Brush
Copper Gilding Wax
Rustoleum Black Spray Paint
Patina Guard Topcoat
DIY COPPER PATINA OUTDOOR CLOCK
CLEAN | PREP
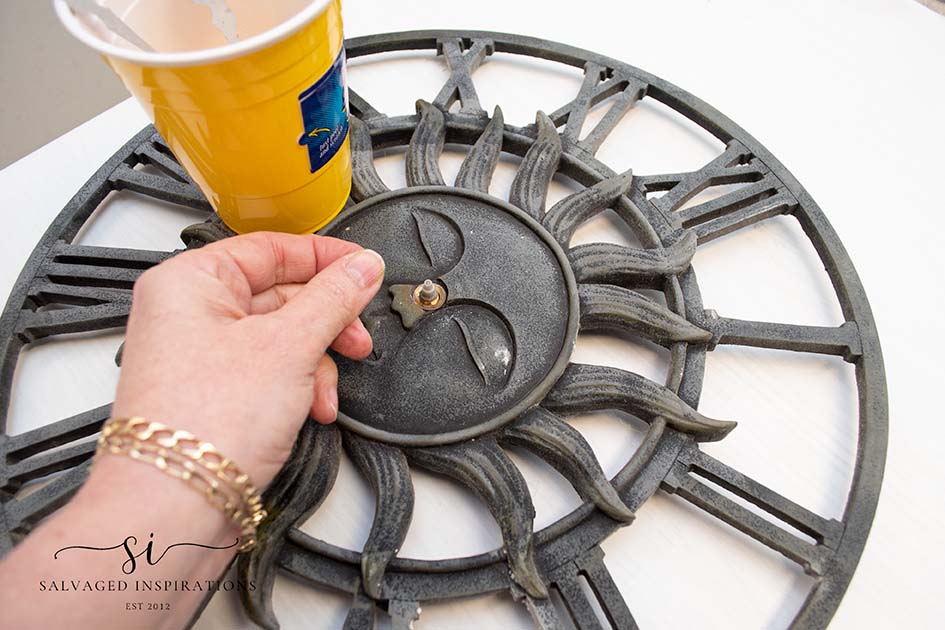
I started by giving this clock and cleaning and then removing the clock mechanism in the back.
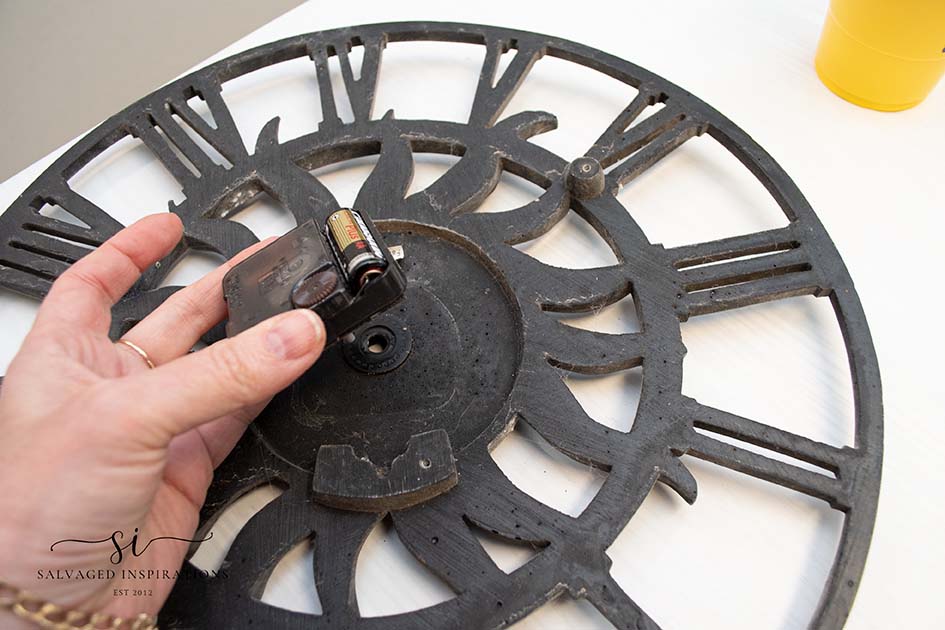
I made sure to keep all the clock parts and the clock hands in a plastic cup for safe keeping as I didn’t want to lose any of the small parts.
PAINT
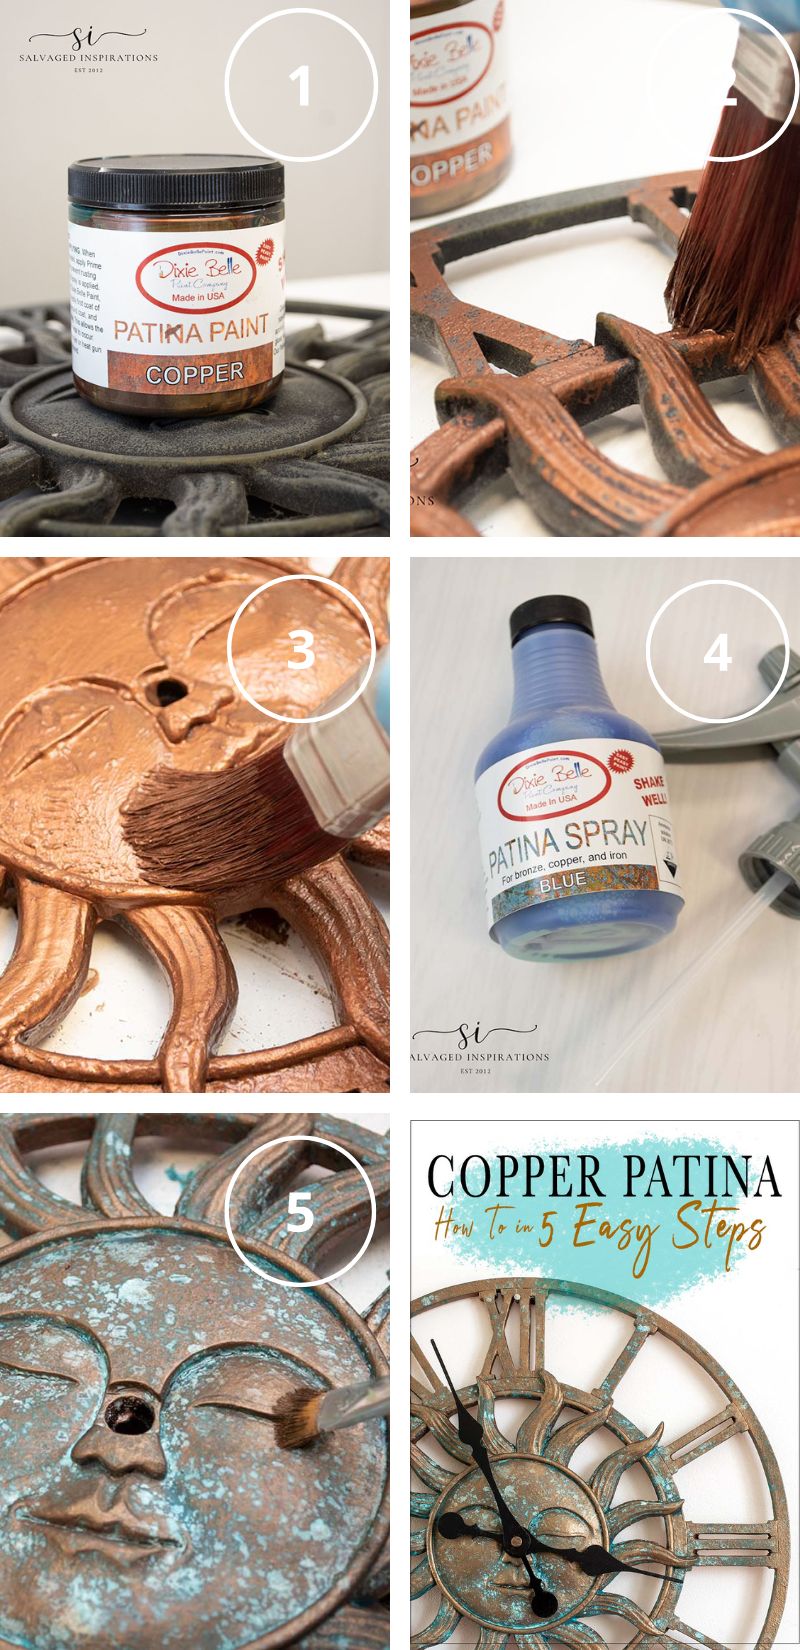
The fastest and simplest way to create an authentic-looking patina or verdigris finish is by using patina paints. There are all sorts of different brands that sell patina paints but I’ve always used Dixie Belles Patina finishes and have always LOVED the results. For this outdoor clock, I decided to start with this Copper Patina Paint.
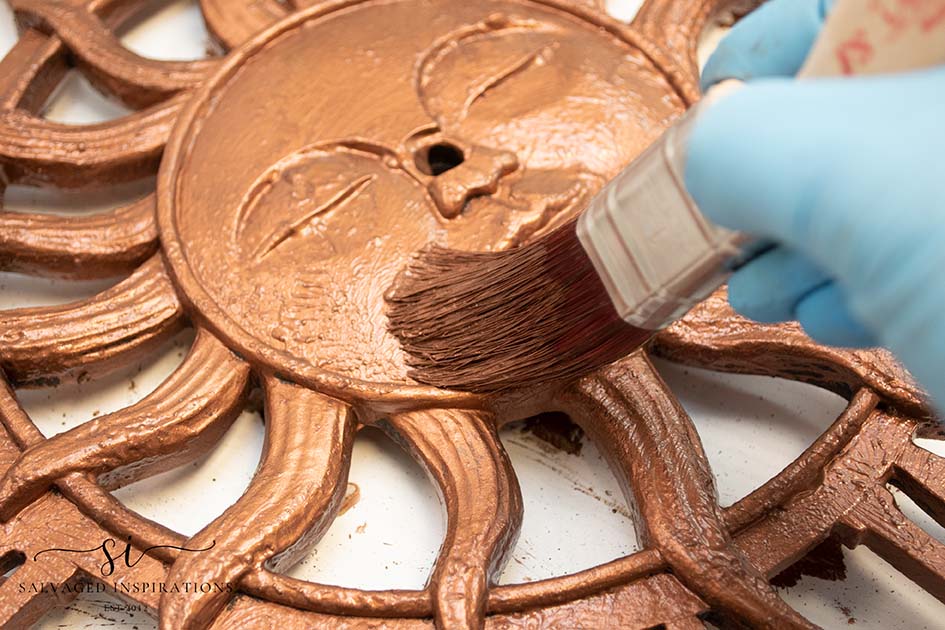
I painted one coat onto the clock making sure to add some texture by bouncing my brush up and down rather than brushing it all on smoothly. This makes applying patina paint to a project fast and easy. You don’t have to worry about a smooth finish or making it look perfect.


Once my first coat of copper dried, I added a second coat of Copper Patina Paint in the exact same way as the first. It doesn’t have to be a perfect paint job.
While my second coat of paint was STILL WET, I got out this Blue Patina Spray and gave it a really good shake.
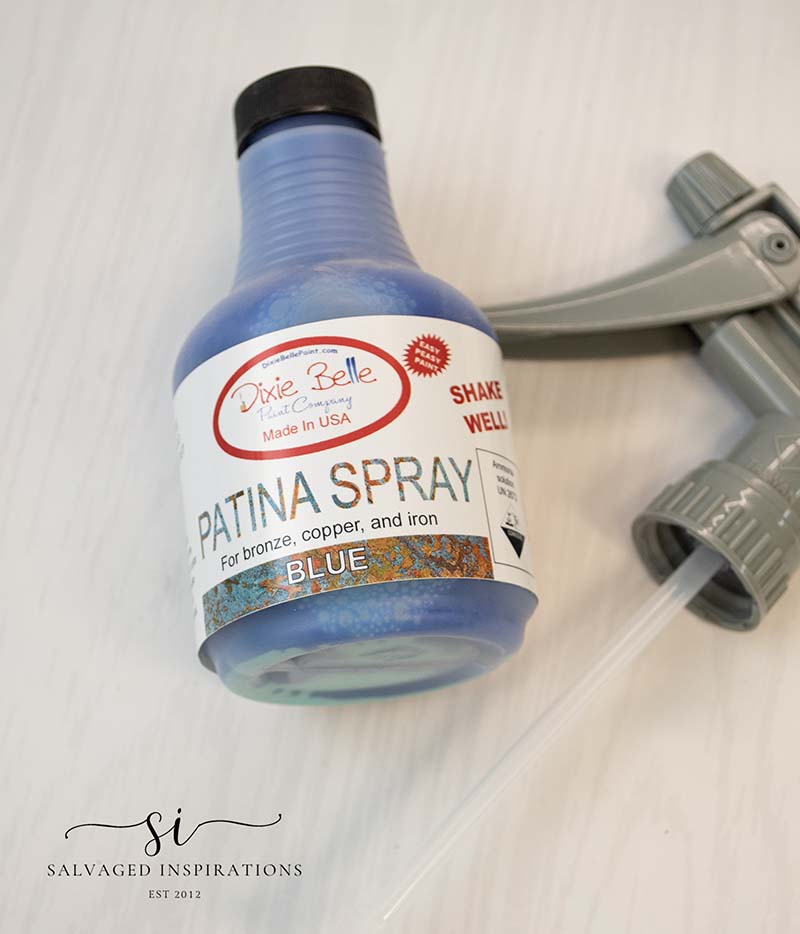
After it was shaken well, I opened the top and screwed on the spray nozzle which is included with the spray. Then I sprayed the Blue Patina Spray randomly over the wet Copper-Painted Clock as shown below.
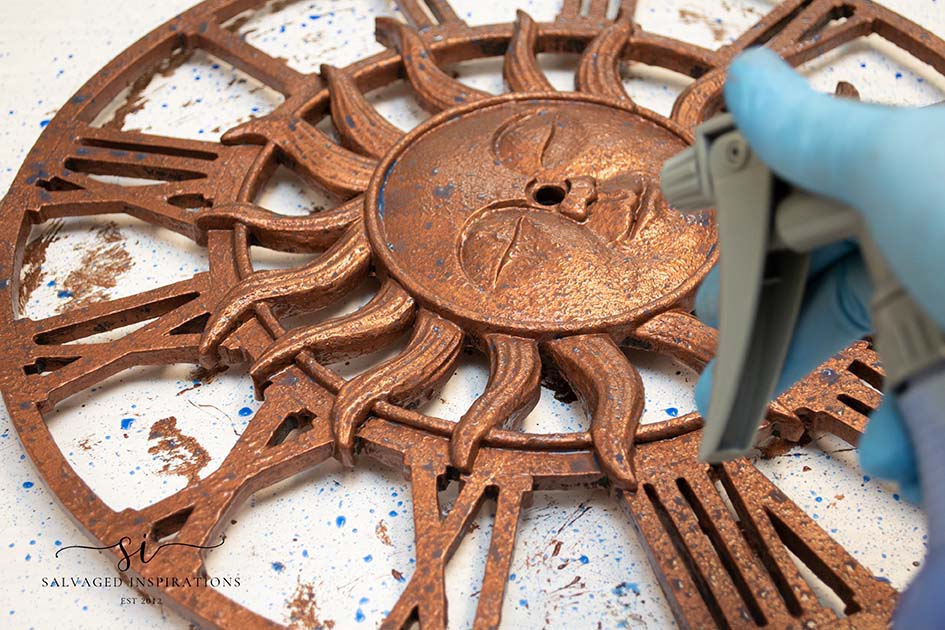
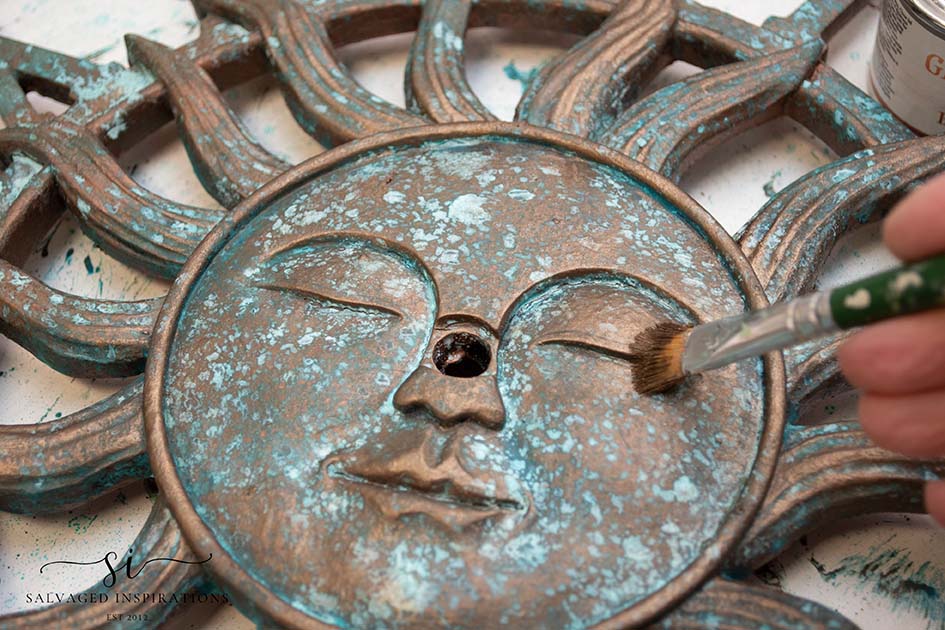
After 2-6 hours you get an authentic-looking Verdigris finish! To finish my clock, I decided to add some gilding wax to layer the patina and bring back a little shine. I think the extra shine will look really beautiful when the sun hits it.
5 EASY STEPS TO AN *AUTHENTIC* LOOKING COPPER PATINA
Getting an authentic copper patina on wood, plastic, metal or glass is super easy to do using the products. If you’re working with a slick surface like glass or plastic, I recommend using this Slick Stick Primer before painting the copper, bronze, or iron patina paint onto your project. This will ensure the metal paint will adhere to your project.
Copper Patina ~ How-To in 5 Easy Steps
- Clean project
- Apply the first coat of Copper Paint and let dry
- Apply a second coat of Copper Paint and while wet go to step #4
- Shake well and spray the Patina Spray onto the wet Copper Paint
- When dry, add Copper Gilding Wax or Seal with Poly
FINISHING TOUCHES
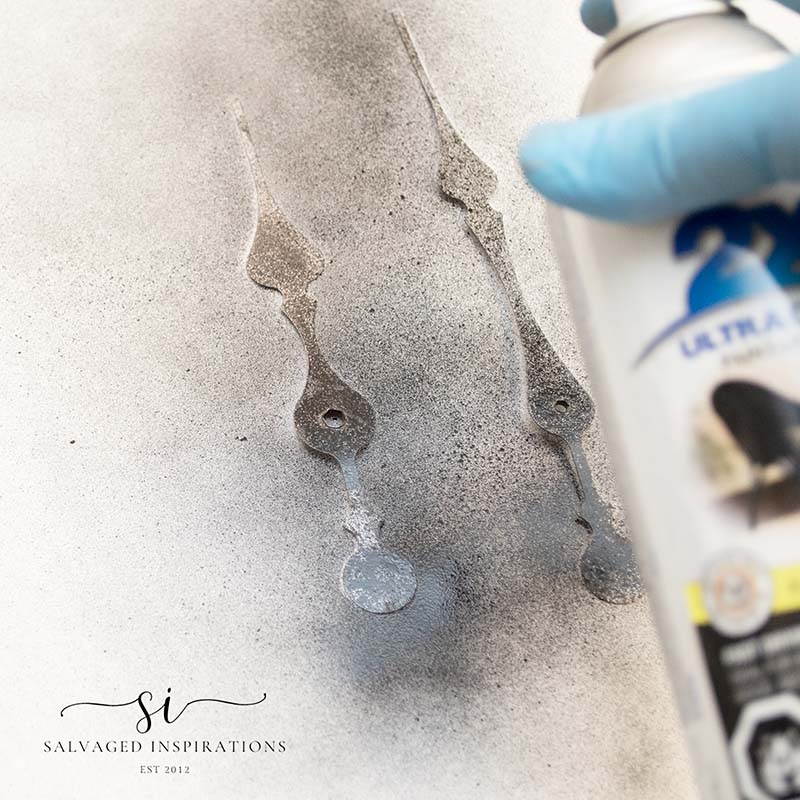
Once I was happy with the copper patina on this clock, I put on the finishing touches. I sprayed the clock hands with this Primer All In One spray paint in black.
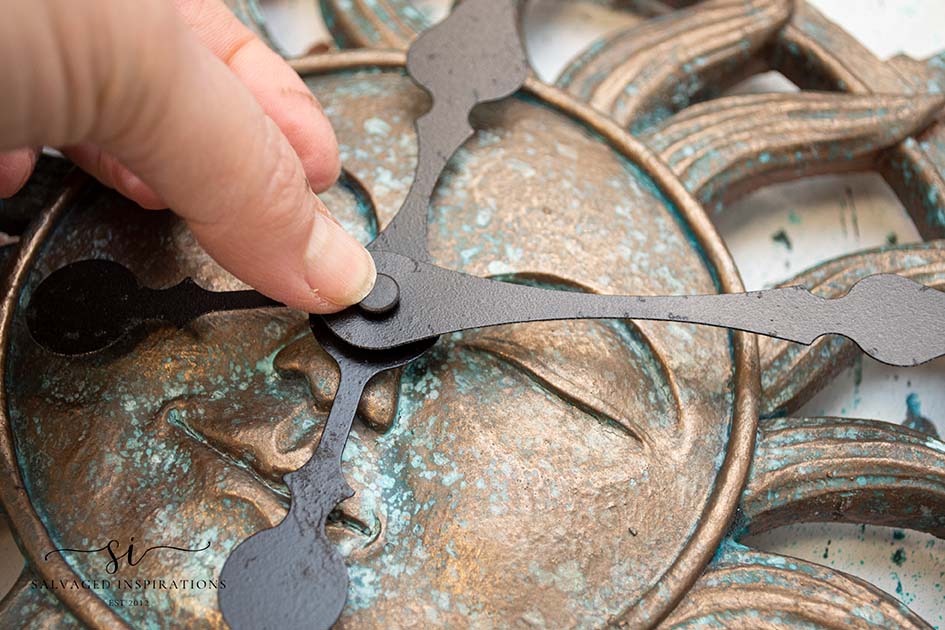
Then I added a new battery and assembled the clock mechanism and clock hands back onto the clock.
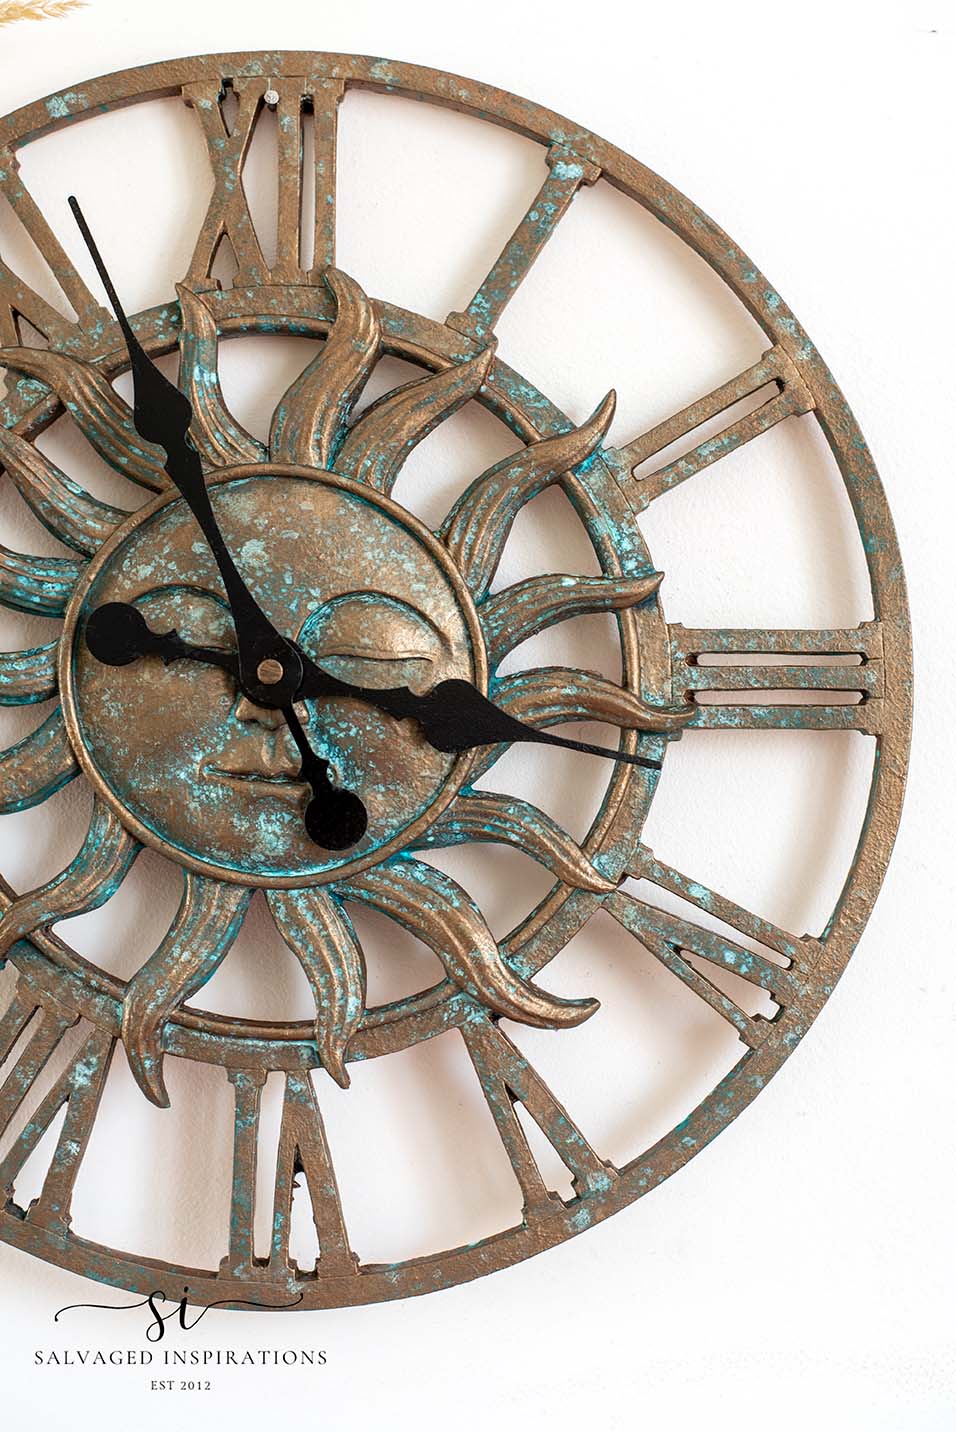
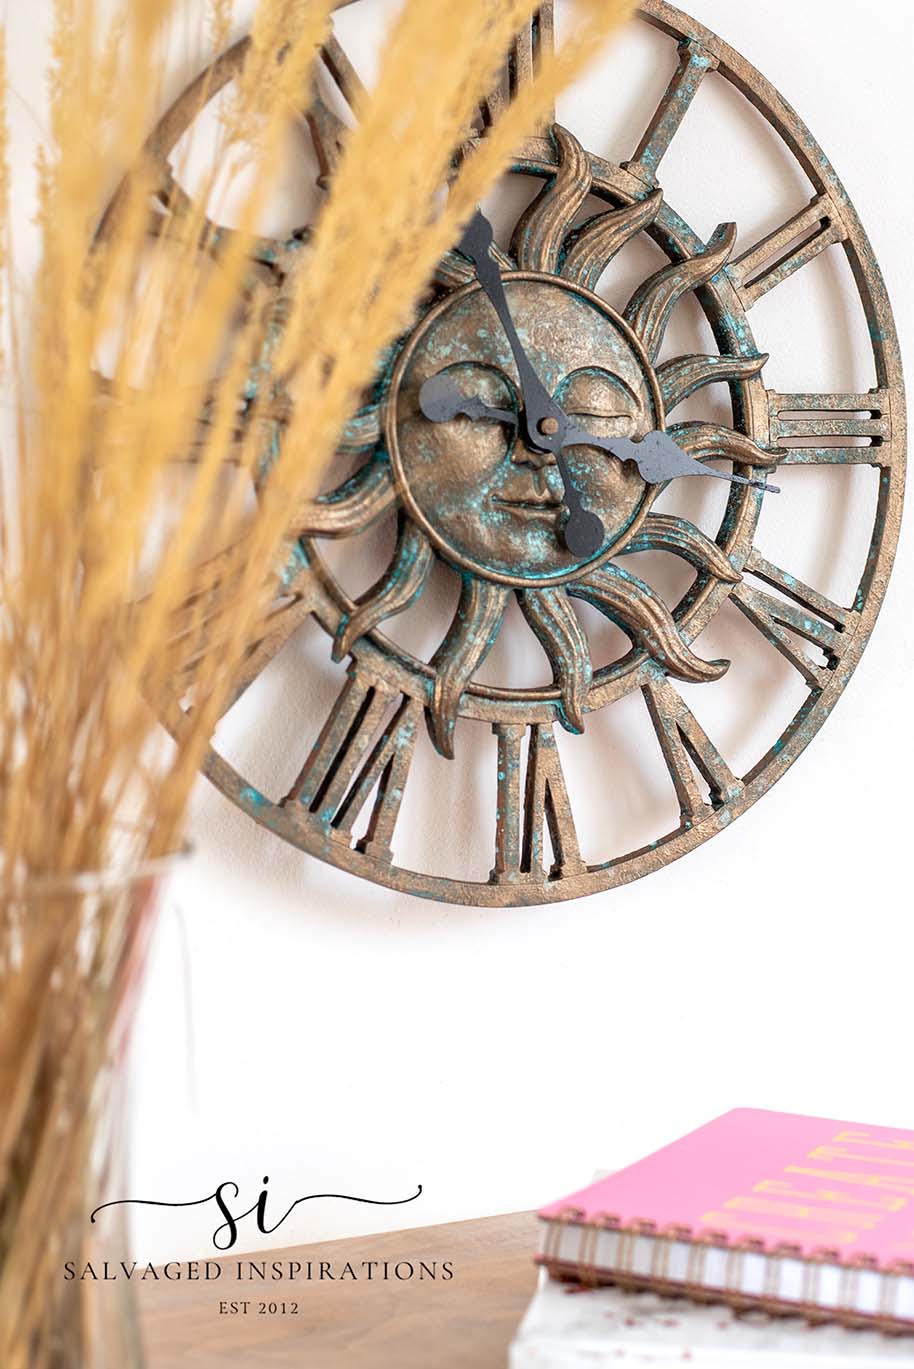
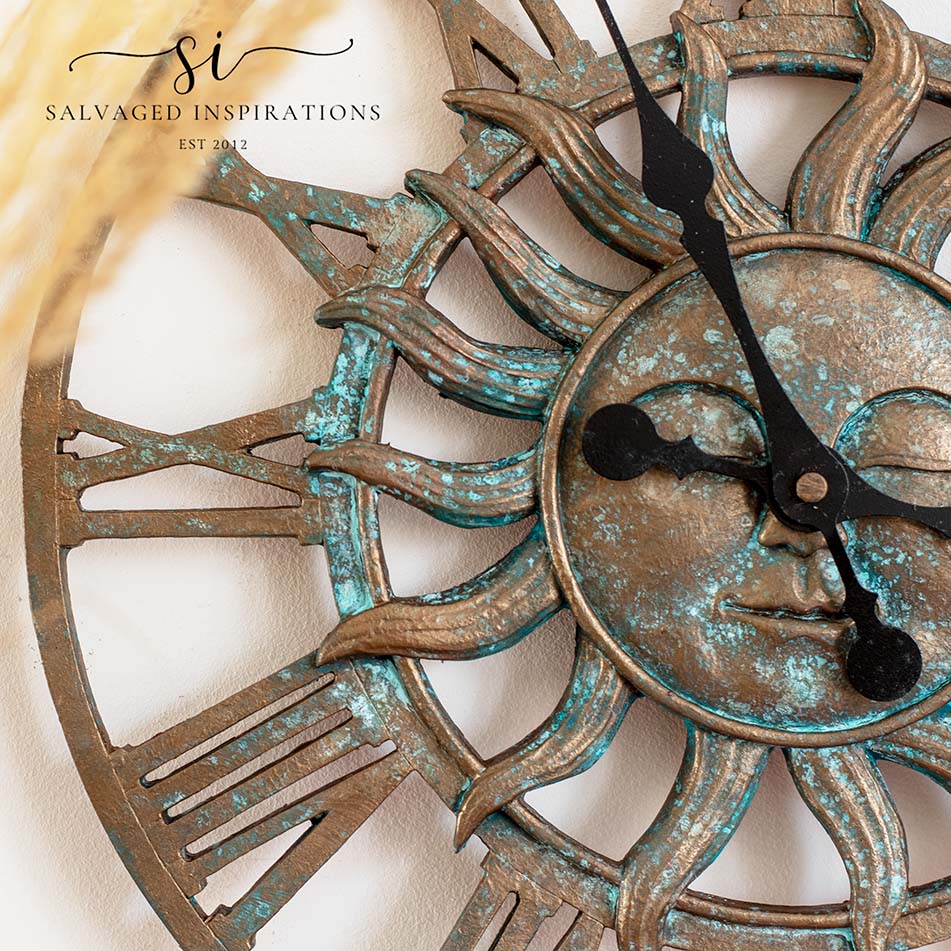
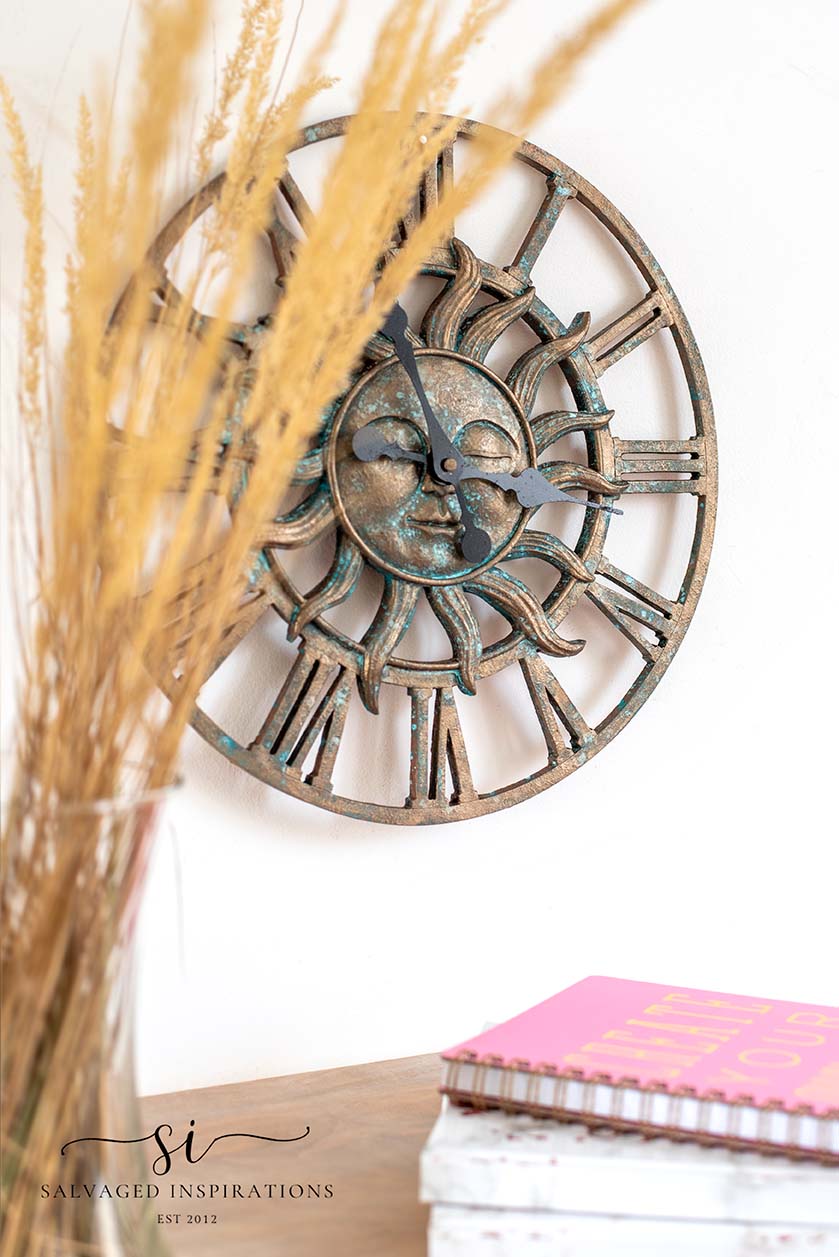
And here’s the finished look. Check out this GORGEOUS finish!! What do you think?
I wish I could have staged it IN my garden but unfortunately here in the Toronto area (GTA), everything is still dormant and nothing is green or blooming yet.
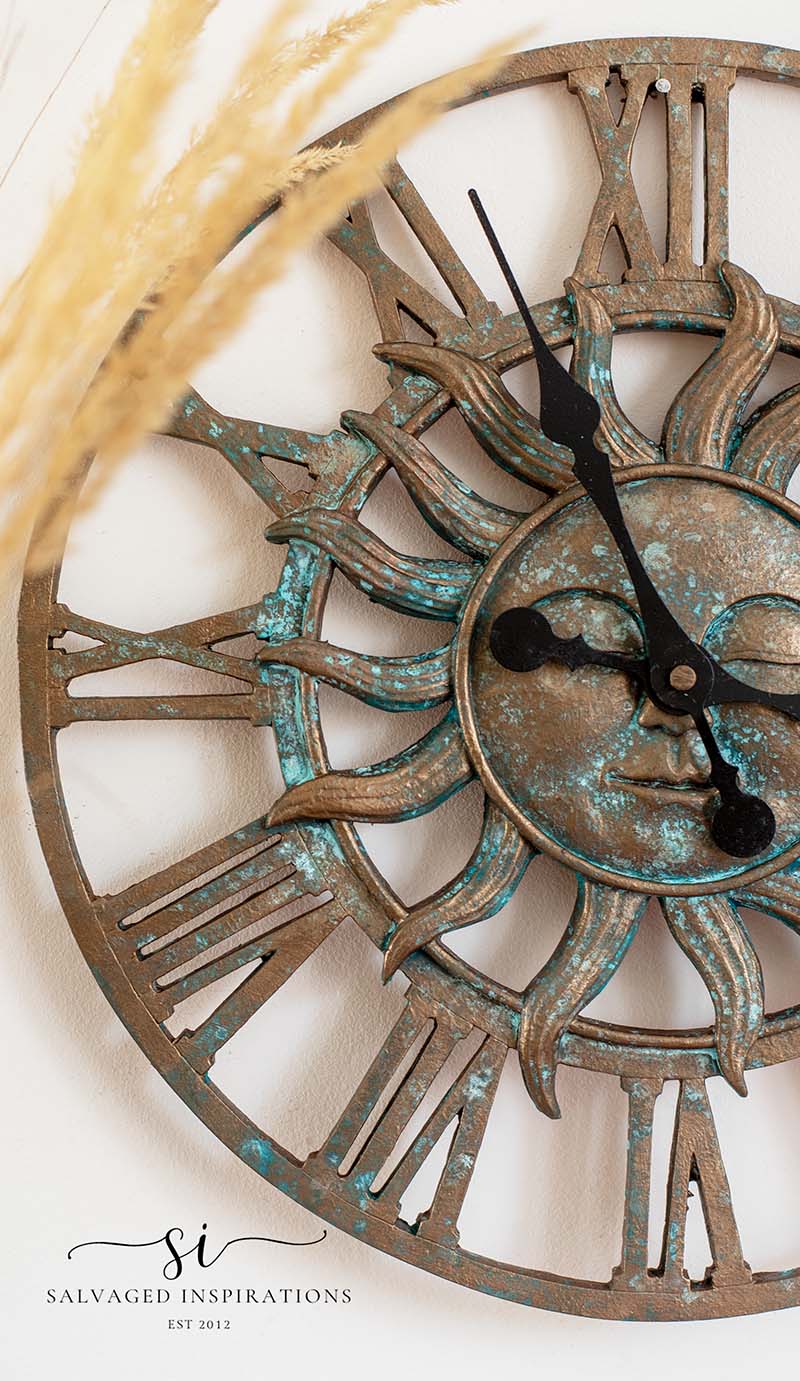
Here’s a closer look at this Verdigris paint finish. You’d never guess this stunning patina was created in a couple of hours, right?!
I can’t wait to hang it on my garden wall but it will also be great for staging and styling my painted furniture!
YOUTUBE TUTORIAL
Here’s a step-by-step tutorial on Youtube. If you have any problems viewing it below, feel free to watch it on my Youtube Channel HERE. Our #siyoutubefamily is already a community of 38.1K so don’t forget to subscribe if you haven’t done so already! So exciting, thank YOU! 🙂
And now for some Trash To Treasure FUN!
You’re going to LOVE what my creative Trash To Treasure ladies do and I’m thrilled that Jen is rejoining us this month! 🙂 Below are the BEFORE photos. Visit the links underneath to see the amazing AFTERS and learn how they did it! I’m heading over to take a peek as well! x

1. PRODIGAL PIECES
2. SALVAGED INSPIRATIONS (HAPPY YOU’RE HERE!)
3. GIRL IN THE GARAGE
4. ARTSY CHICKS RULE
5. CONFESSIONS OF A SERIAL DIYER
Here’s another look at the clocks before and after. I hope it’s inspired you and given you some ideas for your projects!
I’ll be back next Tuesday with a nightstand set makeover. I can’t wait to share. See you then!
LET ME KNOW WHAT YOU THINK OF THIS DIY COPPER PATINA! FEEL FREE TO ASK ANY QUESTIONS YOU MAY HAVE… I ALWAYS LOVE HEARING FROM YOU. IT MAKES MY DAY! 🙂
Happy furniture painting friends!
Denise x
RELATED POSTS::
DIY CLOCK WITH PAINT STICKS
HOW TO PROPAGATE SPIDER PLANTS
BRUSH AND ROLL FOR A SMOOTH FINISH
HOW TO SAND SPINDLES EASILY
BOHEMIAN WEDDING DRESSER
PIN AND SHARE!


Do you think the paints would work on concrete ? I have a large sun , bench with an angel sitting on it and several lanterns I have always wanted to give them an aged look but have no idea how to go about it . Your clock is absolutely gorgeous ! I’d love for my concert pieces to look like that ! Thanks for any advice .
That sounds like an amazing project Shelby! Yes, I believe it would work on concrete! Using Slick Stick for adhesion first is your best bet though.
Lovely job, Denise!! Your clock could come from any rooftop in northern Europe.
I can’t wait to try those patina paints
Thanks so much Ana!
Denise that is going to look fantastic in your garden! Can’t wait for those warmer days! xo
Thanks my friend and again, so happy you’re BACK! And I can’t wait either!!
That’s super cool!! Love it!! Xo
Thanks my friend! XOXO
I had no idea those products existed. Thank you for this tutorial! It’s really pretty and perfect for an outside space.
My pleasure and so glad I’ve introduced something NEW to you! Thanks Lizzy! XOXO
SO cool, Denise! I love how easy it is to get this super authentic patina look! XOXO
Super easy, right!?😃 Thanks my friend! XOXO
I need to try this! Thanks for sharing, Denise!
You’d have so much fun! XOXO
Hi Denise. What a great project. This clock will look beautiful in your garden. I hope the weather in your area gets warm soon. It’s already summer where I am:)
Lucky that sounds lovely 💚, I can’t wait for the weather to warm up here! Thanks so much, my friend. XOXO
Love me some patina! Beautiful job, Denise.
Me too! Thanks Larissa! XOXO