THIS VINTAGE DRESSER GETS A GLAMOROUS MAKEOVER USING TEA ROSE PINK FOR BREAST CANCER AWARENESS MONTH
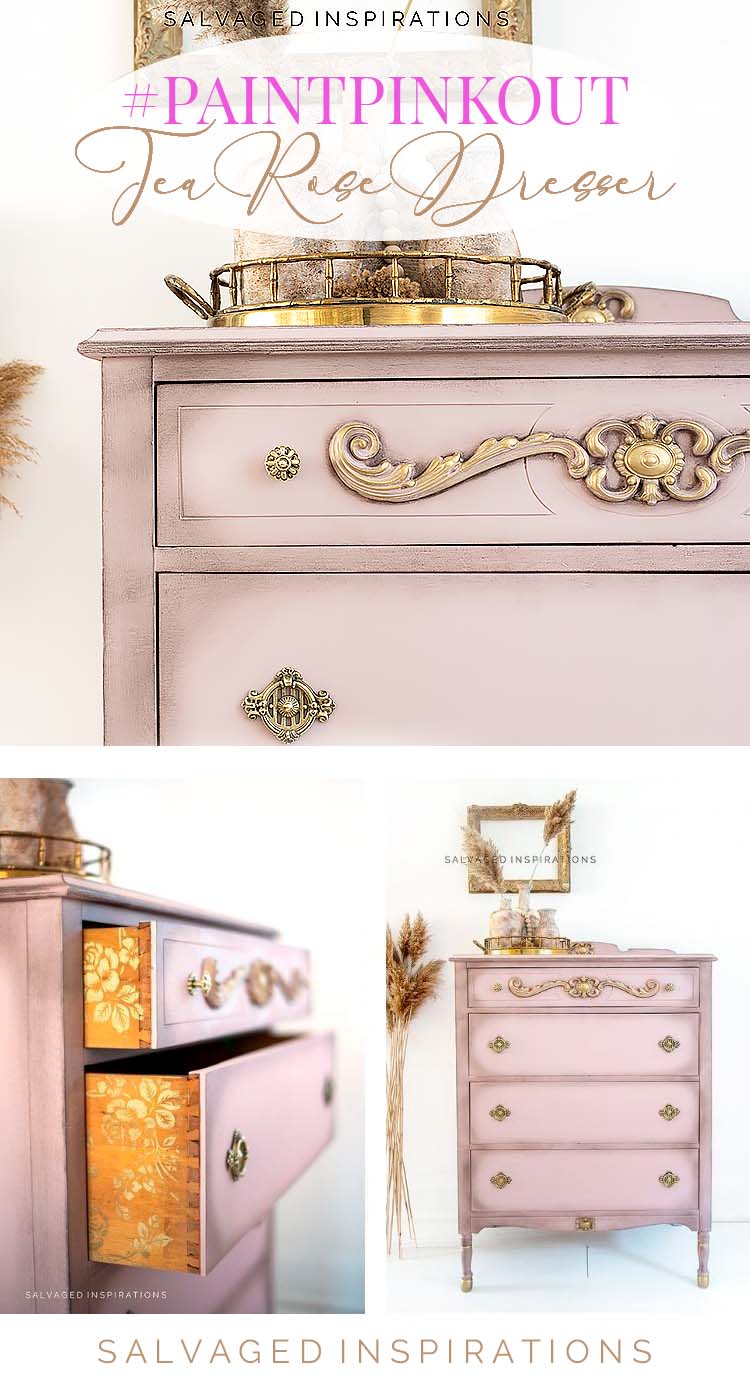
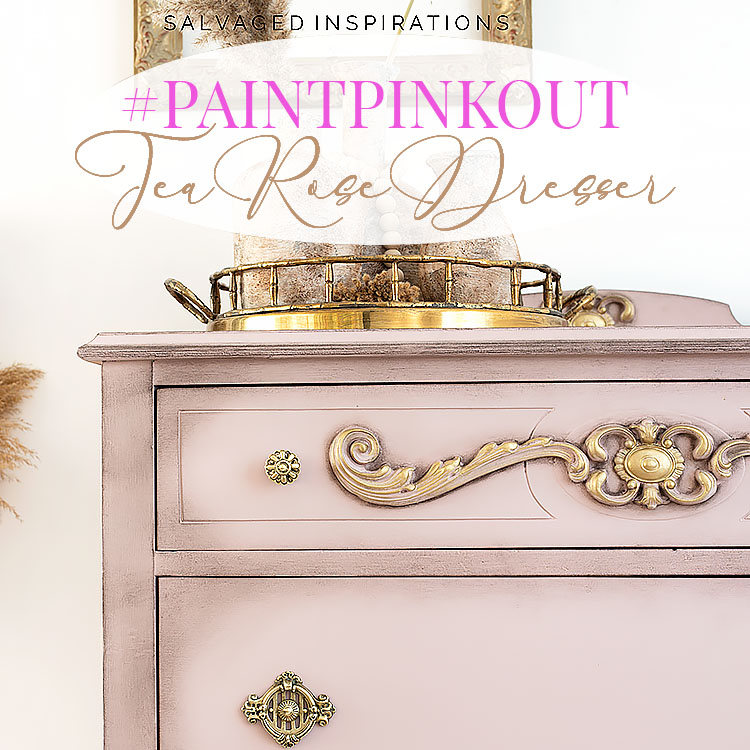 Hi, creative #sifamily! October is Breast Cancer Awareness month and I’m participating in a #PAINTPINKOUT campaign with this Tea Rose Dresser Makeover.
It’s also Furniture Fixer Upper day – one of my favorite days of the month! I’m joining my furniture painting besties and linking to their makeovers below so be sure to check them out before you go!
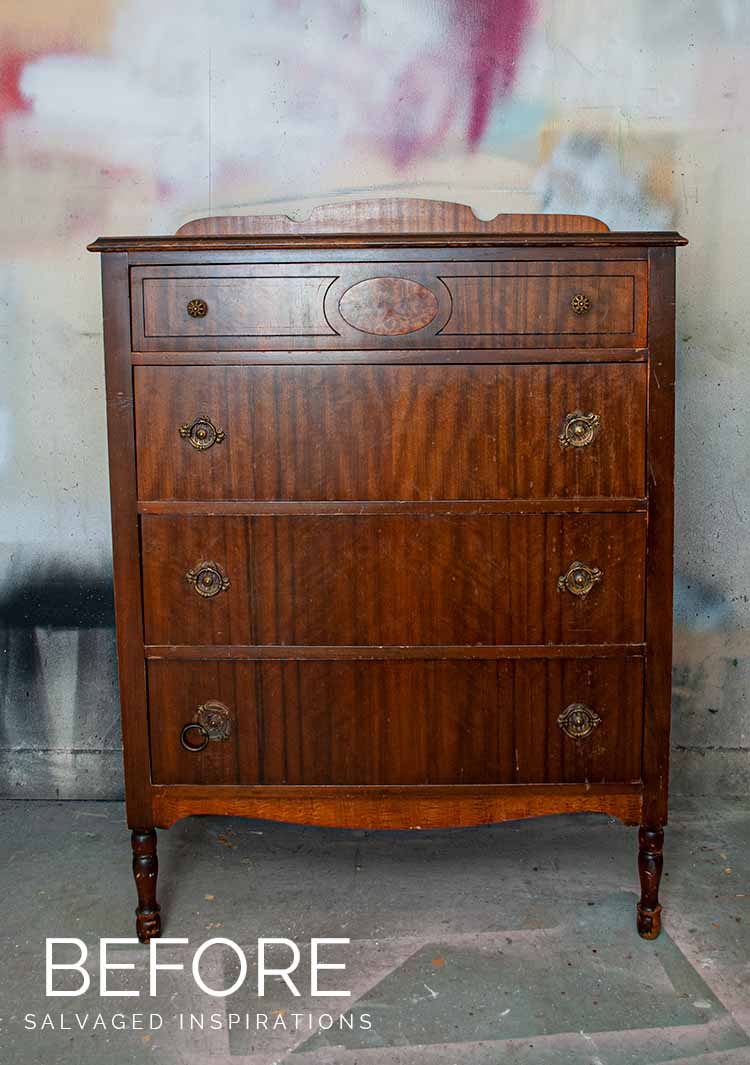
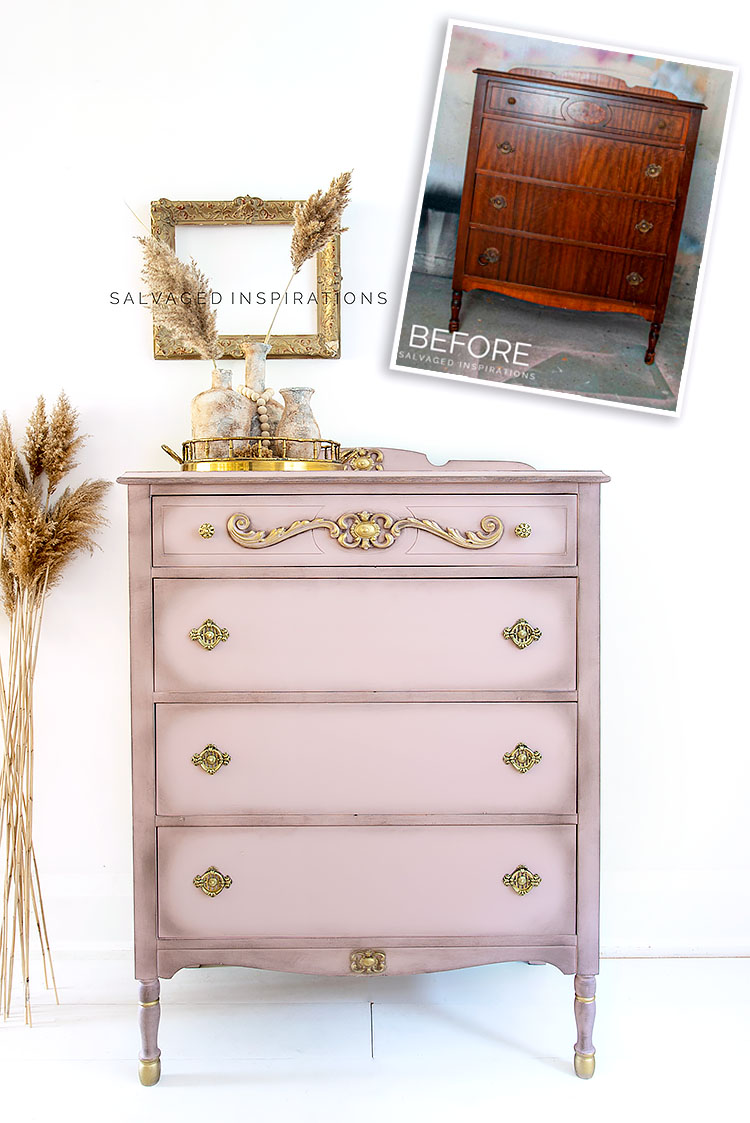
Here’s the vintage dresser I started with. I found this dresser at my friends’ local Restore selling for $75. Isn’t she a beauty?! The hardware attracted me. I haven’t seen brass knobs with this exact detail before. I know they look kind of grungy now, but wait until you see them all polished up!
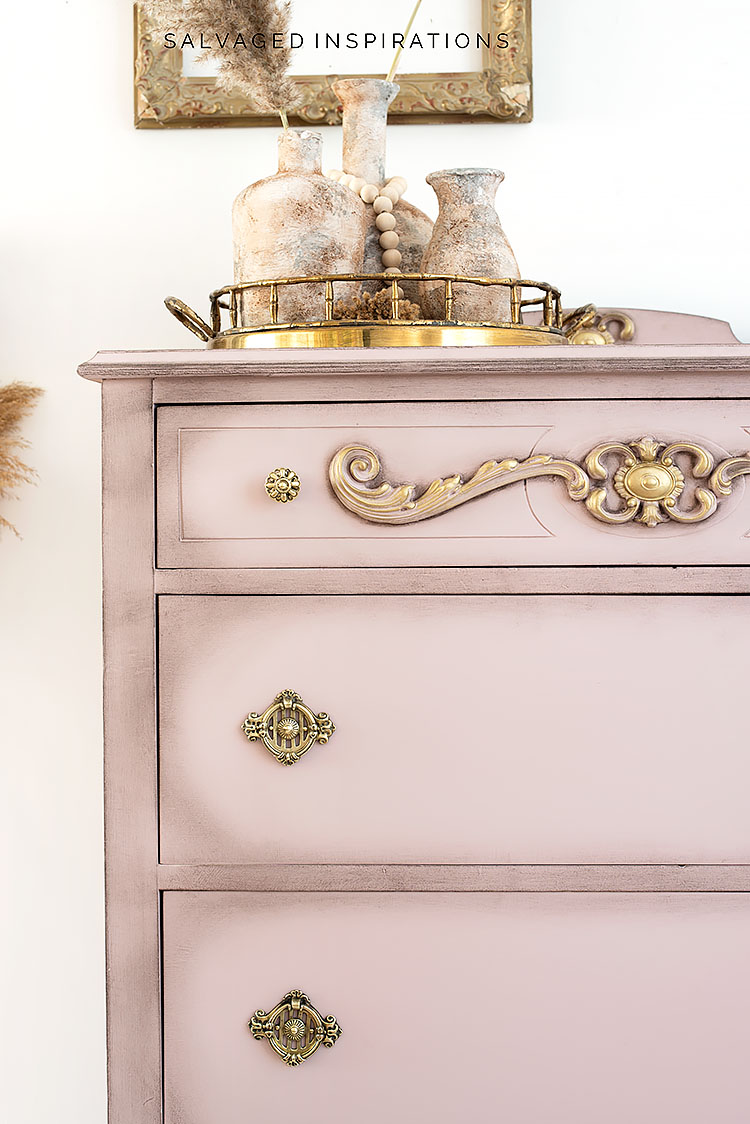
Before I get into the how-to tutorial and the full reveal, here’s a sneak peek. The floral drawer detail shimmers gold and I can’t wait to share how easy this was!
THIS POST IS SPONSORED/CONTAINS AFFILIATE LINKS TO PRODUCTS I USE. YOU CAN SEE MY FULL DISCLOSURE HERE.
SOURCE LIST
Vintage Dresser – SALVAGED
Paint Brushes
Shop Towel
White Lightning
Dewalt Orbital Sander
Sandpaper | Tack Cloth
Water Mister
Brasso + Dremel Tool
B-I-N Shellac Base Primer
Woodubend Appliques
Tea Rose Chalk Mineral Paint
Gold Gilding Wax
Brown Wax
Rose Silkscreen Stencil
Satin Clear Coat
TEA ROSE DRESSER MAKEOVER
Here’s how it all came together…
REMOVE DRAWER LINERS
I like finding drawer liners in furniture. Not only because the patterns are often vintage and charming, but because it indicates that the previous owners cared enough to keep the drawers clean.
The easiest way I know to remove adhered liners or contact paper is with heat. I have a full tutorial on How To Remove Contact Paper In Minutes here.

BRASS HARDWARE
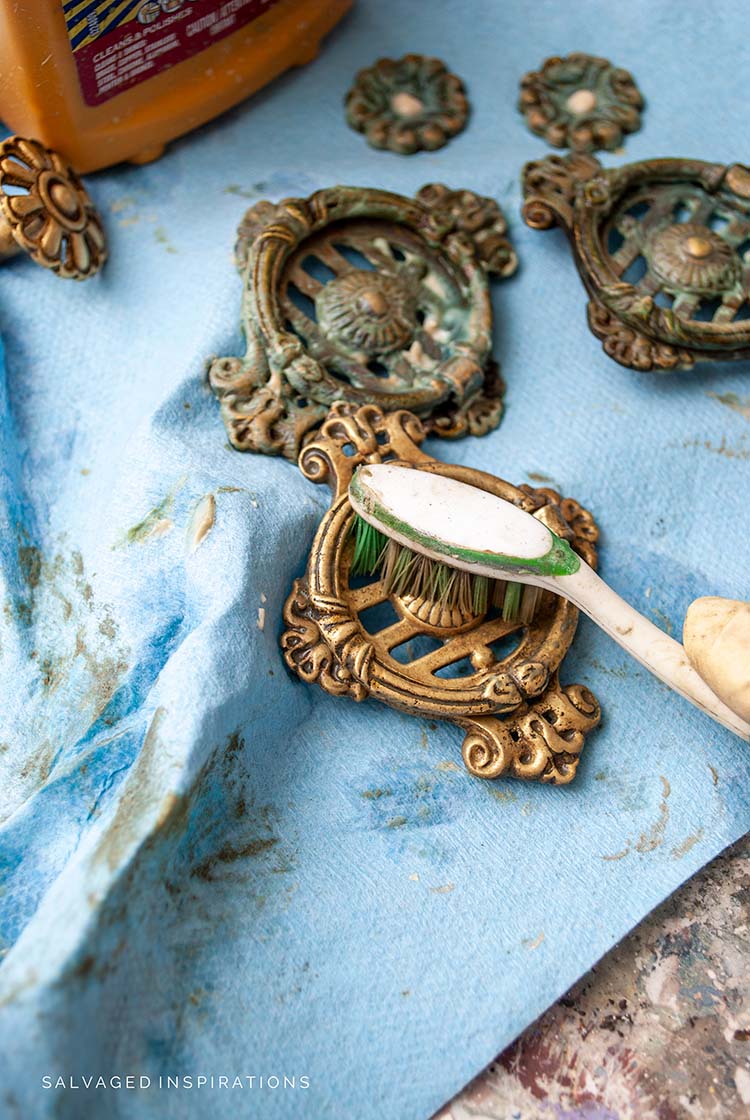
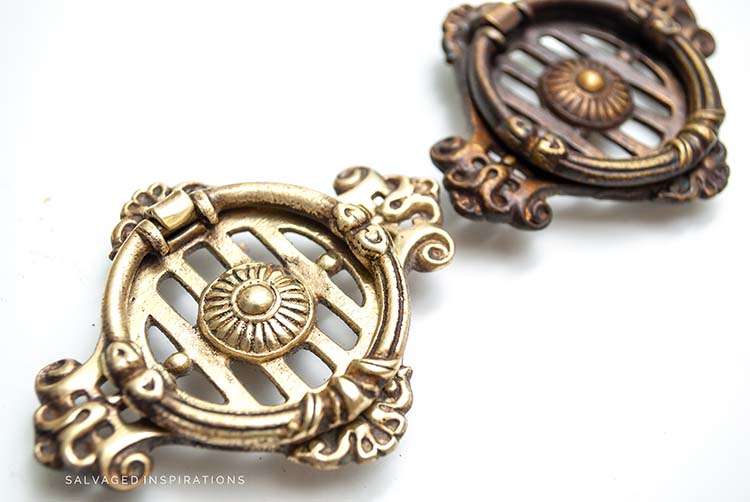
I’ve worked on a lot of vintage pieces and this is the first time seeing this particular hardware. They are so beautiful. I used this Brasso with an old toothbrush to get years of grunge and tarnish off.
Brasso is really easy to use. Squeeze some on and rub. An all-natural brass cleaner alternative is the juice of one lemon mixed with two teaspoons of baking soda. Mix into a paste and cover the hardware in it for 30 minutes. Then rub and buff.
After the Brasso did its job, I buffed them out with my Dremel Tool and a buffing pad.
These Dremel Tools are amazing and come with a variety of bits for buffing, sanding, drilling, inscribing and so much more! I like it because it’s inexpensive, small and easy to use!
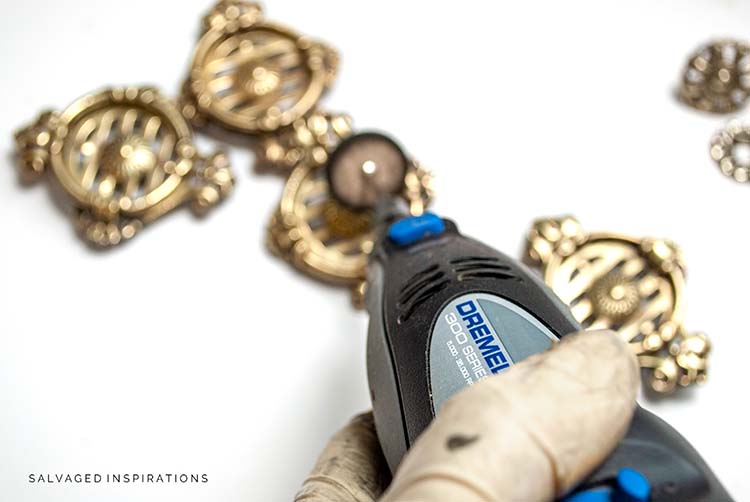
It took me an hour of cleaning and buffing to get them to this point. I could have kept going to clean ALL the nooks and crannies but I was happy.
What a difference… I think they look amazing!
CLEAN + SAND + PRIME
After the drawer liners were removed and the hardware was buffed, I gave this dresser a really good cleaning, inside and out then sanded it with a 180 grit using this orbital sander.

If you missed my post on Dustless Sanding for Under $15, you can see it here. These vintage dressers are bad bleeders because of the stain they used on the veneer so I primed it with two coats of BIN Shellac Based Primer.
WOODUBEND
Here’s where we glam her up all girly! I used this WoodUbend to create some interest and detailing.
WoodUbend is easy to use. Heat it up with a heat gun or hairdryer. Add glue on the back and bend it into place adding some additional heat. I have a full tutorial on How To Apply Woodubend here.
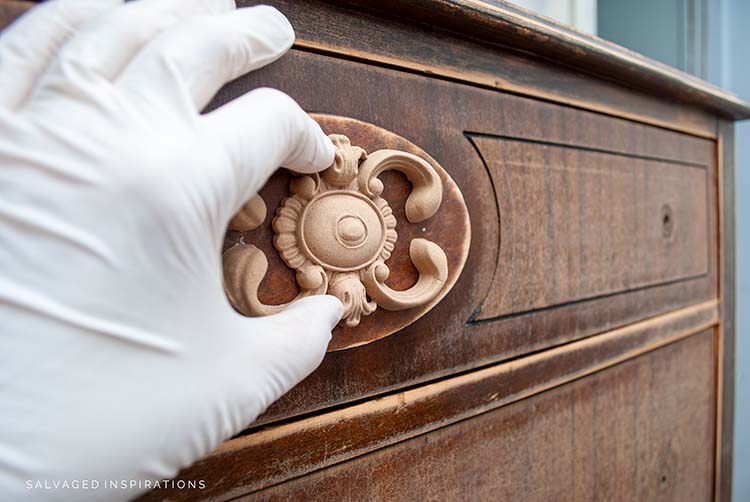
These wood applique moldings make SUCH a HUGE difference, right!?

Here’s a close-up of what these appliques look like finished!
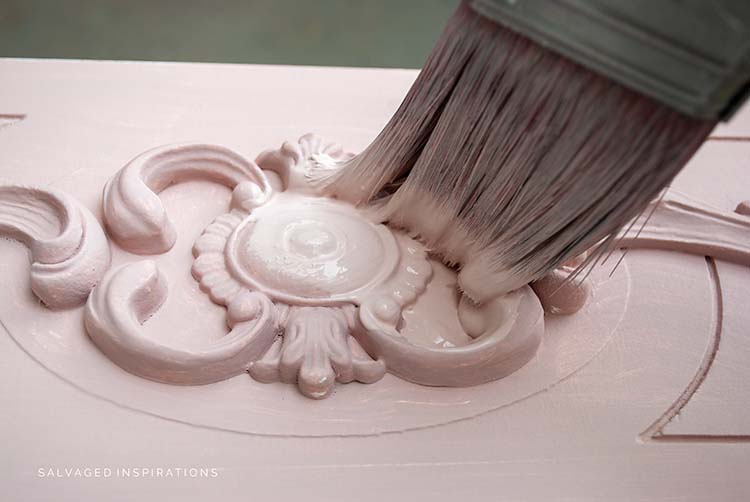
PAINT TEA ROSE
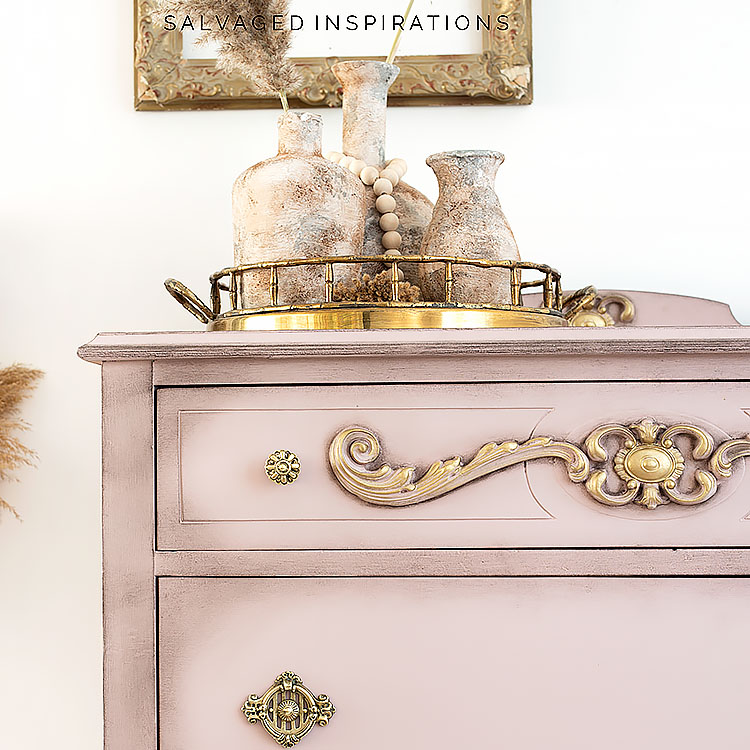
Pink she goes. I brushed on two coats of this TeaRose sanding between each coat for the smoothest finish. If you’re looking for a vintage pink with a hint of tan, Tea Rose is perfect!
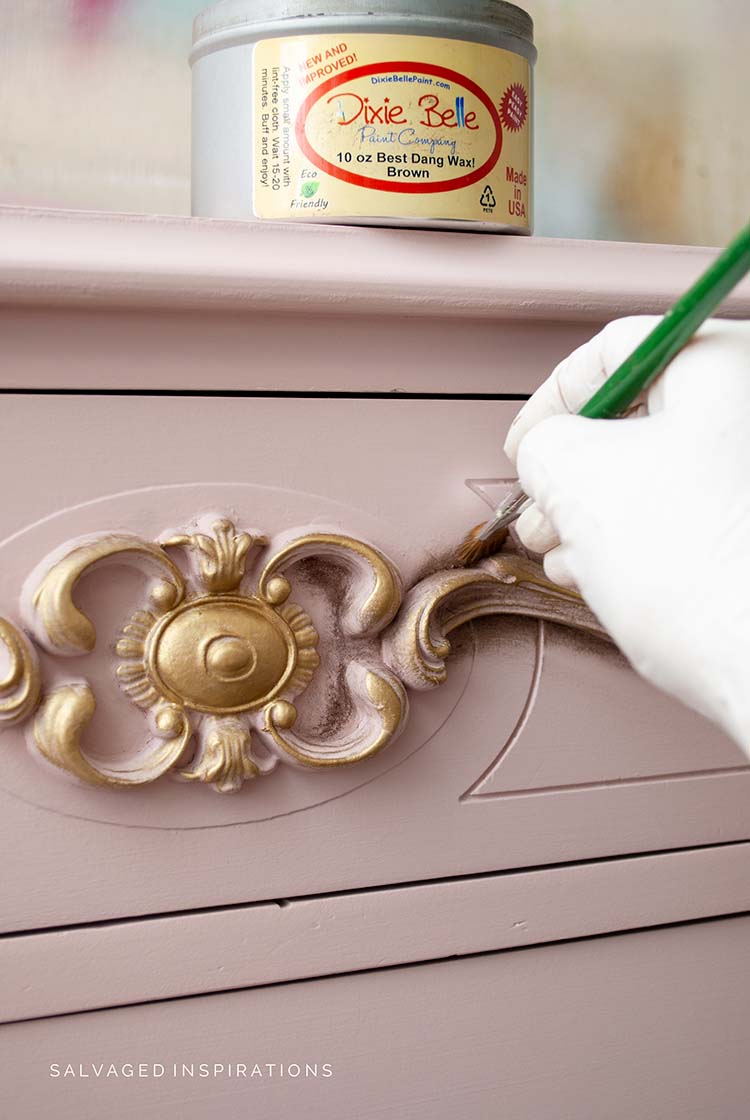
GOLD GEMSTONE MOUSSE
I added some Gold Gilding Wax to the Woodubend Moulds and the feet. It ties in really nicely with the polished-up hardware.
Then to give it a vintage look, I used some brown wax to blend the frame and drawers and bring out the applique details.
DRAWER DETAIL
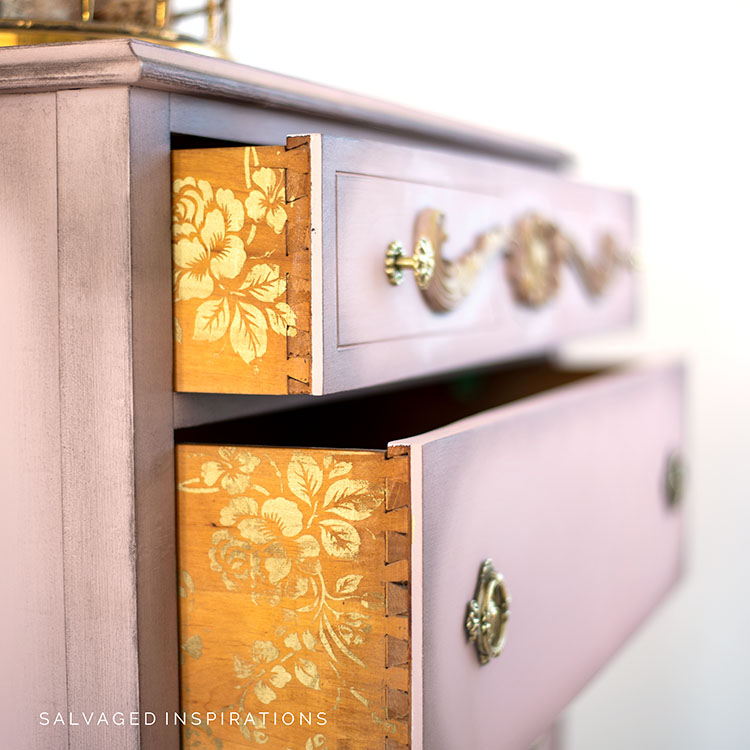
I was having so much fun with the Gold Gemstone Mousse I decided to add a little glimmer to the sides of the drawers.
I used this Floral Silk Screen Stencil and absolutely LOVE this hidden detail! I have a full tutorial on How To Use Silk Screen Stencils here.
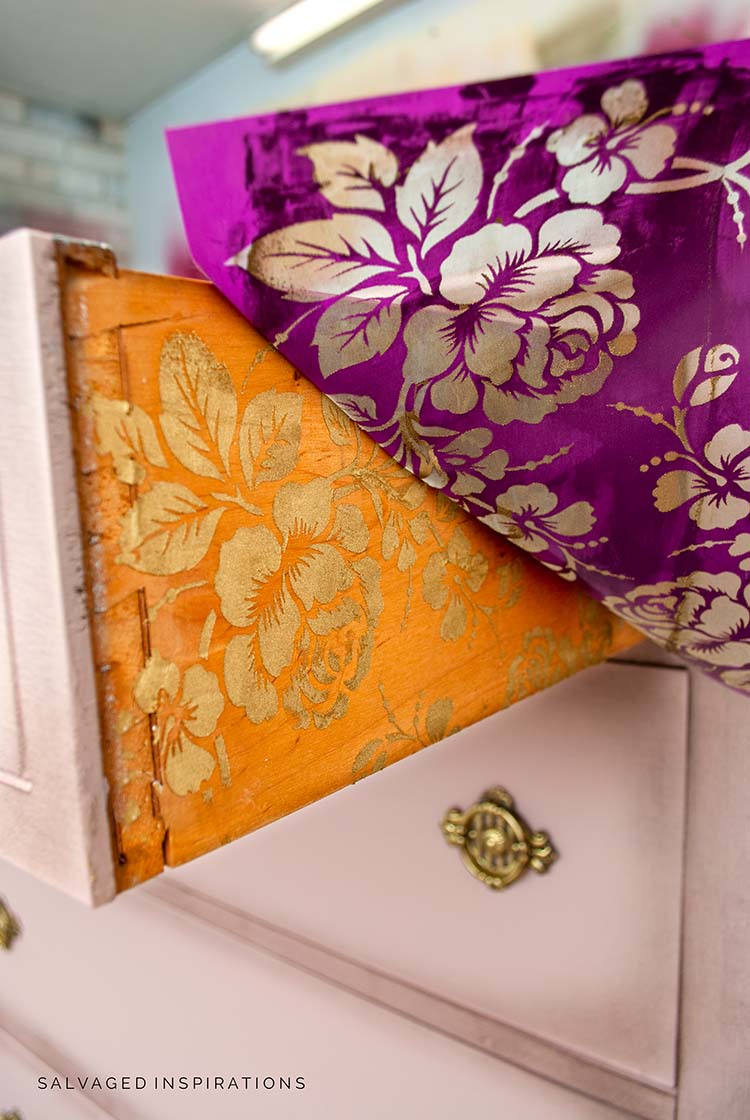
When the light hits it just right, it glows!
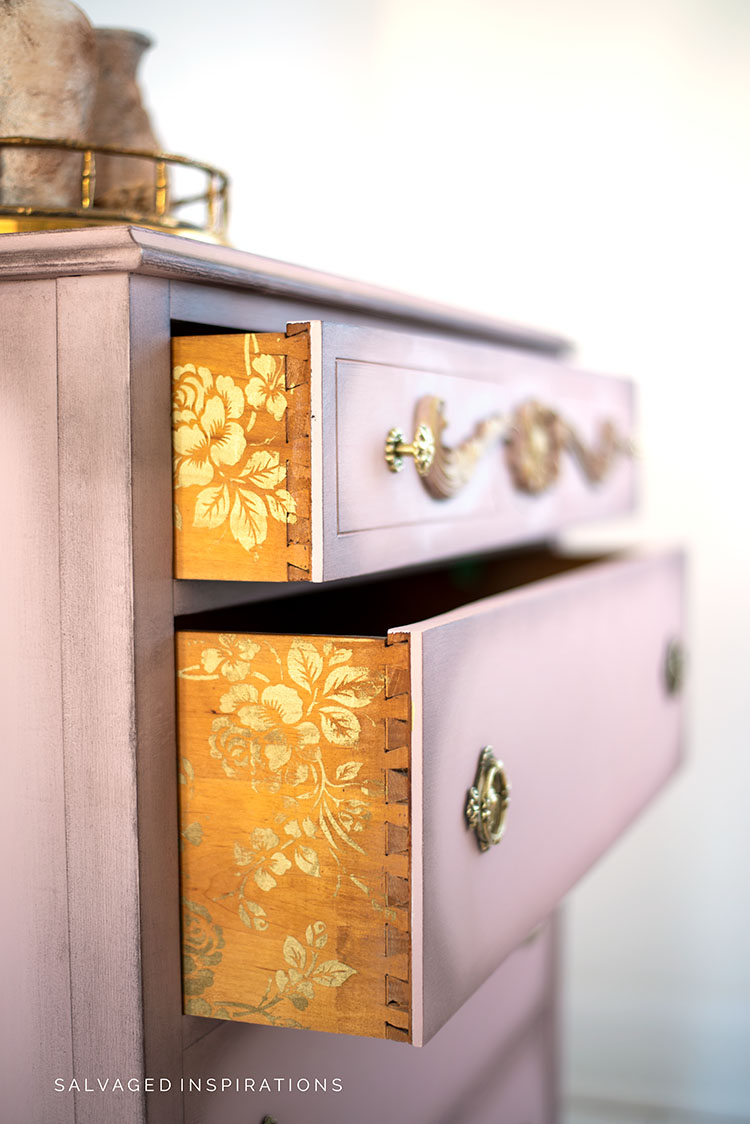
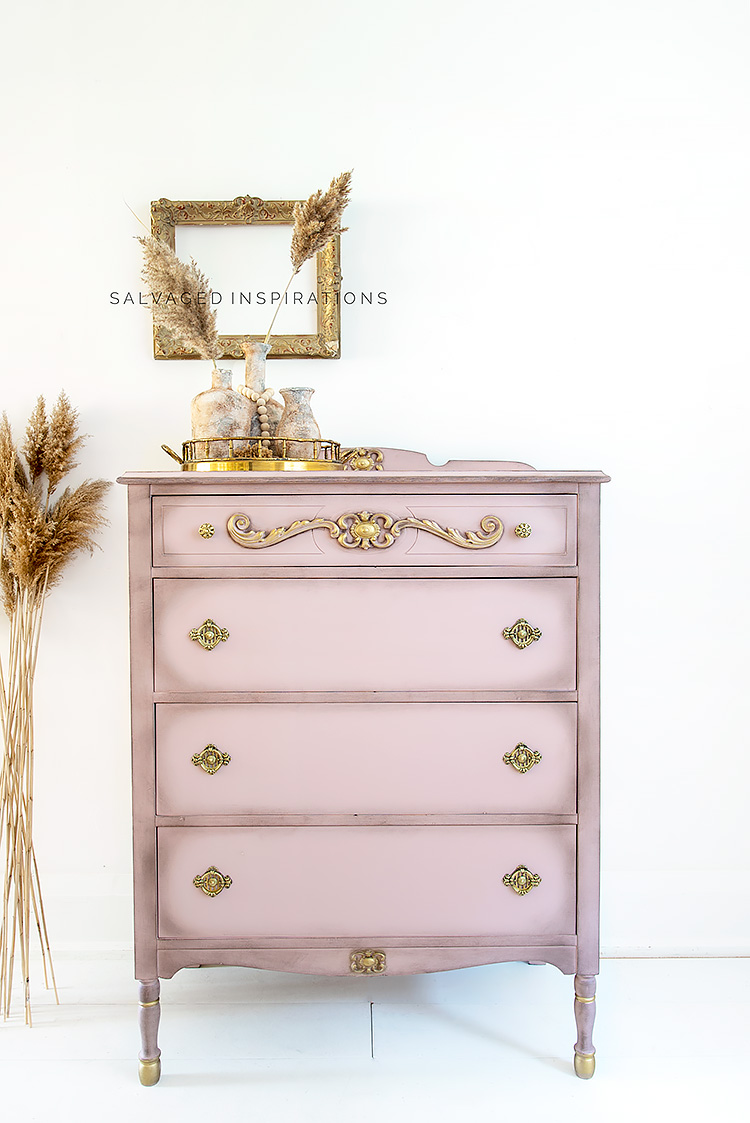
And here’s her final look! What do you think?
AND NOW FOR SOME FURNITURE FIXER-UPPER FUN!
You’re going to LOVE what my creative team of Furniture Fixer Upper ladies do! Below are their BEFORE photos. Visit the links underneath to see the amazing AFTERS and learn how they did it! I’m heading over to take a peek as well! x
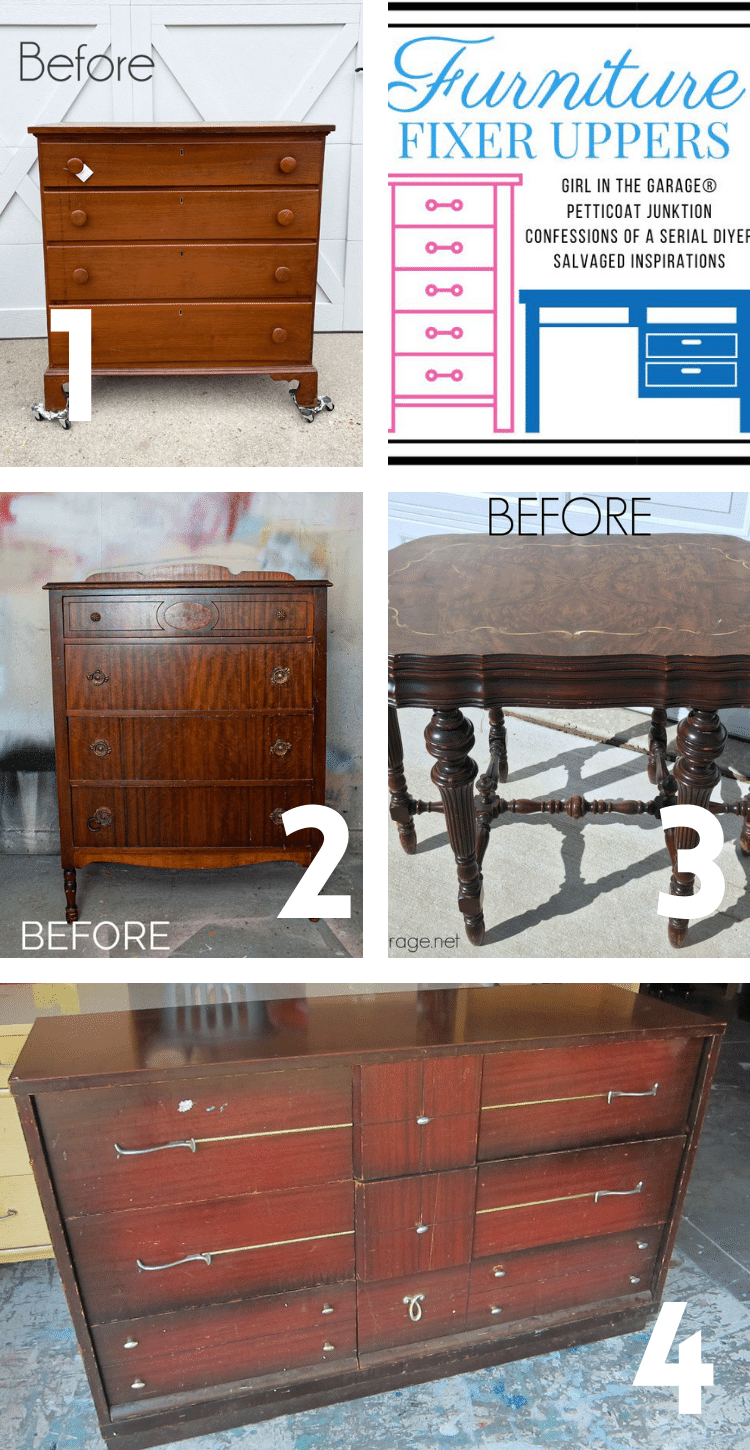
1. CONFESSIONS OF A SERIAL DIYER
2. SALVAGED INSPIRATIONS (HAPPY YOU’RE HERE!)
3. GIRL IN THE GARAGE
4. PETTICOAT JUNKTION
Here’s another look at this before and after. I hope it’s inspired you and given you some new ideas for your projects.
Thanks so much for joining me today! If you’re interested in joining the #PAINTPINKOUT campaign, you can get more details on this short IG post here.
I’d love to hear what you think of this #paintpinkout dresser makeover. Feel free to ask any questions you may have. I love hearing from you, it makes my day! 🙂
Happy furniture painting friends!
Denise x
RELATED POSTS::
CONCHE PAINTED GLOSSY DRESSER
PINK VINTAGE TEA CART
PRETTY IN PINK FARMHOUSE DRESSER
FURNITURE PAINTING W PINK WAX
PINK CHAMPAGNE DRESSER MAKEOVER
PIN AND SHARE!


Hi Denise! Tea rose is such a pretty color and that hardware is amazing. The brown wax just brings it all together. Great job.
Thank you Cheryl! XOXO
Beautiful! I love that you are willing to share how you create these works of art-it is appreciated!
Thanks, Melissa!💕
She is beautiful. I love that hardware. I love it!
Thanks Cheryl! XOXO
This is such a beauty, Denise! I love the pale pink with the gold details! xo
Thanks my friend! XOXO
Truly gorgeous! And using brown wax and gold accents on the hardware is brilliant and shows your vision is amazing! This would make a stunning hall console table all by itself!
Thanks so much Robin! 🙂
Just love how this piece came out! Love the color.
You are amazing!
Hope all is well with you!
Thanks Maryann, so happy you love it! XOXO
I’m not a “pink” girl. But this dresser is gorgeous and so adorable for a sweet girl. If I was a tad younger I might change my mind and be that sweet girl.
That’s so cute Rita… love it… and thank you!💙 A blue heart for you… not pink.😉
Beautiful beautiful beautiful Denise! Love those gorgeous gold details and the tea rose color is stunning.
Thanks so much Marie! XOXO
STUNNING!!!
Over the moon impressed.
Thanks for sharing.
Aw, thank you MJ! So glad you like it! 🙂
Just stunning!
Thank you Carla! 🙂
You really DO have a tutorial for Everything !! 🙂 So helpful !
You have a wonderful furniture design eye. This pink is a soft jewel indeed.
And that Hardware… is stunning.
The side drawer stencil create a fully finished look. A very special surprise !
Another beautiful project – distinctly detailed.
Thanks for sharing !!
p
After SO many years of blogging these tutorials add up…lol. So glad you like this one P! Have a super day! XOXO
SO GORGEOUS AND ELEGANT!
Thank YOU, Rebecca!!! XOXO
This is so gorgeous as usual with all your creative additions!! That hardware really is so beautiful! XOXO
Thanks my friend! It was a really fun makeover! XOXO
You did a beautiful job as usual, the stenciled sides are genius! Did you paint the drawer sides with the bin shellac? And I would love to see a video of the brown wax application, I don’t seem to get it on evenly. Thanks for all your inspiration!
I had a few ooops with the BIN Shellac on the drawers sides, but no, I left them naked and silk stenciled on the wood. And thanks for the video idea!!! I’ll keep this in mind for the next piece that will fit a similar wax finish. And I might have a super short clip of it that I will be posting to stories and Pinterest. And little secret, I don’t get it perfectly even either… but it’s okay… I figure it adds to the vintage’ness. 😉
Buffing with dremnel -great idea!! I live the shading on the edges, what color did you use for that? Is it paint or something else?
Dremel is AWESOME… love it and it helped me out with so many things! For the shading, I used brown wax. 🙂
This is beautiful! I am ready to run home and paint something pink. Way to honor Breast Cancer Awareness month. I love all the details. I have been wanting to try a screen print stencil and this is such an amazing way to use it.
I am always inspired by your creativeness. Way to go!
Thanks Kathy! And I think you’d love the silkscreen stencils. I find them SO EASY to use and no bleedthrough… nice crisp edges every time!
I’m not at all a girly girl, so pink has never ever been my thing. I have an October birthday though and so pink has been made a thing in my life ( I prefer the opal birthstone over the pink quartzite). Last Decembers breast cancer diagnosis made it so now I can’t avoid pink especially in October. This soft Tea-rose pink is lovely! When I saw the cleaned up hardware I thought it would be a stunning brooch, so it adds a hint of glam along with the other gold accents. Good job Denice!
I hope everything is going well after your diagnosis Nicki.💙 I just went for my mammogram a few weeks ago but I have to admit I was putting it off… I guess a lot of women do but it’s SO important to look after ourselves!!! And funny that you brought up your pink quartzite. I’m November – the topaz. I never liked mine either. lol
Don’t put off that mammo, Denise! I too have had breast cancer. I had no idea there was a lump- without my mammo I could have been in much worse shape before I got treatment. Nicki, best wishes to you. I hope you recover completely!
And thanks for the detailed tutorial, Denise. My style is different from yours (I like deep colors and not so much shabby chic), but the info certainly can work for any style. And I do love the stencils on the sides of the drawers! That effect is just lovely.
Thanks Anne! For the feedback and the heart-felt reminder. I did go and as usual, it’s always the anticipation that is more nerve-wracking than the actual mamogram.
It certainly had a beautiful shape and lovely hardware to begin with, but it really shines now, Denise! The hardware is so bright, I actually thought you painted it. I haven’t been successful with dark wax because I think it makes the paint look dirty instead of aged, but it really adds to the look here. And I love the surprise of decorated drawer sides. How did you apply the mousse to the stencil?
I used this Thing-A-Ma-Jig which I forgot to add to my source list so thanks for asking. It’s a lot stiffer and thicker than the flexible silicone applicators I have from Prima but honestly, I’m not sure which I prefer using.
It’s beyond perfect, as is everything you recreate! So talented! The brown wax complements the tea rose pink so well. Denise, how did you do the jars on top of the dresser? They’re amazing, too.
ahhh, they’re my cinnamon jars and I love them. I’ve used them for so many styling projects and have them displayed on my l/r table. You can check out that Trash 2 Treasure Glass Painting project here Bev! XOXO
Love, love, love! I have a similar vintage dresser sitting in my workshop and I couldn’t figure out what to do with it. You did it for me! I even have all of the materials and colors, except for the brown wax. Do you think I can do the shadowing with a brown glaze instead? It takes so long to get Dixie Belle products shipped to me in Israel, I would rather use what I have already got. The reason I love tea rose is because it is soft and feminine, yet still sophisticated and not too “Barbie-like”. My favorite part of the whole project, though, would have to be the stenciling on the side. I love how you did it on the bare wood. I would have for sure painted the sides first, but your way is better! Keep them coming!!!
Thanks Gabi and I really like the gold floral on the wood sides as well… and so much easier and faster than painting! hmmm, I’m not sure glaze would be a good choice to shade if you’re looking for a similar look. I’m sure it can be done – but it would take some work. An easier and quicker way imo, would be to use a darker paint and dry brush and blend. I have a youtube demo video on how I dry brushed and antiqued this box … the dry brushing starts a the 6min mark so you don’t have to watch the entire video. Hope this helps. 🙂
As always, I just love your work. And this one is no exception. As for your new set up on your emails. I too love the bottom. I’m thinking that the top needs a new font instead of block letters maybe? Your so artistic that I’m thinking really cool swirly letters would be a great start and a double underline or something to separate the body of the email. What do you think? 🙂
I think I love your input because I don’t like the top either…lol. A few readers have mentioned that it didn’t even show up properly on their mobile so I’ll have to go back to the drawing board. I want to keep it simple, short, and sweet but step it up a notch. I get these GORGEOUS emails (magazine-worthy layouts) from my blogging buddies and I feel I’m letting you guys down with my boring text emails. I love and appreciate your input Cindy. Thank YOU!
Denise a terrific job!
Def love the detailing and added trim.
The gold detailing was such a neat idea!
Keep keeping us inspired!
Thank so much Dawn! XOXO
This is one of my all-time favorite pink makeovers! Thank you for sharing and inspiring me every week. I look forward to every email!
Yaaaaaay! I’m so happy you like it Nicki! Thank YOU! XOXOX
Oh Denise, I’m not sure what to comment on first! That hardware REALLY is something! Tea Rose looks like the perfect choice! and that brown wax worked wonders! I love the embellishments and the drawer sides! I expect to see this on one of my magazine covers soon!
Aw, thanks so much Gwen! It was a little work to get her here but I enjoyed every minute. And lets keep our fingers crossed for a magazine cover. hehe😆🤞
Absolutely gorgeous!!! Fantastic work 😊
Love your detailed direction
I’m so glad and thankful for the input Rosie! While I’m writing, I sometimes question if I’m being “too detailed” or too chatty.
Hi Denise. This dresser makeover absolutely dazzles me. The soft pink mixed with the gold highlights are stunning. Not to mention the gorgeous hardware and flower stencils on the sides of the drawers. Beautifully done.
Oh I’m SO glad you like it, thanks my friend! XOXO