WANT TO ADD SERIOUS WOW FACTOR TO YOUR PAINTED FURNITURE? TODAY I’M ANSWERING YOUR TOP 20 QUESTIONS ABOUT GOLD LEAFING AND GILDING WAX AND ALL THINGS BLING – PLUS SHARING OVER 20 STUNNING EXAMPLES TO INSPIRE YOUR NEXT DIY MAKEOVER!
Want to add instant glam to your painted furniture? Whether you love a subtle shimmer or full-on vintage luxe, gold leaf and gilding wax is an easy way to create high-end looks on a budget! In this guide, I’m answering the TOP 10 most-frequently-asked questions about gold leafing—and the TOP 10 most-frequently-asked questions about gilding wax — including my best tips for smooth application, avoiding common mistakes, and sealing it for long-lasting beauty. Let’s get gilding!
*As an Amazon Associate, I earn from qualifying purchases. There are affiliate links in this post to other companies/products I use and love as well. You will never be charged extra when you purchase through these affiliate links. If you purchase from my links – A BIG thank you for supporting me and the #siblog! To see my full disclaimer, click here.
Following the FAQ, I’ve also included 21 Gorgeous DIY Gilded Makeovers in no particular order to inspire you. If you’d like to read the full tutorial, including colors and all the supplies used, I’ve included a link to the original post in the title above each image.
THIS POST IS SPONSORED/CONTAINS AFFILIATE LINKS TO PRODUCTS I USE. YOU CAN SEE MY FULL DISCLOSURE HERE.
GILDING WAX 101: YOUR TOP QUESTIONS ANSWERED!
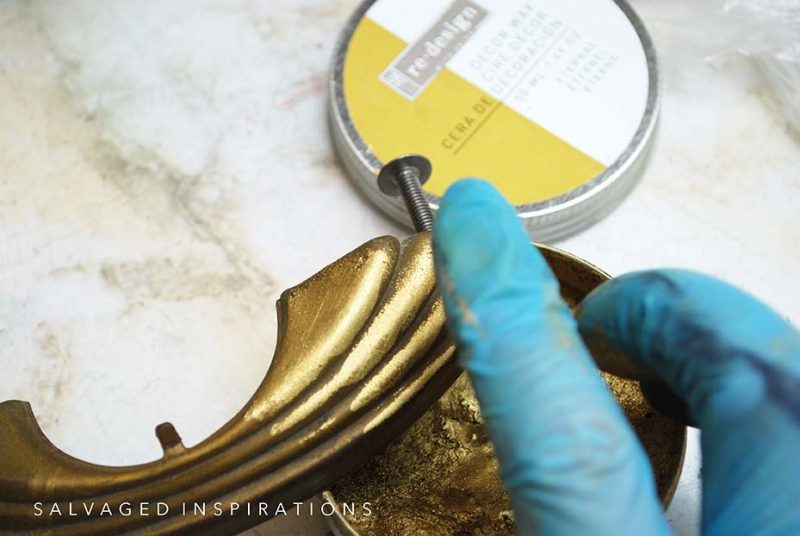
If you love adding a little shimmer, glam, or aged character to your painted furniture, gilding wax is an absolute must-try! This tiny tin of magic can transform details, highlight carvings, and give your pieces that extra WOW factor. I get a ton of questions about gilding wax, so today, I’m answering the top 10 most-asked—from application tips to sealing tricks. Let’s dive in!
1. What is gilding wax, and why should I use it?
Gilding wax is a metallic or colored shimmer wax that adds a gorgeous shine or aged patina to furniture, frames, mirrors, and more. Whether you’re going for a bold pop of gold or a subtle antique finish, it’s a simple way to elevate your projects!
2. Can I use gilding wax on any type of paint?
Yes, but it works best on matte, chalk-style, or mineral-based paints because they’re slightly porous and grab onto the wax beautifully. If your piece has a glossy finish, a light scuff with fine sandpaper can help with adhesion.
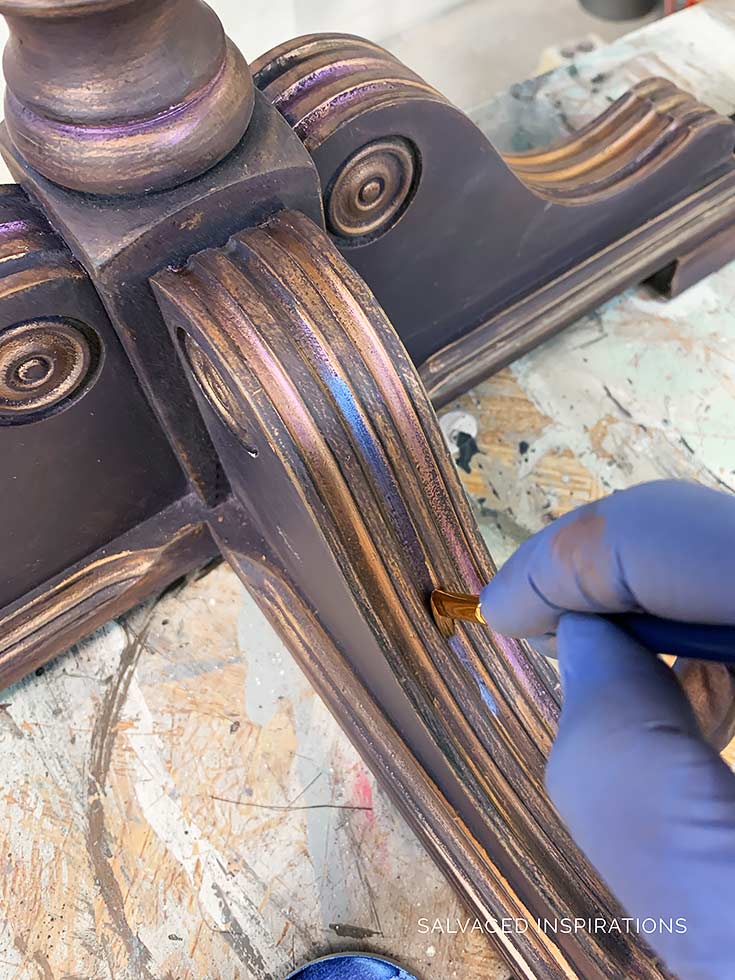
3. What’s the best way to apply gilding wax?
You can use your fingertip, a small artist’s brush, or a soft cloth. Just a tiny amount goes a long way! Start light, build up gradually, and buff to your desired shine.
4. Do I need to seal gilding wax?
Most gilding waxes cure on their own and don’t need sealing. But if your piece gets heavy use (like cabinet handles or tabletops), a clear wax or water-based topcoat can help lock in the look and longevity.
5. How long does gilding wax take to dry?
It sets up pretty quickly—usually within a few hours—but a full cure takes 24-48 hours. If you plan to seal it, wait until it’s fully dry before applying a topcoat.
6. Can I mix different colors of gilding wax?
Absolutely, mix away! Mixing colors is a great way to create custom shades. Layering different tones (like gold and bronze) can also add depth and dimension for a more high-end look.
7. Oops! I used too much. How do I remove excess gilding wax?
No worries! If it’s still wet, just wipe it back with a cloth or dab a little clear wax to lift it. If it’s already dried, a gentle buff with fine steel wool, sandpaper, or mineral spirits will do the trick.
8. Can I use gilding wax on raw wood or metal?
Yes! It adheres beautifully to raw wood, metal, and even glass. However, if you want the color to really pop, a base coat of paint or primer underneath can help.
9. Will gilding wax rub off over time?
It can wear off on high-touch areas, like drawer handles or tabletops. If that’s a concern, a thin layer of clear wax or a water-based poly will keep it looking fresh.
10. Can I use gilding wax on outdoor furniture?
Gilding wax isn’t weatherproof, so if your piece is going outside, you’ll want to seal it well with an outdoor-rated topcoat to help it last longer.

GOLD LEAF 101: TOP 10 QUESTIONS ANSWERED!
If you love a little bling on your furniture makeovers, gold leafing is a game-changer! Whether you want an aged antique look or a bold, glamorous finish, gold leaf adds instant luxury and drama to any piece. But if you’ve never tried it before, I totally get that it can seem intimidating. No worries—I’ve got you! Here are the top 10 most-asked questions about gold leafing and how to get stunning results every time.
1. What is gold leaf, and why use it on furniture?
Gold leaf is real or imitation gold hammered into super-thin sheets. It creates a rich, metallic finish that paint alone can’t replicate. It’s perfect for highlighting details, adding elegance, or creating an aged, distressed look.
2. Can I apply gold leaf directly to painted furniture?
Yes! Just make sure your paint is fully dry before applying adhesive. For best results, a smooth, sealed surface (like satin or semi-gloss paint) helps the leaf adhere evenly. If your surface is too matte, the leaf may grab in unwanted areas.
3. What’s the best adhesive for gold leaf?
You’ll need gold leaf adhesive. It stays tacky when dry, which helps the gold leaf stick. Some people also use mod podge or a thin layer of clear wax, but for the strongest bond, a proper leafing size is best.
4. How do you apply gold leaf?
-
Brush on adhesive where you want the gold leaf to stick.
-
Wait until it turns tacky (usually 15-30 minutes, but check the label).
-
Gently lay the gold leaf over the tacky surface.
-
Use a soft brush to press it down and smooth out wrinkles.
-
Brush off excess leafing with a dry, soft brush or cloth.
5. Do I need to seal gold leaf?
Yes! Gold leaf is delicate and can rub off if not sealed. Use a clear wax, polycrylic, or a special gilding sealer to protect it. Be gentle—too much rubbing can remove the leaf!
6. Can I distress gold leaf for an antique look?
Absolutely! Once sealed, you can lightly sand with fine-grit sandpaper (320-400 grit) or use dark wax to tone it down and add an aged, vintage feel.
7. What’s the best way to fix mistakes or missing spots?
No worries—gold leafing is very forgiving! Just dab a little more adhesive in the missing area, wait for it to turn tacky, and apply another small piece of leaf. Blend with a soft brush.
8. Can I use gold leaf on metal, glass, or wood?
Yes! Gold leaf sticks to almost any surface with the right adhesive. It’s gorgeous on wood, glass, metal, and even fabric! Just be sure to seal it properly, especially on high-use items.
9. How durable is gold leaf on furniture?
Gold leaf looks delicate but holds up well when sealed properly. If it’s on a high-traffic area (like tabletops or dresser handles), a polycrylic topcoat will help protect it.
10. Can I use gold leaf on outdoor furniture?
Gold leaf isn’t waterproof and can tarnish or wear away outdoors. If you’re using it on an outdoor piece, a high-quality exterior sealer is a must to help it last longer.
And that’s it! Gold leafing is such a fun way to add instant elegance, shine, and vintage charm to your projects. Have you tried it before? Let me know in the comments—I’d love to hear how you’re using it!
Now for some inspiration! Below are examples of furniture makeovers and DIY projects using gilding in a variety of ways. Click the title above the image for the FULL step-by-step tutorial! And don’t forget to PIN for later!
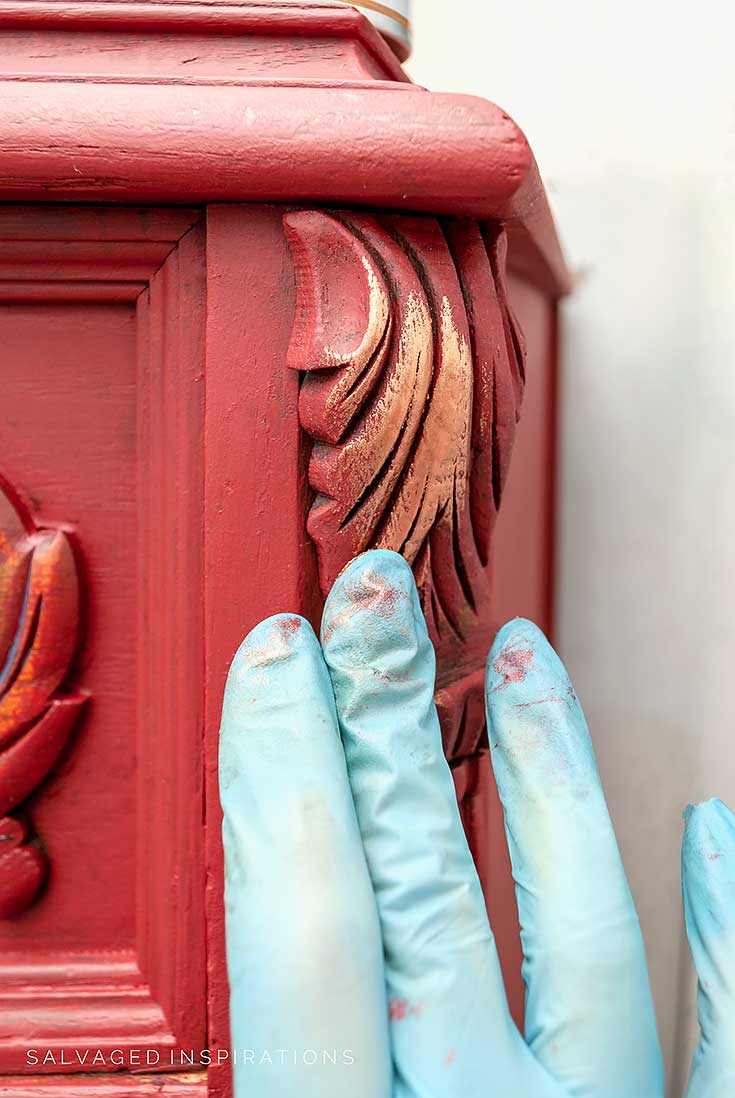
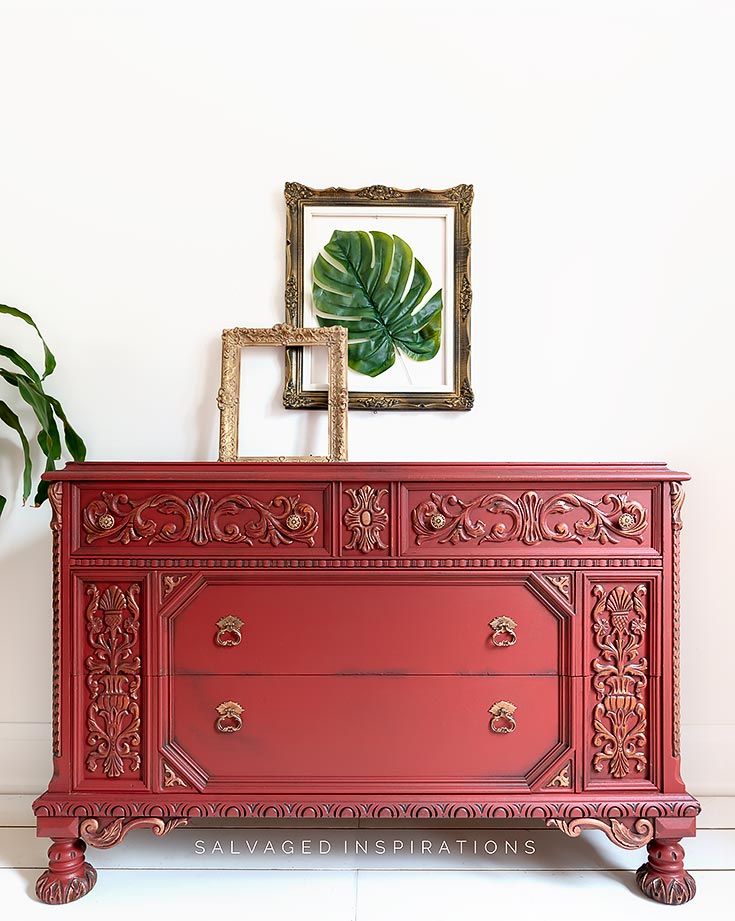
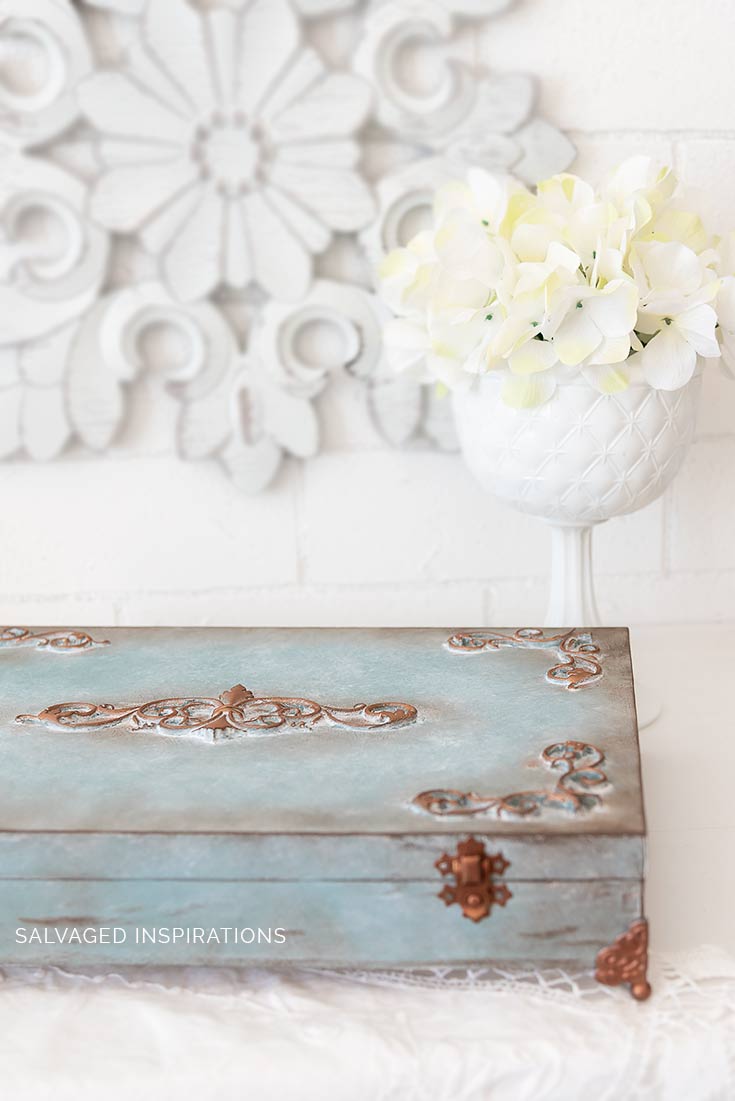
How To Use Copper Gilding Wax + Wet Distress Dresser
In this 2021 dresser makeover, I used a wet distress technique on all these gorgeous details and then used copper gilding wax to accentuate the dresser’s intricate scrollwork and vintage hardware. This added a warm, metallic glow that complemented the custom red finish. Applying the wax was a breeze—just a small dab with my fingertip brought out the details. I love how this simple touch of copper elevates the entire look!
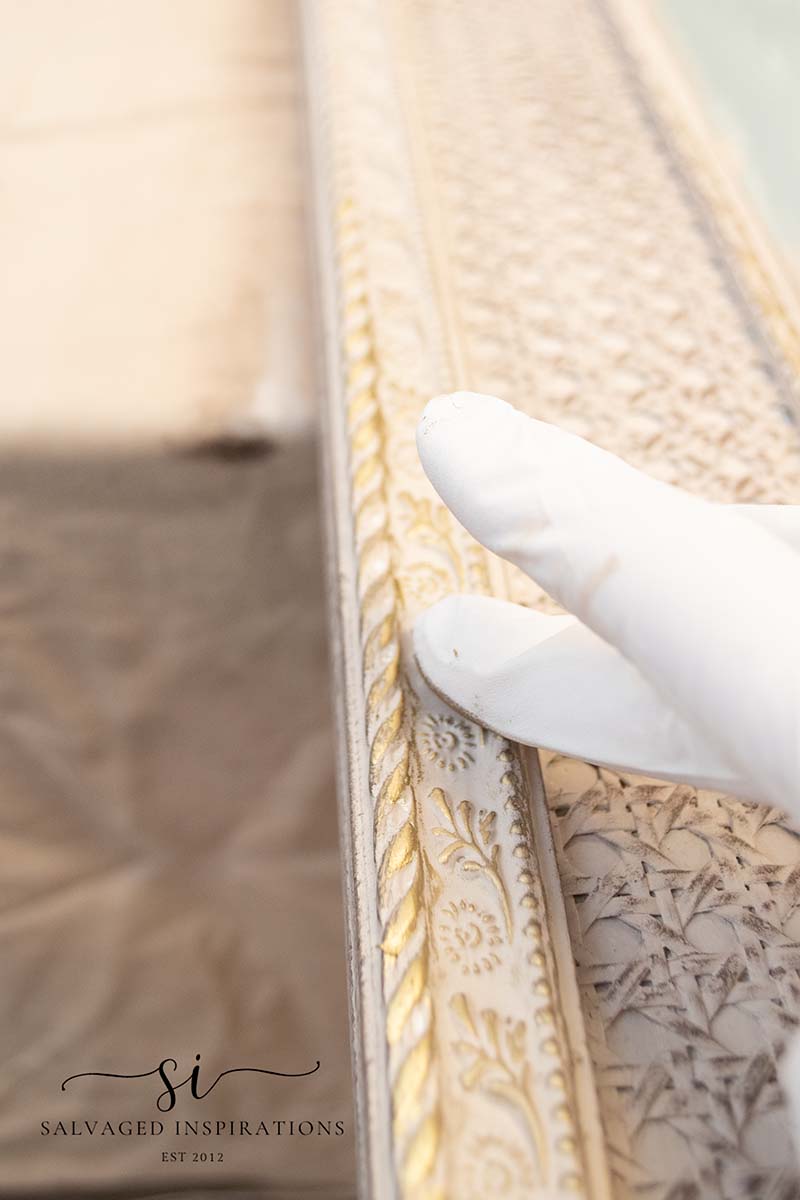
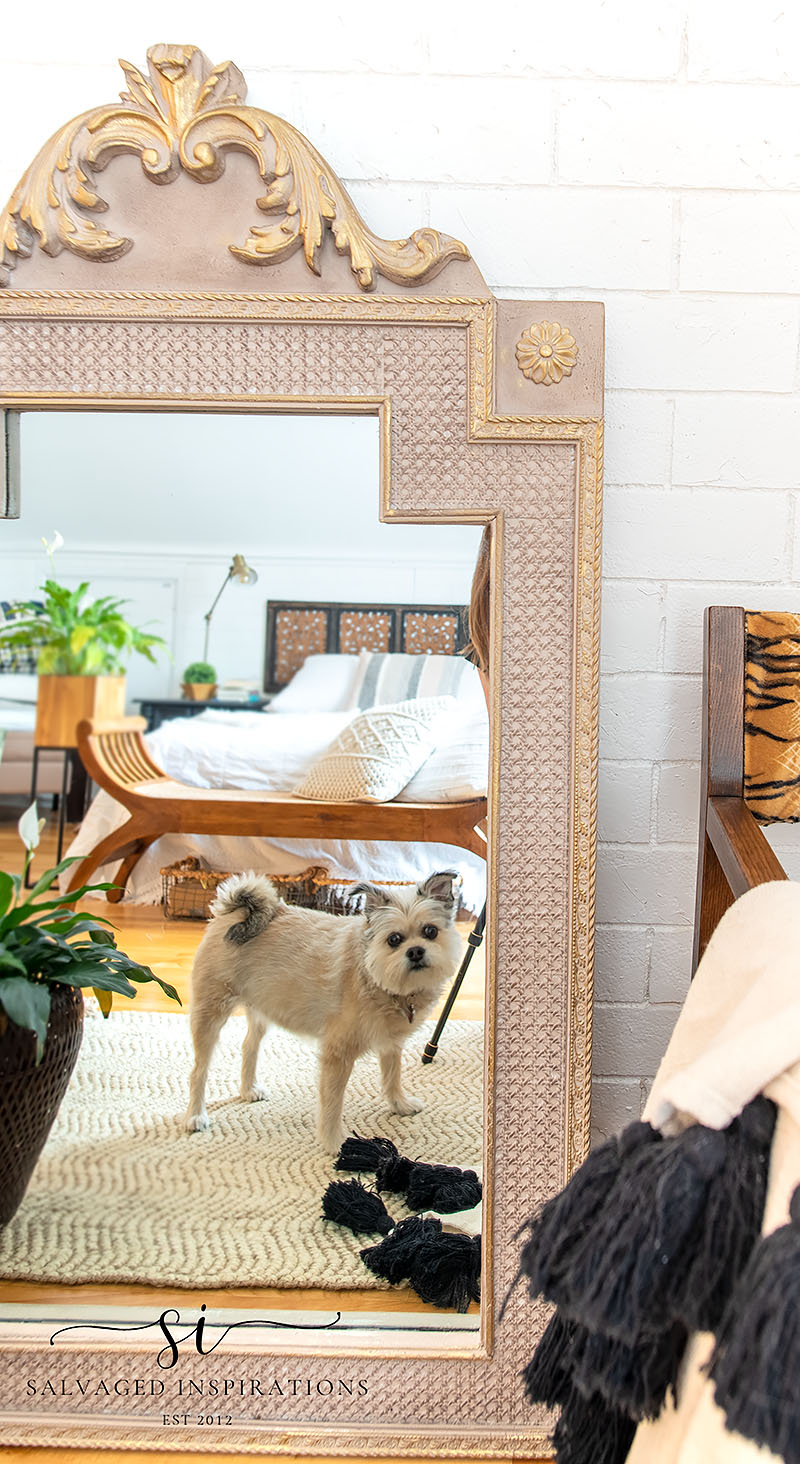
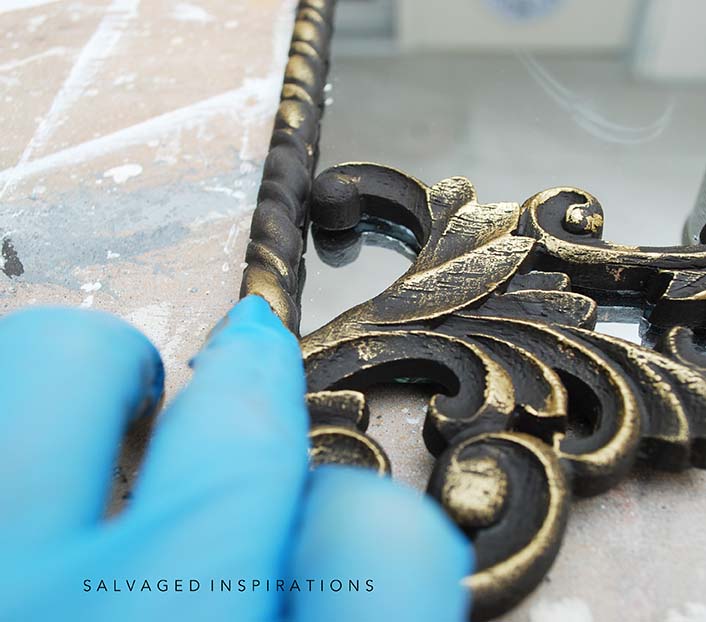
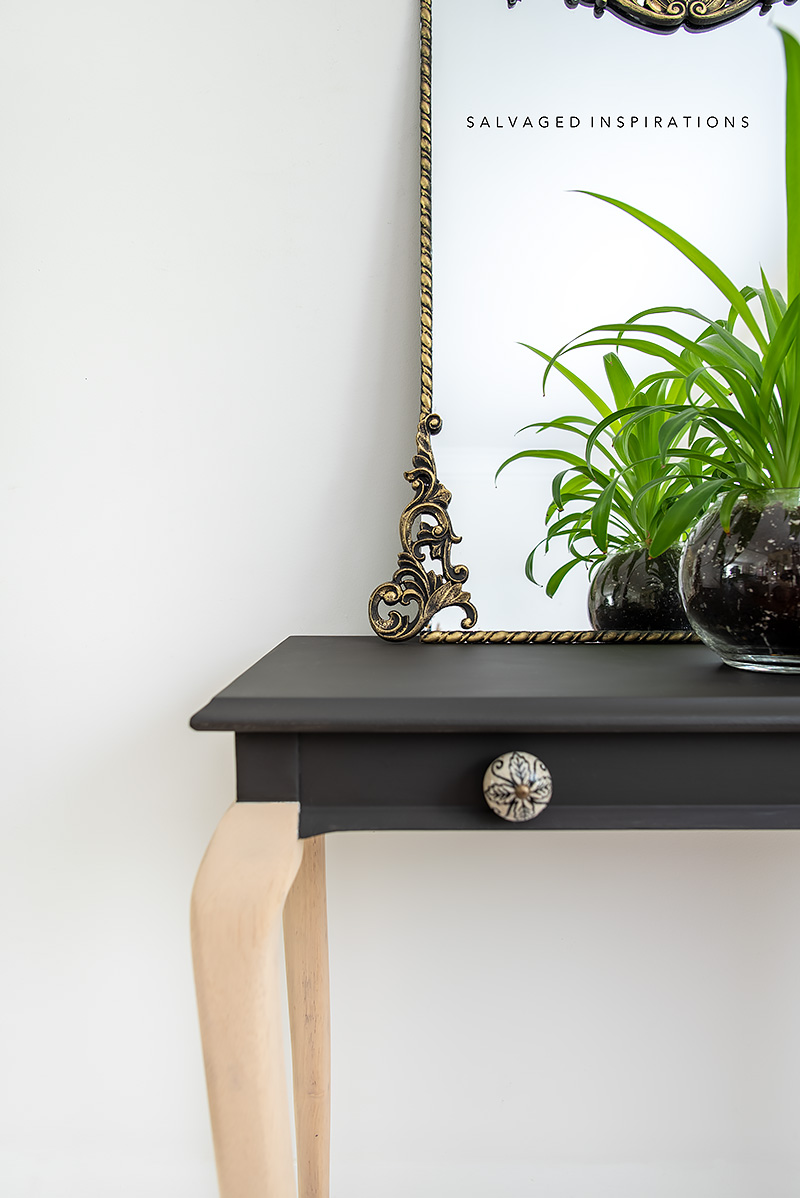
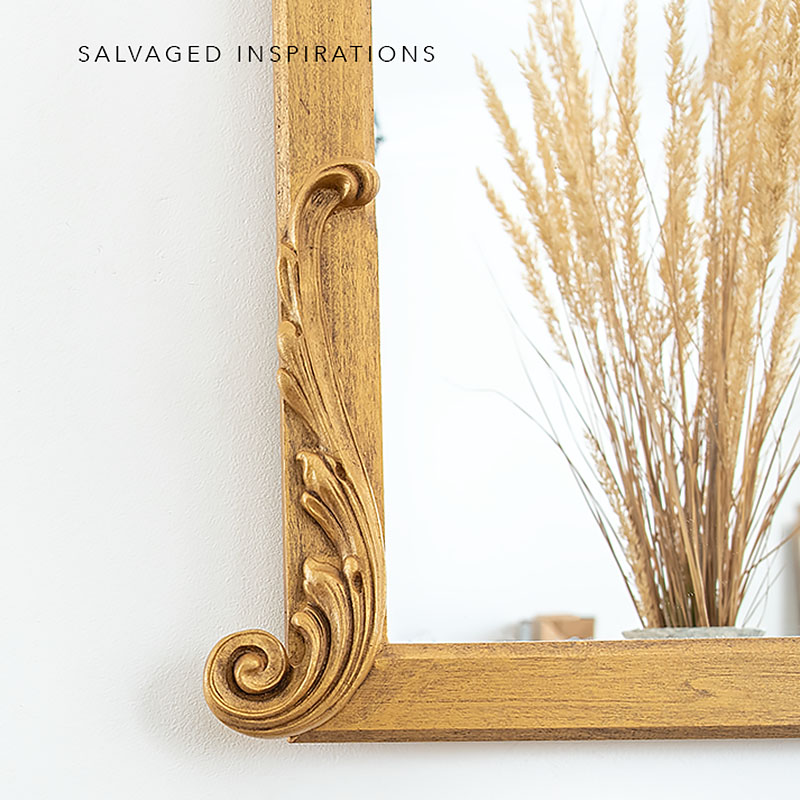
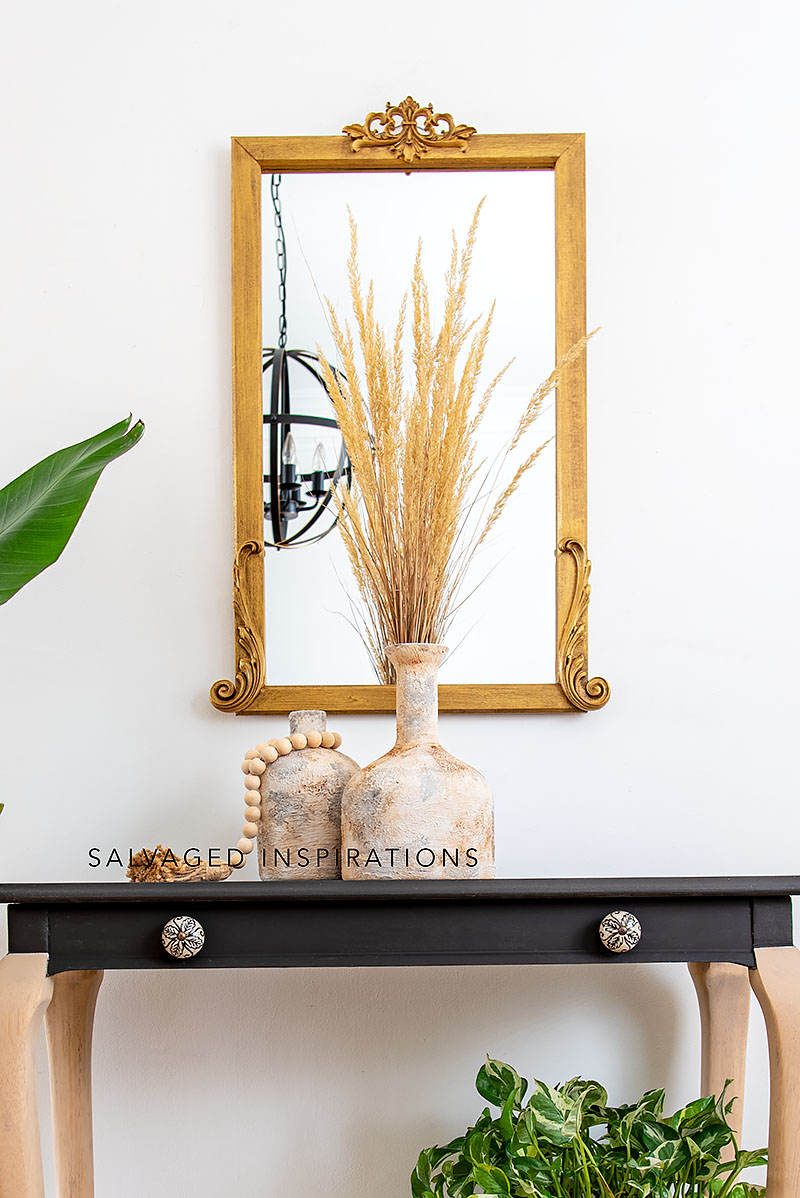
Painting Frames | DIY Mirror Makeover
In this Trash to Treasure project, I upcycled a 30-year-old mirror by painting its frame with Cobblestone Chalk Mineral Paint, adding depth with brown wax, and highlighting the intricate details using gold gilding wax. It was Gidgy approved! 🙂
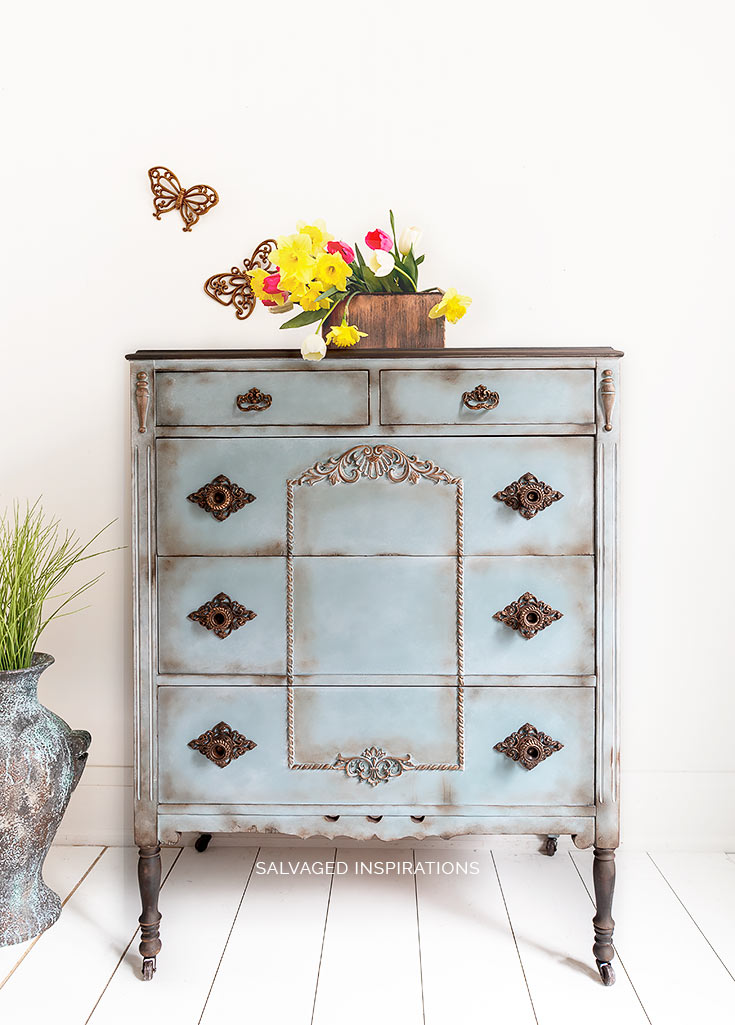
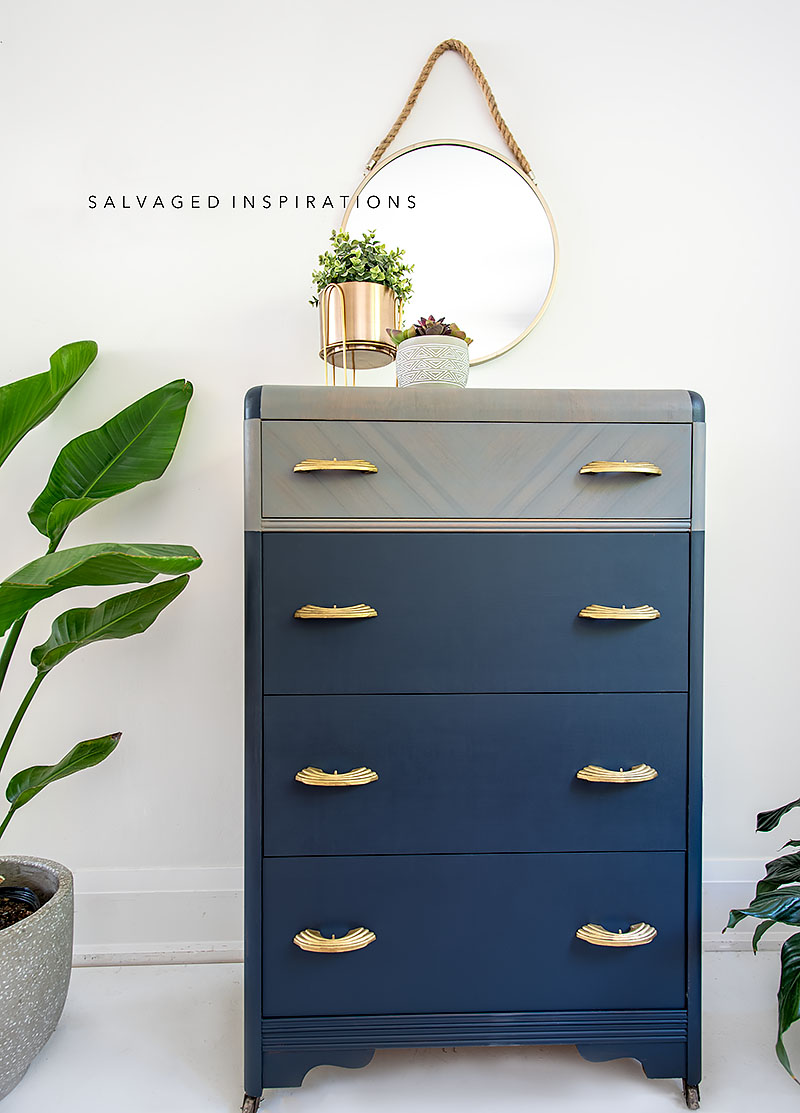
How To Use Gilding Wax on Painted Furniture
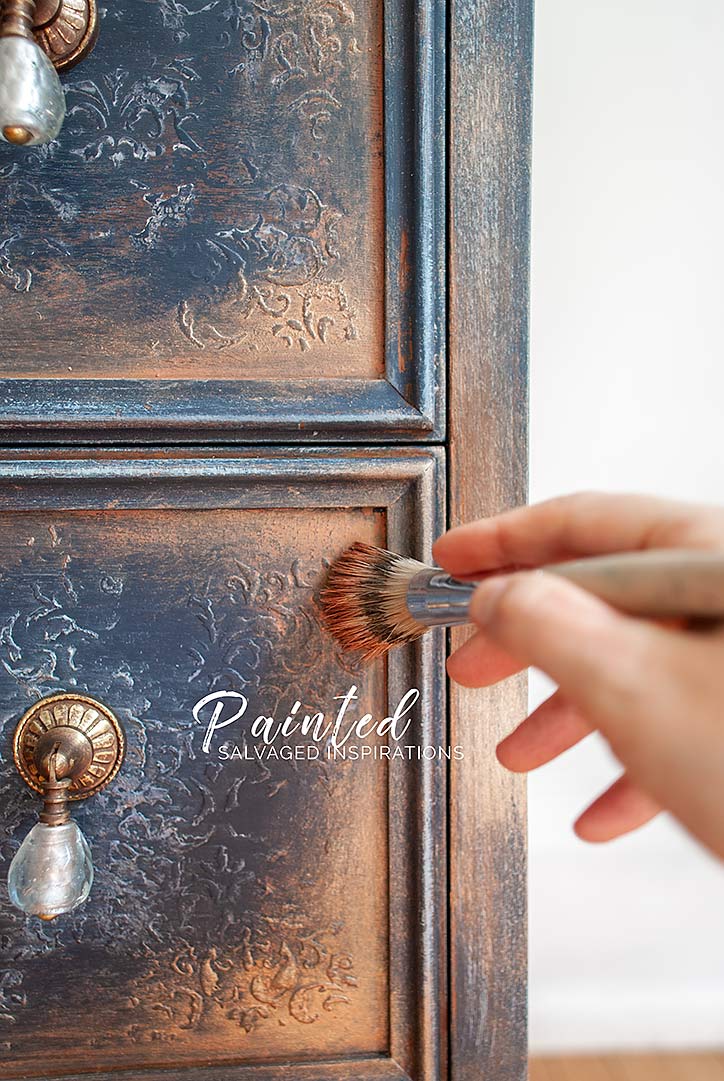
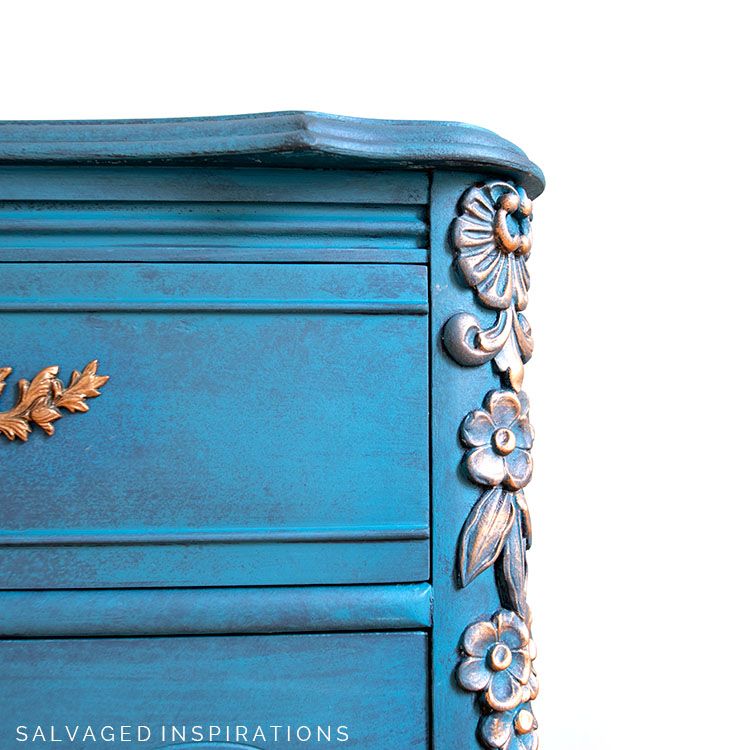
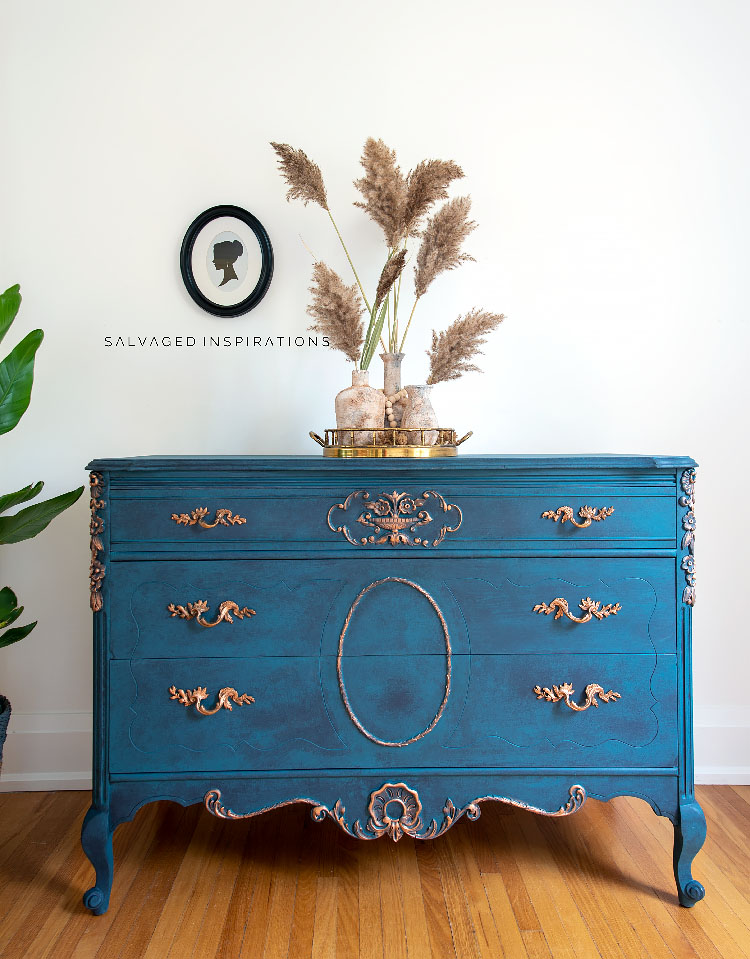
In the makeover below, I transformed a thrift store dresser by painting it in a rich navy blue and enhancing the raised stencil details with Hammered Copper Gilding Wax. This simple technique brought out all the raised details and gave the piece a sophisticated, custom look.
How to Use WoodUBend on Painted Furniture
Woodubend and a little bling are the perfect match! I transformed a vintage cedar chest by adding WoodUbend moldings to the corners and as a test, on a plastic plant holder to see how well they really bend. These bendable appliques are a game-changer—they adhere seamlessly to both flat and curved surfaces, and can be painted, stained, glazed or gilded to match any design vision.
How To Apply Gilding Wax | Thrift Store Demilune Table Makeover
I transformed a pair of thrifted demilune tables by painting them in a rich Aubergine hue and enhancing their intricate details with Redesign With Prima Decor Waxes in shades like Element, Milky Way, and Gravity. Applying the gilding wax was a breeze—using my fingertips and a small artist’s brush, I highlighted the ornate legs and edges, adding depth and a touch of metallic elegance. This simple technique turned these once-overlooked pieces into sophisticated statement furniture.


How To Apply Gold Leaf To Plastic
In a recent Trashy Treasure Tuesday project, I transformed thrifted plastic fruit into chic, gilded décor using gold leaf. After cleaning and scuff-sanding the pieces for better adhesion, I applied a specialized adhesive, allowed it to become tacky, and then carefully laid on the delicate gold leaf sheets. The result? Stunning, upscale accents that breathe new life into ordinary plastic items.


Layered Clay Paint Storage Cube
For this Pottery Barn storage cube, I transformed this beat-up box into a textured beauty using Dixie Belle’s Terra Clay Paint. The piece had numerous imperfections—holes, chips, and scratches—which made it a perfect candidate for a layered paint technique that embraces texture. I got a lot of negative comments on Facebook for this one, but I’m still happy I tried something different using a different type of paint. It’s also an AWESOME example of how to use gilding wax to totally change the look of a base and legs!


DIY Antique Gold Mirror
This project showcases how a bit of creativity and the right techniques can breathe new life into overlooked items. I took a curb-shopped mirror and turned it into a stunning Anthropologie-Inspired antique gold masterpiece. By adding WoodUbend moldings, applying a rich paint finish, and highlighting with gold gilding wax, I elevated a simple find into a luxurious statement piece.
How To Apply Gold Leaf Foil
In this tutorial, I transformed a thrifted console table by applying gold leaf to its intricate details. This step-by-step guide demonstrates how a bit of gold leaf can elevate furniture, turning an ordinary find into an elegant statement piece!


How To Black Wash Over An Existing Furniture Finish
Below, I took a thrifted two-drawer chest and elevated it with WoodUbend moldings and gilding wax highlights, adding elegant detail to its classic shape and simple black wash finish. The touch of gold gilding wax, creates a focal point and a dimensional look.


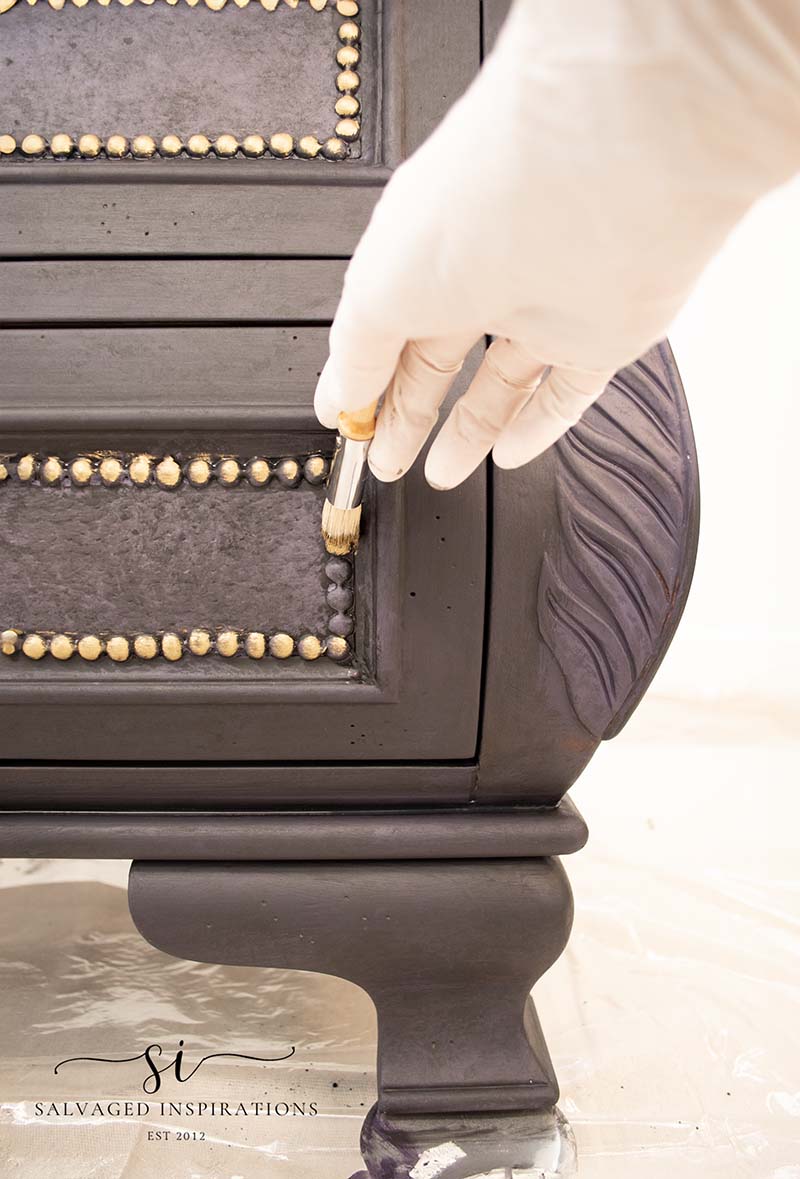
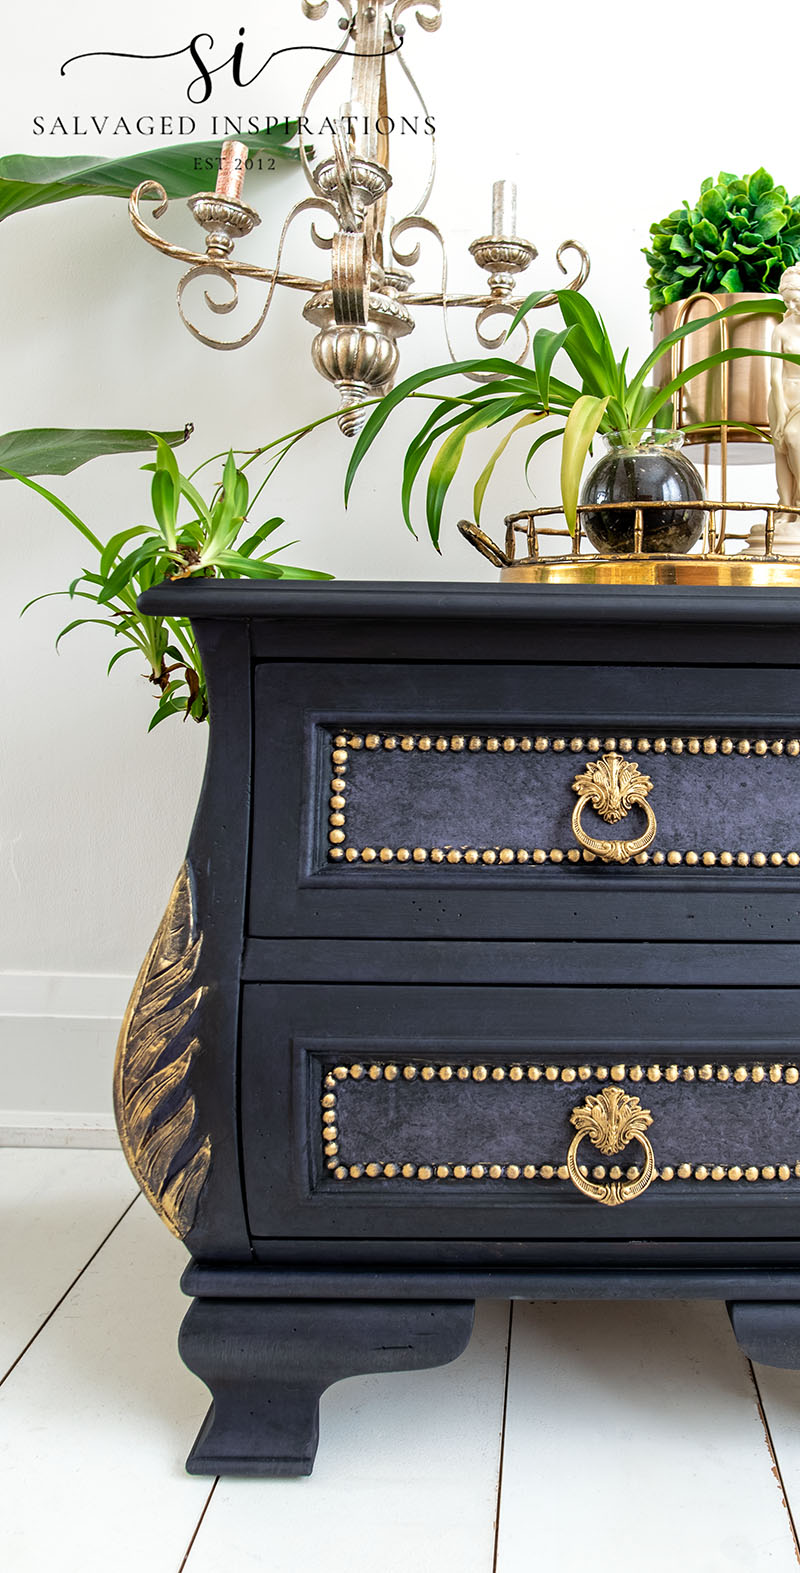
How To Apply A Color Wash Over Painted Furniture
In this makeover, I transformed a thrifted Bombay chest by applying a rich Aubergine base coat, followed by a black color wash. To accentuate the nailhead trim detail on the drawers, the ornate hardware and leaf molding, I used gold gilding wax.
DIY Decorative Wall Mirror
This curb-shopped closet door was transformed into a stunning baroque-inspired decorative mirror. By adding WoodUbend appliques, applying a gold metallic finish, and accentuating details with bronze and black gilding wax, I achieved an elegant, antique look. This makeover demonstrates how salvaged items can be turned into beautiful home décor! I still have it showcased in my livingroom and love it!


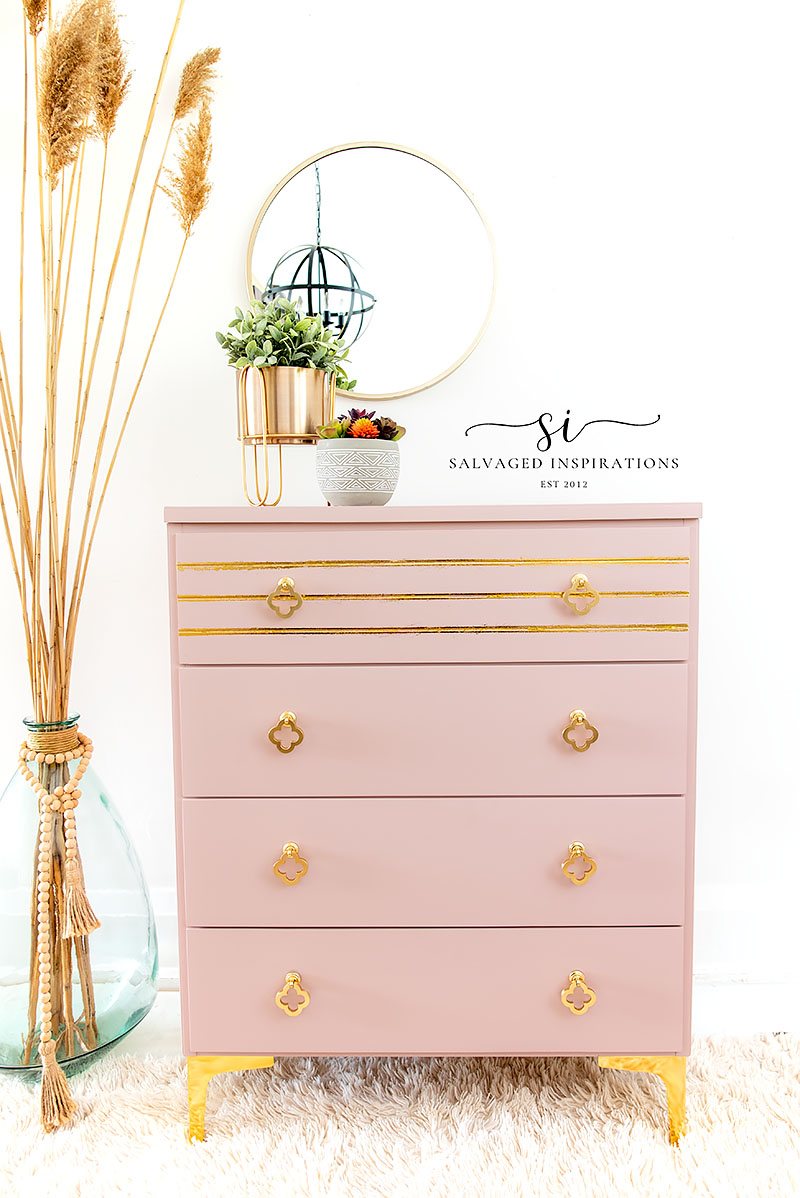
Dixie Shine Dresser Makeover
Here’s how I restyled a tired MCM dresser into a dreamy, soft pink masterpiece with luxe gold accents! I used Dixie Belle’s Conch Silk Mineral Paint and Dixie Shine metallic foil, I added sleek gold stripes and modern hardware for a high-end look.

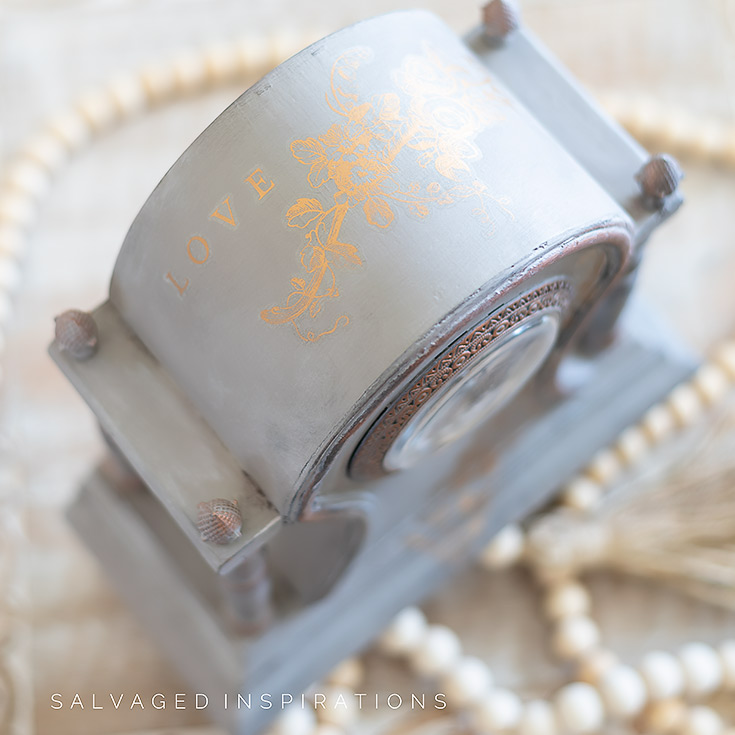
Painted Vintage Clock Makeover

English Ivy Dresser Makeover
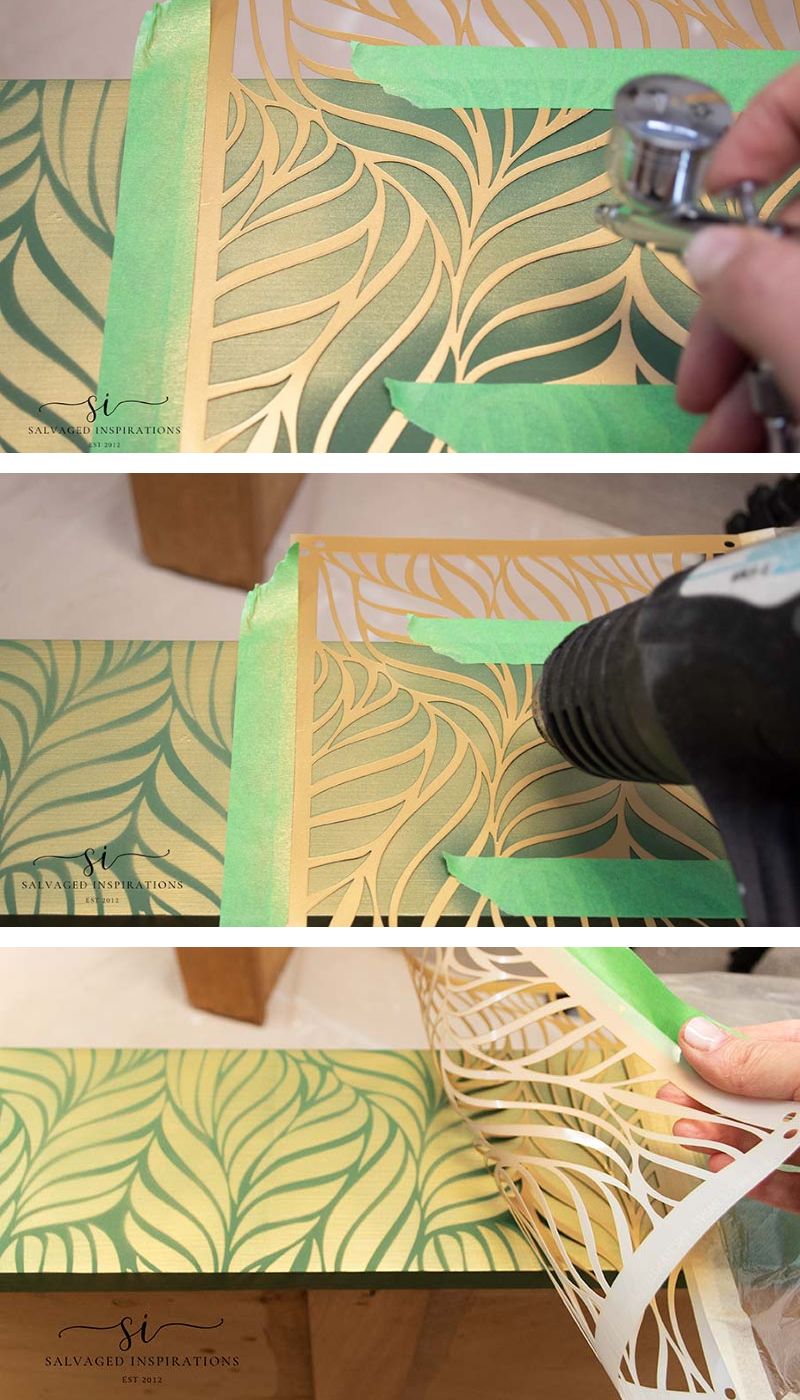
This plain vintage dresser got a bold, nature-inspired makeover with Dixie Belle’s English Ivy—a rich, deep green and GOLD METALLIC air gun stencil makeover! Paired with gold hardware and subtle distressing, this transformation is the perfect blend of classic and modern.

Vintage Duck Egg Paint Finish
Magnolia Garden Dresser Makeover
This vintage dresser went from forgotten to floral perfection with Dixie Belle’s Magnolia Garden Transfer and a dreamy finish and gold gilding wax hightlights! The funny thing was I put the drawers back in the wrong order before I did my photoshoot but it didn’t seem to make any difference. This makeover is a showstopper!

How To Update A Mirror Using WoodUbend
Create Your Own Furniture Trim Designs
Learn how to DIY your own custom furniture trim using an easy, budget-friendly technique and highlight it all with gilding wax. I also used the gilding wax to tie in all the hardware!

Pumpkin Decor With Transfers And Gilding Foil


Painted And Stained Waterfall Dresser
Decor wax works awesome on updated hardware as well. Check out the night and day difference on this waterfall dresser below.
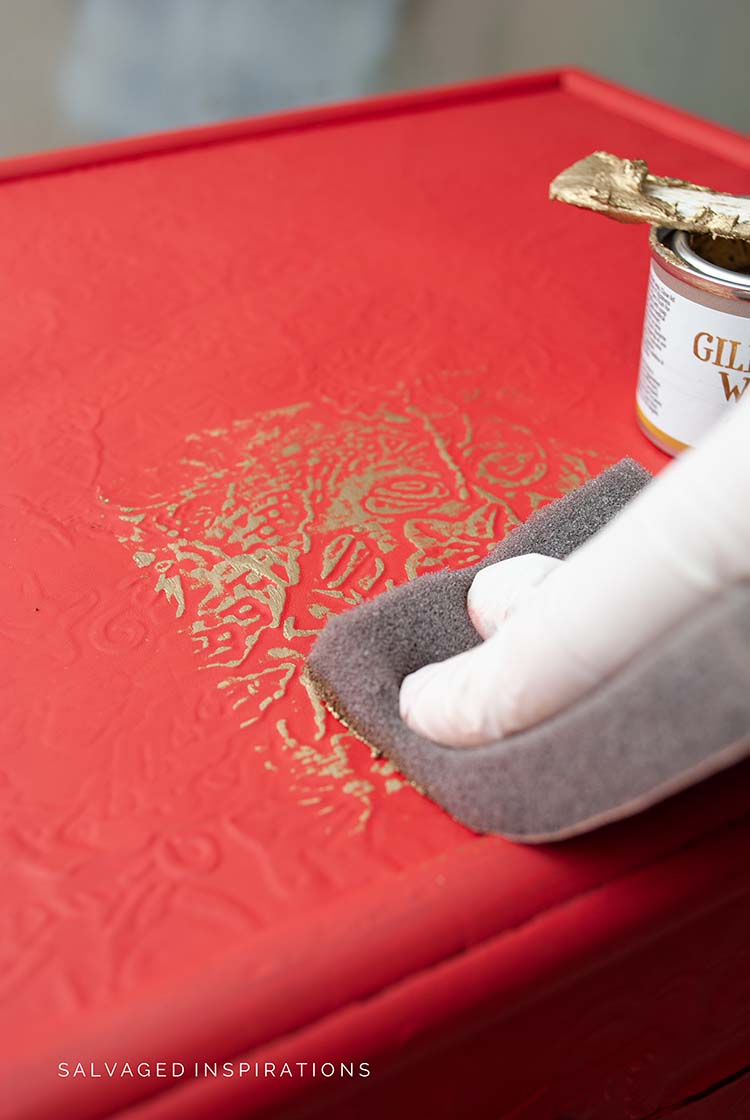
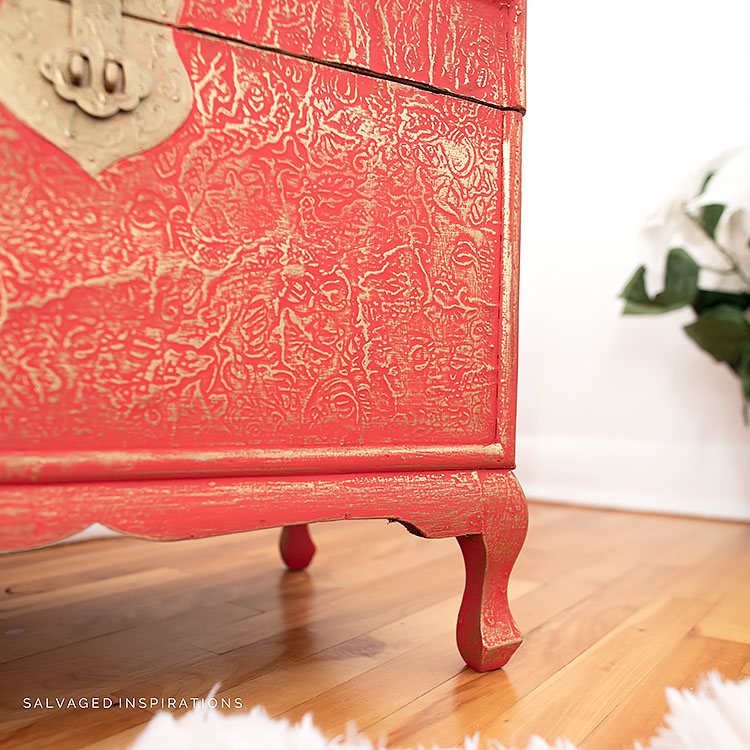
Painted Trunk Makeover
A holiday makeover can always use some gold and glam. This was a fun NEW technique – applying the gilding wax using a sanding sponge!
Tea Rose Dresser
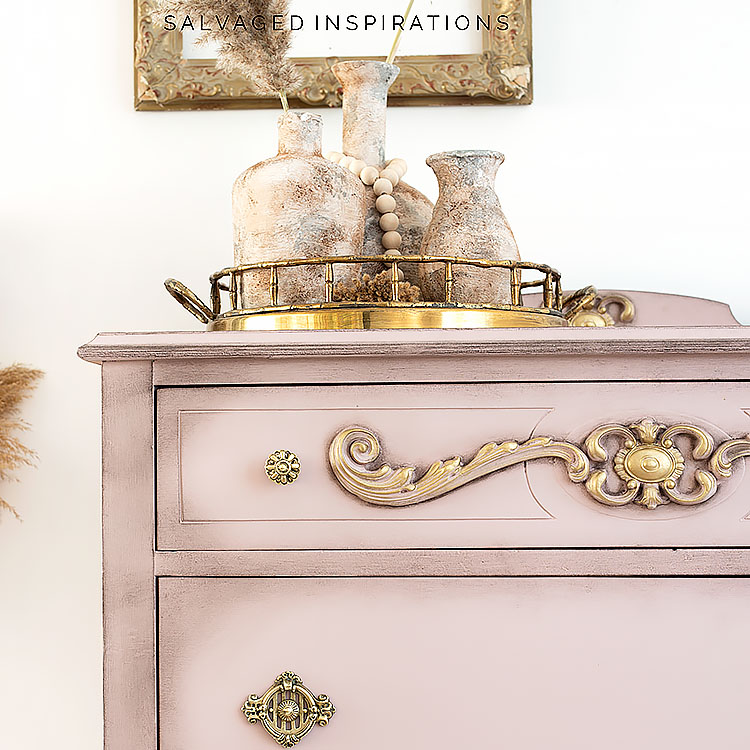
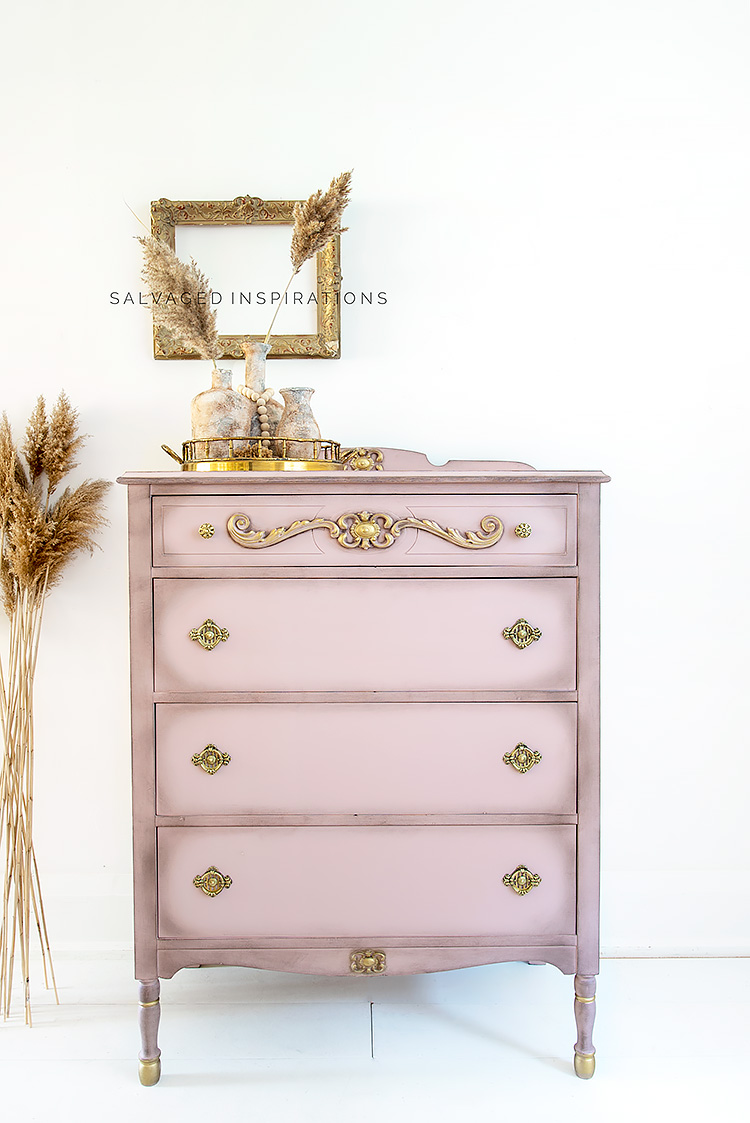
This vintage dresser got a soft and romantic makeover with Dixie Belle’s Tea Rose—a dreamy blush pink with the perfect hint of vintage charm and gold glam! Paired with gold hardware it’s the ultimate feminine-meets-elegant transformation.
How To Paint Gold Accents on Furniture
I loved this makeover. In fact I love it so much, I never listed it for sale and still own it! It was fun to paint gold accents and highlight all these gorgeous details!
I hope you enjoyed the roundup. If it’s inspired you to try glamming up your furniture and DIY projects.
You can grab your paints and gilding wax HERE!
Gilding wax is such a fun, easy way to add character, shine, and detail to your furniture flips. Have you tried it before? Drop a comment—I’d love to hear how you use it! I’ll be back next Tuesday with my Trashy Treasures Tuesday (TTT) friends. Hope to see you then and have a super week!
Happy painting!
Denise xo
RELATED POSTS::
FURNITURE PAINTING MUST-HAVES!
HOW TO ‘MODERNIZE’ OLD FURNITURE
5 IDEAS TO UPDATE YOUR OLD DESK
27 GORGEOUS DESK MAKEOVERS
25 FLORAL FURNITURE MAKEOVERS
WHERE TO FIND FREE FURNITURE
PIN AND SHARE!


Hi Denise. Great tips. Love all of your work ❤️
Thank you Monique! Have a great weekend. XOXO
Great information and inspiration! Pinned
Thanks Nicki and I appreciate the PIN! XOXO
Well written, Denise! You are a wealth of knowledge. Pinned.
xo 😘
THanks my friend and I appreciate the PIN! Have a super weekend. XOXO